I will be honest with you. I really dislike having a TV in my living room. Not only do I dislike how they tend to suck away at my time, or dominate social gatherings, they are also just an unsightly giant blank black box on the wall when I’m not watching something.
In my ideal world, we’d have a house with different rooms for socializing and movie watching, but alas, we live in a teeny tiny bungalow and that is not an option.
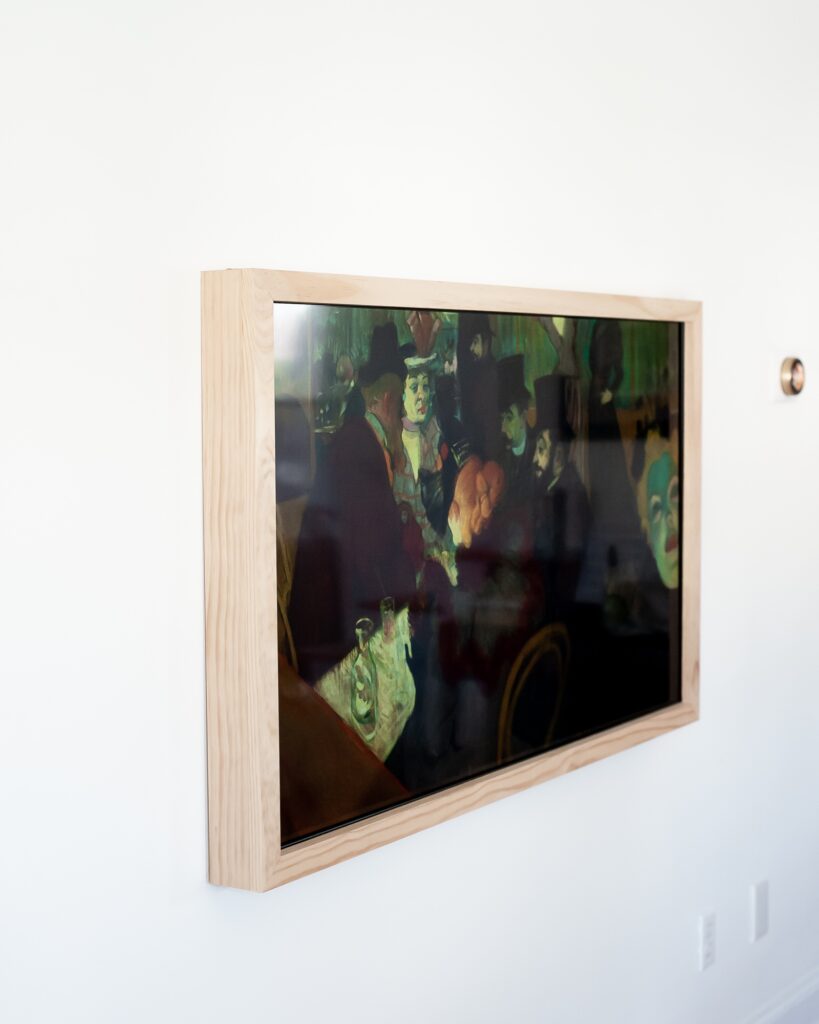
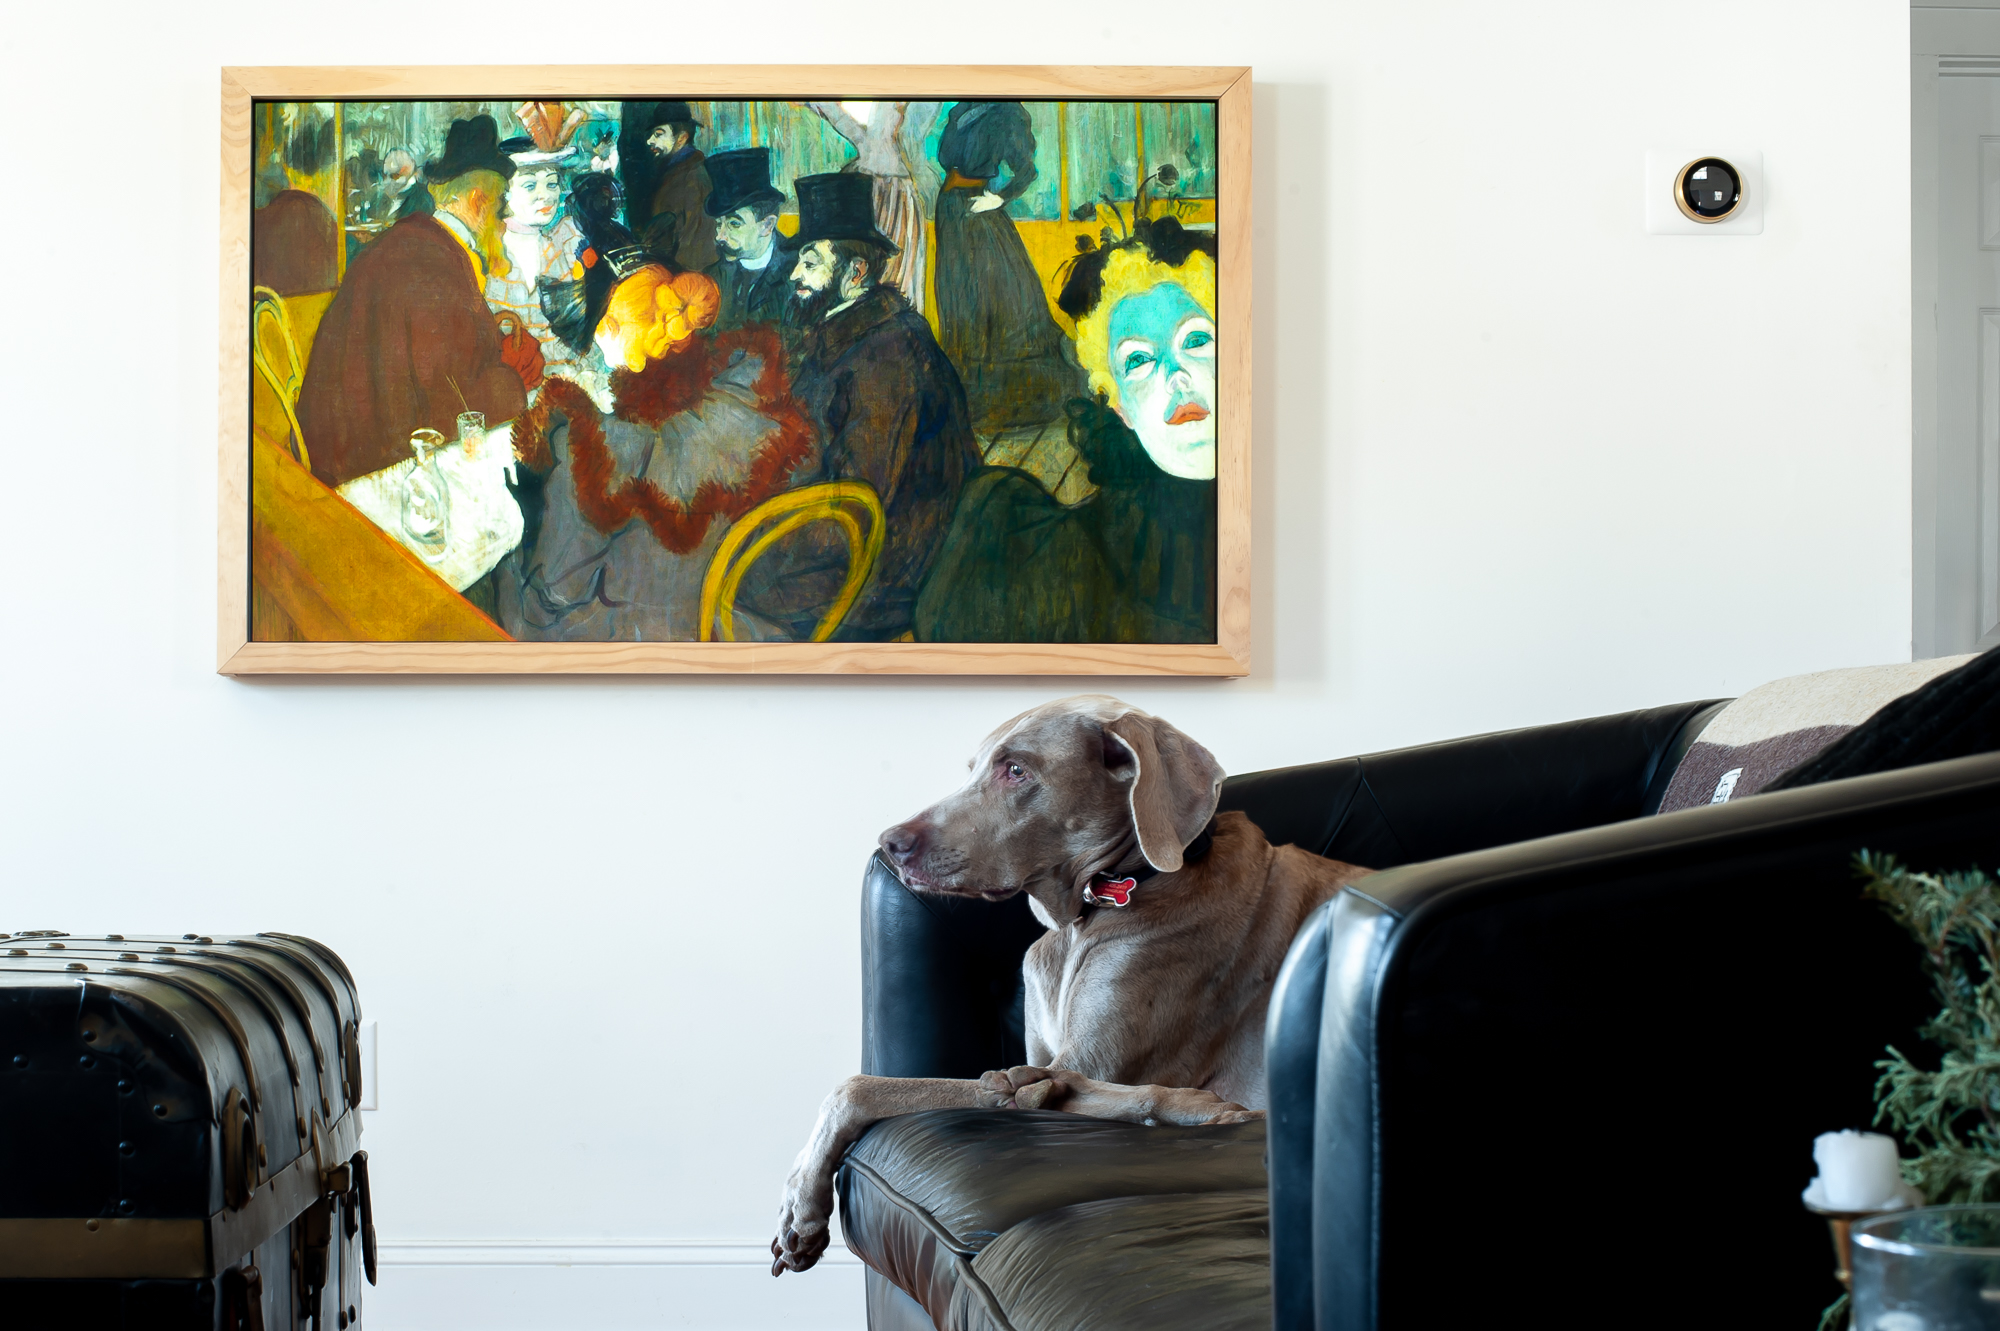
Which is why I was ecstatic when I stumbled upon a way to turn my existing LG TV into a work of art!
For me, this involved 3 major steps:
- Building a custom wood frame to create the illusion that my TV was really a piece of framed artwork on the wall. (Or if you have the money, you could always just splurge on a Frame TV and skip most of these steps….)
- Acquiring art to put on my TV
- Figuring out how to make my LG TV display my selected artwork.
Building The Frame
There are a myriad of ways to go about this step, ranging from the extremely simple to the more complex. Ours falls on the bit more complex side of the spectrum (mostly due to the miter cuts and tools needed) but there are several other DIY tutorials I’ve seen that are much more simple (and still look amazing). This very simple one from Cass Makes Home is one of the first ones I saw and definitely sparked a lot of the inspiration for our build.
Unfortunately, since I wasn’t blogging when we made this frame for our TV, I don’t have any photos or videos of the process. However, I can walk you through the steps we took to create it! (And if you’re not in a hurry, we’ll actually be building another one of these later this year. So I’ll be able to better capture the process for that one and update this post with better images then.).
STEP ONE: MEASURE ALL THE THINGS
To be specific, you’ll need to make FIVE measurements.
- The size of your SCREEN itself (excluding the framework that holds it in place). This will tell you how big to make the opening for your frame so it covers the TV framework and only shows the internal screen.
- The distance from the top of the TV framework to the top of your screen. This will tell you how big of a bumper you’ll need to ensure the frame sits properly on your TV
- The distance from the wall to the front of your TV frame. This will tell you how deep you’ll need to make your frame so it hugs the wall.
- The distance from the front of the TV frame to the back of the TV frame. This will tell you where to place your cross braces which are the things that will hold your frame in place properly.
- The distance from the edge of your screen to the outer edge of the TV framework. This will tell you the minimum width you’ll need to make your frame to ensure it covers you TV framework.
STEP TWO: DRAW A PICTURE WITH ALL YOUR MEASUREMENTS AND MAKE A PLAN
This step isn’t 100% necessary, but it will help you keep everything straight in your head as you start to cut your wood down to size and help ensure you are cutting everything to the correct measurements as you go along.
STEP THREE: BUILD YOUR FRONT FACING FRAME FIRST
While you *could* start with building your sides and then attaching your front facing pieces to that, we chose to build the front of our frame first. That way we could test the opening and make sure all our measurements were correct before getting too far along into our build. We used a heavy duty staple gun to keep things really simple for this bit of the build. (Corner clamps LIKE THIS ONE will be your friend for this bit!)
STEP FOUR: BUILD THE TOP AND SIDES OF YOUR FRAME
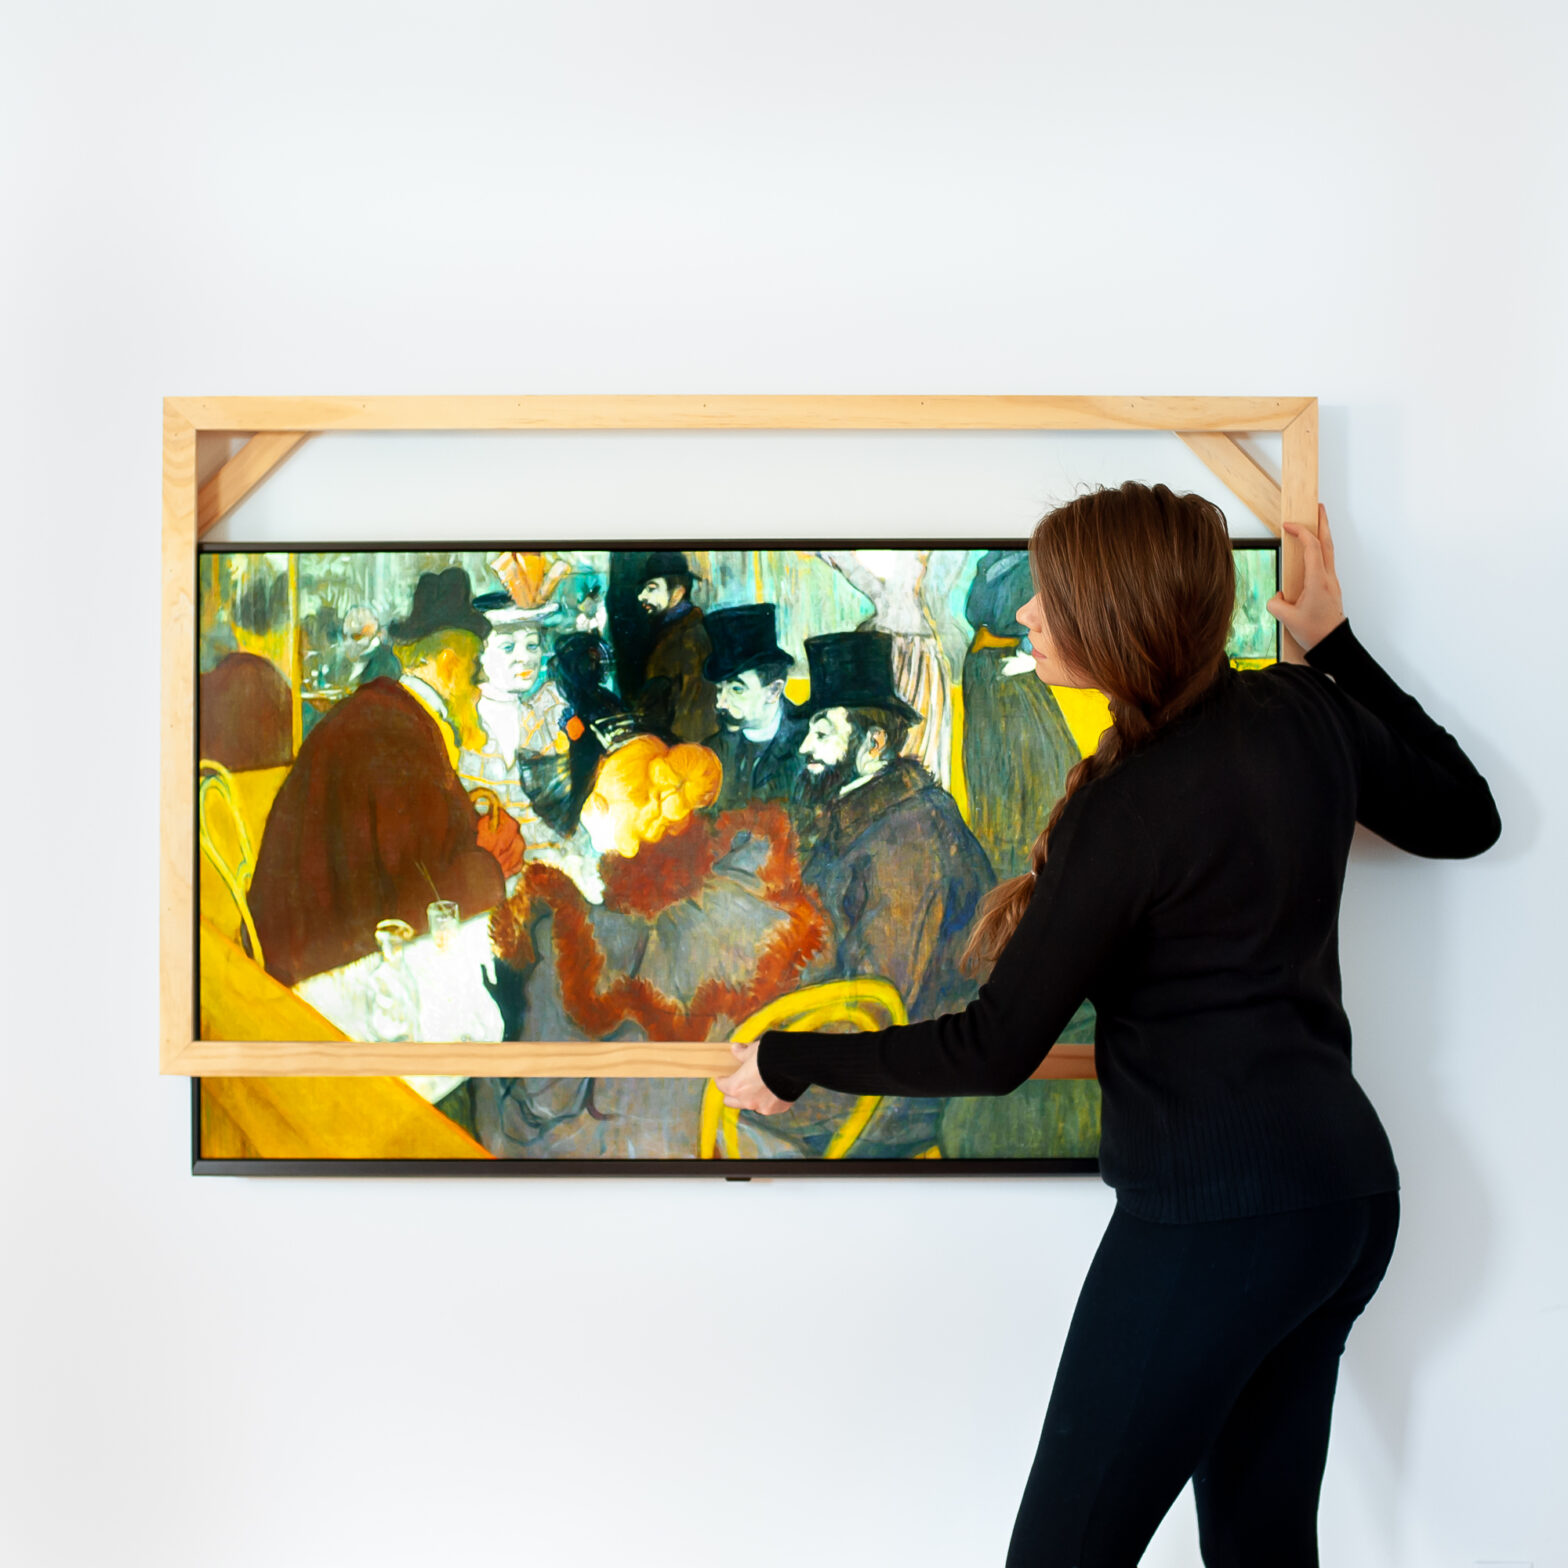
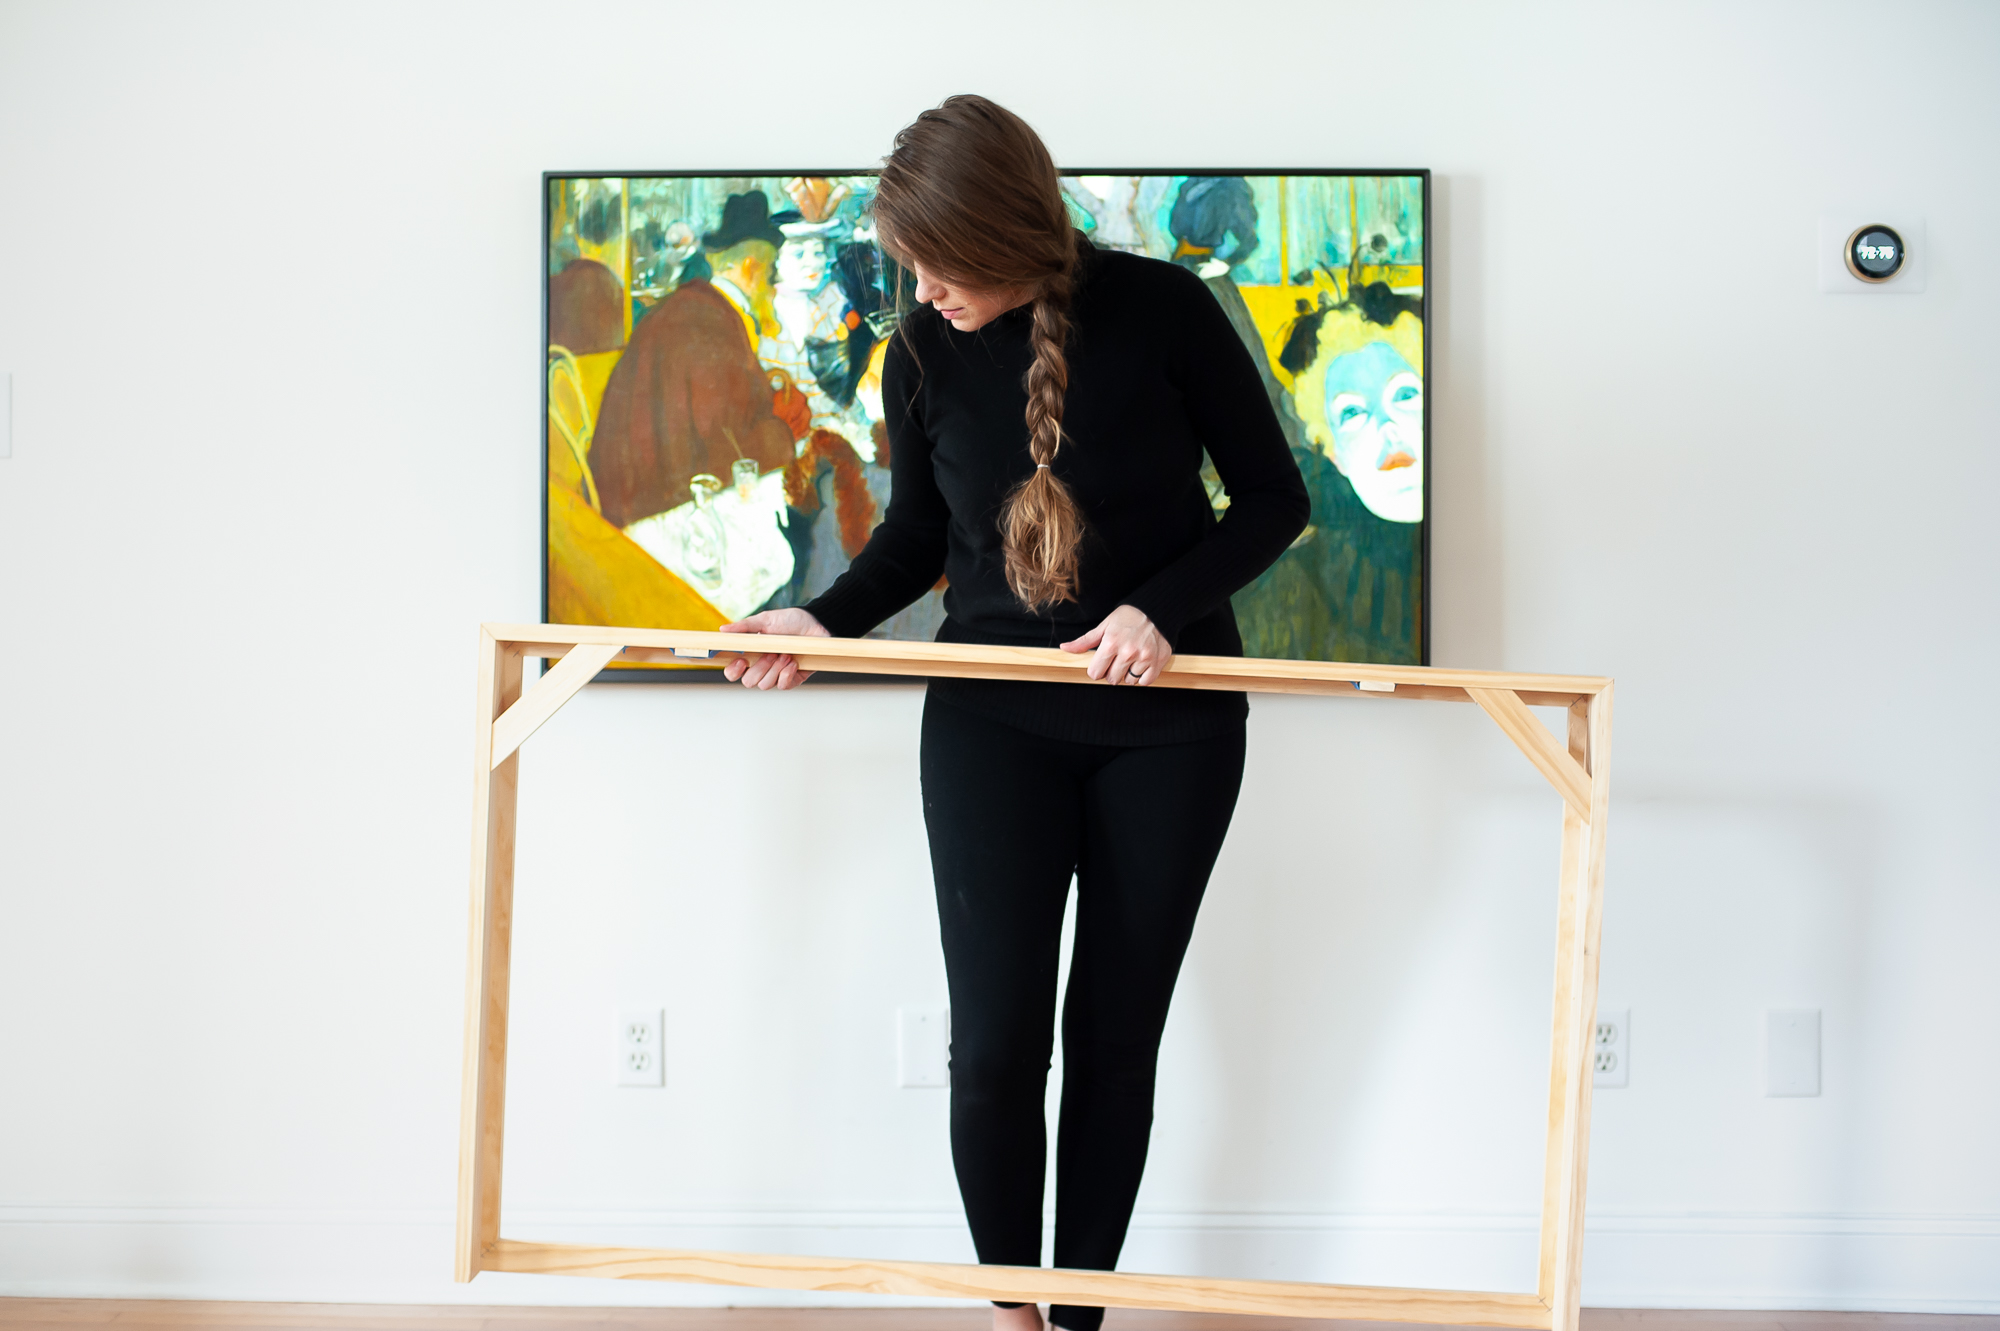
After we had the front of the frame constructed we then added on the sides and the top of the frame and attached it to the front frame with a few brad nails. You may have noticed in the pic of me holding the back of the frame up that the frame doesn’t have a bottom. That’s because that is where the manual control buttons on our TV are located, so we left it open to allow access for that and to help make sure we’d be able to easily slip the frame on and off the TV.
STEP FIVE: ADD THE CROSS BRACES IN THE CORNERS ON THE BACK
After your sides and top are on, you can then add your cross braces on the top right and left corners of the frame. These are what will make sure your frame doesn’t just fall off your TV.
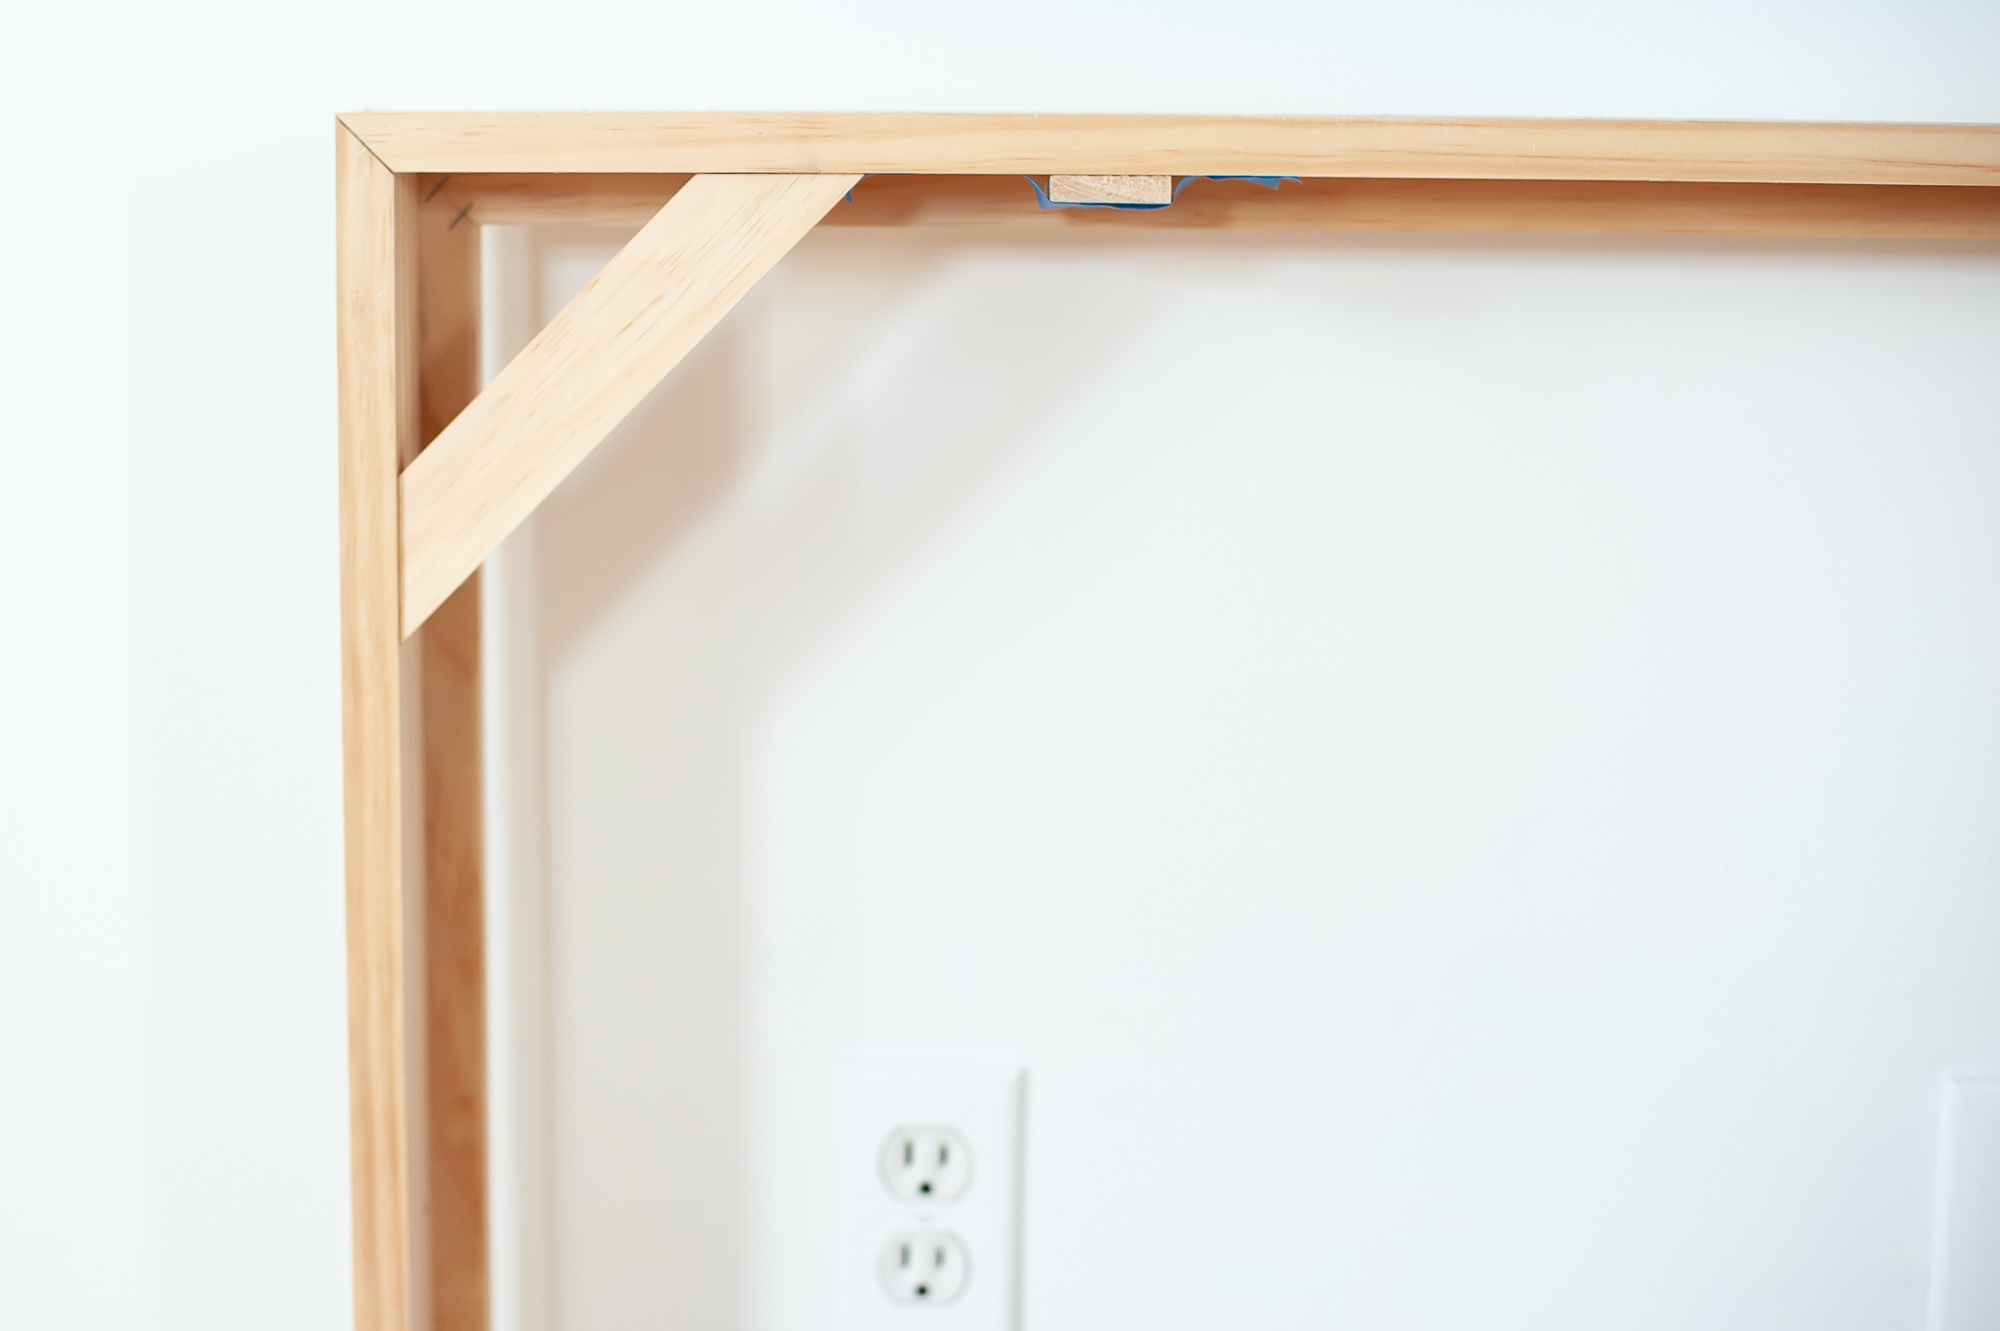
STEP SIX: ADD YOUR SPACERS/BUMPERS UNDER THE TOP OF YOUR FRAME
Once you’ve got the cross braces in place, you’ll need to add on some extra wood under the top of your frame so that it lifts the frame up enough to ensure the opening for your frame is sitting in the correct spot to line up with the screen on your TV. We got lazy at this point and totally tested out a set of bumpers by just taping them on with painters tape…. and then never went back and installed them properly… So they are still just hanging out there doing there job attached by painters tape…
STEP SEVEN: SET YOUR FRAME ON YOUR TV AN ENJOY
This is really the best part to me, that you can just set the frame on the TV without having to attach it to the wall in any way. Ours, hasn’t budged an inch just hanging on the TV as is, but if you feel the need to secure yours down a bit more, you could alway stick a couple of velcro command strips on the back to secure it the the wall.
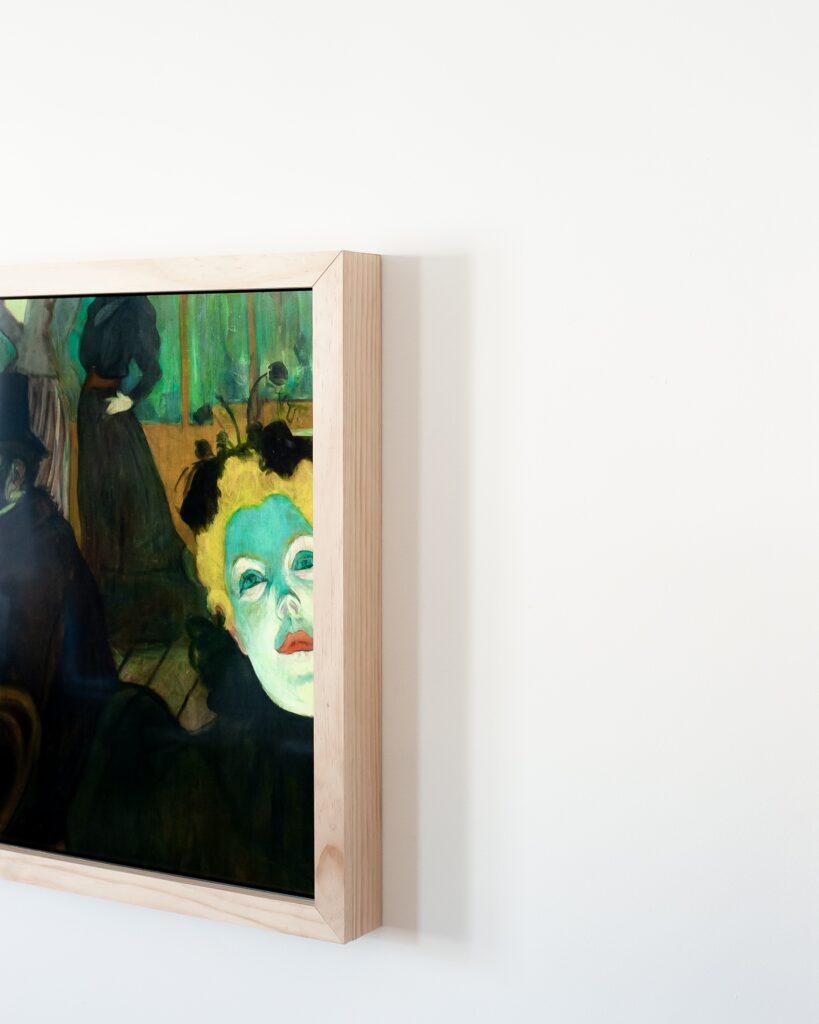
And of course if you want to get fancy, you can always paint your frame, stain the wood or decorate your frame in whatever way you’d like. We left ours as the raw wood while we contemplated what we wanted to do with it, then ultimately decided we liked how the raw wood looked as is and just left it be.
As a final note: If you don’t have all the fancy tools we did, I think it’s worth being said that you could *probably* get away with building this entire thing with just some really strong wood glue and skipping the staples and brad nails all together.
Acquiring Digital Artwork For Your TV

There are several really great sources for acquiring amazing high resolution digital art. Let’s start with the free options, of which there are many.
HELLO MUSEUM ARCHIVES
Did you know that many major museums have online digital archives that offer free digital downloads of high resolution images of many of the works of art in their collection? It’s true! Here’s a list of just a few of my favorite museums with these types of resources:
- The Met Open Access Collection
- National Gallery of Art Collection
- Art Institute of Chicago Collection
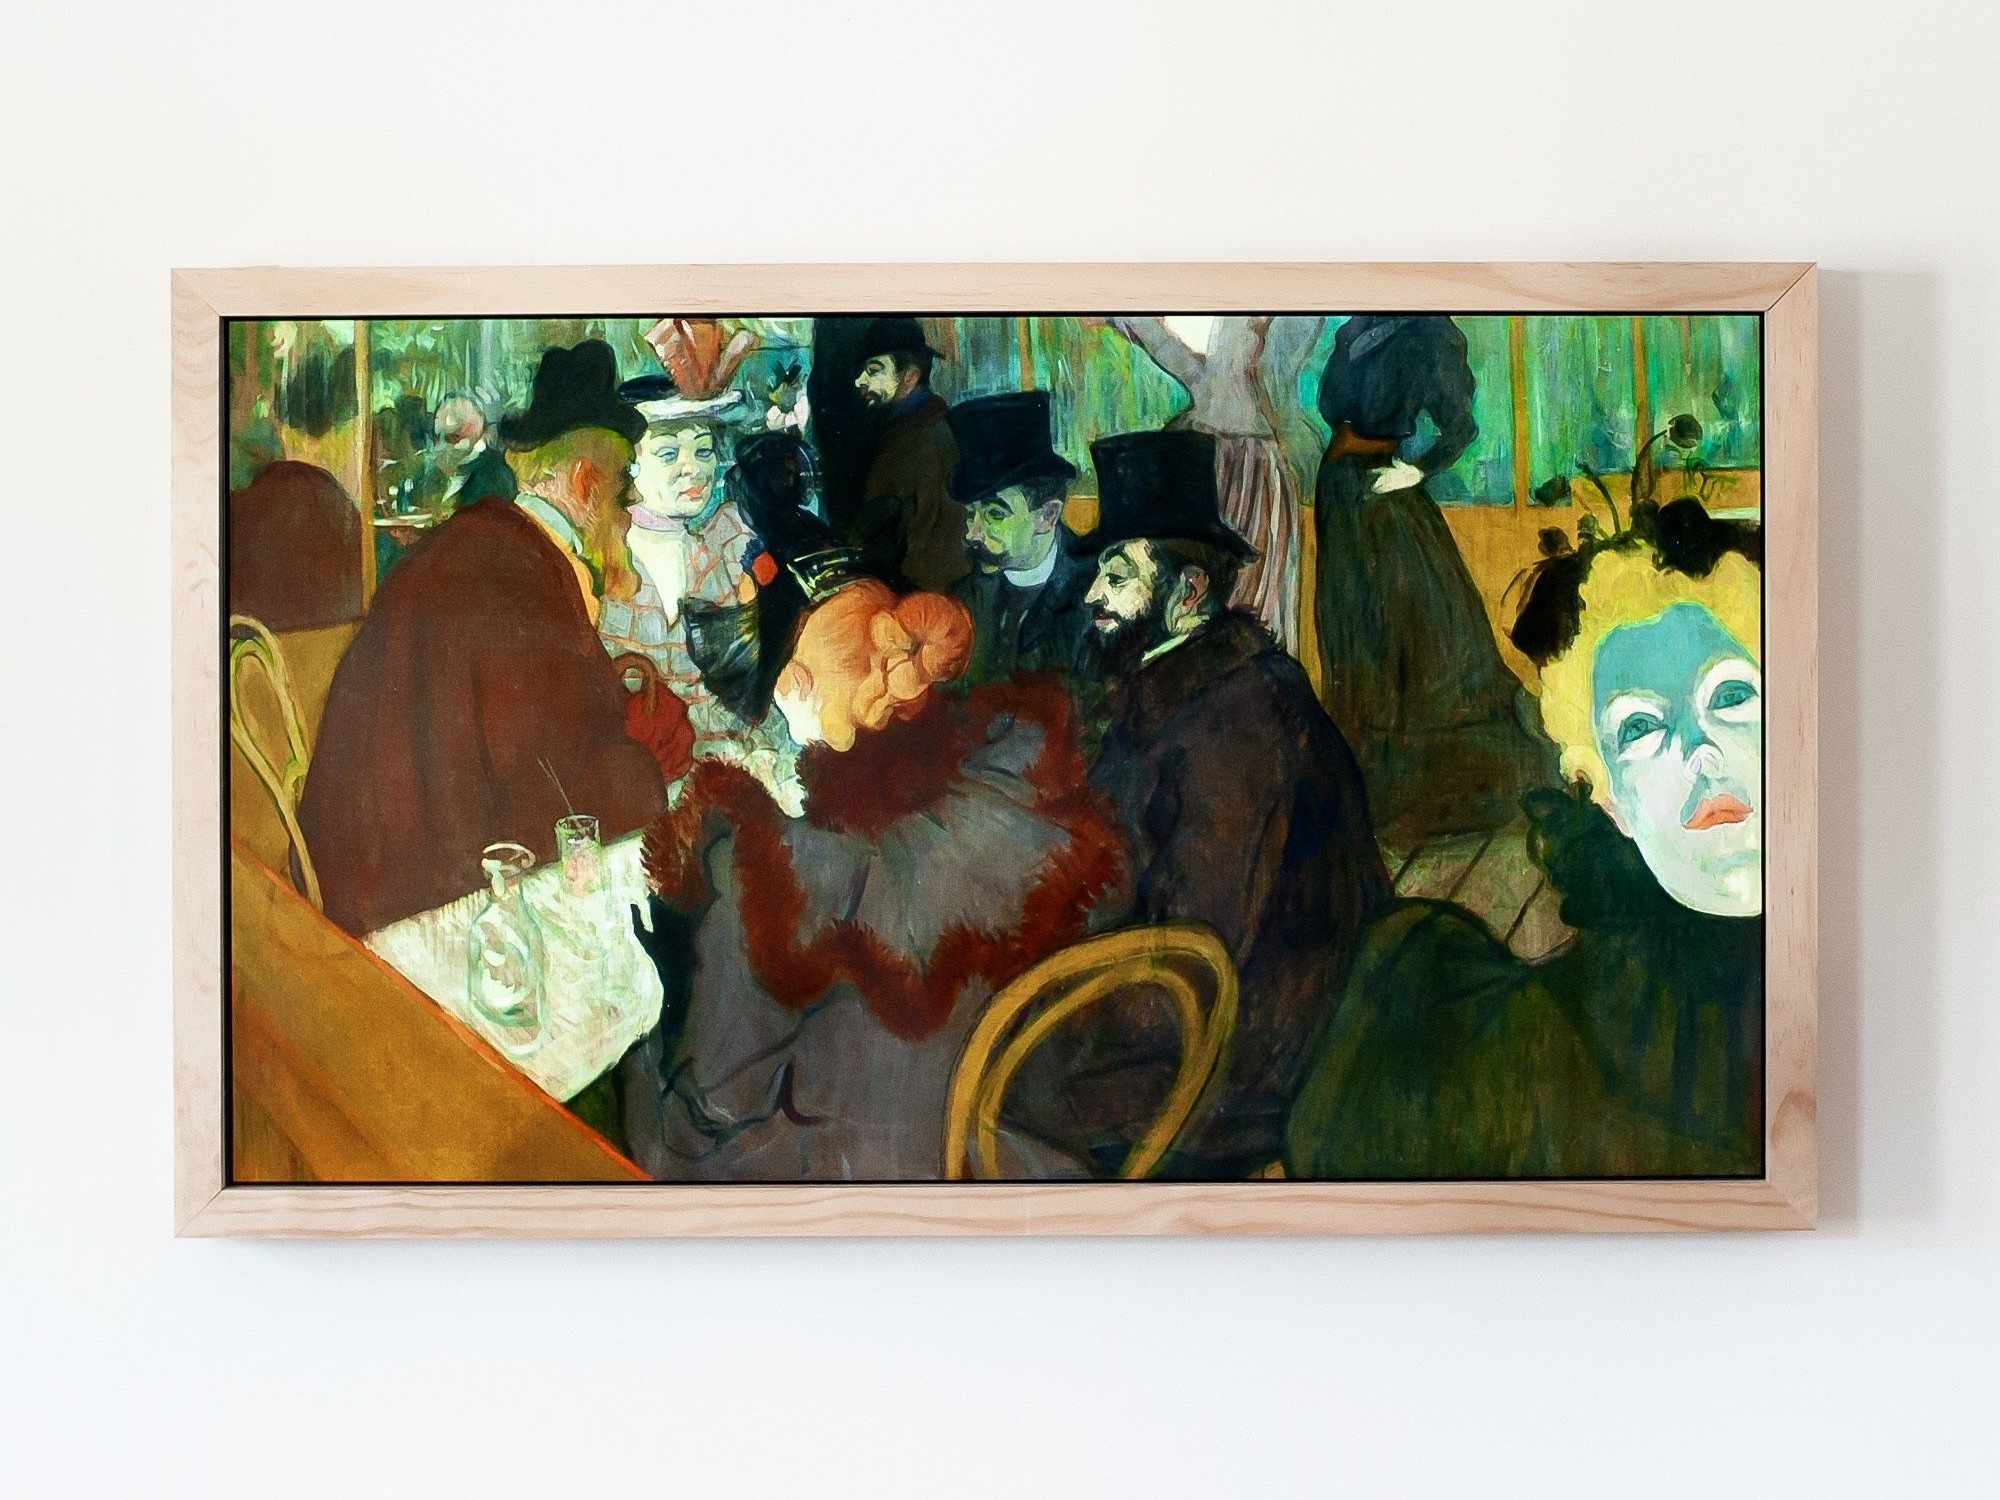
- If you like the image shown on my TV in the images here, it’s by Henri de Toulouse-Lautrec entitled At the Moulin Rouge and you can DOWNLOAD IT HERE FROM THEIR COLLECTION.
- The Smithsonian Institution Collection
- Paris Musées Collection (this one is mostly in french and can be a bit more challenging to navigate)
If you don’t have the time to hunt through all those archives yourself, I’ve curated an entire gallery of some of my favorite artwork currently available for free in the public domain RIGHT HERE ON MY WEBSITE.
PAID DIGITAL DOWNLOADS
If you’re looking for something a bit more modern than what is available for free in the public domain, You may be better off going with a paid digital download from a modern artist. Here’s my word of warning though, many of the the services currently offering paid digital downloads are selling images that are currently in the public domain that they have “curated” into collections and possibly slightly modified. I would ***highly recommend*** not purchasing anything, from any digital print provider, who does not credit the name of the artist who created the work you are about to purchase. Even if the work is in the public domain, I think every work of art should be credited to the artist who created it and labeled with the title they gave the piece. If you want to read more on this, Deema over at Pretty On Friday’s wrote a really great blog post all about this HERE. To be honest, I tried to come up with a list for you of some shops that are better about this, but most of the shops I found don’t give credit for anything. Juniper Print Shop is one of the few I found that does a better job of crediting their artists. Leave me a note in the comments below if you have others you have found that do a good job crediting their artists!
Displaying The Artwork On My LG Smart TV
Every television has a different way you’ll need to go about doing this next bit. So I can only tell you what I had to do to make this work on my LG Smart TV. If you don’t own an LG TV Smart TV you may need to google the best way to do this next bit on whatever brand of device you have.
STEP ONE: HOOK UP YOUR COMPUTER TO YOUR TV WITH AN HDMI CABLE
The first step you’ll need to do is to connect your computer (the one where you saved all that digital art you just downloaded) to your TV via an HDMI cable. Essentially you’ll be using the television as a giant computer monitor.
STEP TWO: PULL UP YOUR SELECTED IMAGE ON YOUR COMPUTER AND MAKE IT FULL SCREEN
Once you have your computer screen up on your TV display, you’ll want to pull up whatever image you have chosen and make it full screen, making sure to zoom in on the photo until your image fills the entire screen.
STEP THREE: CLICK THE LIVE ZOOM BUTTON ON YOUR REMOTE
On your LG TV magic remote, you’re now going to press the “Live Zoom” button. (Its on the bottom right hand corner of my remote).
STEP FOUR: CLICK CAPTURE
An overlay box should pop up over your image. You’ll want to zoom out on your remote control and then select the “capture” option on the right hand side. (Make sure you’ve moved your computer mouse cursor icon off the screen for this bit otherwise it will be in your art). What this will do is take a screen shot of whatever you have pulled up on your TV at that time and save it to your LG TV’s internal memory.
Once you’ve completed your capture, you’ll want to exit the “live zoom”. You can then pull up additional images and keep taking screen shots to save to your TV in this same way as many times as you’d like.
STEP FIVE: NAVIGATE TO THE PHOTO & VIDEO APP ON YOUR LG TV
Once you’ve created all your screen shots of your selected artwork with the “live zoom” capture function. You’re going to want to click the home button and pull up the LG TV “photo & video” app. Then click on “Captured Image: Internal Storage” and that should pull up all the screen shots of artwork you captured! From there you can either play them as a slideshow, or simply select one single image to display on your TV screen!
I would also recommend going into your display settings and selecting the dimmest option you have. If the screen is too bright it tends to ruin the illusion that the image is a piece of art. So the dimmer you can get the display the better usually.
And that’s it! You are now the curator of your own tiny gallery!
And if you’re a more visual person, I made a short video of the entire process. NOTE: I AM TERRIBLE AT VIDEO SO THIS IS REAL ROUGH, but hopefully it helps walk you through the process a bit.
If all else fails, and you can’t figure out how to get your art to display on your TV, you can always use another easy hack of pulling up a high definition youtube video LIKE THIS ONE OF VINCENT VAN GOGH PAINTINGS to play on your TV.

Don’t Forget To Pin This Post & Subscribe!
Want to keep getting more DIY home decor inspiration, thrifting tips & tricks, free art downloads, reading recommendations, and home renovation tutorials? Then don’t forget to pin this post for later so you can follow me on Pinterest and then subscribe to my blog so you can get links to my newest content as soon as it hits the blog!
Did you have any sensor issues with the frame blocking it?
I was worried about that as well, but we never had a single issue with it!