Talking about money is nobody’s favorite subject, but I’m also pretty sure its the one thing everyone secretly wants to know most when you share a project like this. Some might say its just natural human curiosity, but personally, I feel like if you’re spending time reading kitchen renovation blog posts in the first place, you’re probably just after more information on if you can afford to do something like this yourself.
So wether you really are just curious, or are desperately searching for information on if you can afford to redo your own kitchen, I’ve put together a rough budget breakdown of our kitchen renovation for you! Additionally, if you’re looking for any links to specific items we used during our renovation, I’ve hyperlinked each product for you to the exact same product we used.
Things To Keep In Mind When Looking At These Numbers
Bear in mind when looking at this budget breakdown that this isn’t accounting for any possible tools you may need to purchase, any professional labor you may need to hire to do some of the more complex work, or the fact that I was able to snag some pretty killer deals on some of these items.
Additionally, when I say “killer deal” that doesn’t mean we purchased the cheapest budget option on the market. What it means is that I was able to snag some high quality items we wanted for much less than they normally retail for by doing a lot of digging and internet stalking. For instance, we bought a really nice oven for this kitchen that retails for about $2,000, I found it for $1,000. Did I save $1000 and get a really nice oven? Yes. Was this the cheapest oven I could have purchased? No, obviously not.
We were also able to cut down on a lot of our out of pocket expenses by selling off all the old cabinetry and appliances from the original kitchen. That extra money gave us a bit of wiggle room to upgrade some of the items and hire help for a few tasks we might not have been able to afford otherwise.
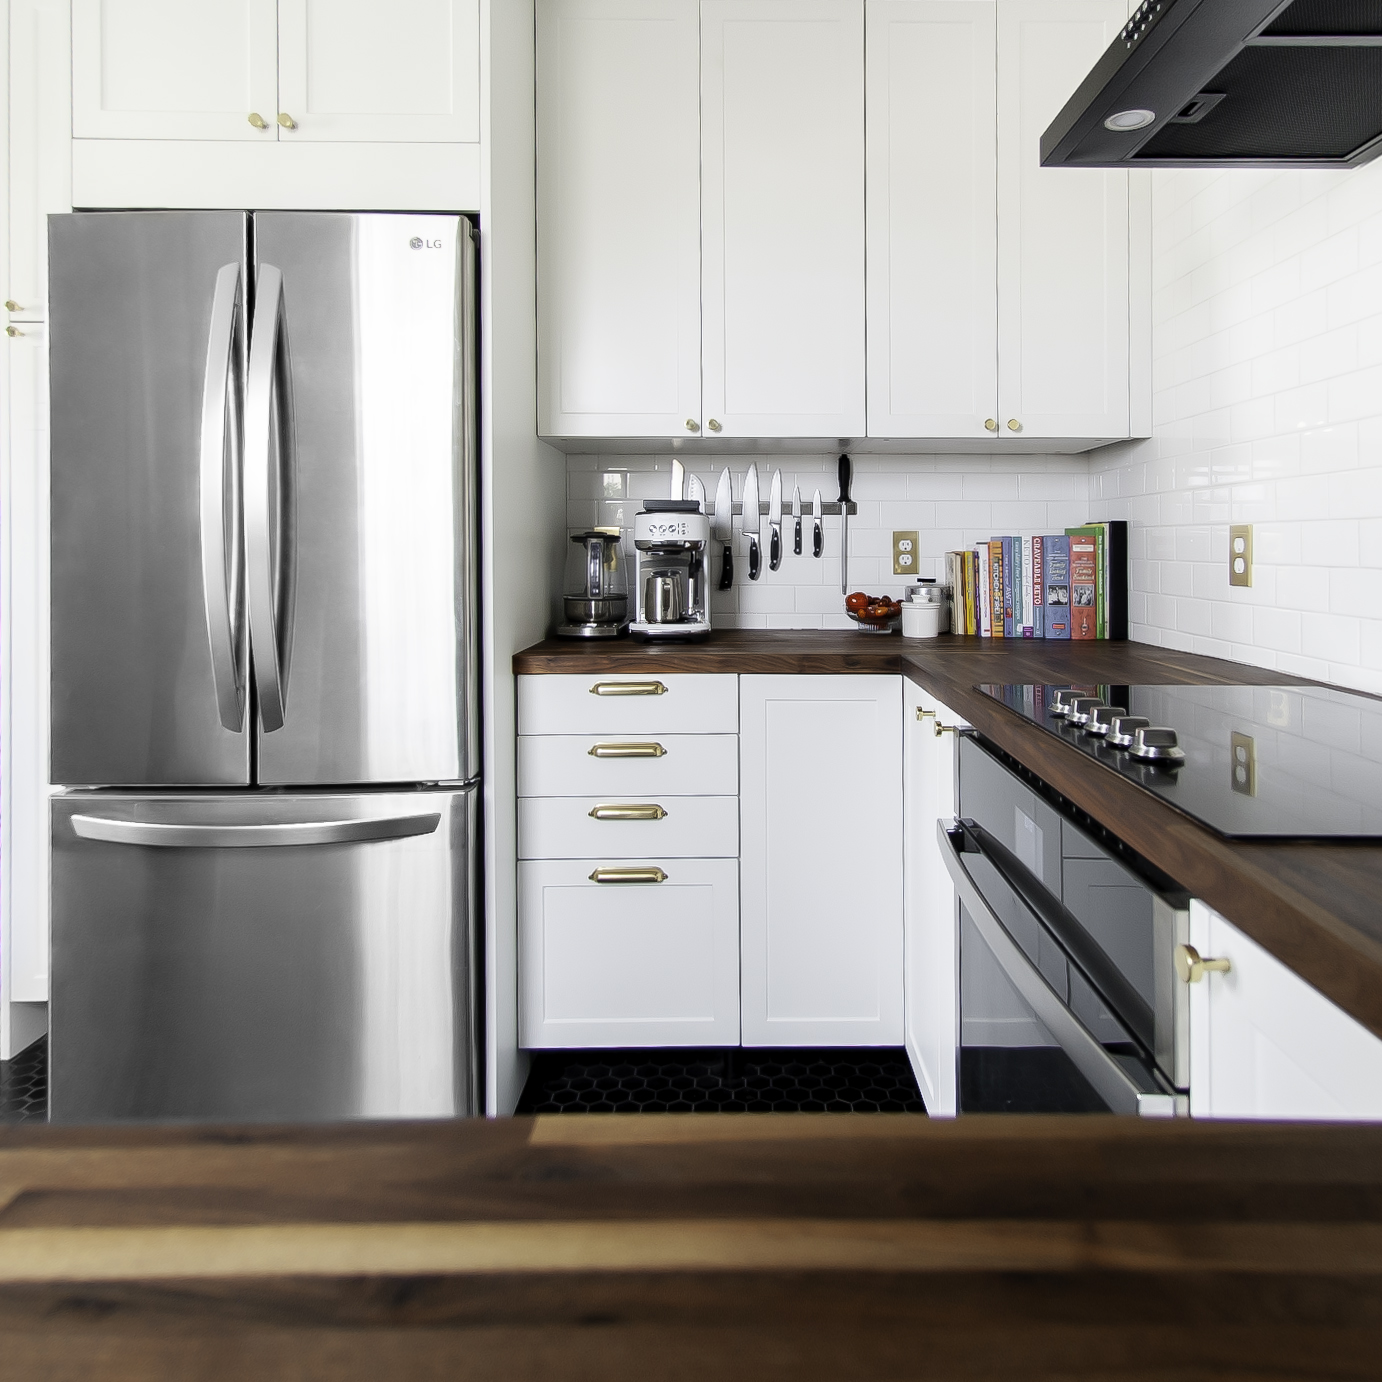
In total, our kitchen and dining nook combined are only about 126 sq ft. So this was a very *tiny* kitchen remodel in the scheme of American kitchen remodels.
This project was also something we took into account when deciding on wether or not to purchase our home. So the cost of this renovation was a calculated into our home buying, loan and budgeting process at the time of purchase.

Budget Breakdown & Product Links
| Item & Product Links | Cost | Comments |
| Black Floor Tile | $819.40 | We needed about 170ish sheets |
| Floor Grout | $136.41 | We used the color “black” (price was for 3 buckets, but we probably only used 2ish?) |
| Backer Board | $0 | We were able to use the existing backer board, but you may need this |
| Cabinet Boxes & Ikea Install Kit | $1,319 | This included 7 base boxes, 3 upper boxes and a tall pantry box. |
| Semihandmade Fronts & Faces | $3,489.40 | We took advantage of an annual sale event. We went with the “White Supermatte Shaker” style. The big ticket items in the order were the giant panels we used to wrap the refrigerator with. |
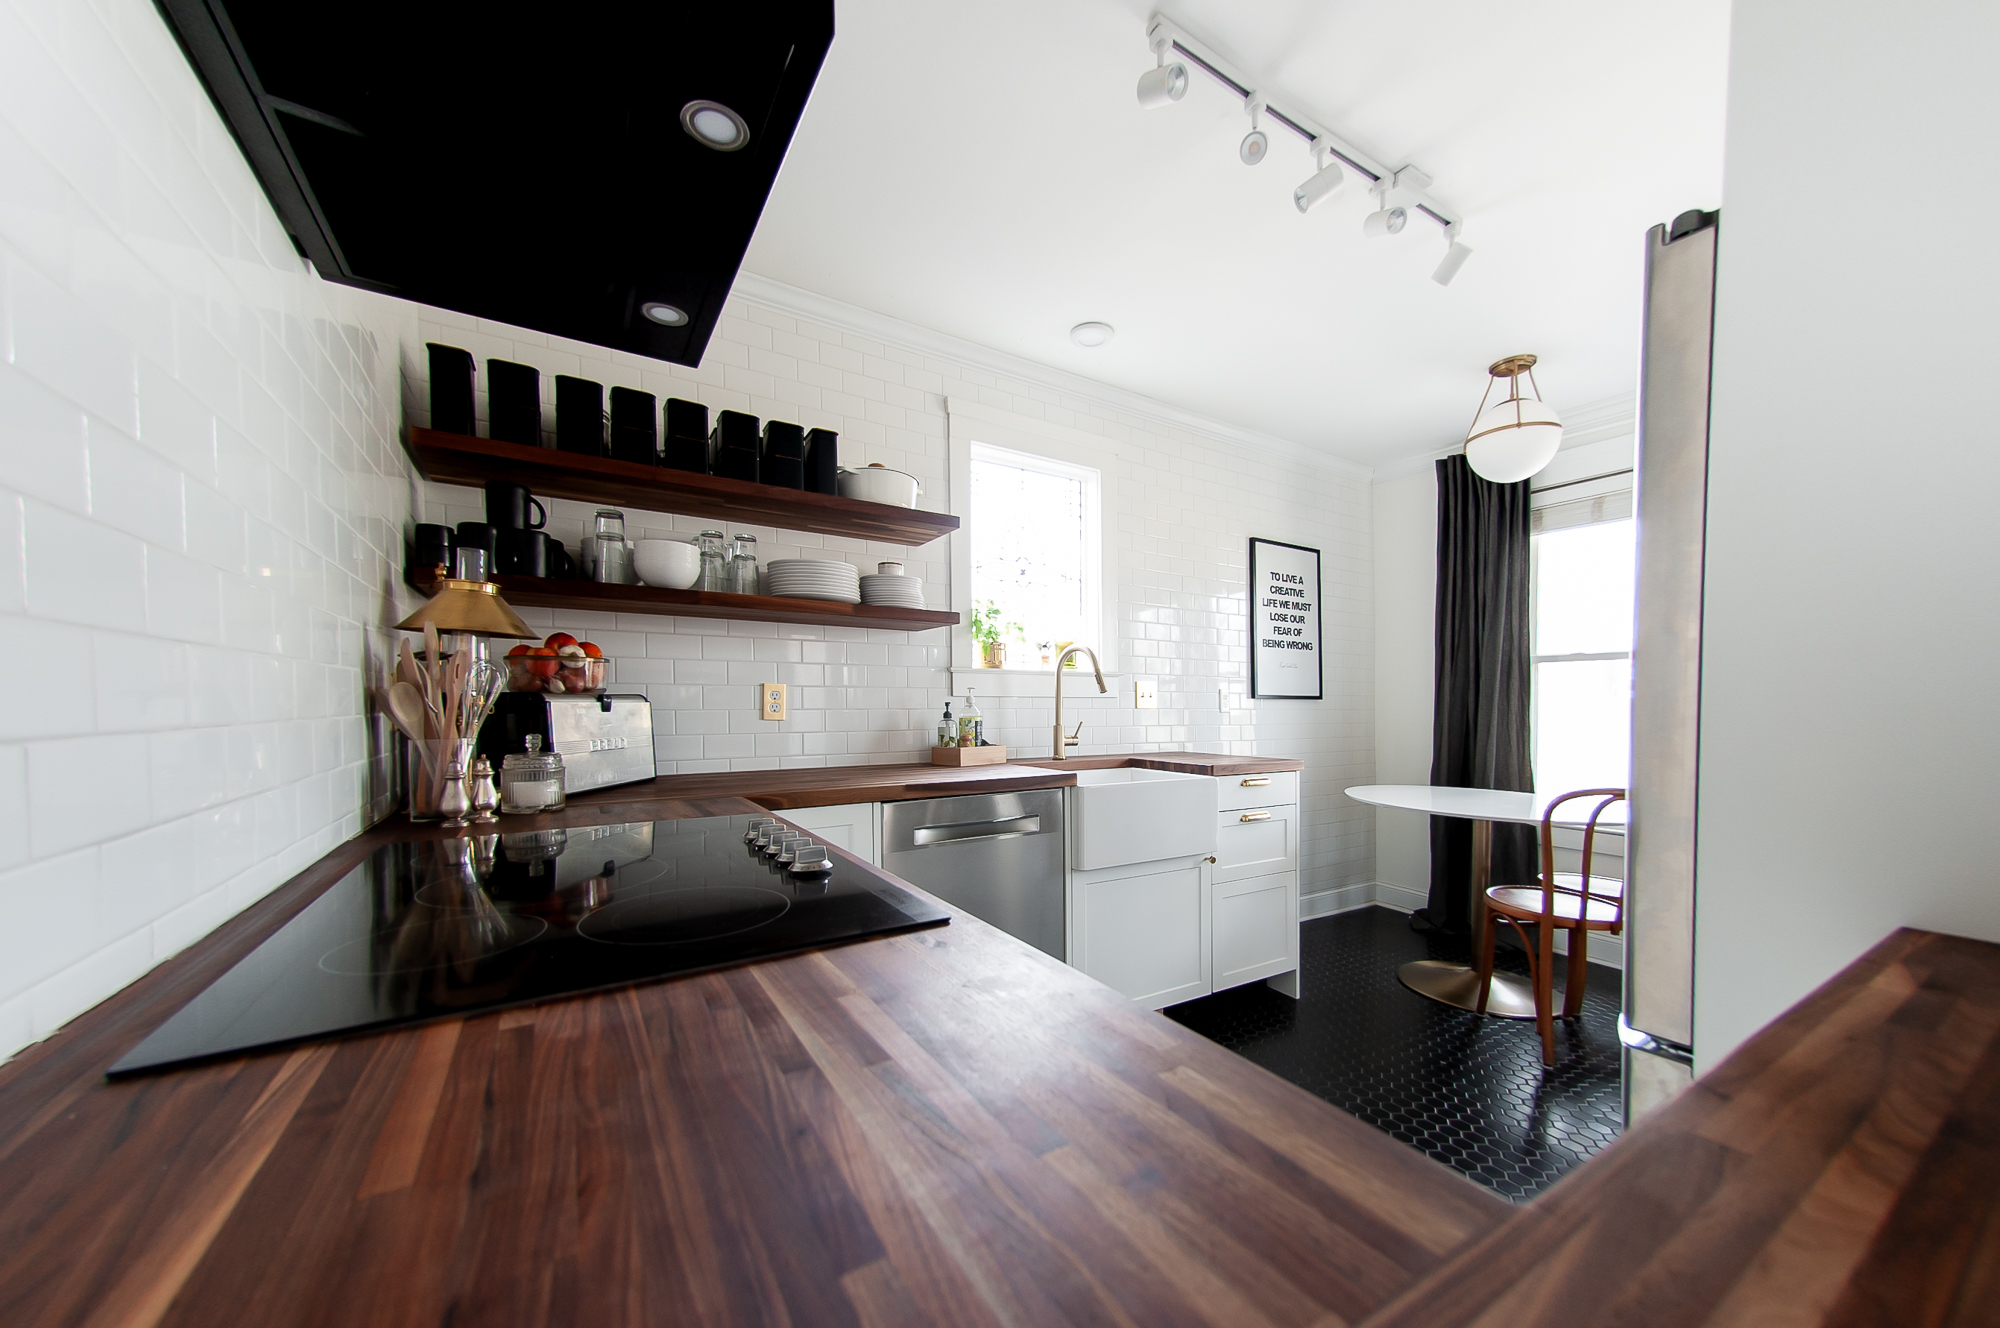
| Countertops & Shelves | $1,540.14 | We took advantage of an annual sale event. We chose to use American Walnut (which is a harder, but more expensive wood). We made the shelves by cutting down a piece of the butch block to our desired width and then installed it just like this blogger did. (This number also included a *little extra* material we ended up not using in here.) |
| Floating Shelf Brackets | $33.97 | We DIY’d the shelves themselves out of the same materiel we used for the countertops. I will warn you, these individual brackets were not Joe’s favorite to work with. They are *super heavy duty* and worked great, but they are tricky to get all lined up properly on the wall. (we needed 8 total, size large brackets for ours). |
| Sink | $369.67 | After owning this sink for a year, I love still love it, but it has not held up as well as I’d like. We’ve already noticed some small chips in the bottom of the basin. If you decide to purchase the same item, I’d recommend purchasing a protective grate cover for the bottom to help protect it. |
| Faucet | $129.99 | Budget dupe of a more expensive item. After owning this faucet for about a year now, I can say I do not recommend it, it looks very pretty, but it’s difficult to install, is prone to leak and is just not super user friendly. So proceed at your own risk. |
| Sink Flange | $24.27 | We got the vibrant polished brass option, and it’s a bit more of a shiny gold color than I’d like ideally, but it works. |
| Knobs, Bin Pulls & Brass Plate Covers | $280.00 | We ordered all these in the “aged brass”. Face plates are the “Fenton Style” |
| Oven | $1000 | As you can see, we somehow found this for half the price, brand new in the box on Craig’s List. Joe has his doubts about its provenance…. |
| Refrigerator | $1,037.68 | We purchased this item “As Is” from Lowes. It had been the floor model during a summer appliance event the previous month. We ended up only having room for a 30″ fridge, and I’ve been over the moon with how much we can fit in this one! It looks and feels just like a normal size fridge to us. |
| Dishwasher | $800 | Originally we were going to keep our old dishwasher, but we had saved so much on other items, we chose to upgrade the dishwasher to a ventless option to help protect our new butcher block countertops from steam damage. |
| Stovetop | $290 | Found on FB Marketplace, had been installed into a model home and never used, seller still even had the original box. We love it. |
| Range Hood | $163.48 | This “ventless” range hood is super affordable, looks cute and didn’t require us to add any ductwork to the house. However, I can’t say that it really does a great job of actually venting anything? If I had this to do over, I’d probably go for a nicer one with more suction. |
| Wall Tile | $240 | At $1.20/sq ft these are so inexpensive and turned out so well! |
| Wall Grout | $11.48 | We used the color “Frost” to add just a *slight* bit of contrast. (Also I was worried if we went with white, it would look dirty right away, and I wasn’t about to spend half my life cleaning grout in our kitchen to keep it white). |
| Grout Maximizer | $28.48 | Since we were still using a very light colored grout as a blacksplash, we fortified it a bit by using this grout maximizer. It helps give the grout a bit more stain resistance. It also makes it so you don’t have to seal the grout afterwards! |
| Finishing Caulk | $14.48 | Made in the exact shade of our grout, we sealed all our major seems with this matching “Frost” caulk. However, this has not held up well and we have seen an excessive amounts of shrinkage where we used it, so beware. |
| Track Light | $150 | We added two additional light heads, for a total of 5 lights to give each area of the kitchen some dedicated task lighting. |
| Can Light LED Puck | $5 | I found this item new in the original box at a local Habitat For Humanity. |
| Dining Nook Light | $120 | The globe on this light is as big as a large pumpkin! |
| ROUGH GRAND TOTAL: | ~$12,002.85 | (All prices included tax when possible) |
| TOTAL MINUS NEW APPLIANCES | $8,875.17 |
Ways You Could Decrease This Number
For starters we purchased all new (albeit “semi-used”), top of the line appliances for our kitchen. There are a lot of cheaper options you could choose to go with instead, or you could just opt to use your existing appliances.
We definitely splurged a bit on our cabinet hardware and plate covers from Rejuvenation, but there are a lot of really great, more budget friendly hardware options out there.
Another area that can be a huge savings, especially if you have a large kitchen, is reusing your old cabinet boxes instead of installing new ones. Unless you need to alter the size of your cabinets, or drastically change the layout of your kitchen, most people can actually get away with just reusing their existing cabinet boxes and updating them with new doors (Companies like Nieu Cabinet Doors specialize in just that!). You can even pull your existing cabinet boxes off the walls and rearrange them like lego pieces!
You could also choose to keep the existing flooring you have instead of removing it and installing new tile, many people who do this are able to update the look of their old tile by painting it, or by applying vinyl stickers to the floor to cover the old tiles.
Speaking of paint, I have been amazed and some of the projects I’ve seen where people create hand painted backsplashes, or even paint their countertops to cut down on renovations costs.
You can always DIY your own cabinets. And when I mean DIY, I mean, build them from scratch, boxes, doors, drawers, panels and all. As just one example, Hey There Toots just finished an AMAZING, budget friendly, kitchen where they MADE ALL THEIR OWN CABINETRY! I am still in awe.
Lastly, there is alway the option to just give your existing kitchen a fresh coat of paint and maybe rearrange a cabinet box or two. It really is amazing how much a fresh coat of paint and some new hardware can change the look of a space. I love how Chris Loves Julia did this in their kitchen and totally updated the look of the space.

Ways These Numbers Could Increase Drastically
Obviously, if this number can go down it can also go up. And while I think a lot of the ways that could happen are pretty obvious, I’ll just do a quick hit list of things that could have DRASTICALLY increased our renovation costs.
The first variable to consider here is the size of your kitchen. Our kitchen is teeny tiny compared to a lot of kitchens in the US. (We’re talking only like 126sq ft remember). So the size of your kitchen will greatly affect the amount of money it costs to renovate it.
Joe has a background in construction, so he was able to handle most of the electrical and plumbing updates to the space himself and the two of us were able to DIY almost the entire project along with a bit of help from our friends, my Dad (who we flew in to assist us for a few weeks) and Joe’s brother (who is a professional handyman/homebuilder). Had we hired professionals to do many of these tasks for us, the cost would have increased DRASTICALLY. So if you know there are updates to your space that you’ll need to hire out. Getting quotes from a professional in advance will be super helpful for updating this number to something more realistic for you.
Another area that can GREATLY increase the cost of your renovation is how much you will be changing the general layout of your space; because moving the hookups for the sink, refrigerator, range & oven can be insanely expensive. We were able to avoid any of those costs by making sure all the updates we made to the cabinetry still allowed the appliances and sink to utilize the existing hookups in the space.
As I’ve mentioned before, I was also able to snag some pretty great deals on some very nice appliances for our kitchen. If you compare the full price on these items vs what I paid, I was able to save about $2,585.32 just on the fridge, oven and stovetop alone. If you paid close attention you might also have noticed they are all completely different brands of appliances. The fridge is LG, the stove is Frigidaire, the oven is GE and the dishwasher is Bosh. (I feel like that should earn me some kind of kitchen Bingo prize?) If I had instead chosen to get all matching brand new appliances, the price would have drastically increased.
Custom cabinetry is another way that this number can quickly skyrocket. We chose to use Ikea cabinet boxes and upgrade the fronts with faces and panels from Semihandmade. However, you do have limitations on how much you can customize your kitchen if you choose to go this route. So if you’re looking for fancy spice rack pull-outs, or other highly custom cabinet options, this might not be the best option for you.
And of course, the materials you chose to use in your kitchen can alter the final price tag a lot as well. For instance butcher block countertops are a lot cheaper than marble (and you can install them yourself much much much more easily) and our black mini hex floor tile was only $4.99/sqft which is solidly on the budget end of the world of tile options.
Lastly, there’s always the possibility during any renovation that you’ll run into unexpected hurdles, like discovering your house has asbestos, or that there is mold growing in your walls. These discoveries are unpredictable and can be costly to address once discovered. If you have a newer built home, you probably (fingers crossed) won’t have to deal with a lot of those issues. If you’re home is older like ours, it’s always going to be a bit of a roll of the dice on what you’ll find. Luckily, this project just had a lot of uneven surfaces and wavy walls to deal with.
Whew I think that about sums it all up? Did I missing anything? Let me know if you have any questions in the comments below!
Don’t Forget To Pin This Post & Subscribe!
Want to keep getting more DIY home decor inspiration, thrifting tips & tricks, free art downloads, reading recommendations, and home renovation tutorials? Then don’t forget to pin this post for later so you can follow me on Pinterest and then subscribe to my blog so you can get links to my newest content as soon as it hits the blog!
This budget breakdown is incredibly helpful, especially for anyone planning a kitchen remodel with a clear sense of financial boundaries. As someone involved in construction, I appreciate how you’ve categorized each expense, from cabinetry to flooring, giving a realistic picture of where the major costs lie. The tip about unexpected expenses is spot on—unforeseen issues always seem to pop up during a remodel, no matter how well-planned.