
Want to up your pumpkin carving game but don’t know where to start? Try etching! I switched over from carving my pumpkins to etching my designs a few years ago and I’ve been blown away with how easy it is for even a beginner to achieve really amazing results! Here’s the entire process broken down into seven easy steps.
*This blog post contains affiliate links, meaning that if you purchase any of the items using the links I provide I, as the author of this website, will receive a very very small commission from that sale. This is a great way to help support your favorite bloggers at no cost to you. Think of it like a tip jar that costs you nothing!
Step One: Give Your Pumpkin A Bath
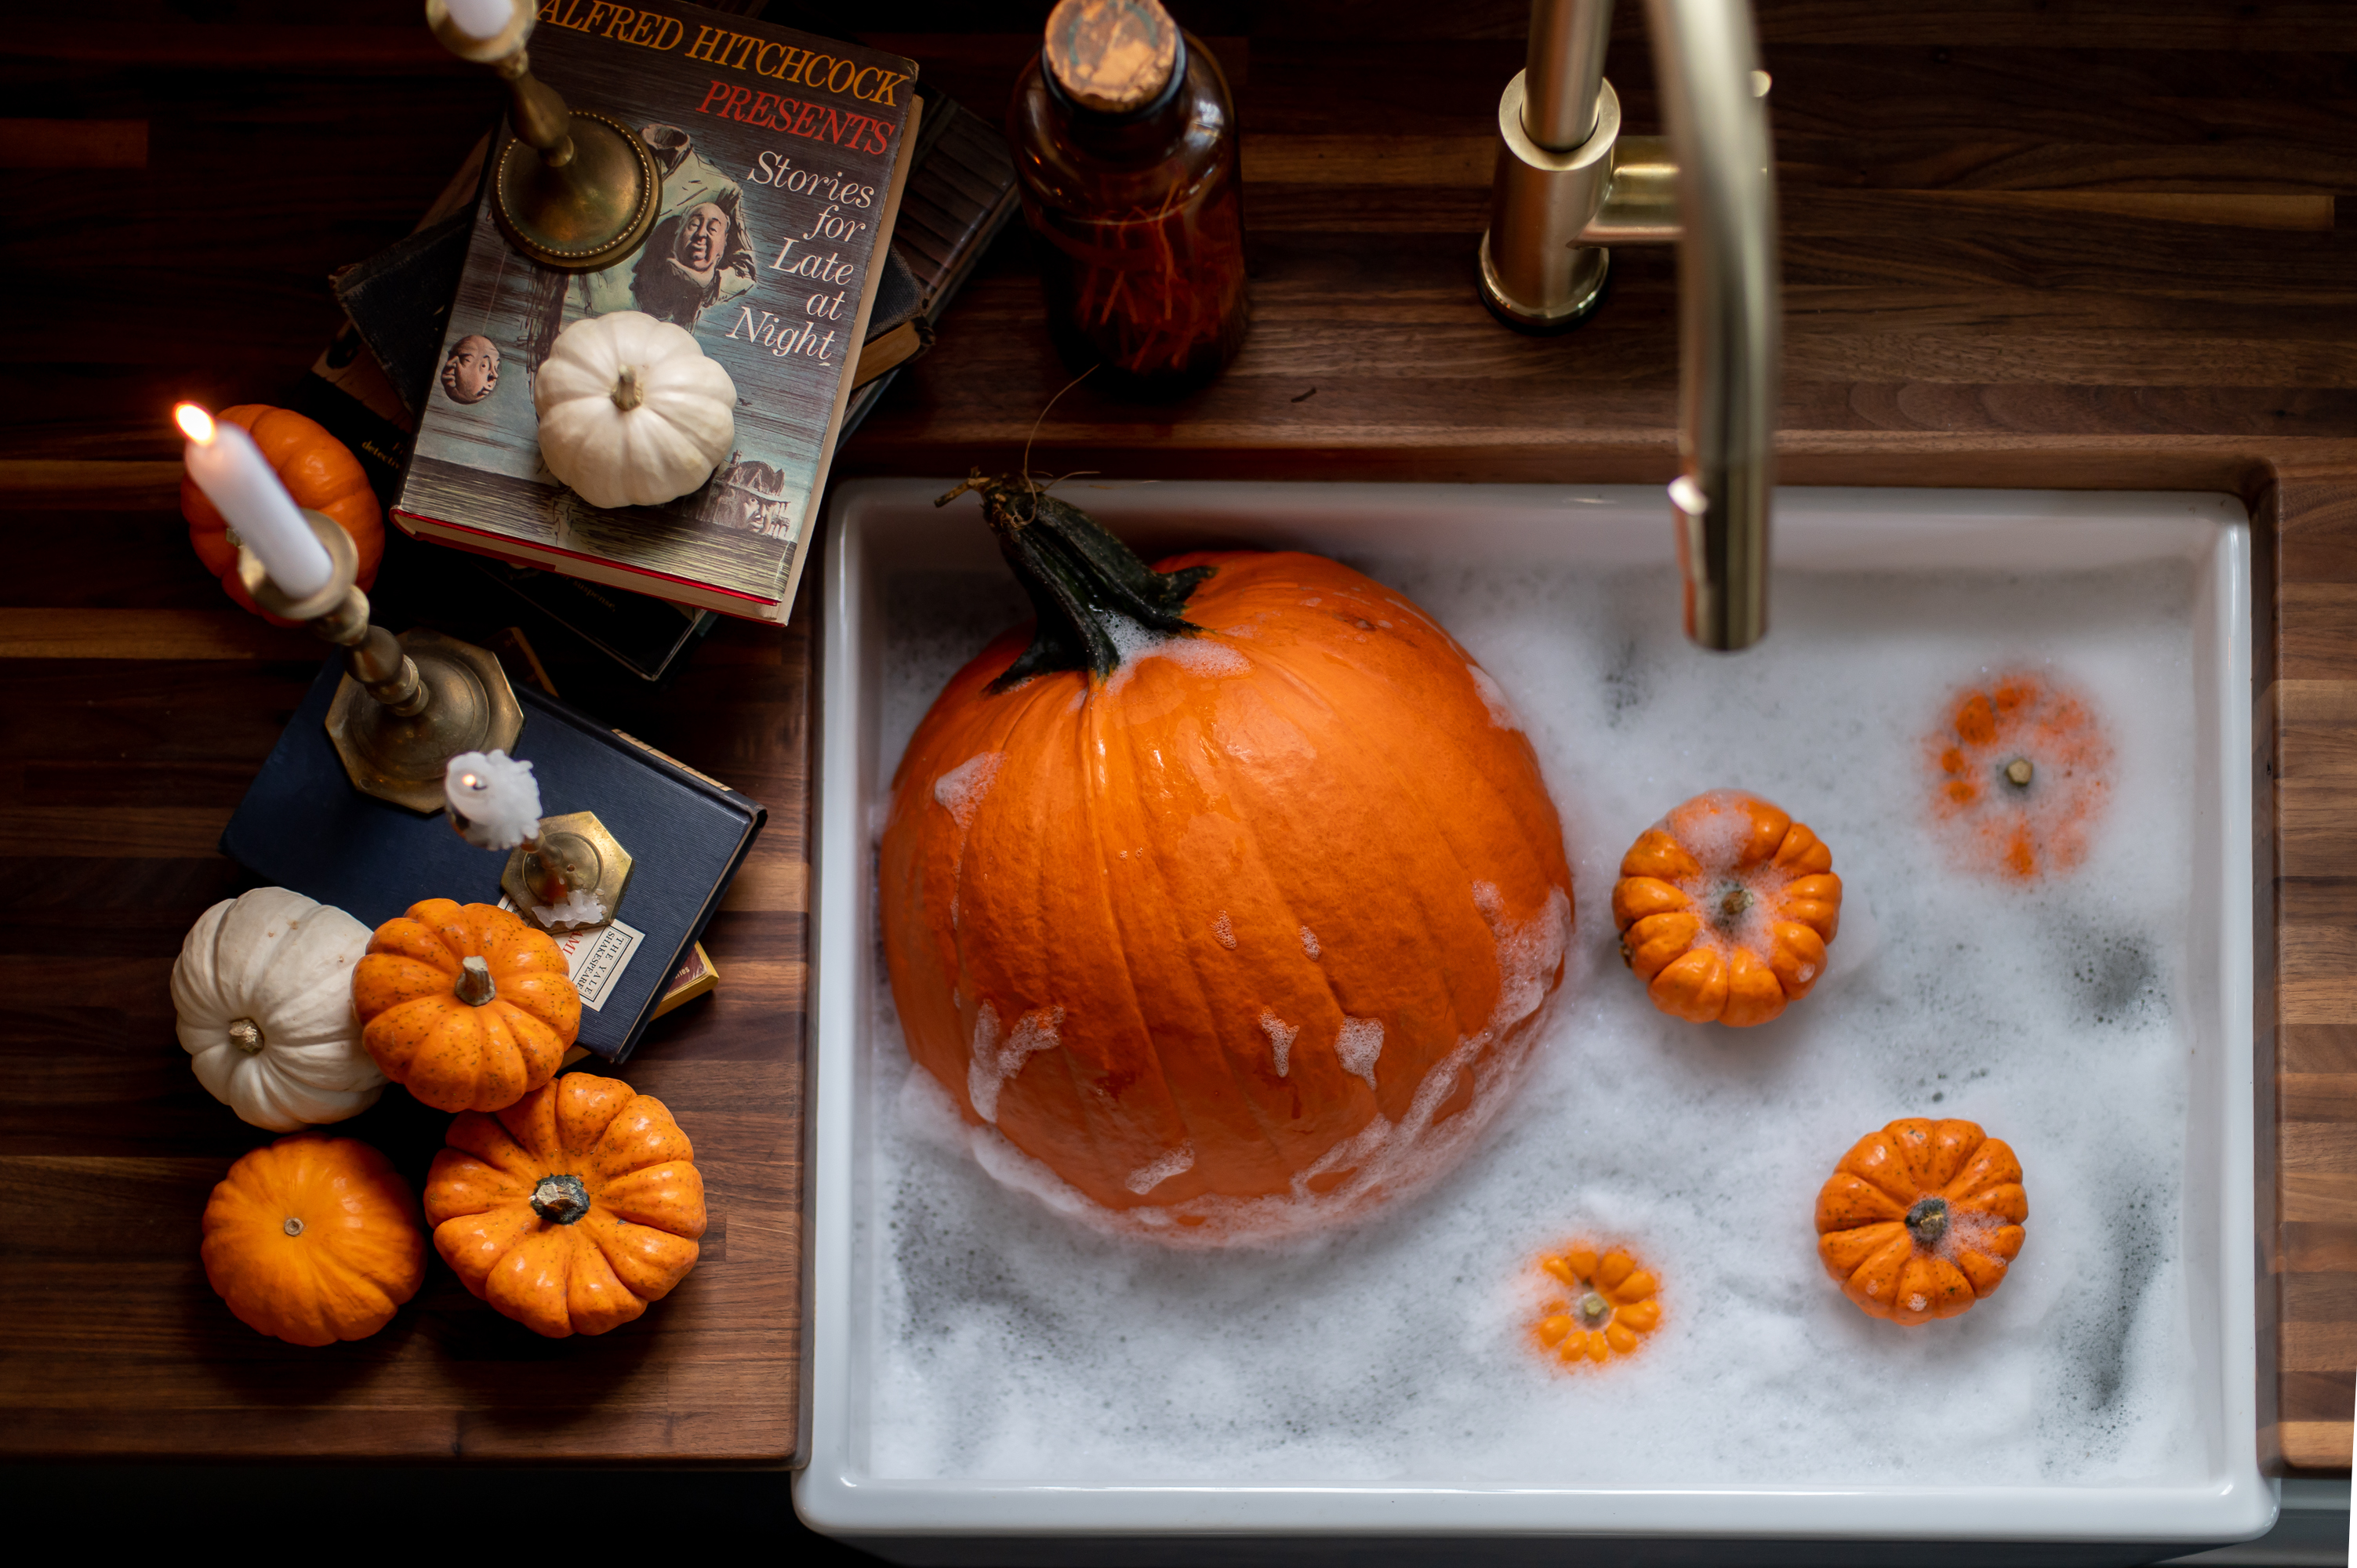
Did you know that thoroughly washing and cleaning your pumpkin with a bit of soap and either bleach or vinegar will help kill the bacteria that lives on the outside of the skin and slow the natural decomposition process! (Bubbles, candle light and books are optional….)
If you want detailed instructions for how to do this, I broke down the entire process here!
Step Two: Gather Your Tools
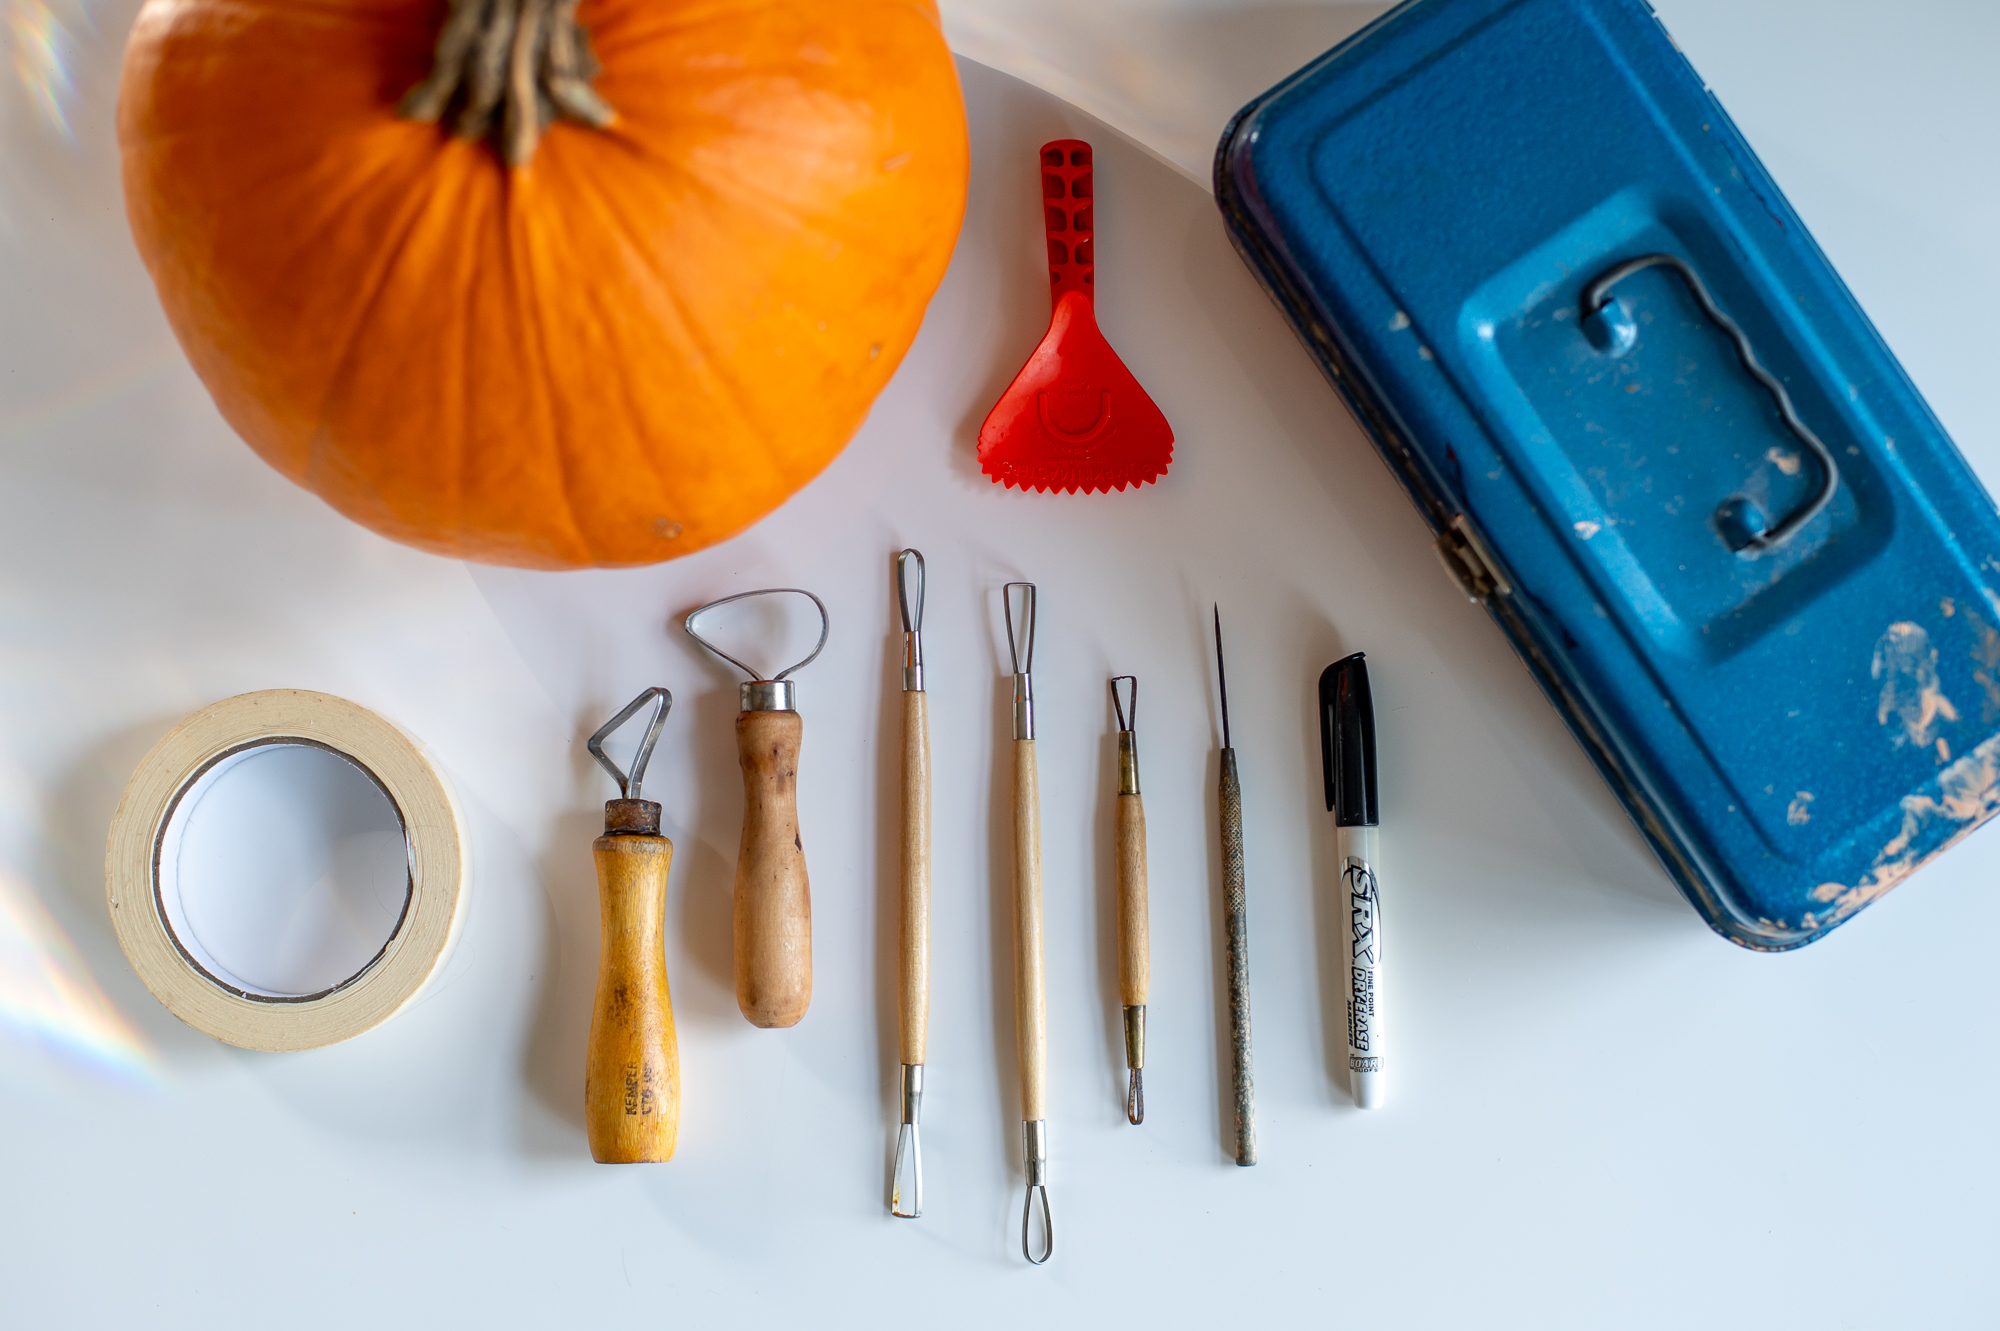
In addition to the usual tools you’d use to carve a pumpkin:
- A pumpkin
- Masking Tape
- A Traditional Pumpkin Scraper/Scoop
- (Not nessecary but helpful if you happen to have one lying around from an old pumpkin carving tool set)
- A dry erase marker
To ETCH your pumpkin you’re going to need a few special tools.
- I’ve found a set of TOOLS LIKE THESE (traditionally used for carving clay) work really well for this purpose!
- The three most important ones in the set being, the tool with a sharp pointy needle-like tip (you’ll use that to transfer your design onto your pumpkin), the smallest wood handled one you see in the picture above (the one with the triangle loop on one end and the small oval loop on the other), and the big guy with the large metal loop on top second in from the left. The other ones are great to have, but you really only need those three to do this.
Step Three: Choose Your Design
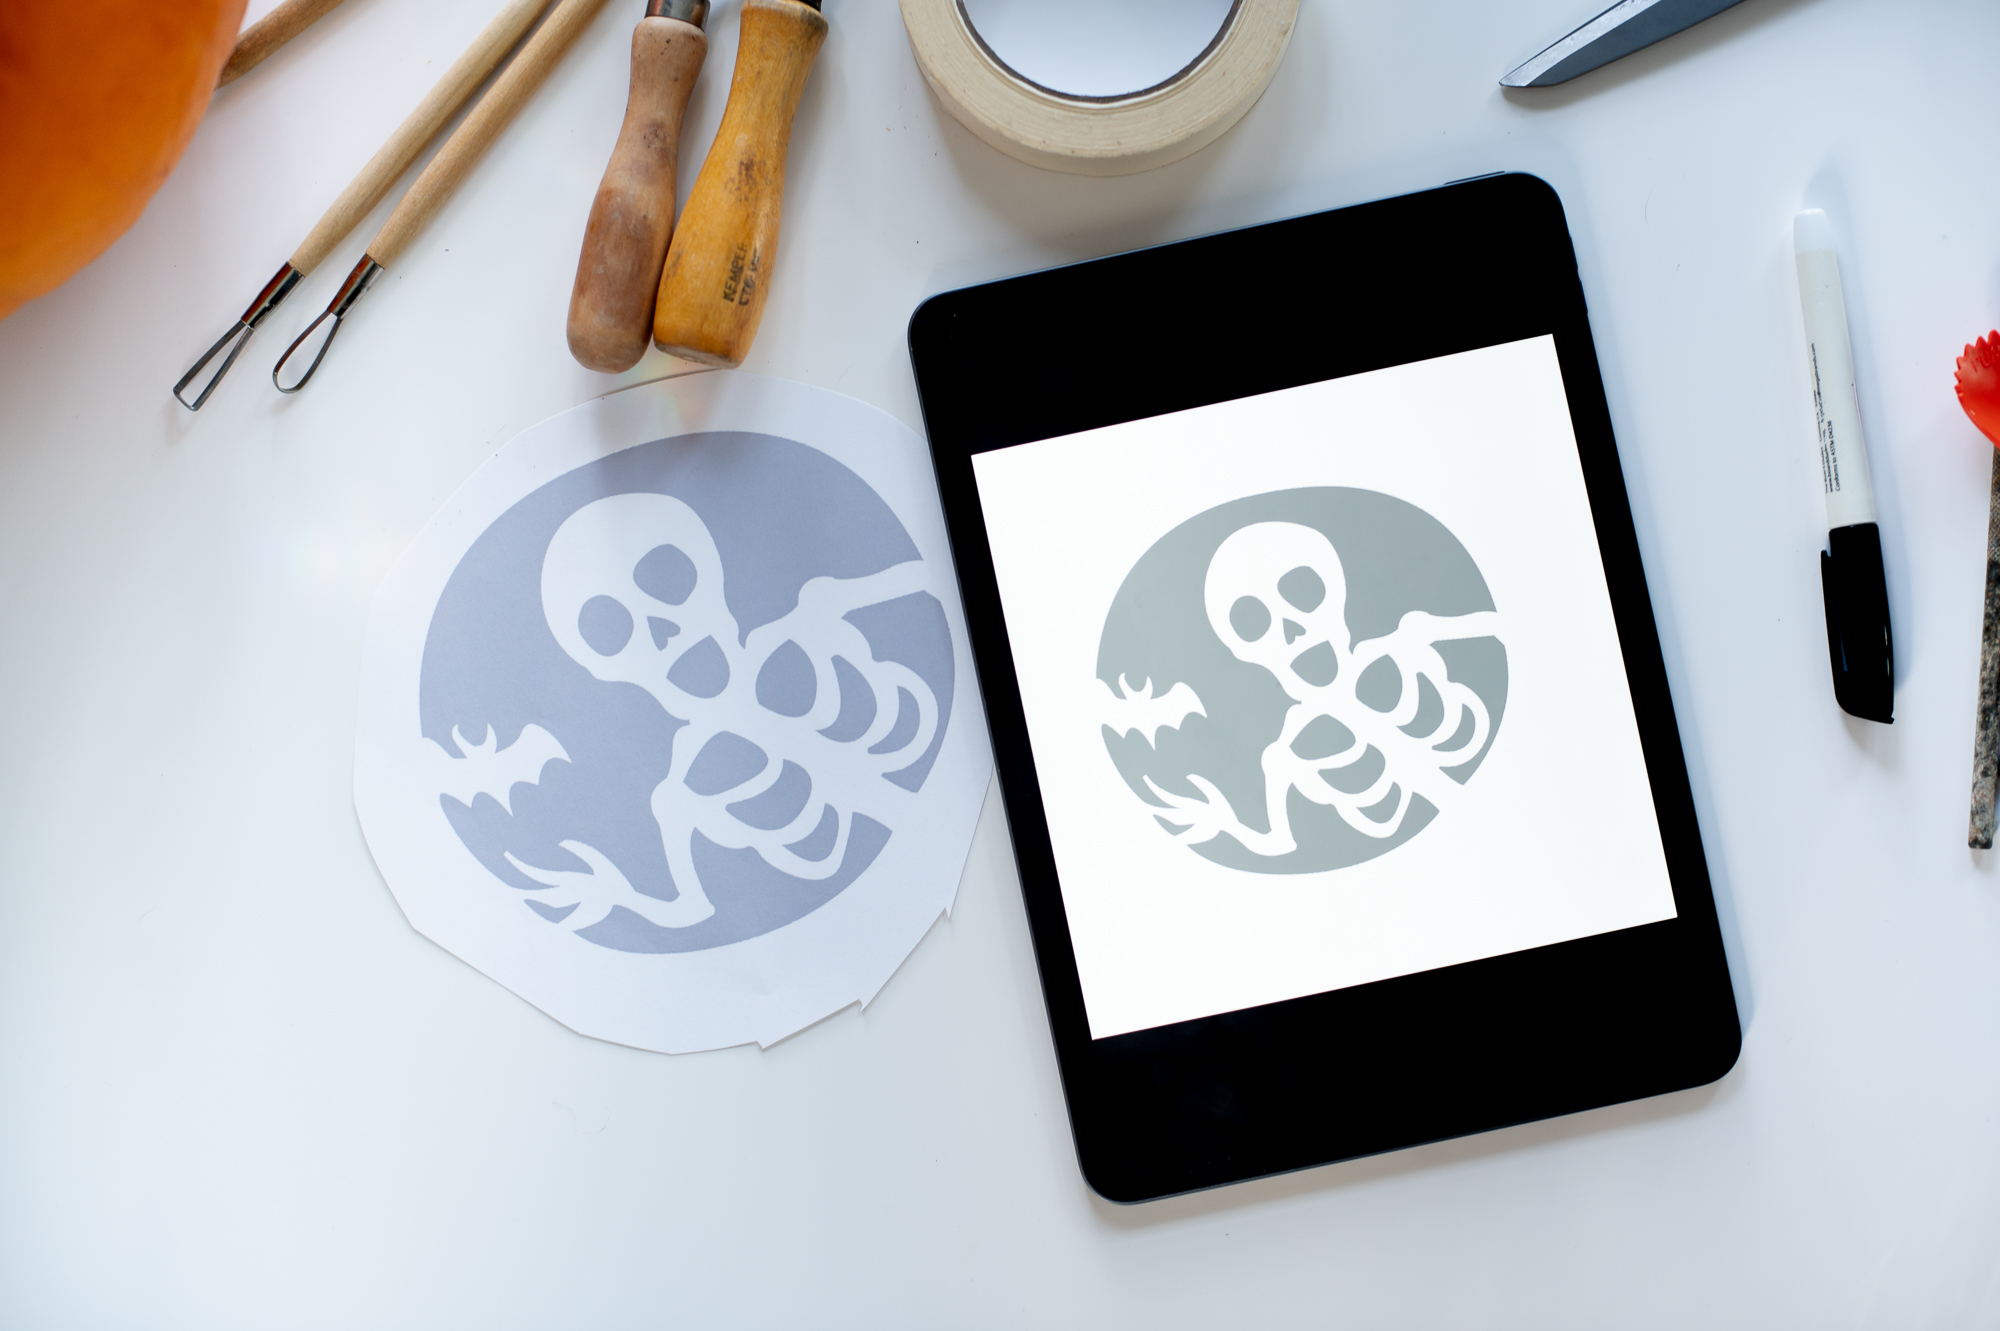
Now comes the fun part, choosing your design! And because you’re etching your pumpkin and not carving it, your options here really open up since as you no longer have to worry about all the sections of your design being connected like you would when traditionally carving a pumpkin.
Once you’ve chosen your design, you’ll want to print out two copies, one to tape onto your pumpkin and use as a template, and one to preserve as your reference sheet.
Want to use the same design I did in this tutorial? You can find it HERE. (It’s free!)
Step Four: Transfer Your Design Onto Your Pumpkin
(Somehow I totally forgot to photograph this step. Luckily, if you look below at the picture for Step Five, you can easily see the end result of this step).
After securely taping your paper template where you want it onto your pumpkin with the masking tape, you are then going to use the long sharp pointy tool to begin tracing your pattern onto you pumpkin by slowly stabbing repeatedly through your paper design and into your pumpkin all along the edges of your design. The more dots your stab, the easier it will be to see your design when you remove the paper!
When you are done, you should be able to simply wipe down your pumpkin and play connect the dots to draw out your shape in dry erase marker if needed for a clear visual (which easily washes off with a bit of water afterwards).
Step Five: Time To Etch A Pumpkin
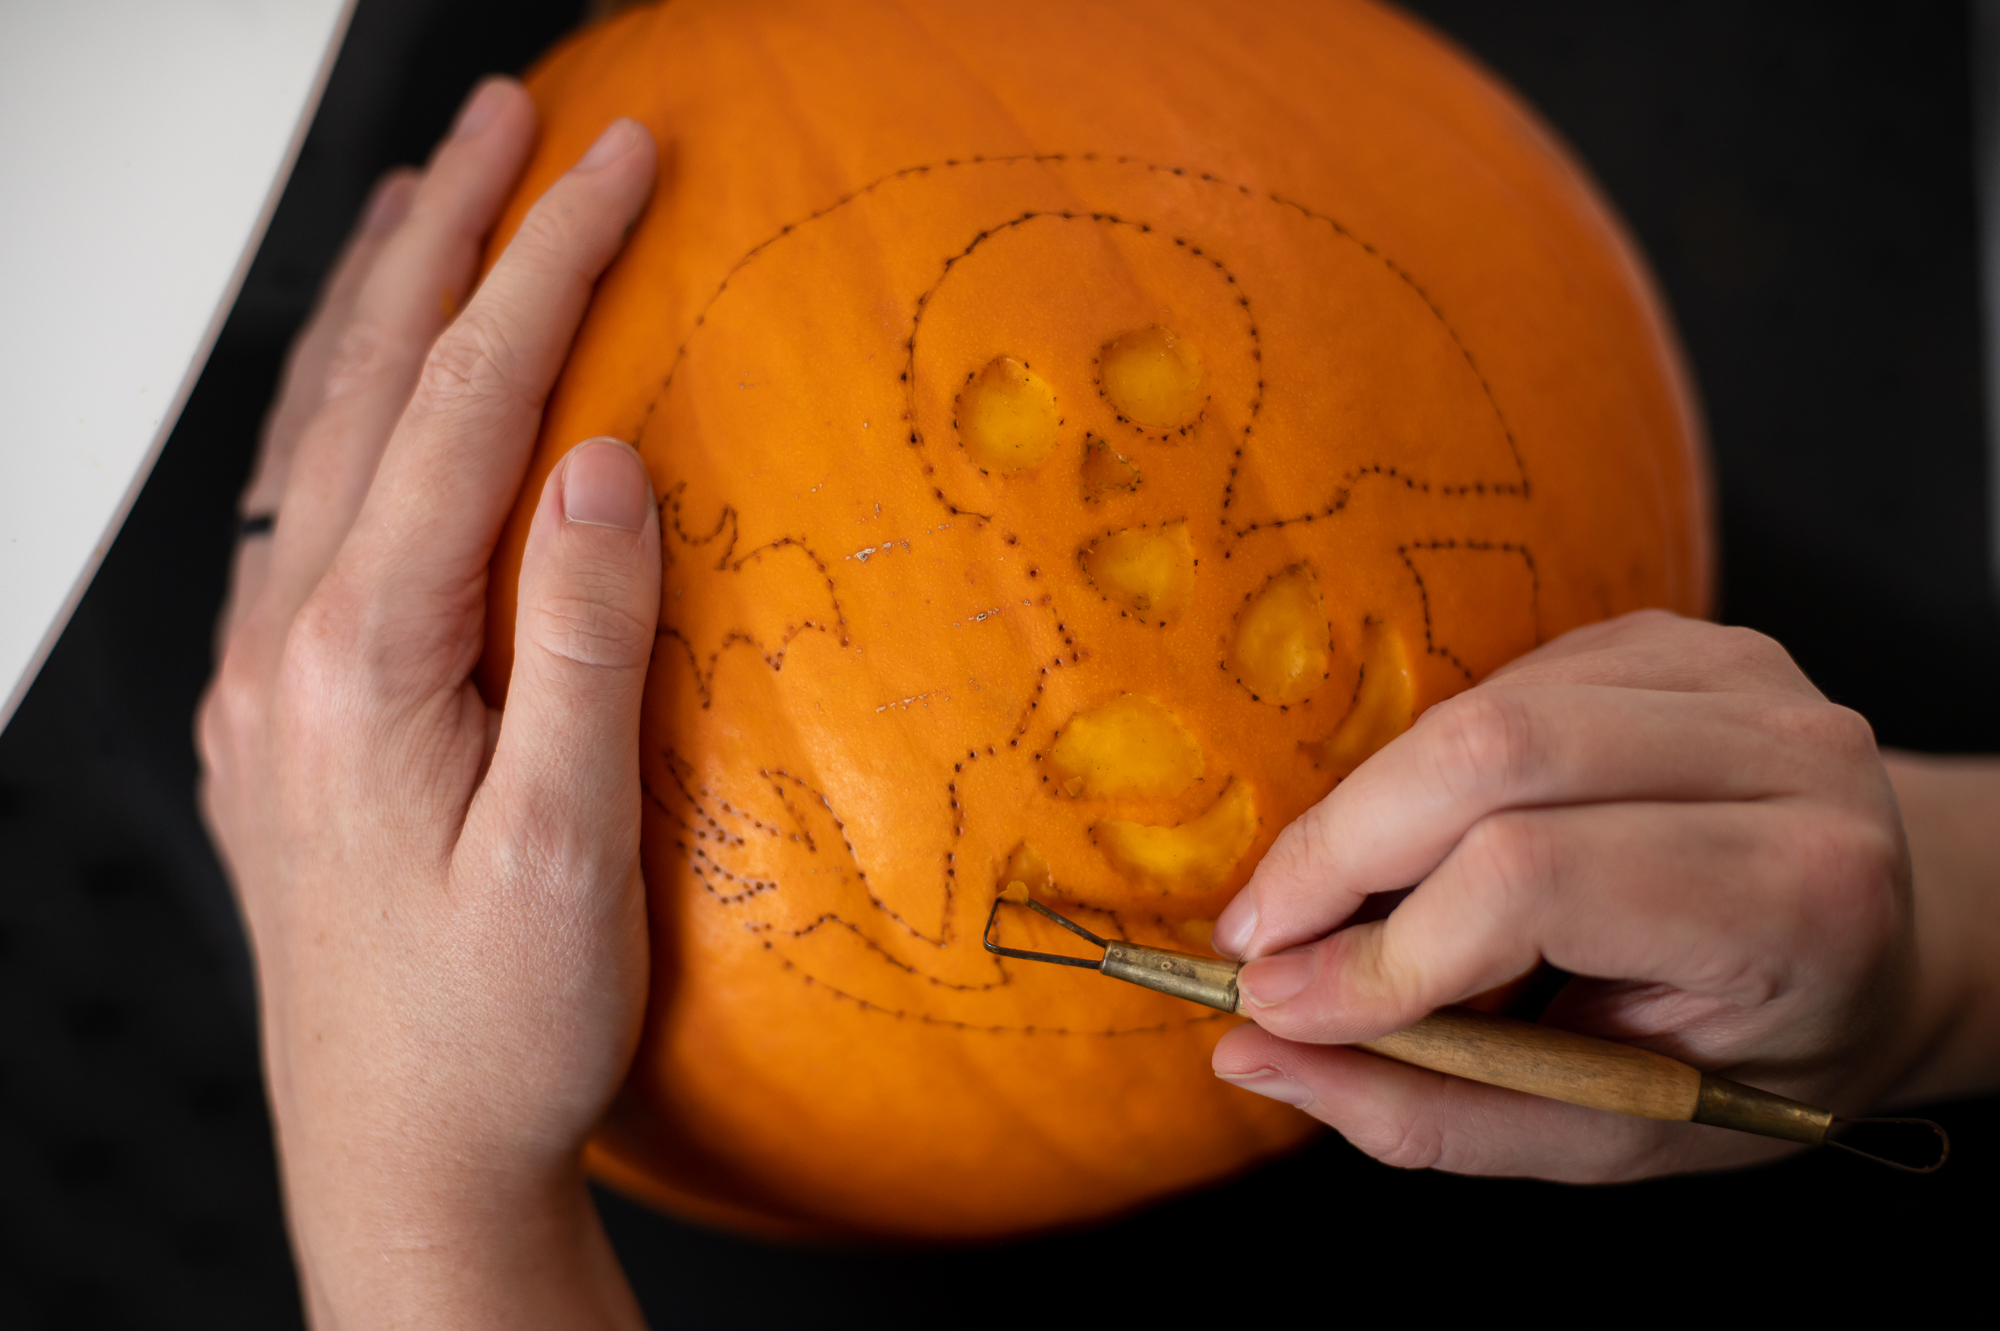
Ok time to etch. For this step you’ll need to grab the small wood handled tool with the smallest metal loops on the end.
To start etching, you first need to puncture the skin of the pumpkin. I do this by gently pushing down with the tool until it pops through the top layer of skin. After you’ve popped through the top layer you’ll just flick it off and then continue to use your tool to carve/scrape/peel off the top layer of pumpkin rind from all the areas of your design where you want the light to shine through.
I find flicking off small little bits at a time, vs large sections all at once help me be more precise and avoid mistakes.
NOTE: While you can always choose to carve deeper into the surface of the pumpkin for creative purposes, be aware that any fluctuation in the depth of your carving will cause the light to shine through more or less brightly later. Because of this I try to carve off a very thin even layer of pumpkin rind.
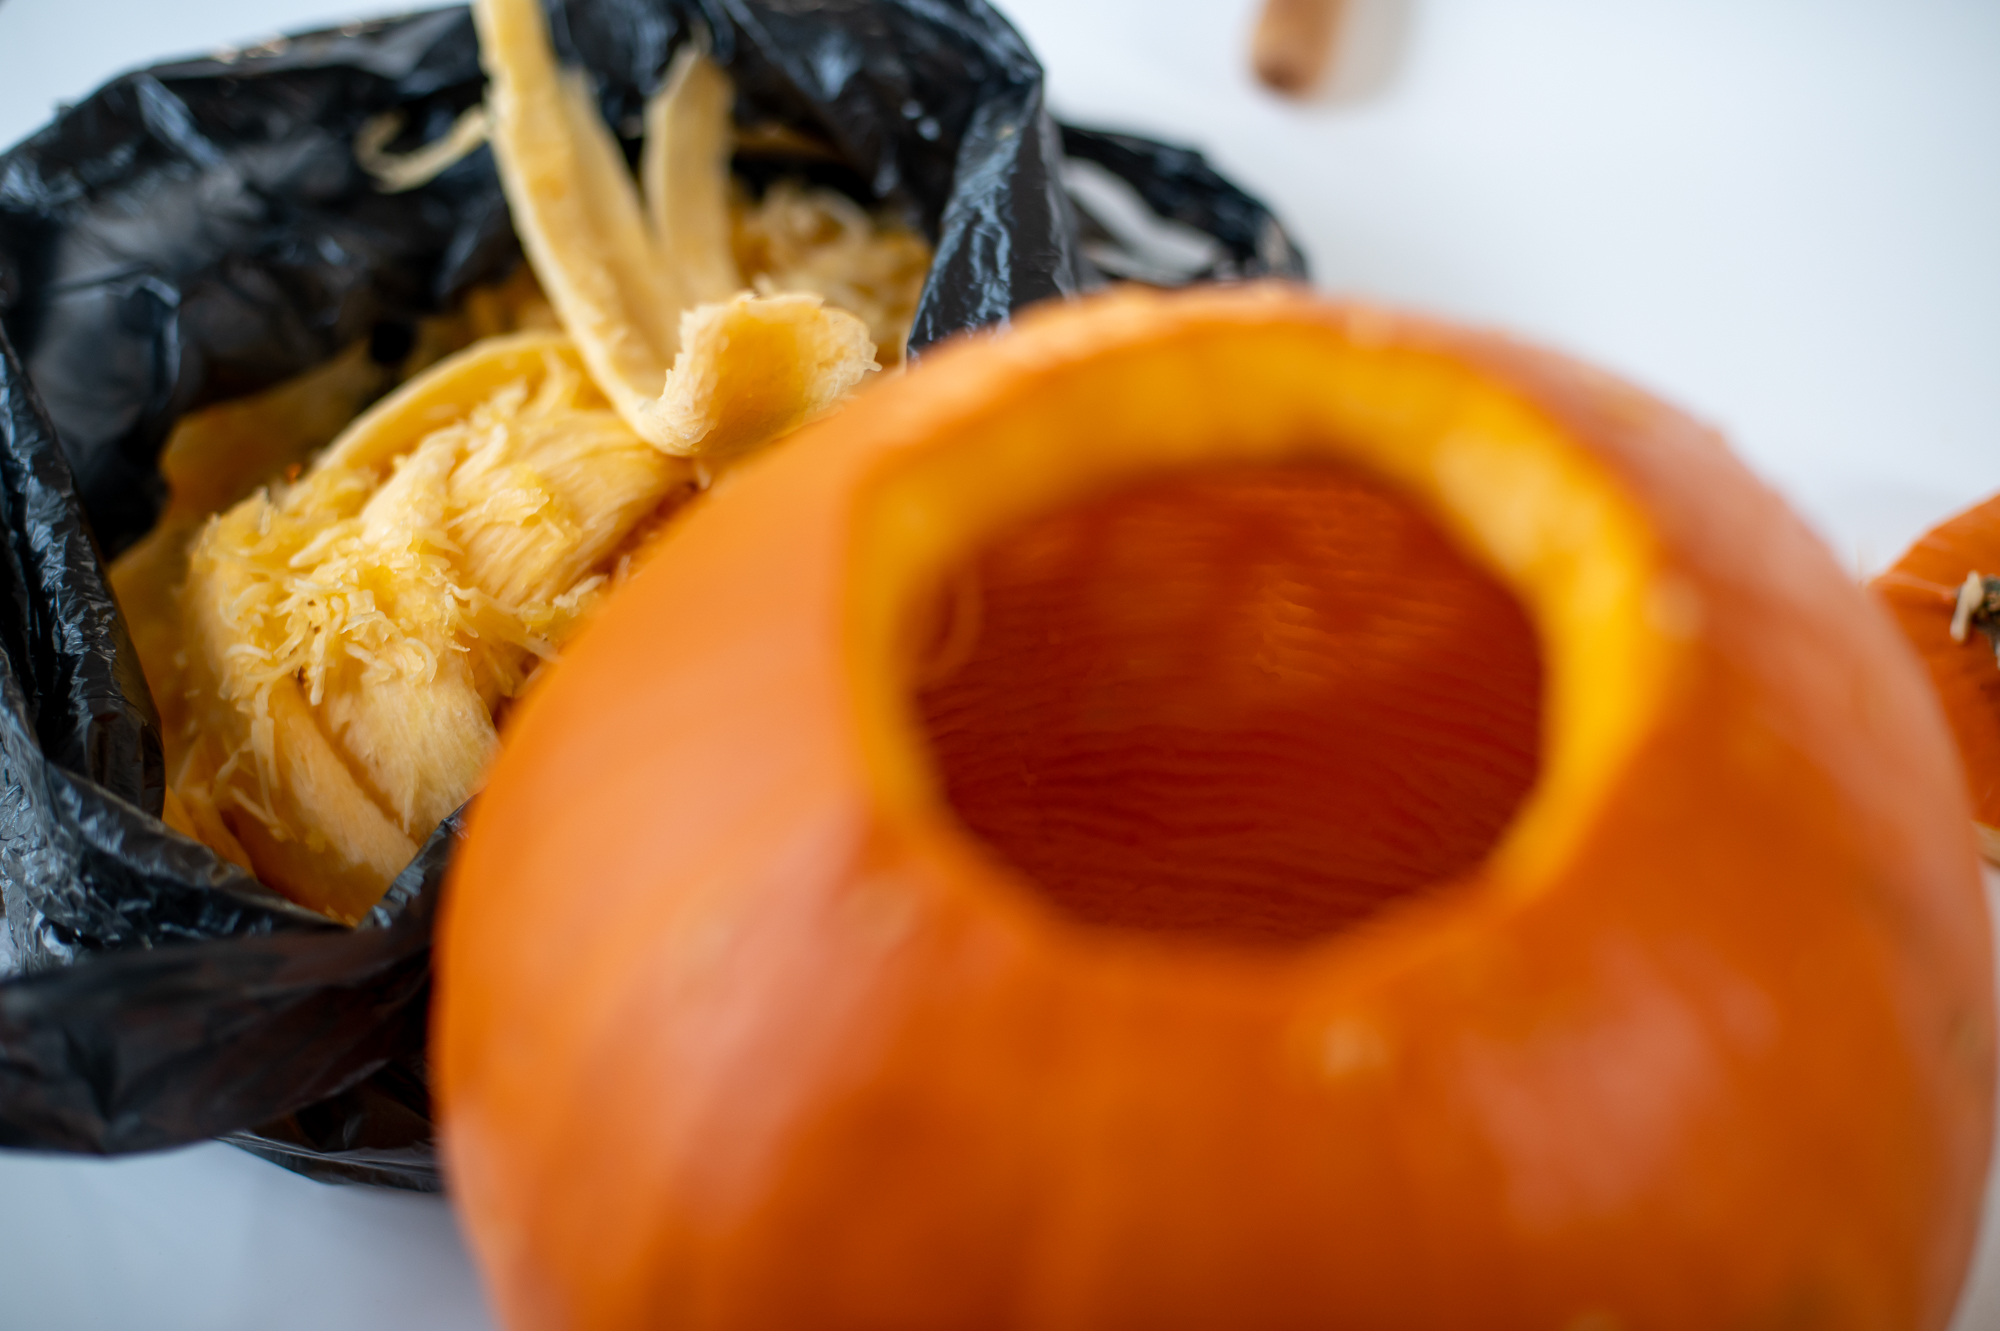
Step Six: Gut & Scrape That Pumpkin
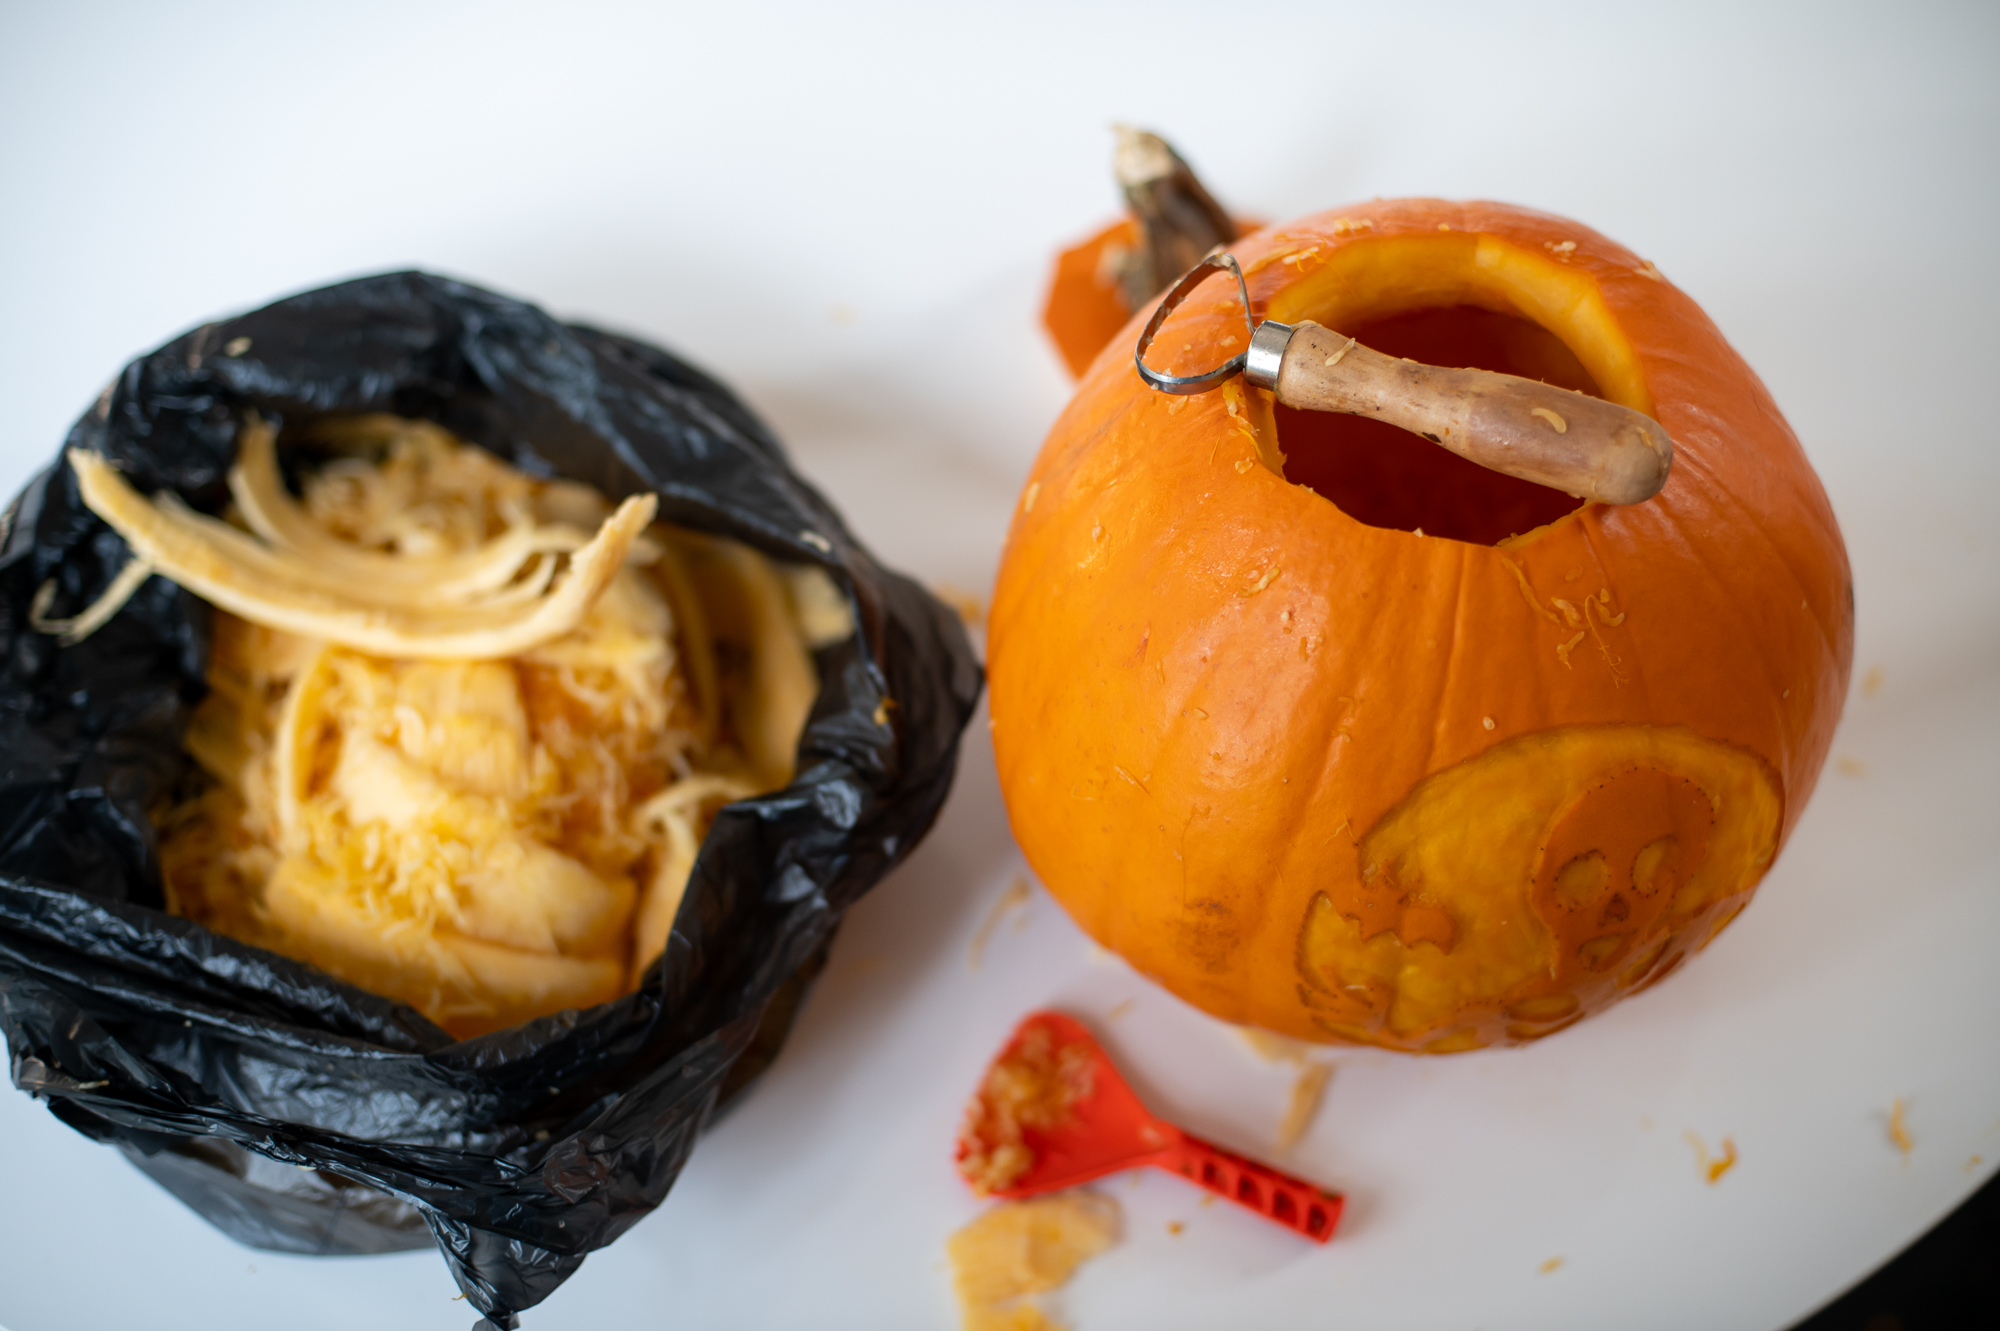
Yep, using this method you actually gut the pumpkin LAST instead of first. That’s because after you gut the pumpkin as normal. you’re going to take the largest wood handled tool with the biggest metal loop on the end and use it inside your pumpkin to scape down the back side of your design as thin as possible without breaking through to the surface.
Your aim here is to create a sort of stained glass window effect by gently scraping away at the backside of your design inside your pumpkin until the skin is thin enough for light to shine through. I like to hold one hand over the front of my design while scraping the inside with the other hand. This helps to protect my design and ensures that I can quickly feel if any areas of my design are getting too thin and I need to be careful not to break through to the surface.
Step Seven: Test Your Design
When you think you’ve carved enough pumpkin away from the back of your design, it’s time to test it out! I like to do this by setting a simple shop light on top and turning it on.


If you like how the light is shining through, that’s it! You’re all done! If it’s still too dark, go back and scrape away more from the inside of the pumpkin from the back side of your design until you achieve the level of light you want!
Want to watch a video of me going through this entire process from start to finish? You can see the whole thing in my pumpkin etching highlight in my instagram stories here!
Want Your Pumpkin To Last As Long As Possible?
Don’t gut it! Sure it can’t light up at night, but there are lots of instances where you might care more about how your design on your pumpkin looks during the day and not gutting your pumpkin can drastically increase its longevity!

Don’t Forget To Pin This Post & Subscribe!
Want to keep getting more DIY home decor inspiration, thrifting tip & tricks, free art downloads, reading recommendations, and home renovation tutorials? Then don’t forget to pin this post for later so you can follow me on Pinterest and then subscribe to my blog so you can get links to my newest content as soon as it hits the blog!