
As someone whose favorite color is black and loves all things dark and moody, traditional Easter decor doesn’t usually spark a lot of joy for me.
However, my daughter is turning 2 this year and is utterly obsessed with bunnies, so I’ve been spending a lot of time thinking about how I could come up with Easter decorating ideas that aligned more with my personal aesthetic.
I also love a good budget craft project.
So when I was struck with three different moody and elegant Easter egg decorating ideas while wandering the isles of our local Dollar Tree, I snagged all the supplies I needed and got to work.
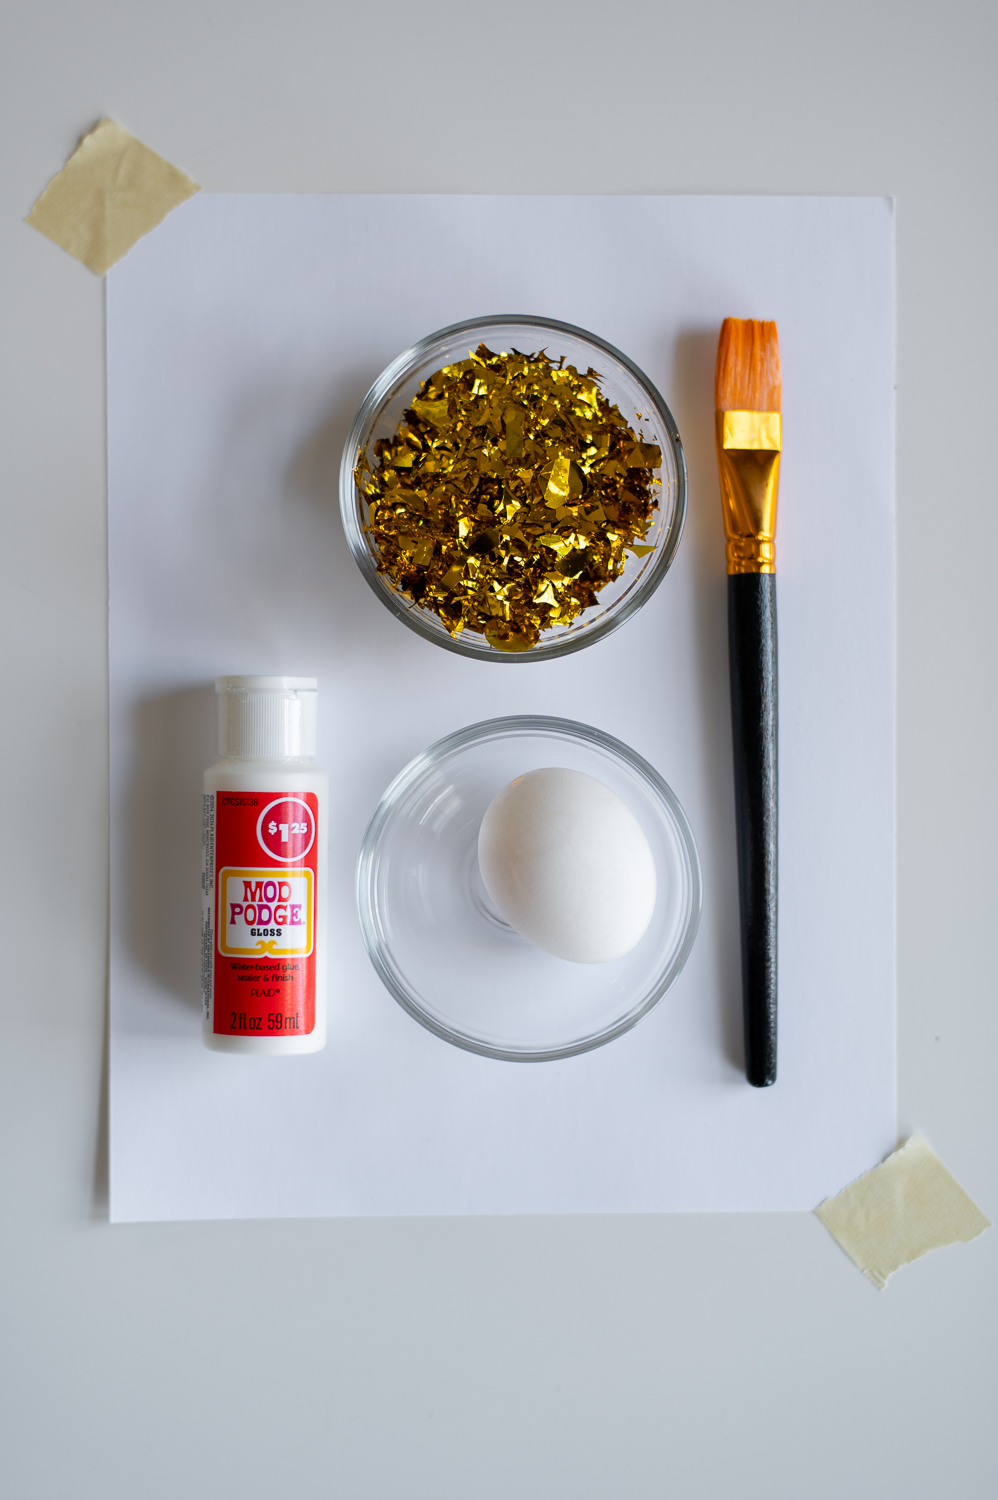
Up first, my take on a faux gold leaf Easter egg using gold confetti and glossy mod podge!


*This blog post contains affiliate links, meaning that if you purchase any of the items using the links I provide I, as the author of this website, will receive a very very small commission from that sale. This is a great way to help support your favorite bloggers at no cost to you. Think of it like a tip jar that costs you nothing!
This DIY was a roller coaster of “this is an amazing idea!” to “oh no what have I done!?” to “oh… I think these are actually going to work!” Which is a pretty common pattern for my DIY ideas come to think of it.
In any case, I love how these sparkly little golden eggs came out! They are just so fun!
How I Made My Golden Confetti Easter Eggs
I chose to empty out my eggs first and dry them. Which, if this is your first time doing that, this is a great project to practice on as you can easily cover up even very large holes or cracks you may make by accident as you’re figuring out the egg emptying process. (I’m definitely picking up one of these to help me next year though…)
Step One: Paint Your Egg With A Very Generous Coat Of Mod Podge
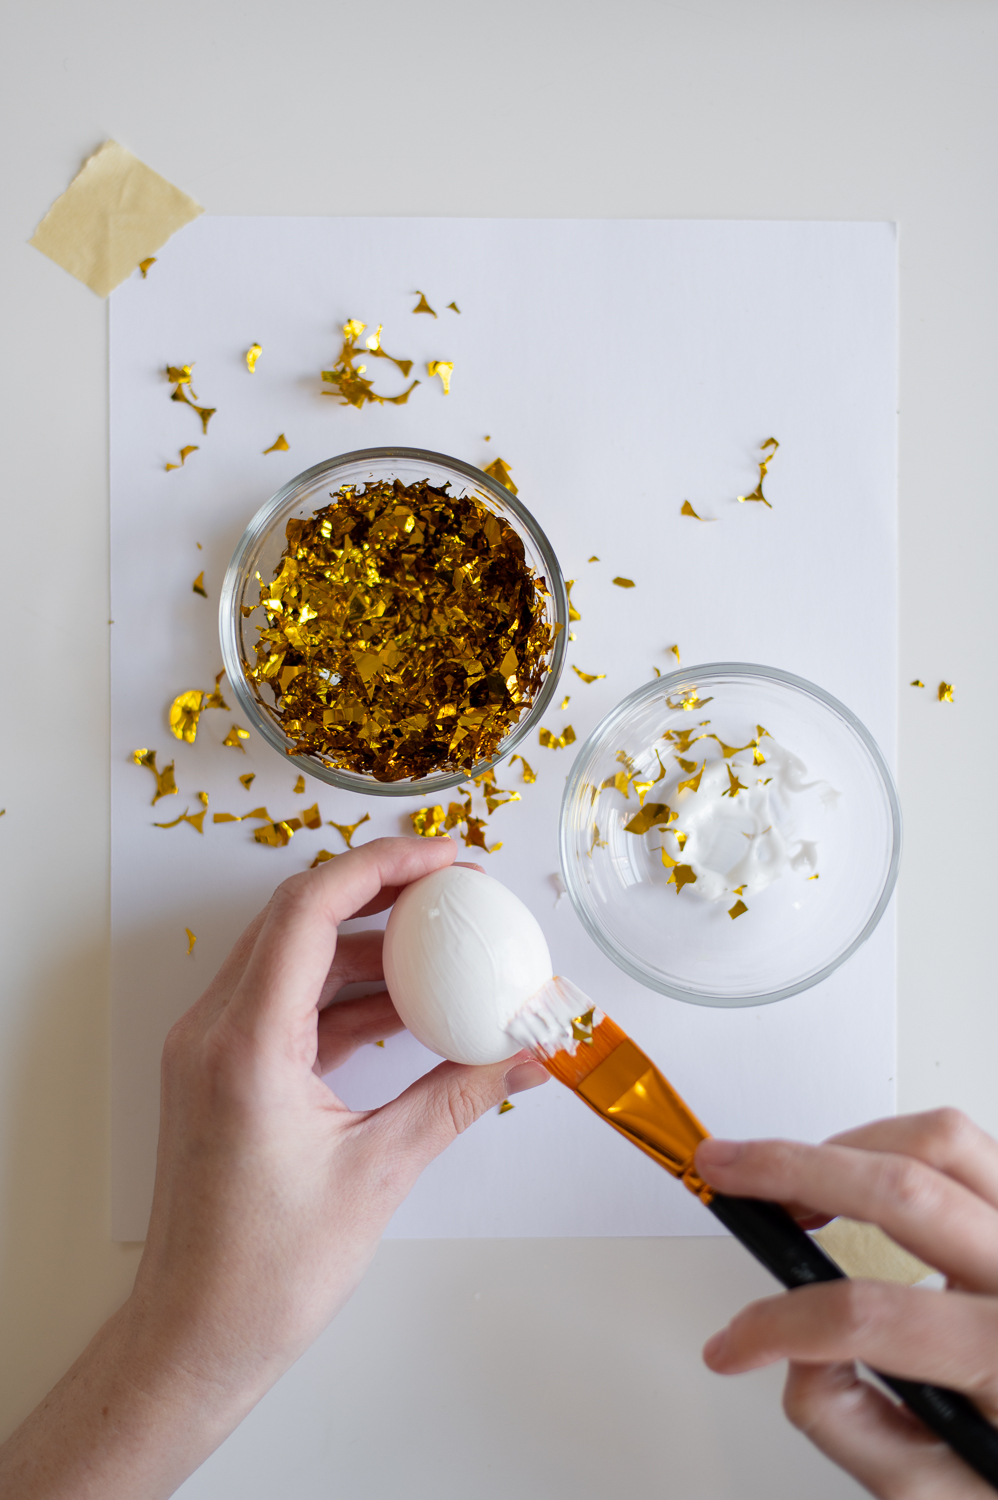
And when I say generous, I mean GENEROUS. Do not be shy with the mod podge here. You need it nice and thick so the confetti has as much glue as possible to stick to.
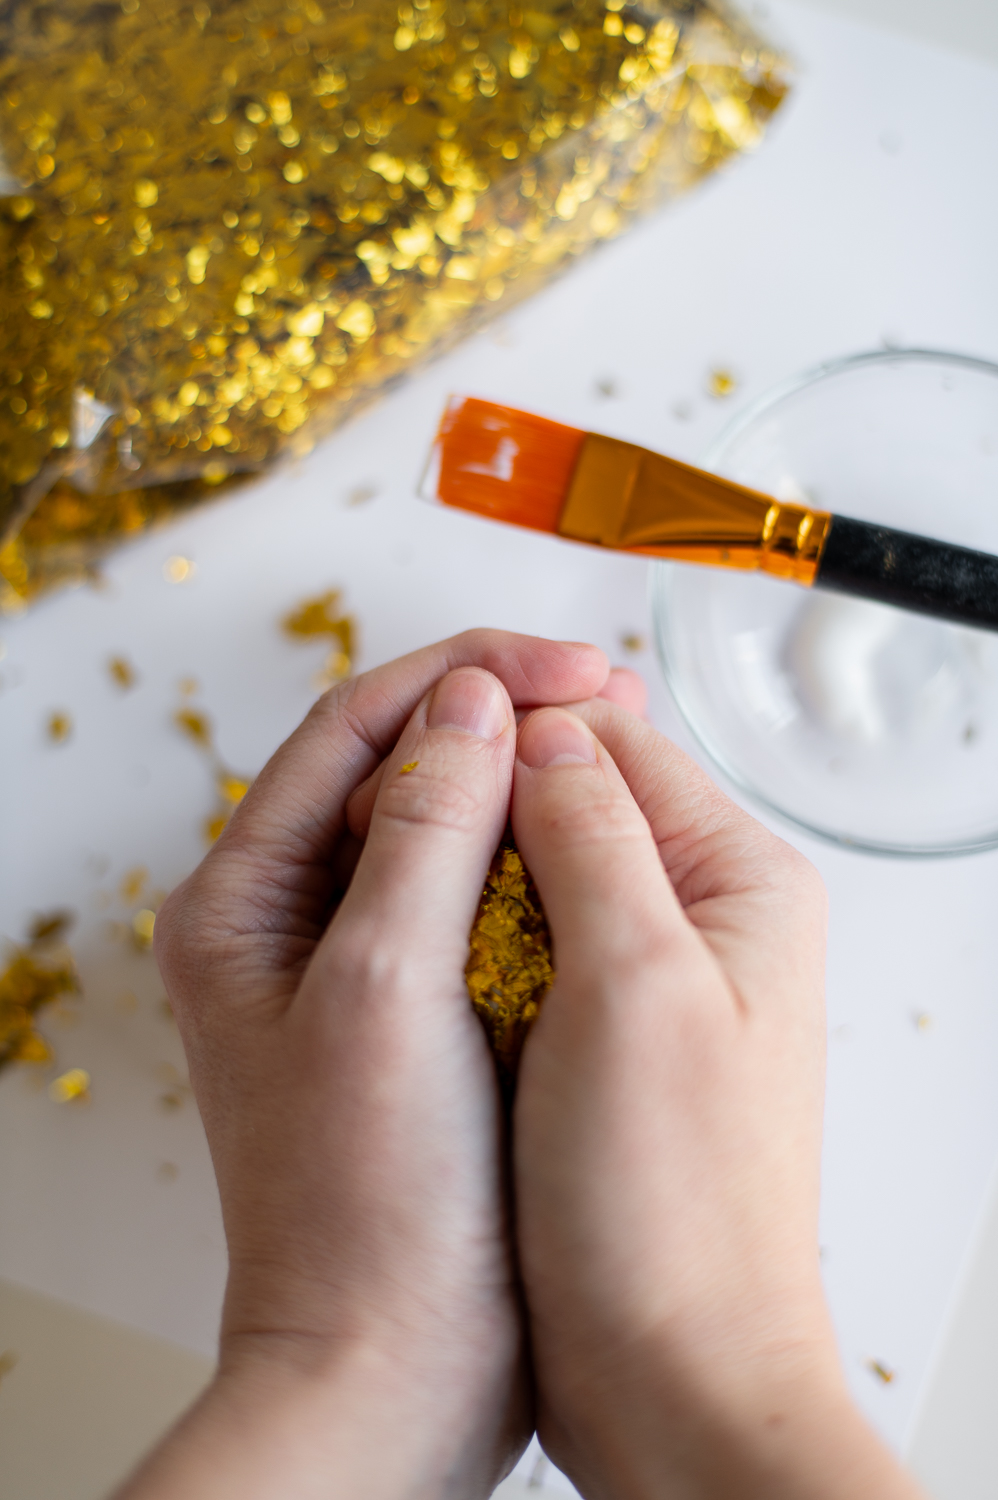
Step Two: Dip Your Egg Into A Bowl Of Gold Confetti

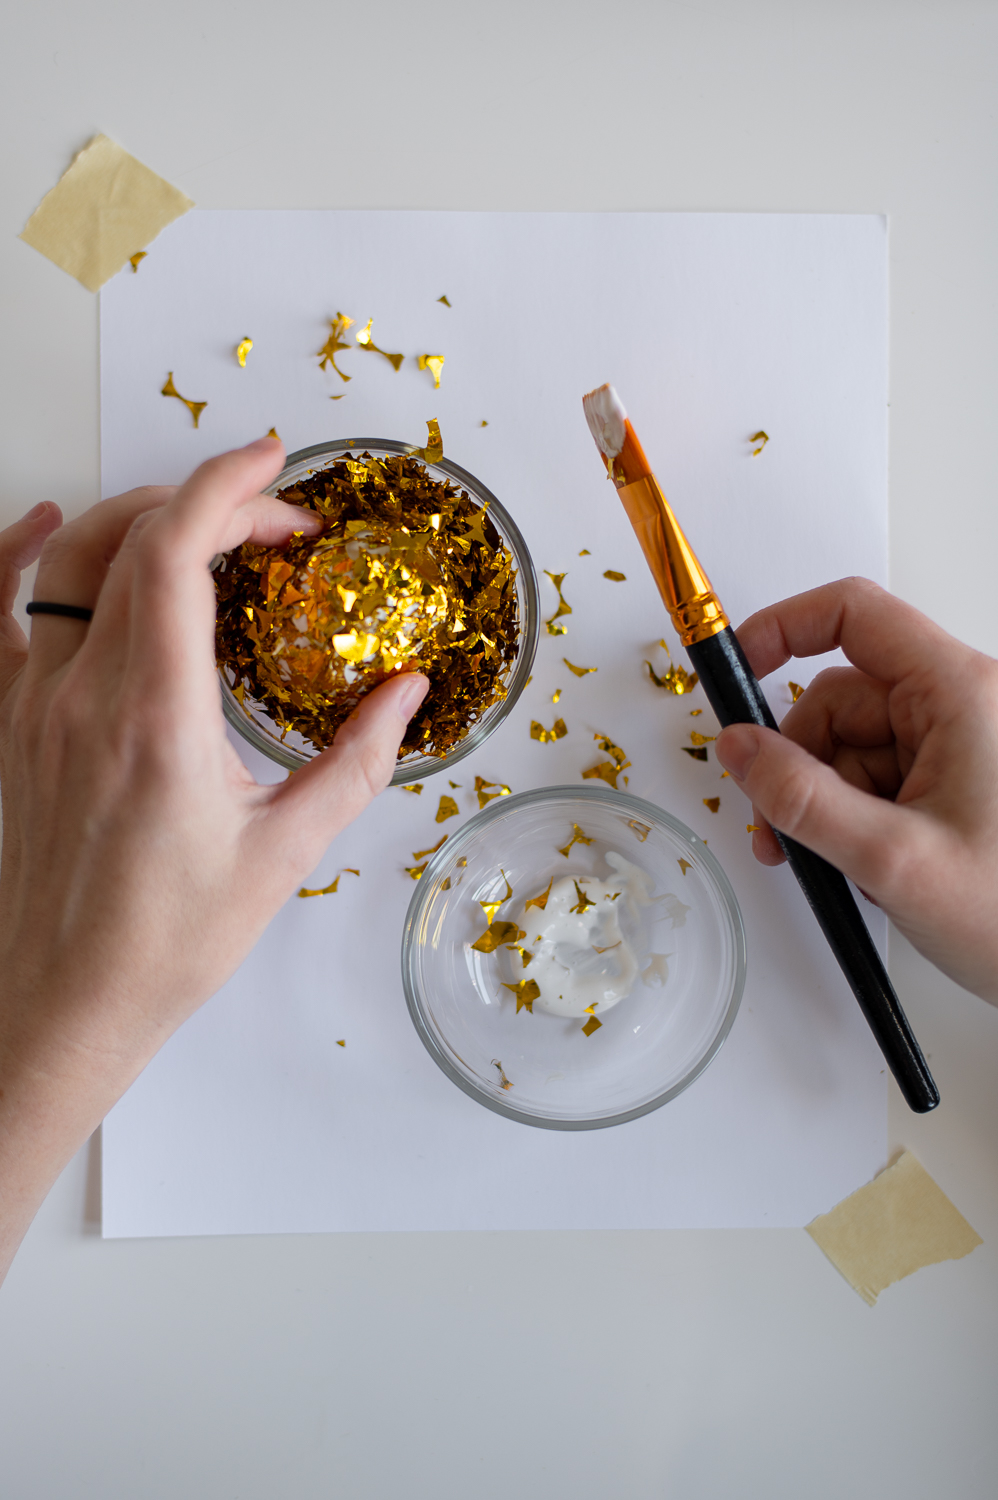
Yep. Just dunk that mod podge coated egg right into a bowl of gold confetti and get it nice and coated with as much confetti as possible. It’s ok if not every single spot on the egg gets covered in this go round as we’ll be adding more layers.
Note: Your egg may look *very fluffy* after this first round. That’s totally normal, we’ll fix that in a second. (I say this because I had my doubts this was going to work at this point in the process.)
Step Three: Let It Dry (Almost) Then Let It Actually Dry
Once your egg is covered in wet mod podge and gold confetti pieces, you’re going to need to set it somewhere for it to dry for a while.
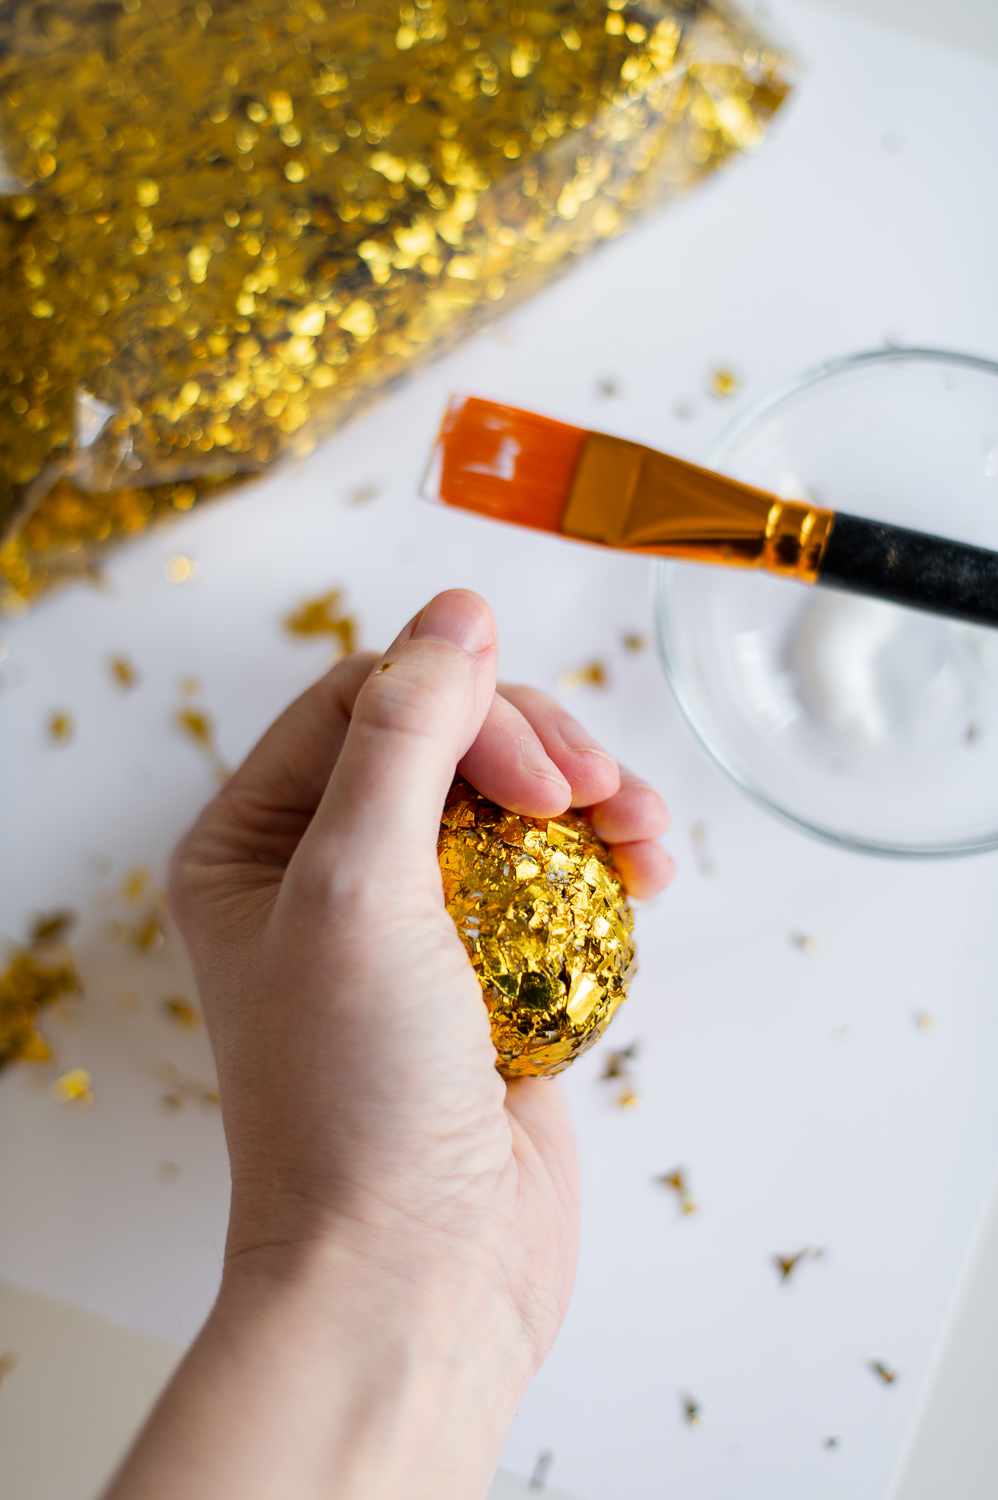
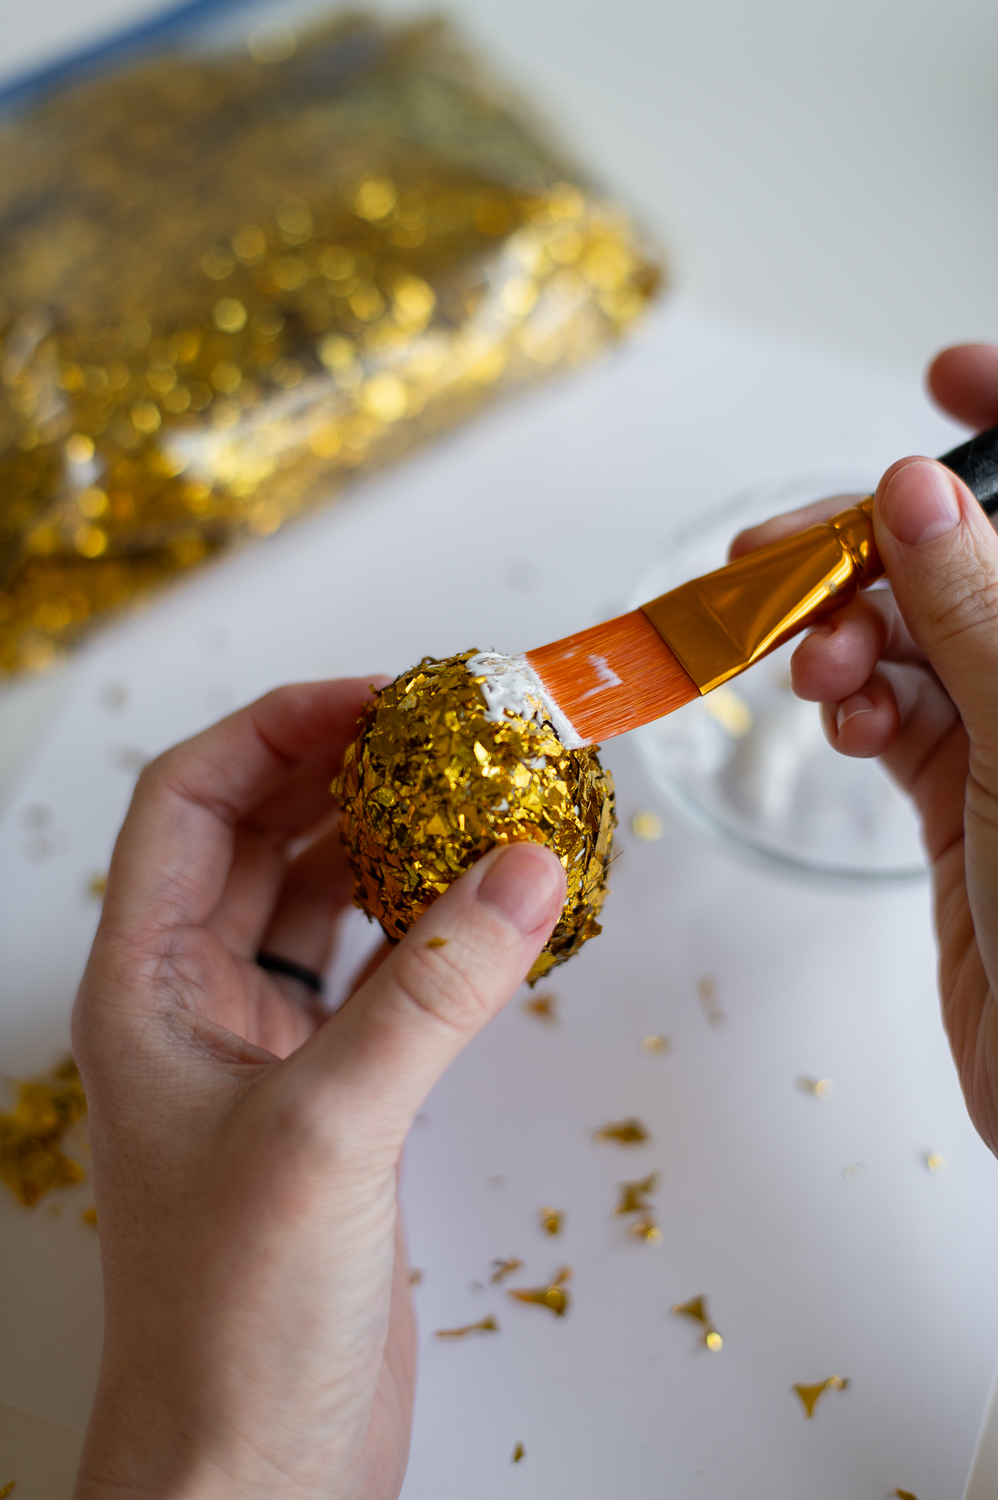
However, before it is *totally dry*, the mod podge will reach a consistency where it is no longer wet and soupy but more like soft putty to the touch. When your egg reaches this state, pick it up and roll it around in your hands, squeezing gently, to help smooth down the confetti. This will help conform the confetti to the shape of the egg and make it less fluffy looking.
When you’re done, set down your egg, walk away and let it dry COMPLETELY.
Step Four: Repeat Steps One, Two & Three Until Happy With Results

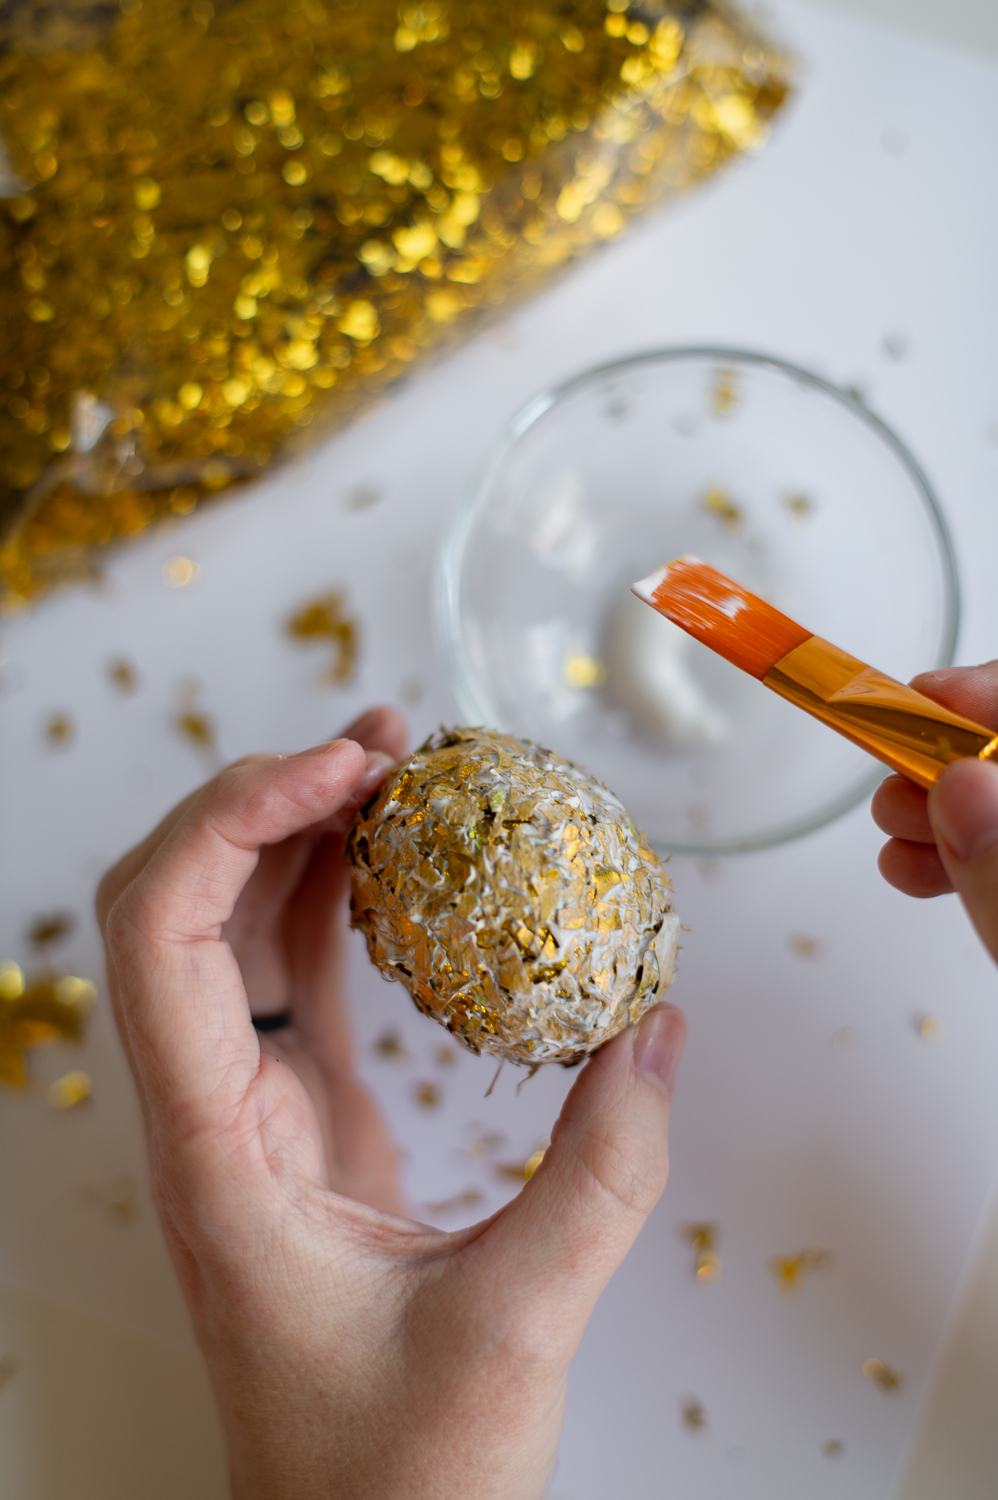
After your egg has dried completely, you can coat it in another layer of mod podge. Cover it in more confetti. (Taking care this time to fill in any open gaps where the white of the egg shows through). Then let it dry halfway and do another round of smoothing.
Repeat this process until your egg is completely covered in confetti!
If you are happy with the coverage but your egg still just looks too fluffy, give it another coat of mod podge but don’t put on any more confetti. Smooth when partly dry as before. This should help seal your final layer of confetti down.


Stay tuned for the next two easter egg decorating ideas I came up with!
Shop This Post
For this project I used only supplies you can pick up at your local Dollar Tree. However, if you don’t have a Dollar Tree near you, or they are out of stock of one of the items I used, here are some alternative options I sourced for you (and a one thing I wish I had used).


Don’t Forget To Pin This Post & Subscribe!
Want to keep getting more DIY home decor inspiration, thrifting tips & tricks, free art downloads, reading recommendations, and home renovation tutorials? Then don’t forget to pin this post for later so you can follow me on Pinterest and then subscribe to my blog so you can get links to my newest content as soon as it hits the blog!