
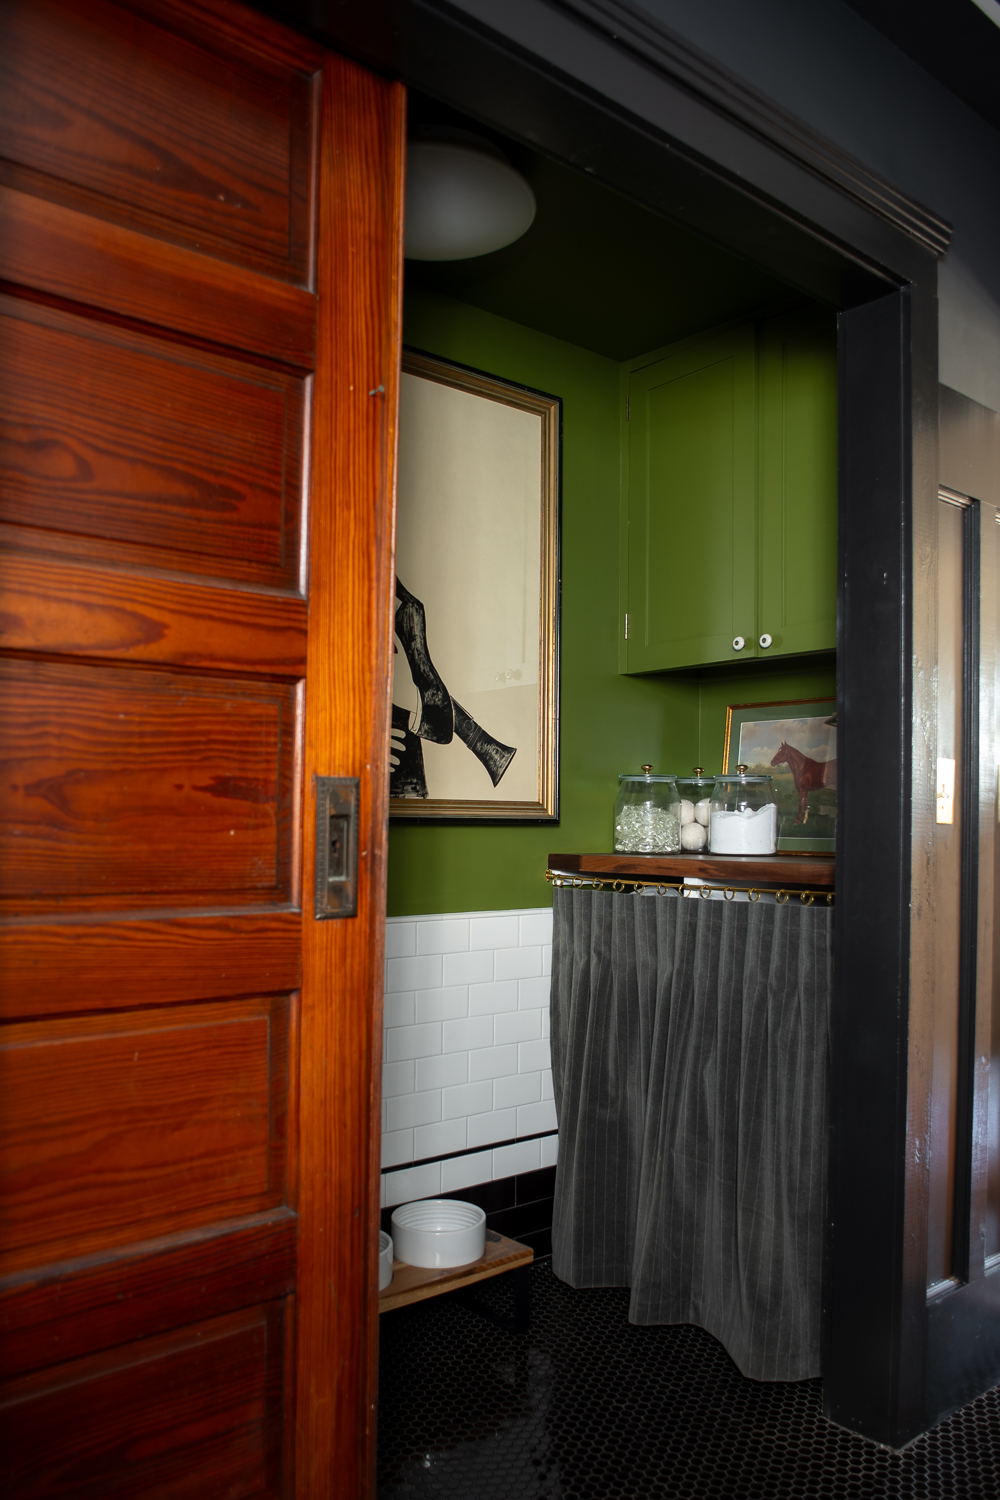
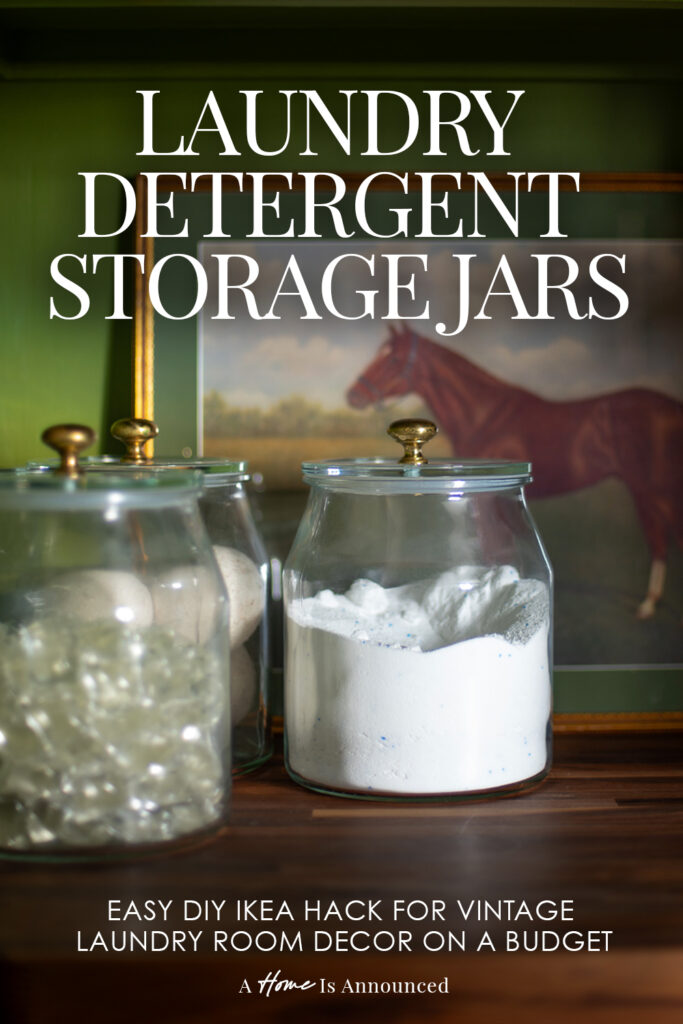
After having dozens of people ask me where I got the laundry detergent storage jars for our small laundry room makeover, I’m finally sharing all the details for this easy laundry room organization idea that uses one of the simplest Ikea hacks I have ever done.
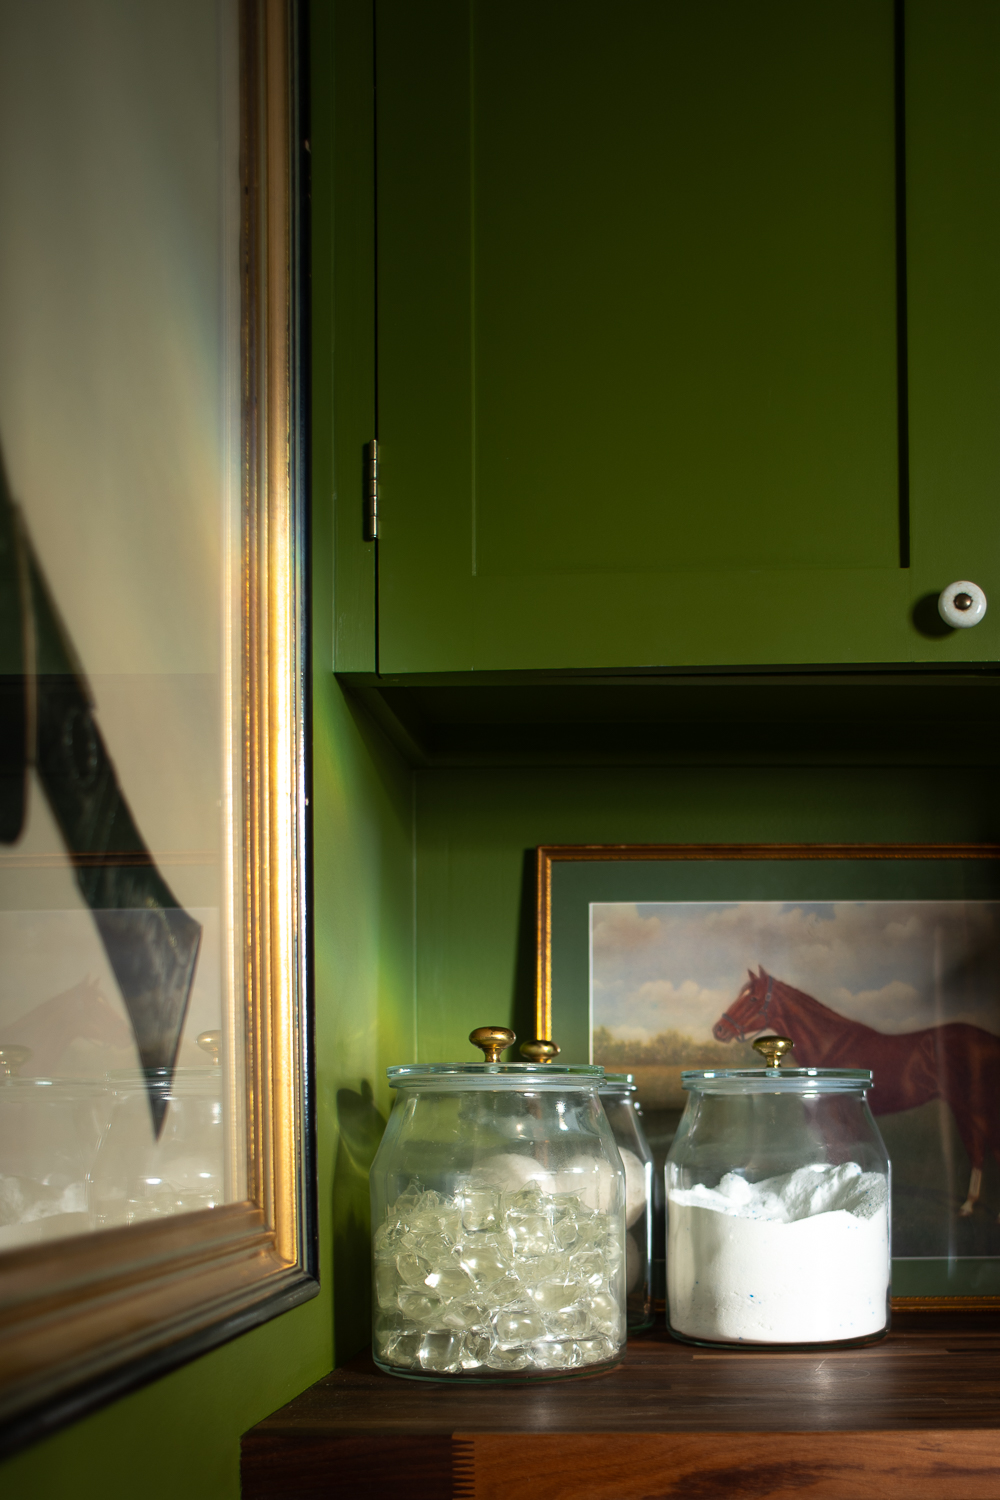
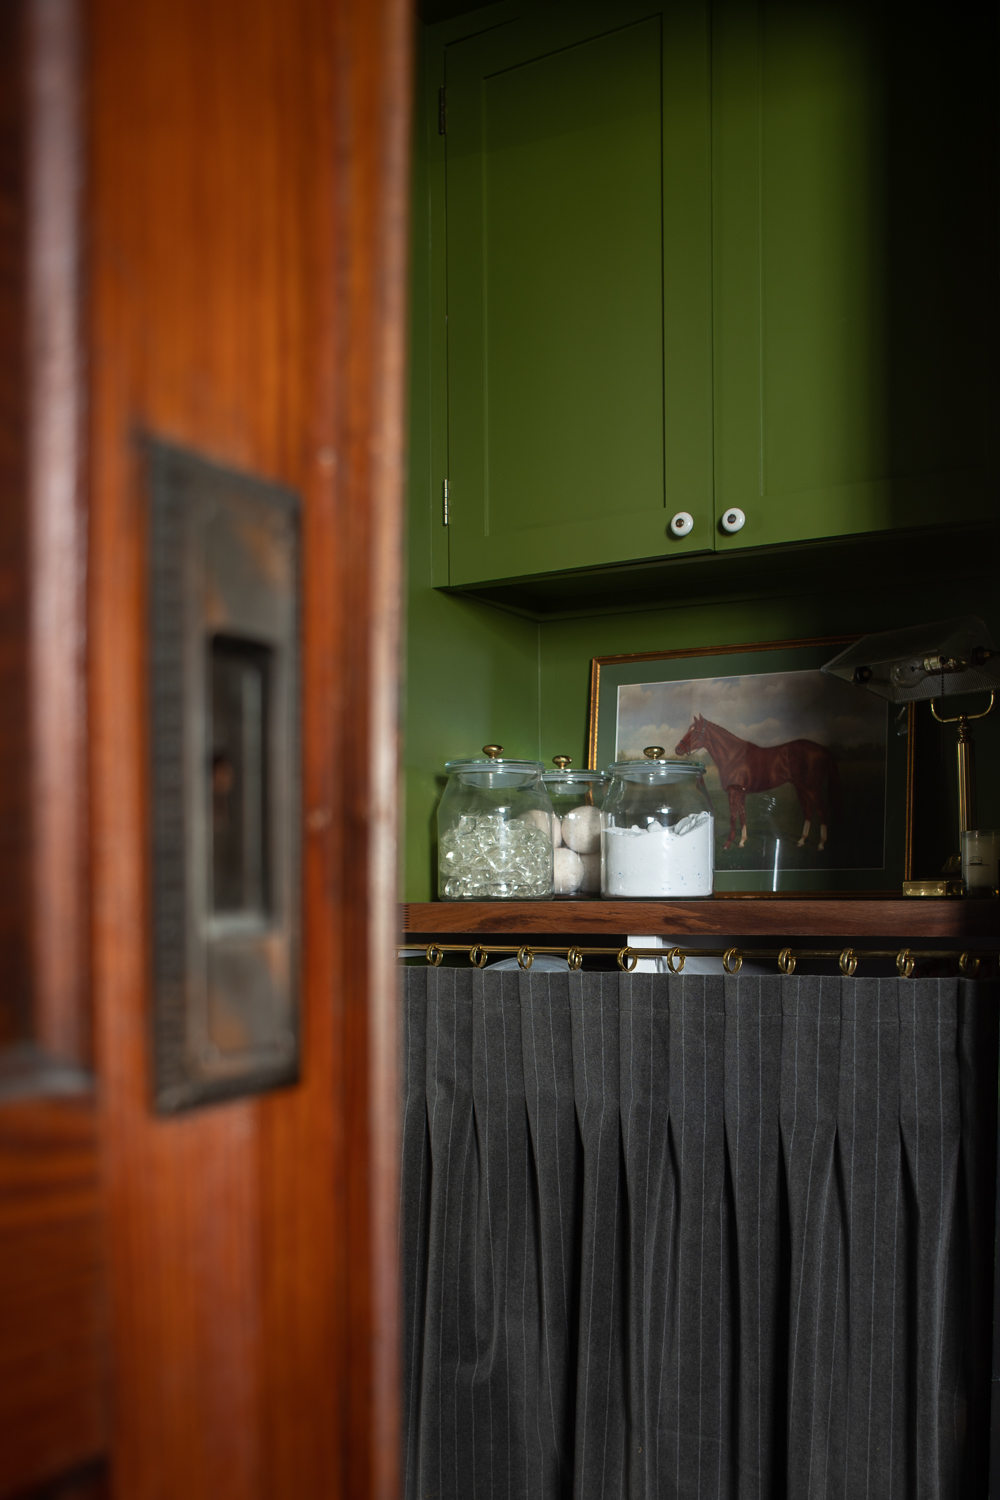
Back when we gave our tiny laundry closet a much needed glow-up, I knew I wanted some beautiful and functional storage jars that could hold my laundry pods, powdered laundry booster and wool dryer balls. After searching high and low for something that was affordable, the right size, and had some of the vintage laundry room decor charm I was looking for, I came up totally empty handed.
What I did find however, were these big glass jars from IKEA that I knew would be PERFECT with just a little imagination and DIY magic.
*This blog post contains affiliate links, meaning that if you purchase any of the items using the links I provide I, as the author of this website, will receive a very very small commission from that sale. This is a great way to help support your favorite bloggers at no cost to you. Think of it like a tip jar that costs you nothing!
The Best Affordable Glass Jars For Laundry Detergent Storage
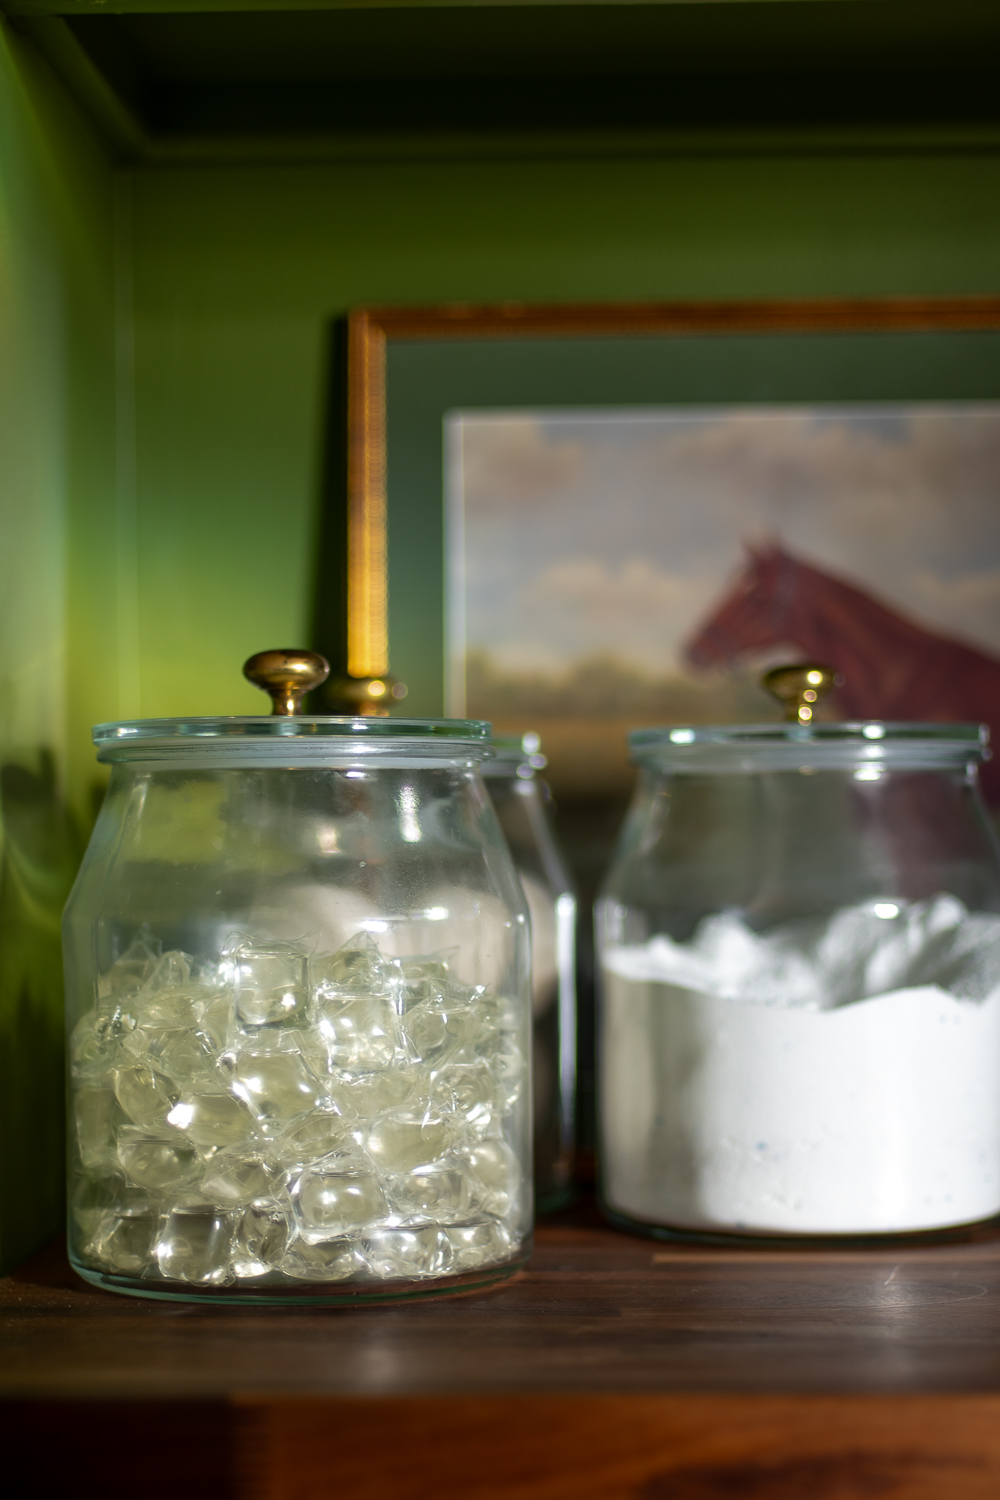
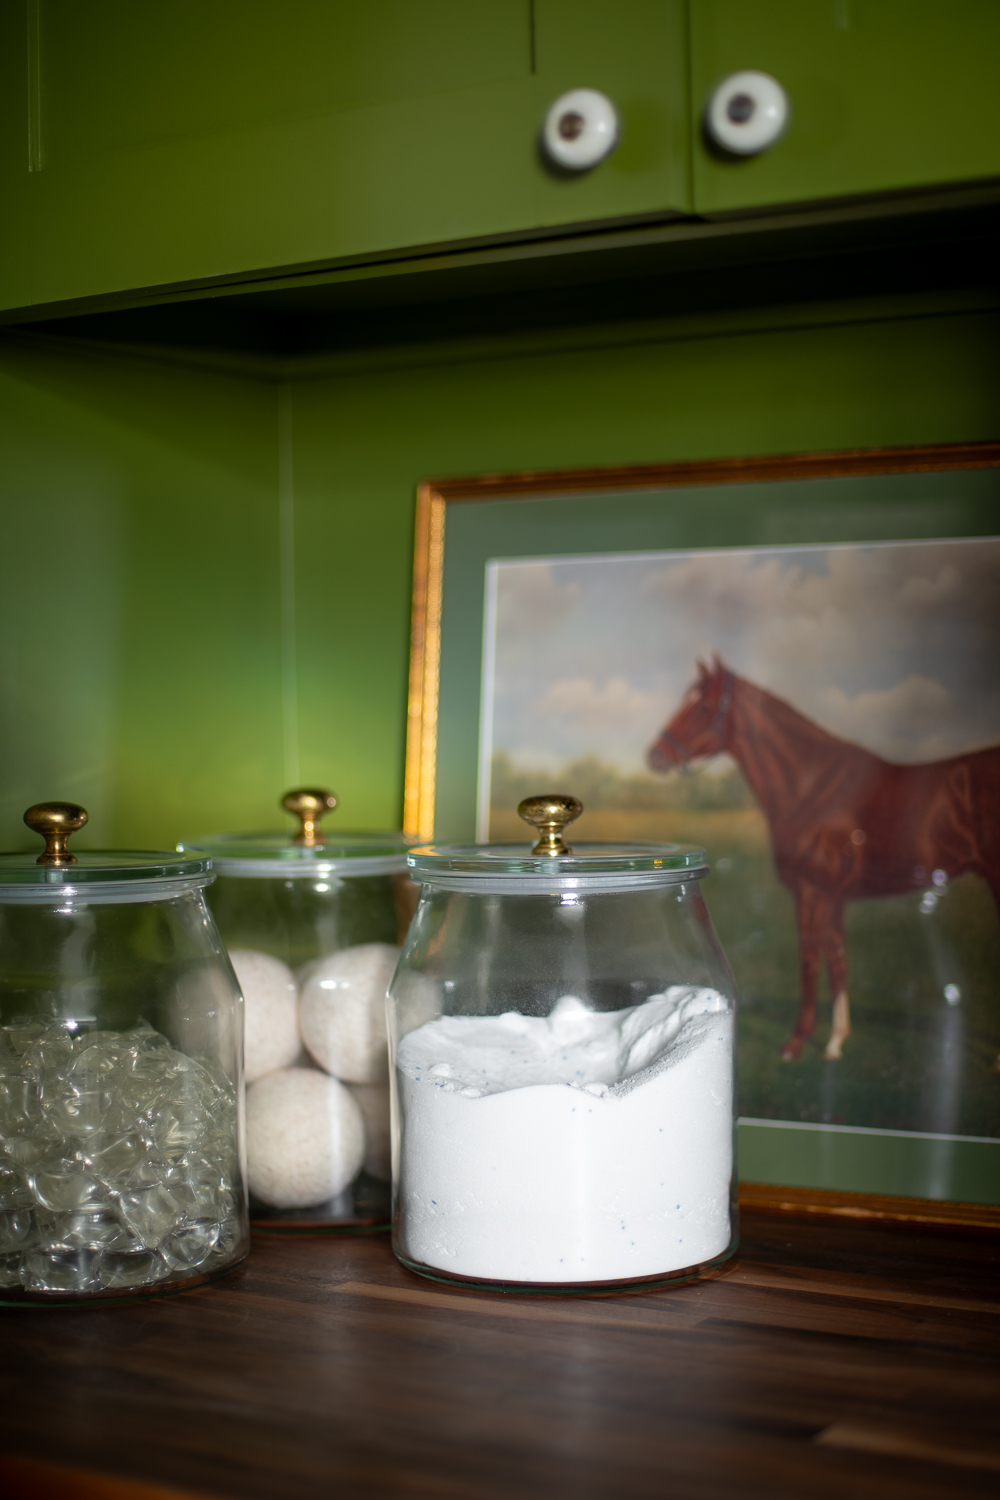
This hack will work with just about any glass jar you would like to use (as long as it has a flat lid). However, I fell in love with the profile of these 112 oz glass jars from Ikea. And for $9.99 they are an incredibly affordable canister.
If Ikea is sold out, Amazon has a few options for laundry pod storage canisters, however most of them will have wooden lids like this jar I found. (The wood lids will also work with this DIY hack, but give you a slightly different look).

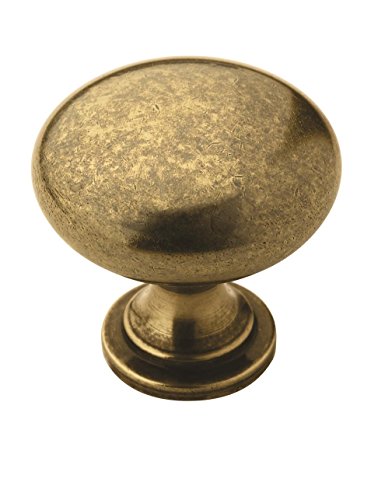
Old School Knobs For Instant Vintage Laundry Room Vibes
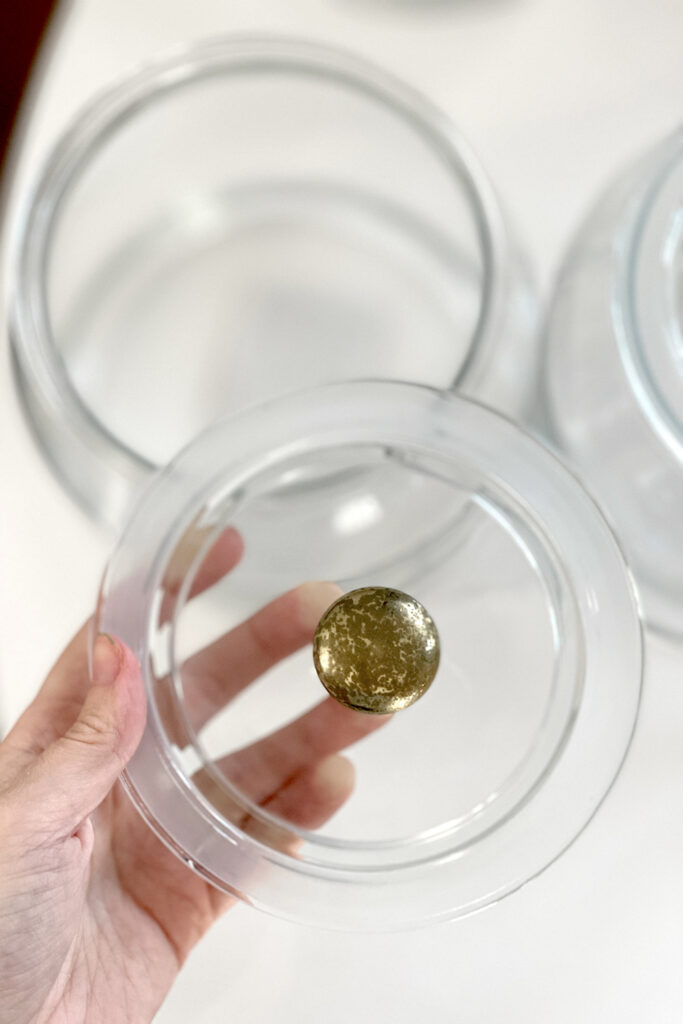
There are two ways to do this Ikea hack. One involves some more advanced DIY skills and the other one your toddler could probably do. I’ll explain both, but for either option you’ll need some cute knobs to attach to the top of your jar. I thrifted my brass knobs from my local Habitat For Humanity ReStore. However, if you’re not into thrifting, I also rounded up some inexpensive options here that I think would work really well for this project and give your the vintage laundry room decor look we’re after.


How To DIY Vintage-Inspired Laundry Detergent Storage Jars – The Easy Way
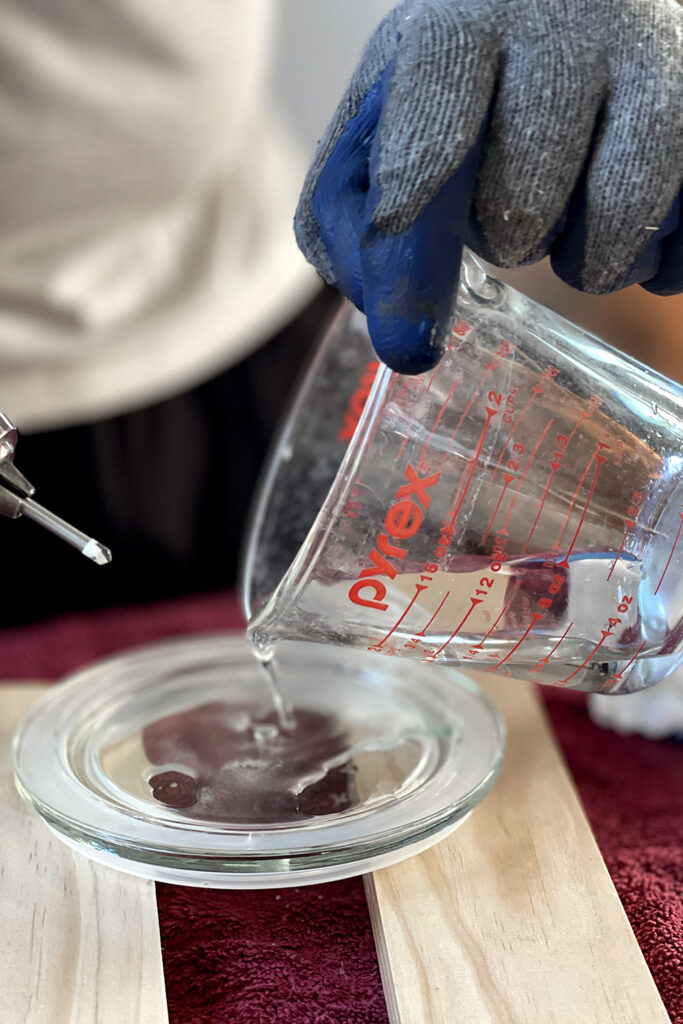
If you want to make this project as quick and easy as possible, you’re simply going to buy yourself a bottle of this clear epoxy (this one is specifically designed to bond with metal and glass) and then glue your knobs to the top of your jar.
That’s it! Super fast, super easy, just make sure not to glue your fingers together because this stuff is STRONG. The benefit to glueing on your knob is that it will ensure the airtight seal on your jar stays intact!
How I DIY’d My Laundry Room Canisters – What I Actually Did
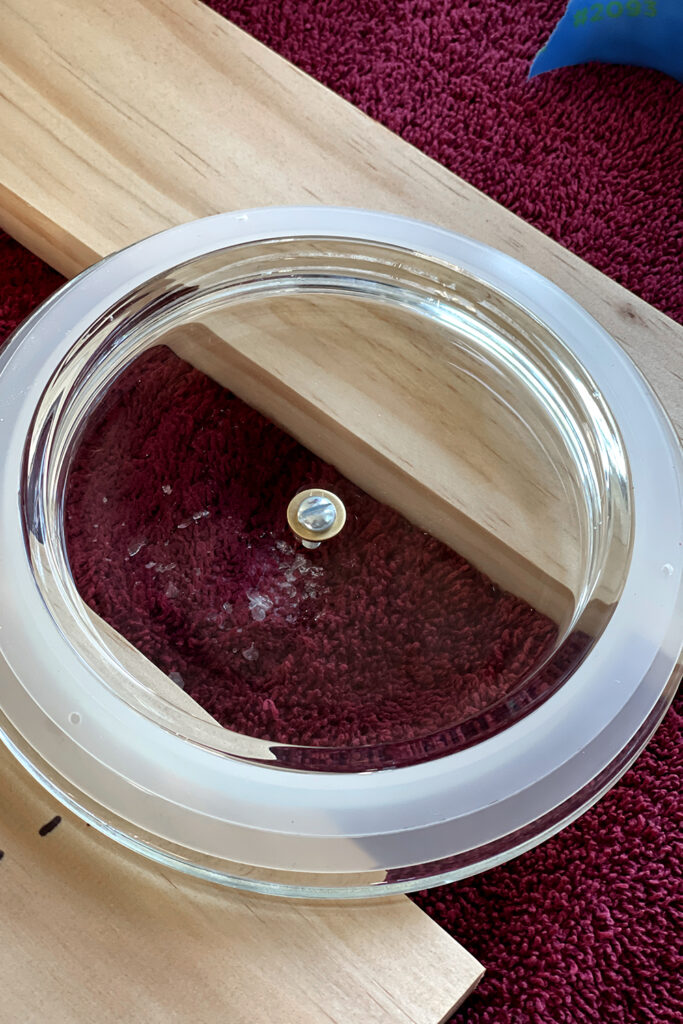
Obviously I couldn’t just do this THE EASY WAY. I chose to make matters slightly more complicated and actually DRILL a hole in the top of my glass storage jar so I could thread the knob through as normal.
Step-By-Step: How To Drill Through Glass (Without Breaking It)
You can drill through glass!? Yep. You just need to be careful and follow a few basic steps:
1) Choose the Right Bit
You’re going to want to use a diamond-tipped or carbide drill bit made specifically for drilling through glass or tile. Here is a link to the one we used (In hindsight I’d probably size up to a slightly larger bit diameter, the 1/8″ was a tad too small).
2) Prep Yourself & Your Workspace
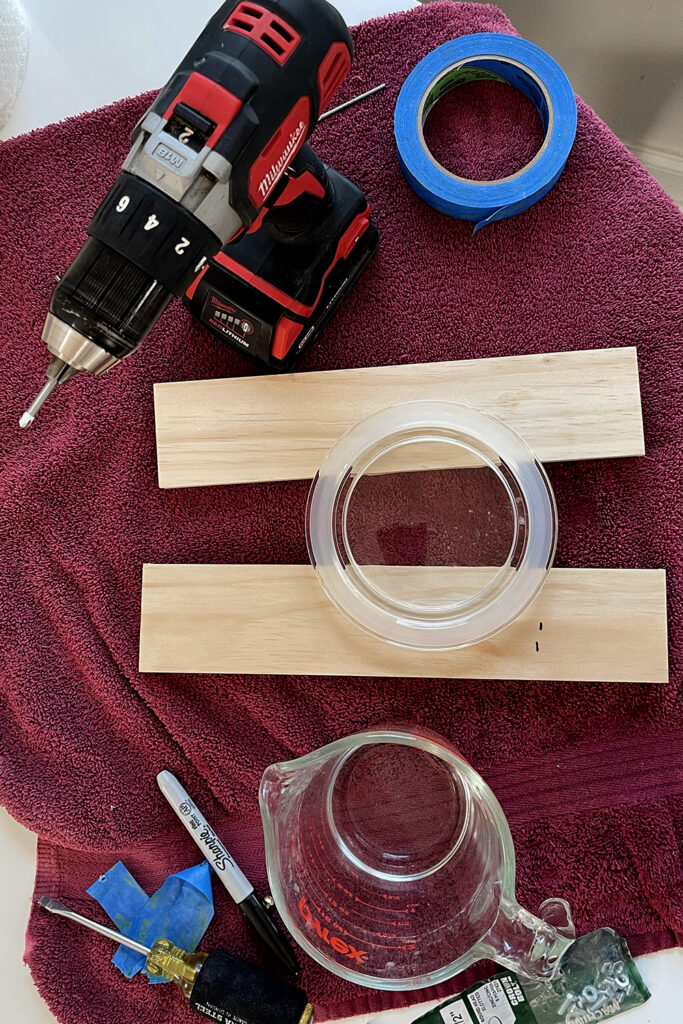
This is going to make a ton of glass dust, which you definitely don’t want in your eyes or to breath into your lungs. So take proper precautions by wearing eye protection and a mask. You’ll also want a decent pair gloves so you don’t cut yourself on any possible broken glass shards.
I’d also suggest laying something down under your project to keep it from sliding around and to collect all the glass dust. We just used an old towel.
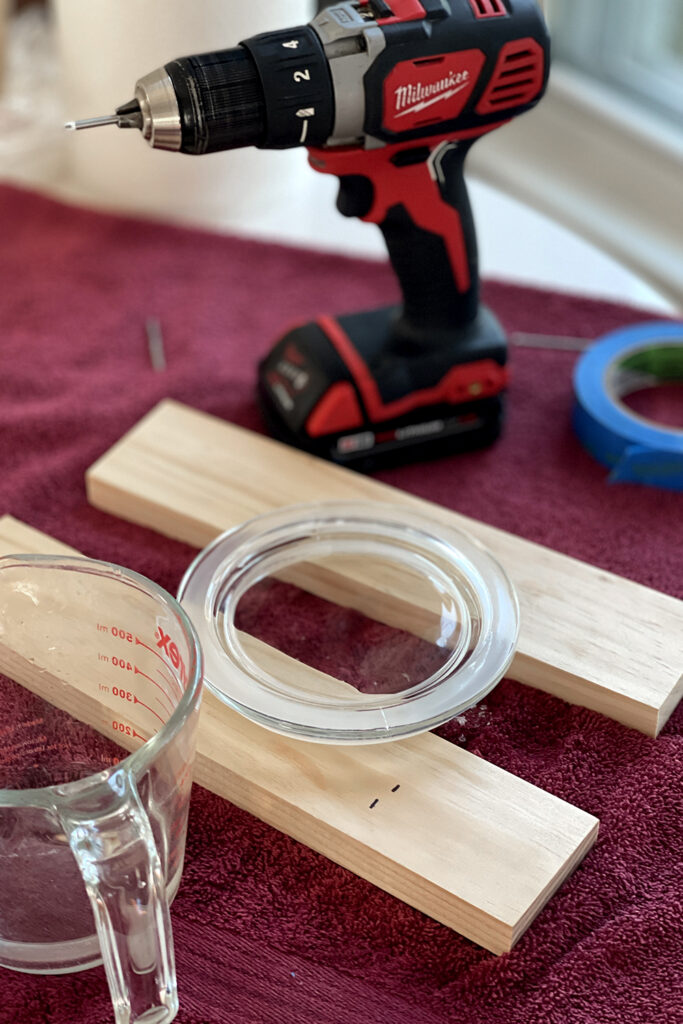
Lastly, since we’ll be drilling into the lid (and we didn’t want to accidentally drill into our tabletop), we laid down two boards to raise the lid up off the table.
3) Mark You Spot With Masking Tape
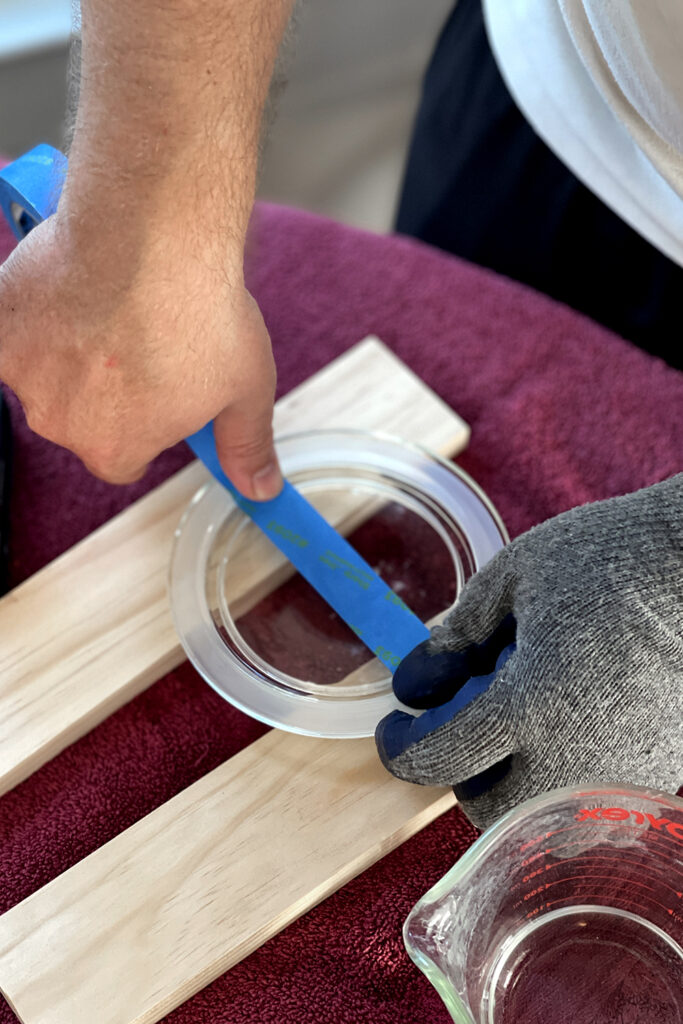
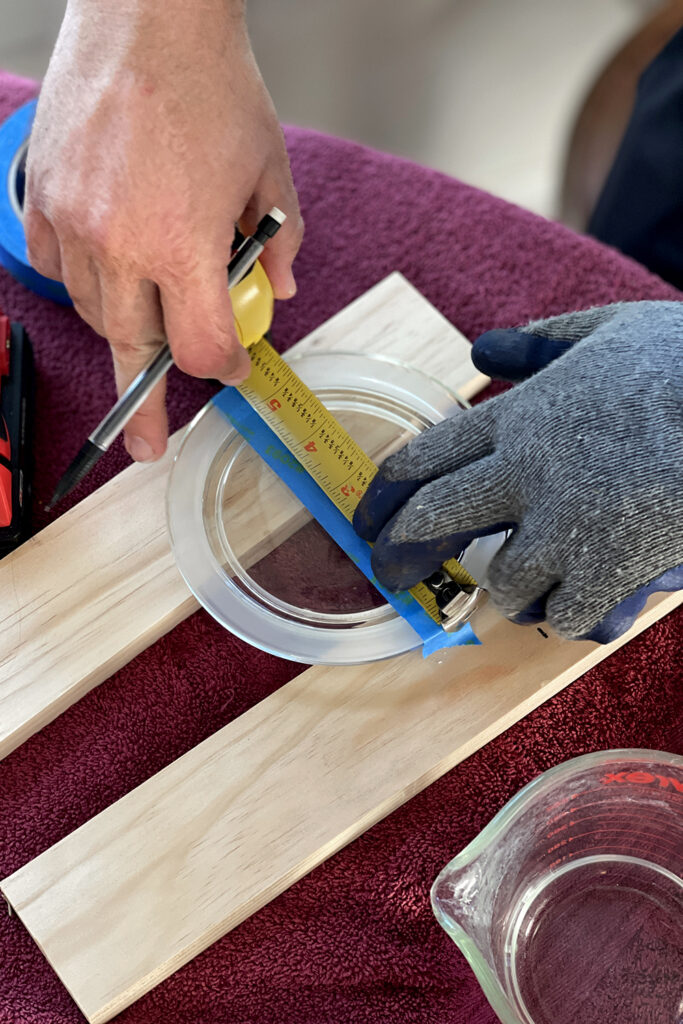
Place a some painters tape over the area you plan to drill and mark the center. The tape will let you draw your mark on the glass and also provide a bit of traction for your drill bit so it doesn’t slide around at first.
4) Start Slow & At An Angle
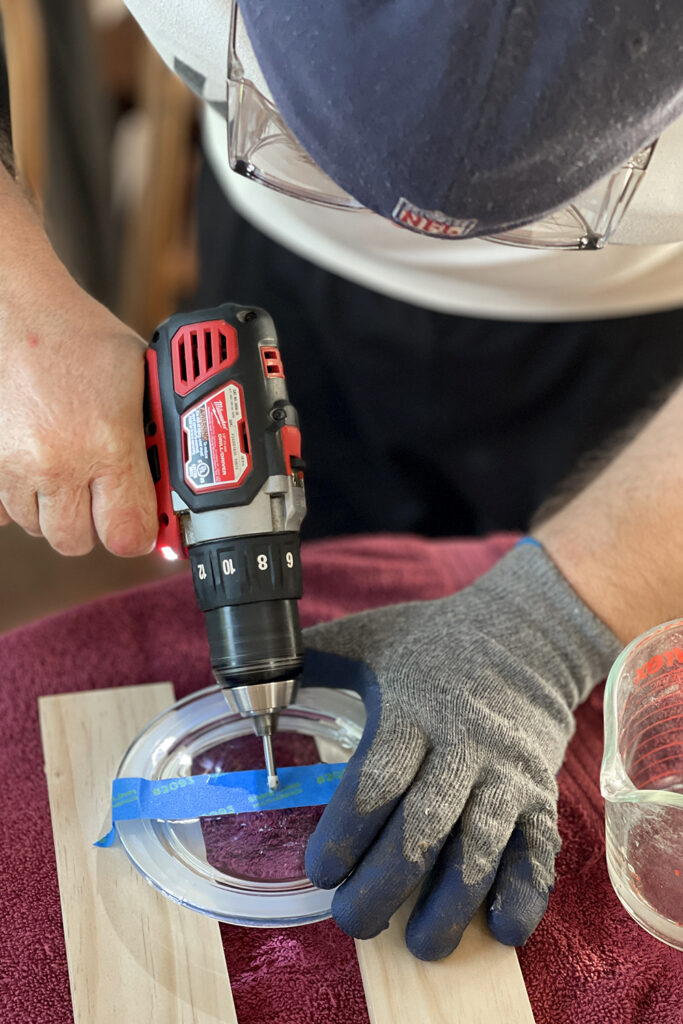

To start your hole, you’re going to want to start off by drilling at a low speed with light pressure, coming at your mark from a slight angle. Let the bit do the work, don’t push. Once the bit has made a slight divot in the glass, you can slowly straighten up your drill until you are fully perpendicular to the surface.
5) Keep The Bit Wet & Cool
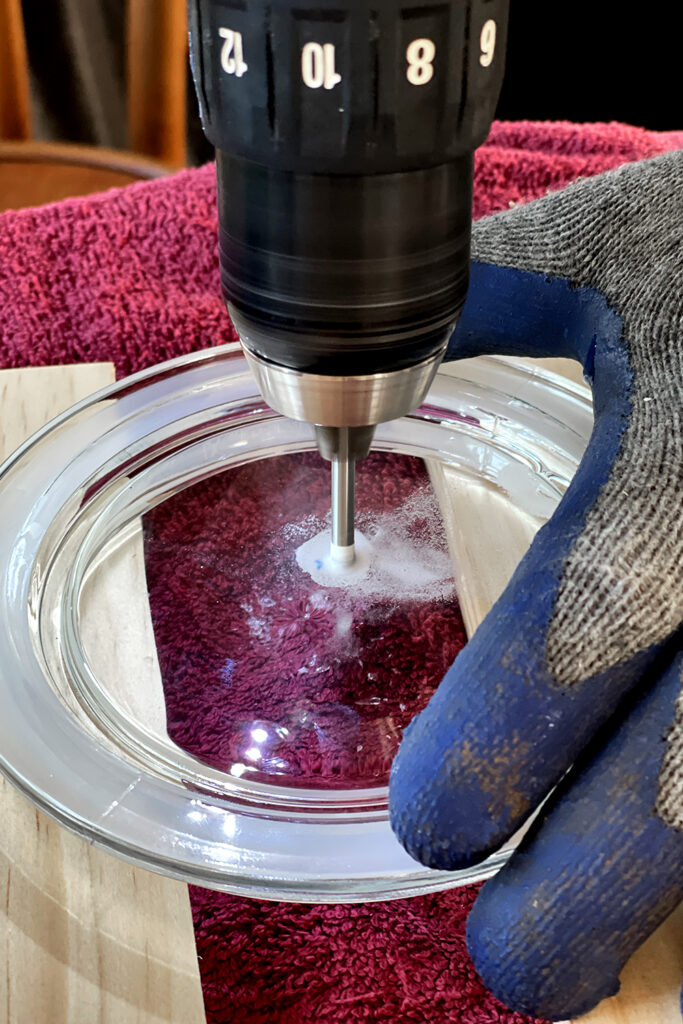
As you go along the bit will start to warm up, if it gets too hot, it can break the glass. You can keep it cool by either dipping the bit in some water every now and then or pouring some water onto the surface you are drilling into. (This second option also helps keep down glass dust.)
6) Slow & Steady Is The Name Of The Game
This is not a fast process. In order to drill through the glass without breaking it, you’ll want to just keep a slow and steady pace with only a slight amount of pressure on the bit.
7) Don’t Forget To Clean Up
Once you’ve made your hole, gently sand any sharp edges if needed and wipe the glass clean of any glass dust.
A Few Other Tips For Your DIY Laundry Detergent Storage Jars
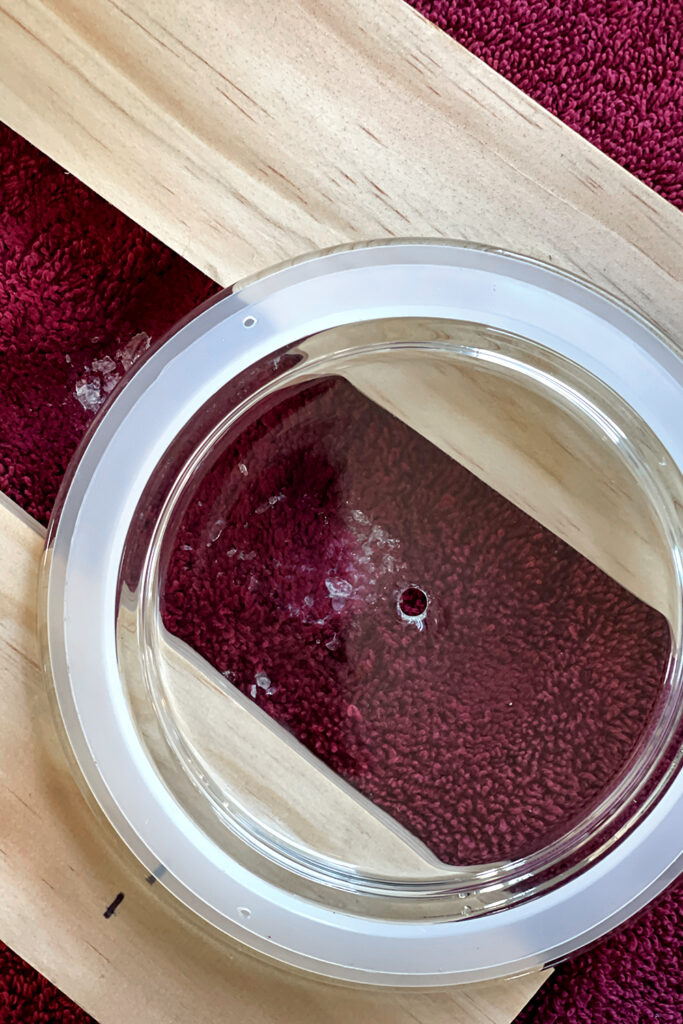
If you end up with small chips in the glass near your drill site that your knob won’t cover (like the example above), you can always use a small washer in either silver or brass to hide the rough edges.
If you are concerned about your jars being airtight, you’ll simply need to install a rubber washer in between the glass and the screw when you secure your knob.
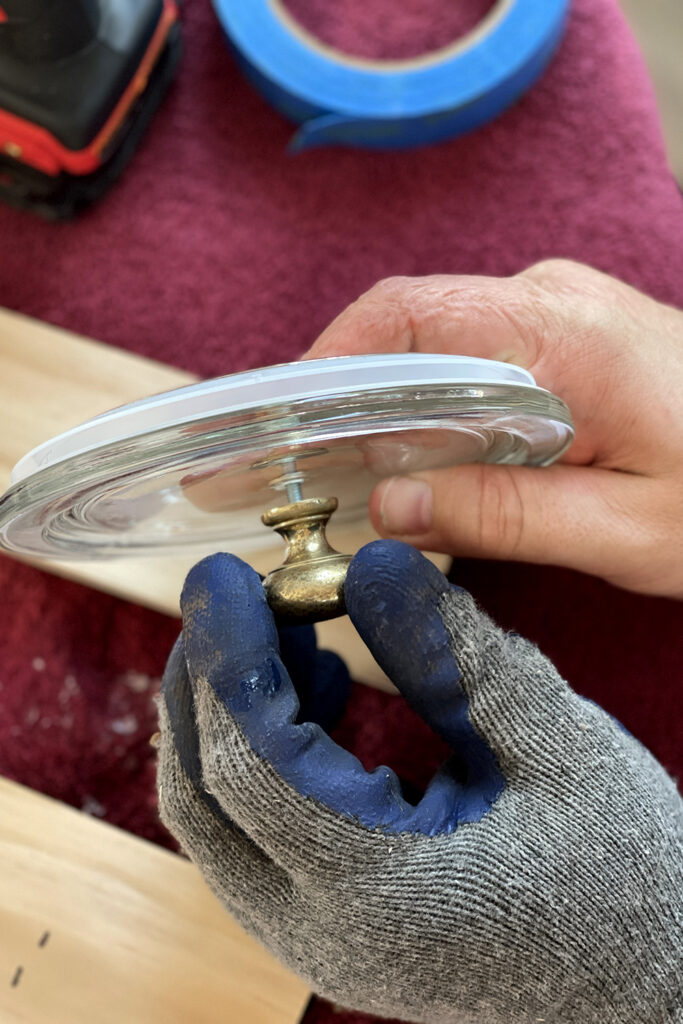
Be sure not to over-tighten the knob when you screw it on. You don’t want to break the glass after all your patience drilling out the hole.
If you’re nervous about drilling into glass for the first time, you can always test the process on the bottom of an empty food jar. We definitely did a practice run using an empty salsa jar first!
Final Thoughts (2 Years Later)
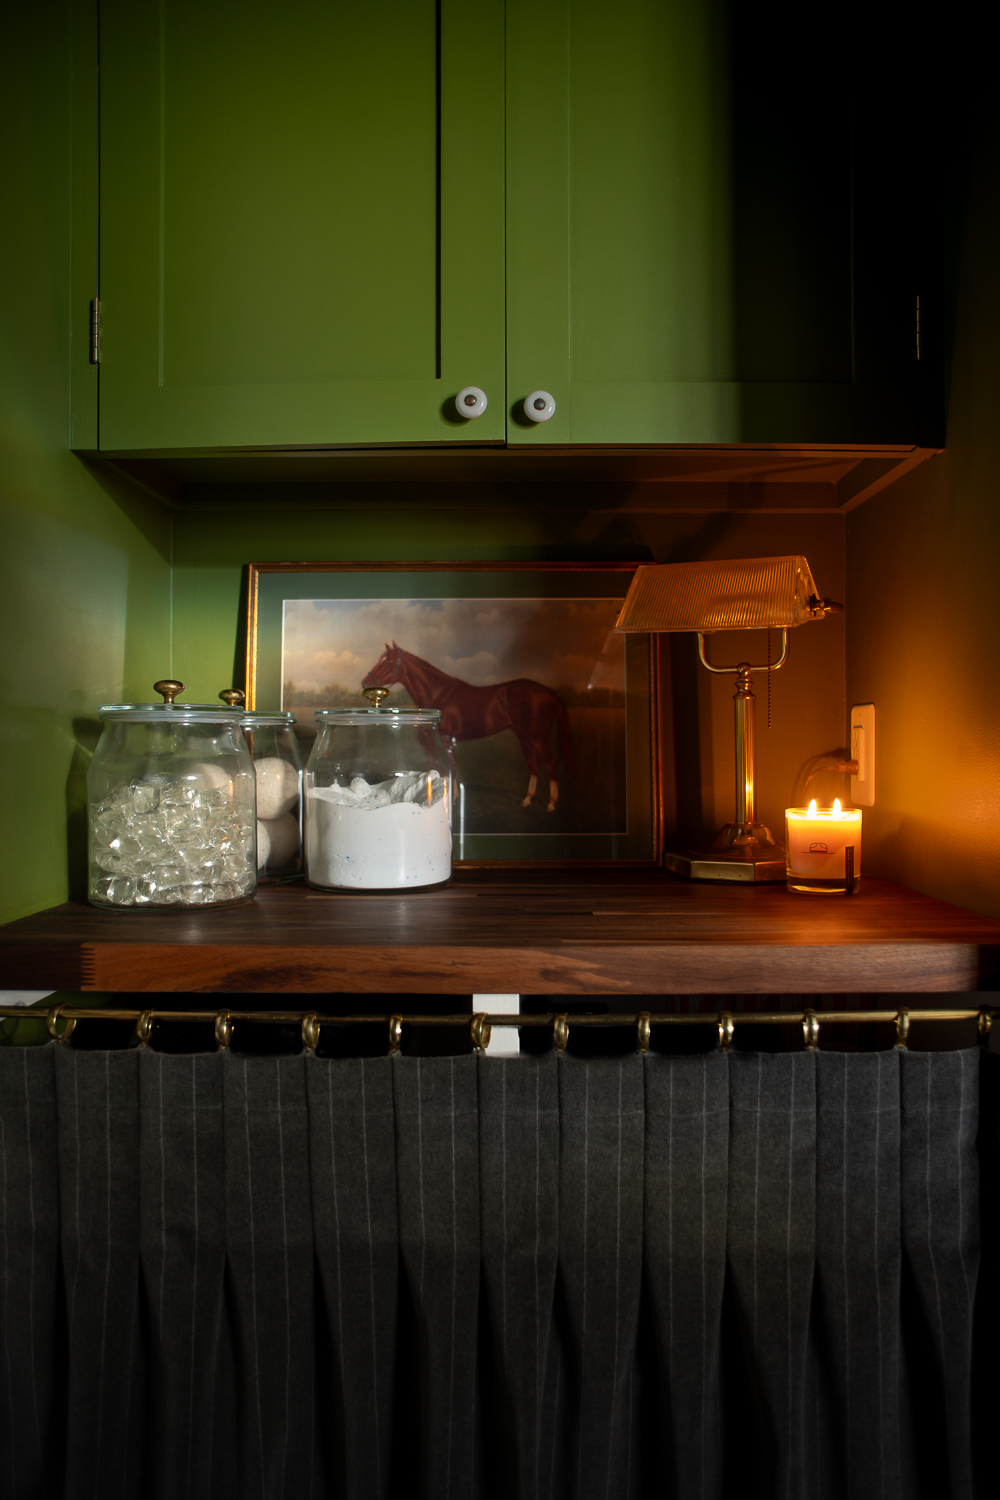
We’ve been using these laundry detergent storage jars for over two years now and I could not be happier with them! They have held up great and look so incredibly beautiful as vintage laundry room decor in our very small laundry closet.
What do you think? Would you have opted for the easy route using just glue or would you have drilled through the glass lids as well?
Want to see the BEFORE images of this laundry nook and learn more about the full renovation we did in this space? Click here!
Don’t Forget To Pin This Post & Subscribe!
Want to keep getting more DIY home decor inspiration, thrifting tips & tricks, free art downloads, reading recommendations, and home renovation tutorials? Then don’t forget to pin this post for later so you can follow me on Pinterest and then subscribe to my blog so you can get links to my newest content as soon as it hits the blog!