Halloween is one of those holidays I really struggle to decorate for. I don’t love the color orange, and most store-bought decor just isn’t my cup of tea. So in the past, I’ve gotten a bit creative in my search for the perfect elegant Halloween decor.
This year, I really wanted to add black roses to my Halloween decor, but I don’t love cheap silk flowers, and real ones are pricey.
That’s when I had the idea to make black Halloween paper roses out of party streamers from the dollar store.
How To Make Elegant Black Paper Roses For Halloween
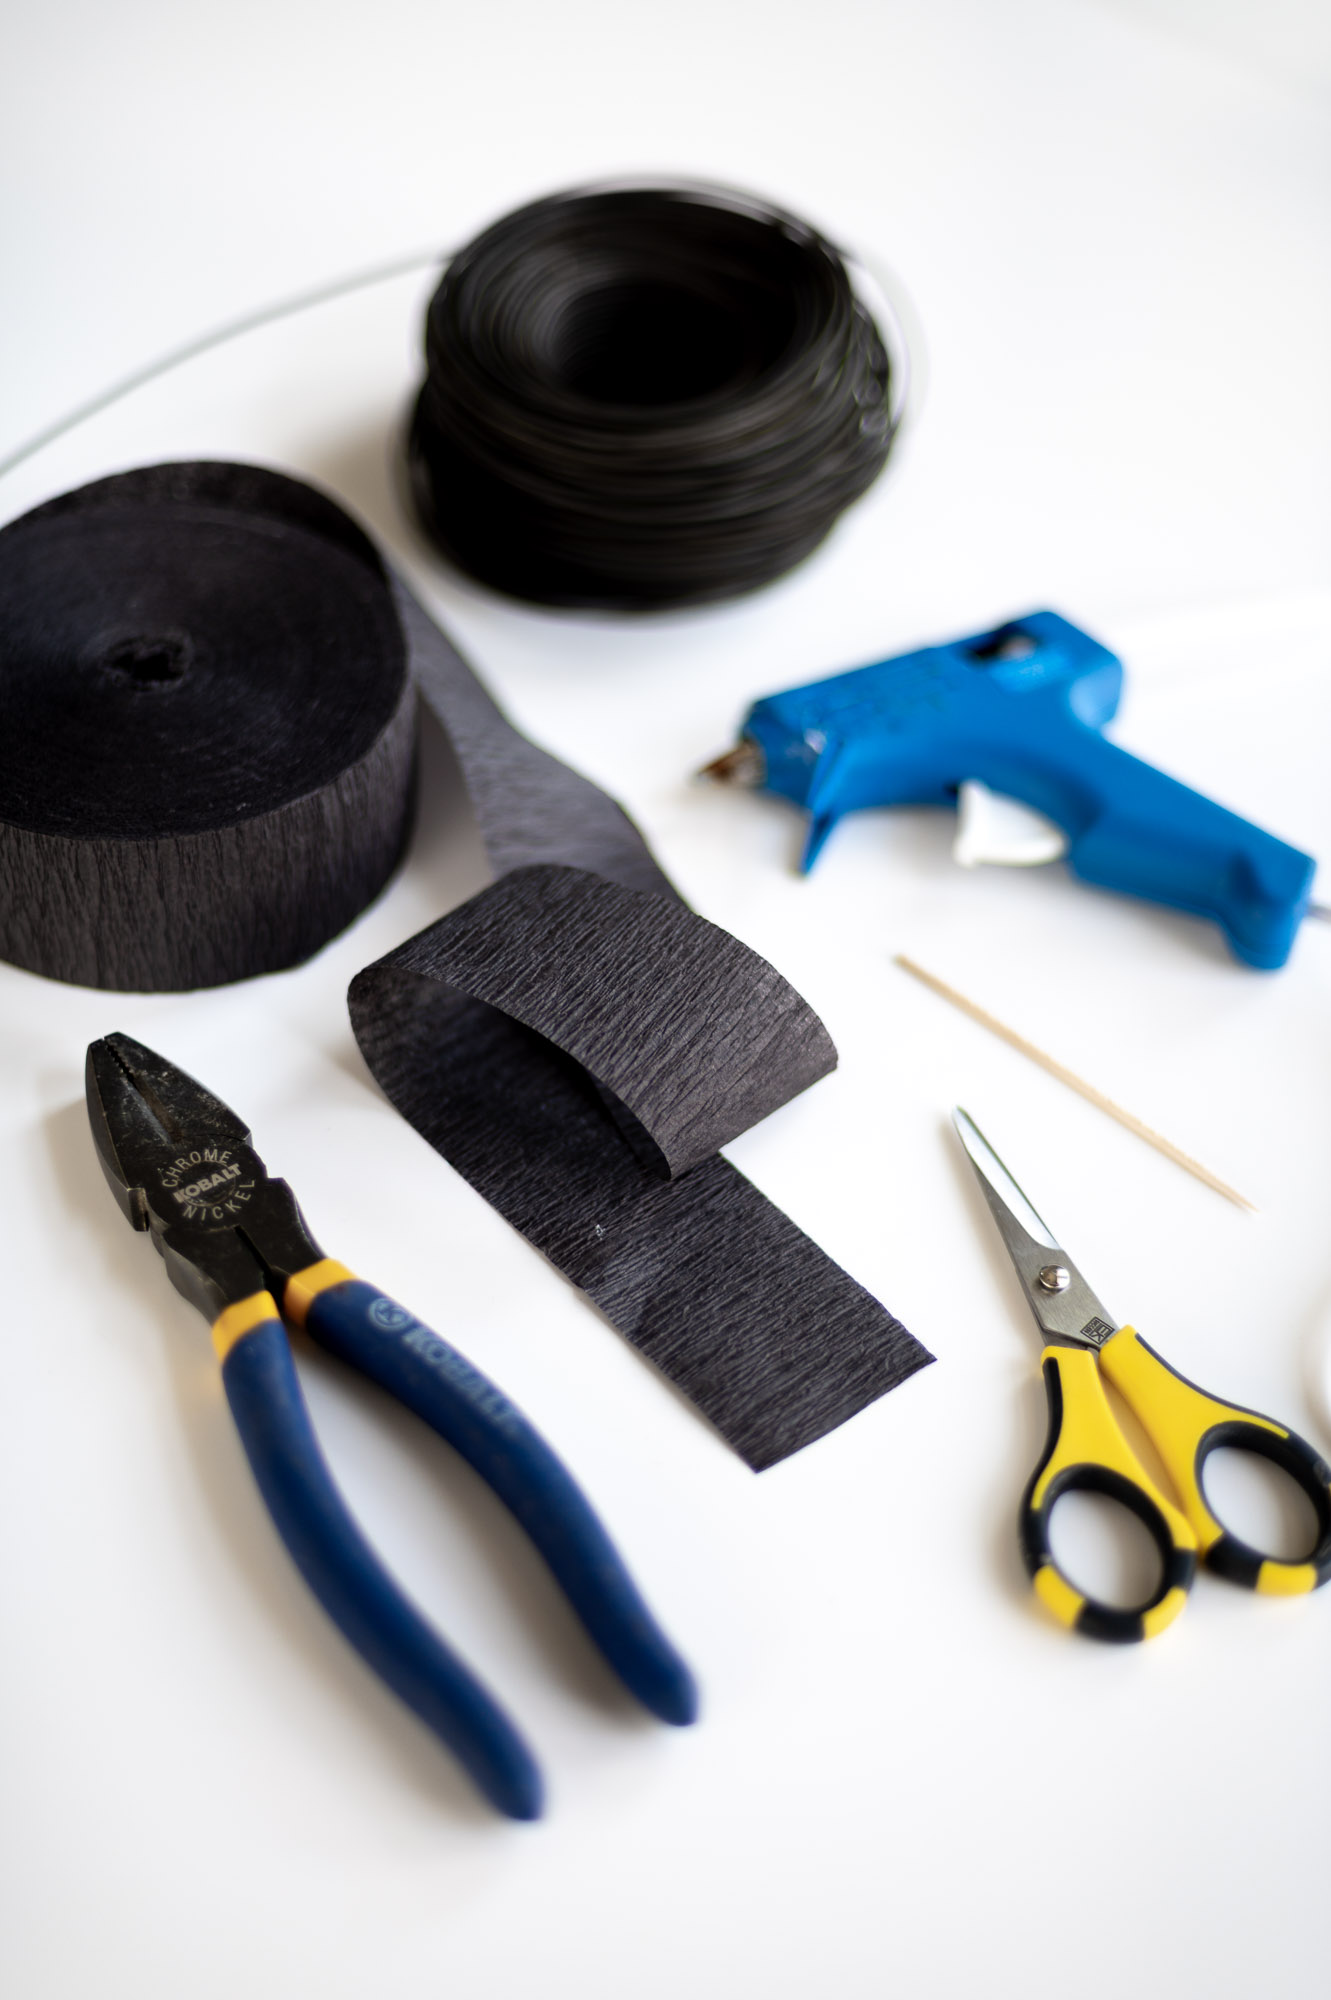
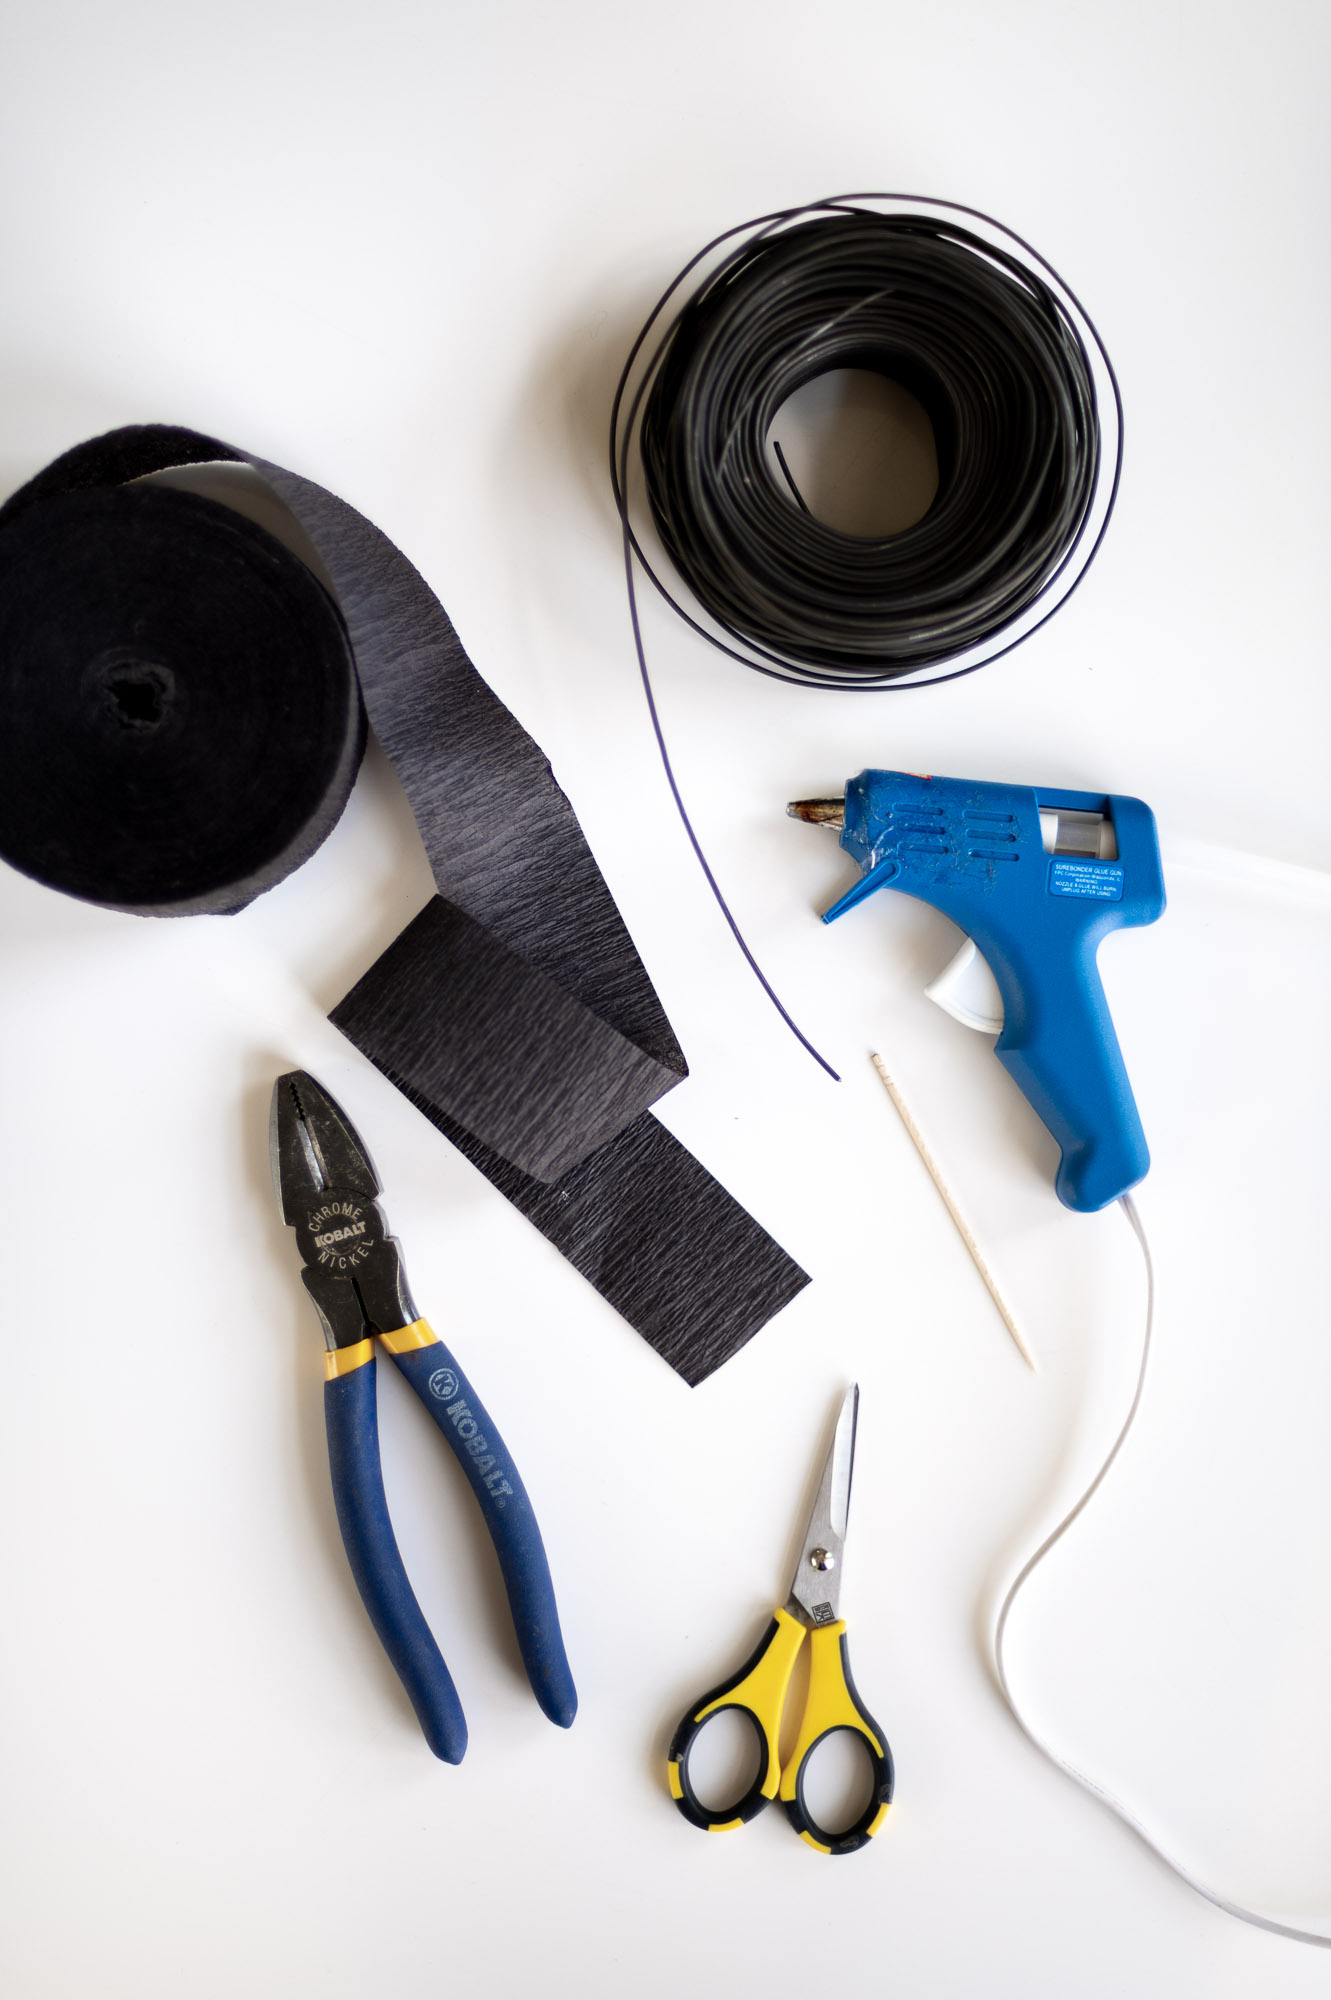
I’ve made paper flowers a few different ways before, and this is by far the quickest and easiest method I’ve tried. I also love that all the supplies are incredibly affordable:
Supplies You’ll Need To Make DIY Spooky Flowers
- A Roll Of Black Crepe Paper Streamers (Available at most dollar stores)
- Heavy-Gauge Wire (I used this 16.5 gauge wire from Home Depot)
- Note: I chose this wire for two reasons: its thickness helps the flowers stand up on their own, and it’s naturally dark in color.
- A Hot Glue Gun
- Scissors
- Wire Snips
- And A Toothpick (or a similar small pointy object)
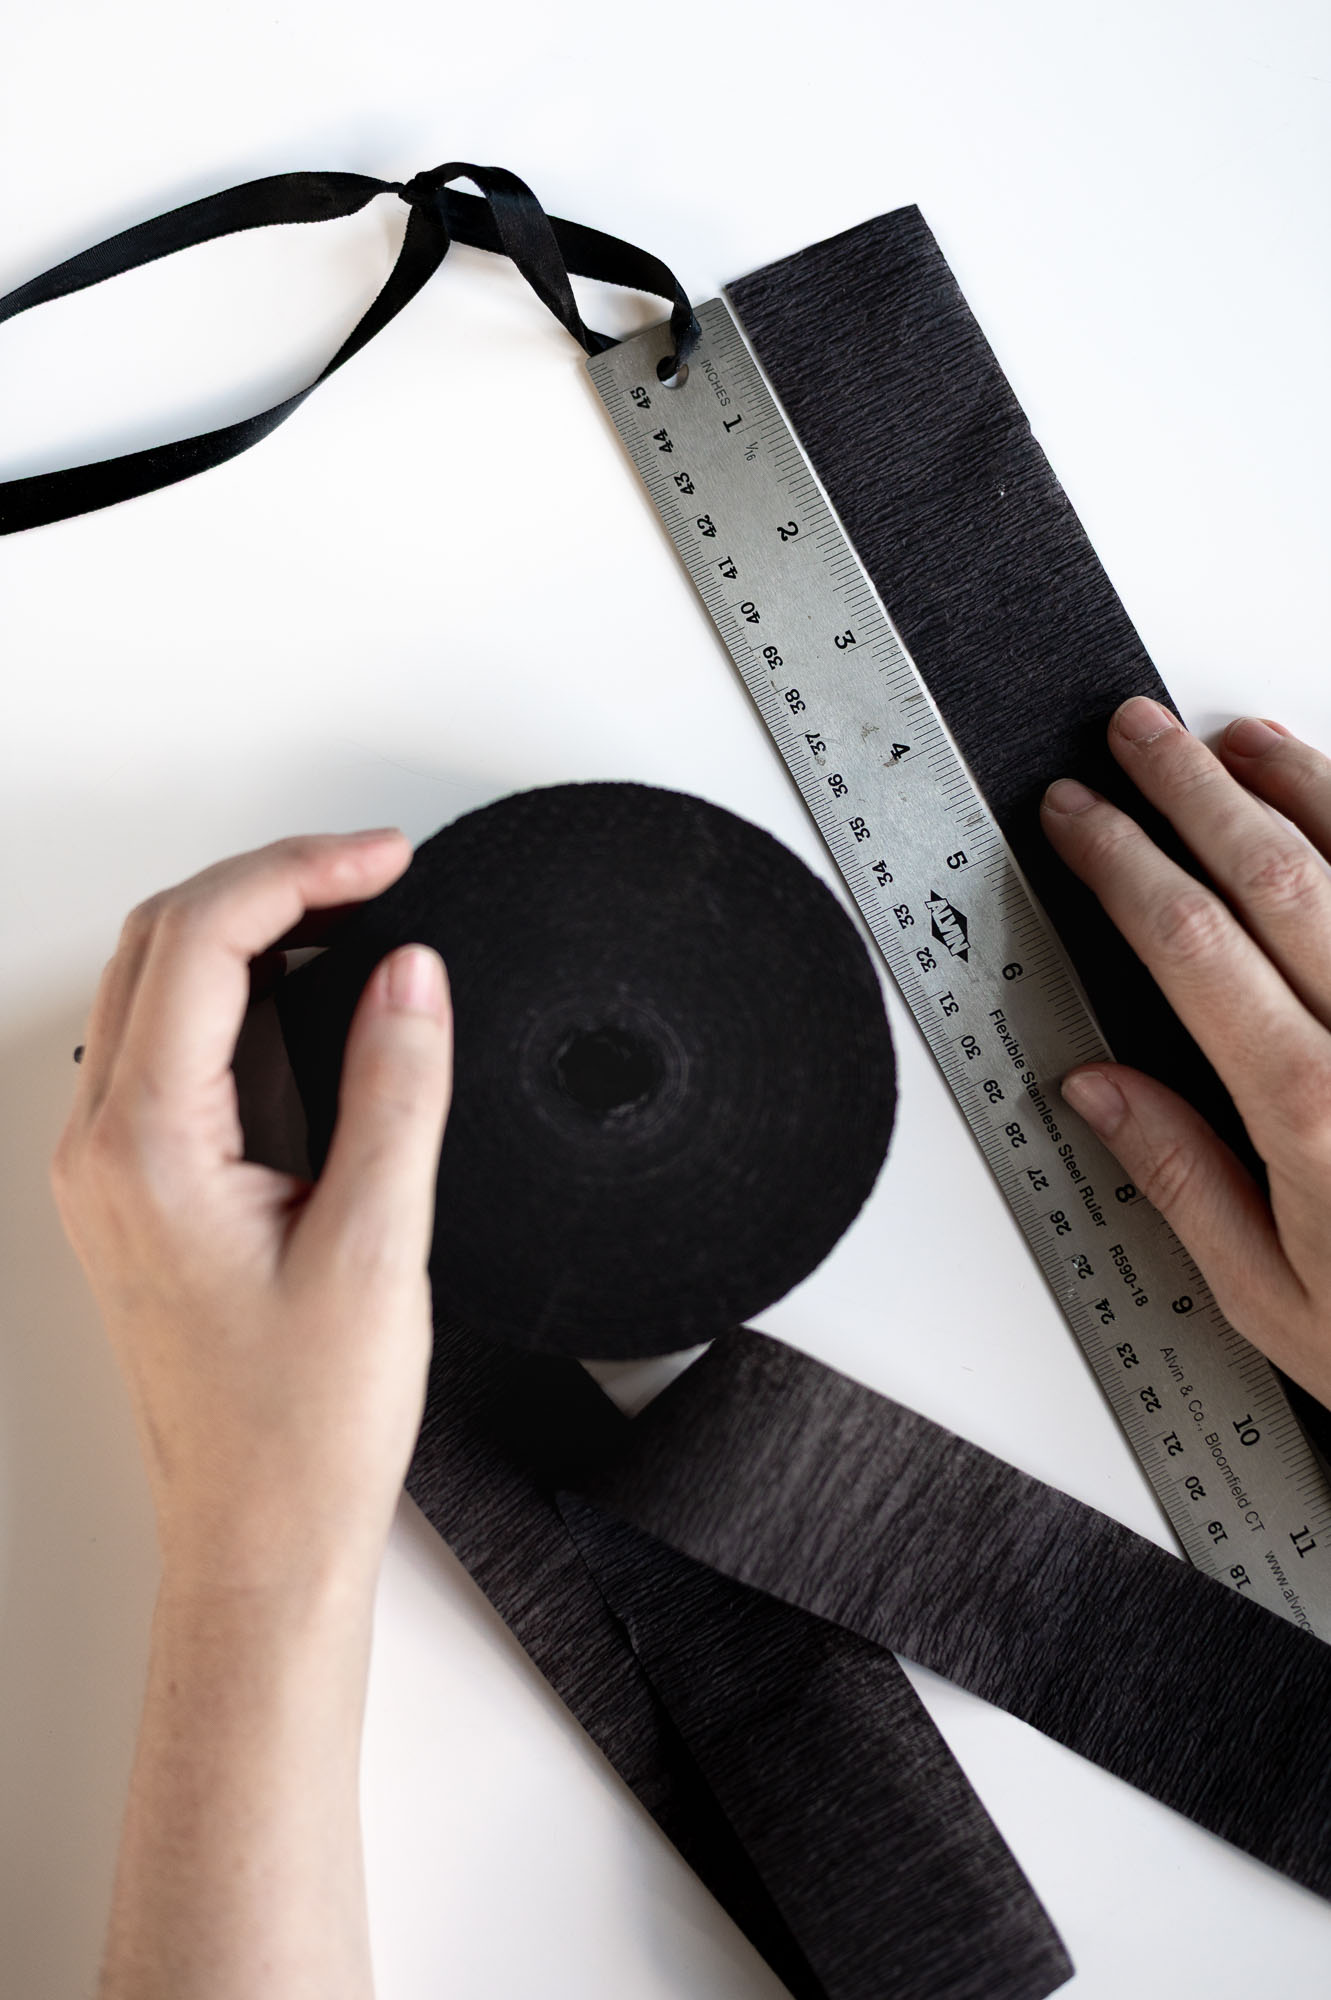
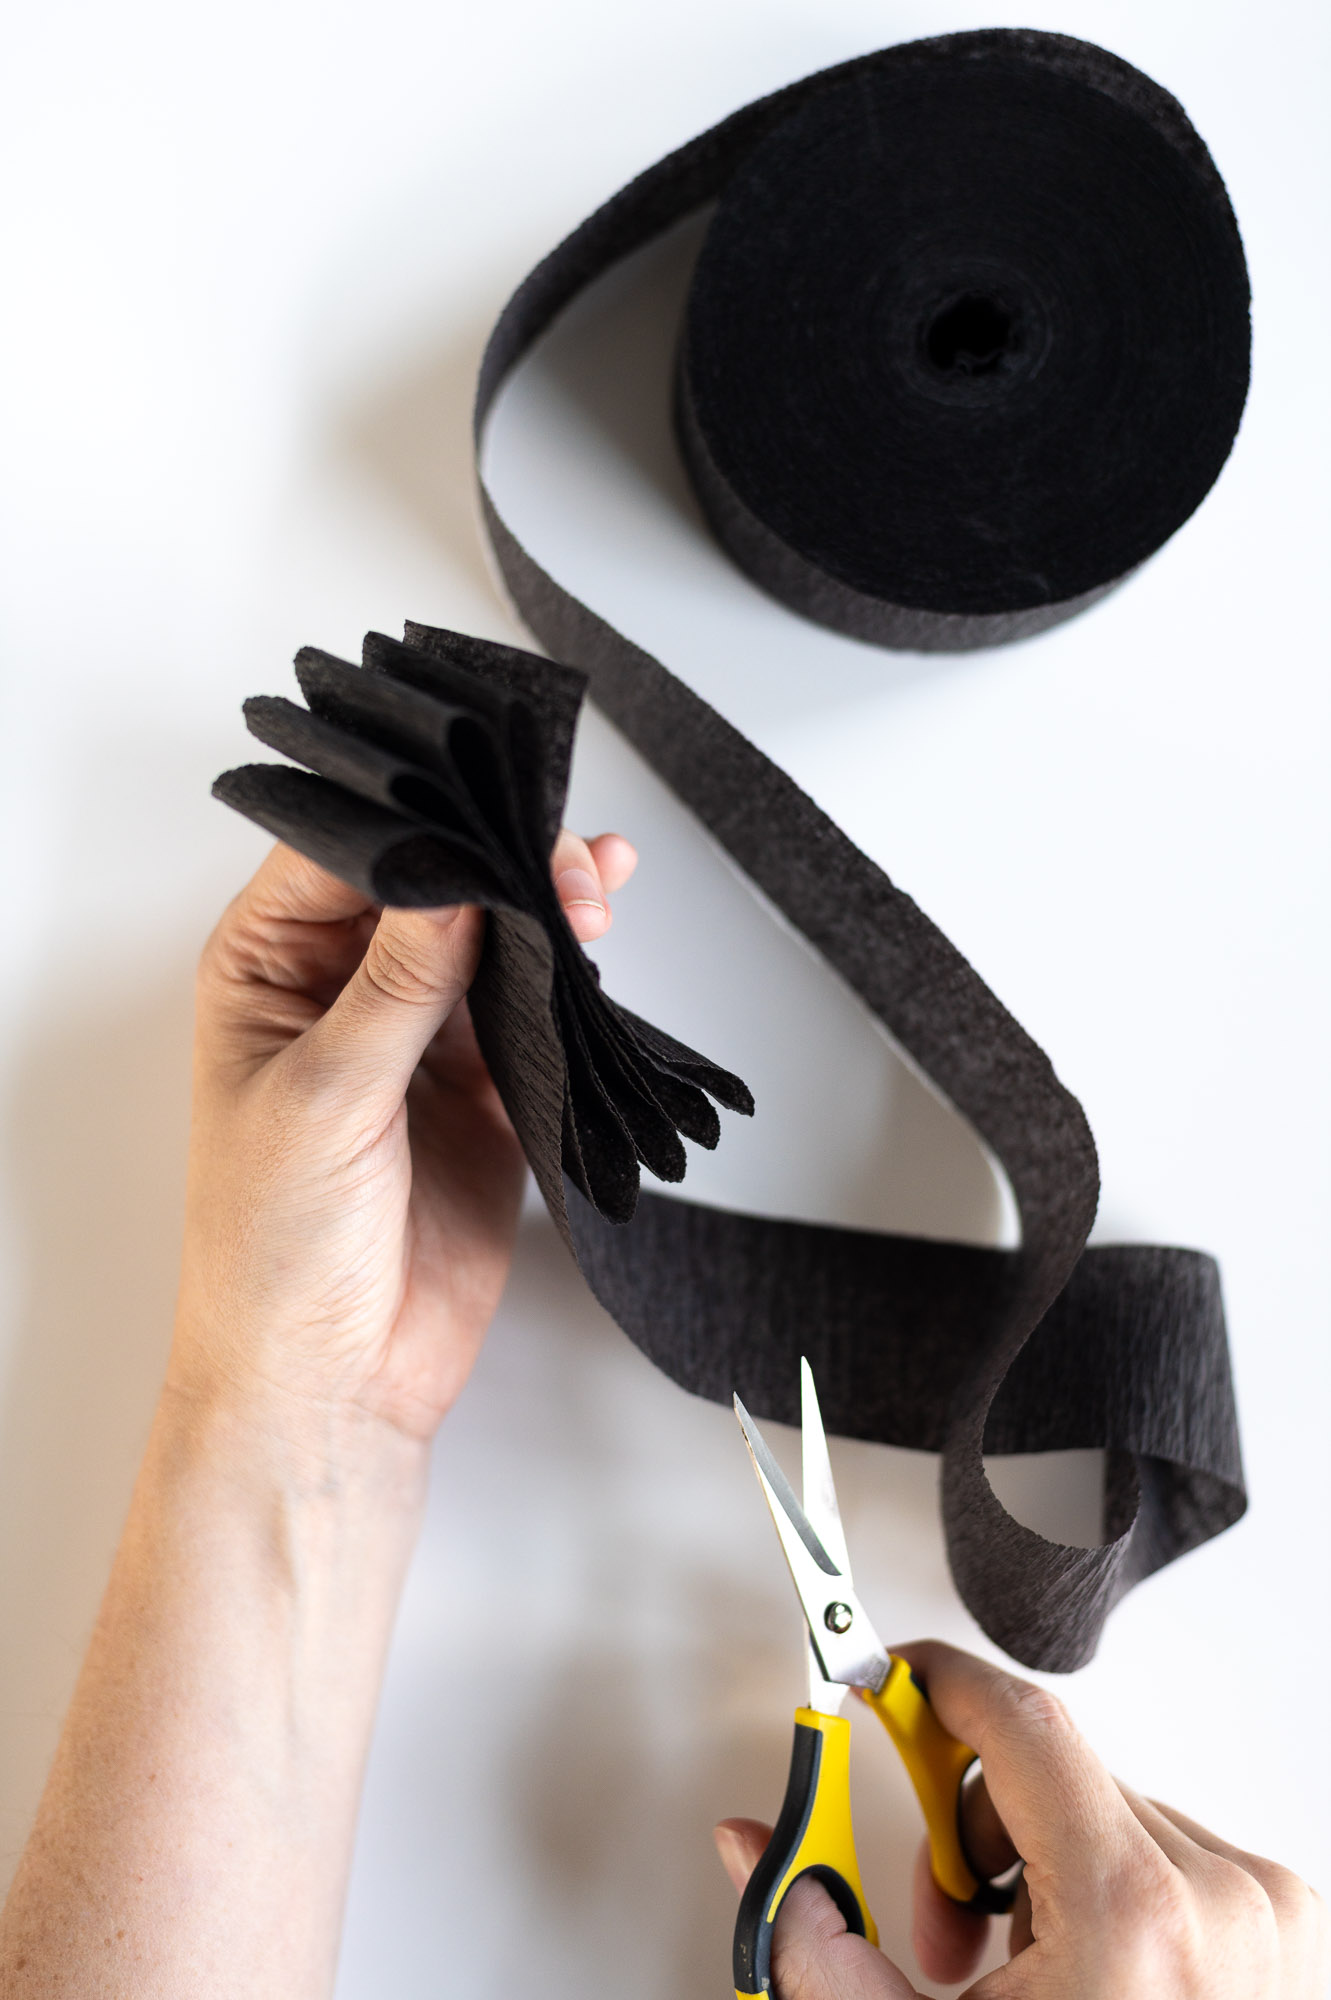
Step 1: Fold Your Streamer & Cut It To Length
Fold your streamer back and forth in roughly 4″ sections, about 9–10 times. This will use around 36–40″ of streamer in total. Then, cut your bundle free from the roll.
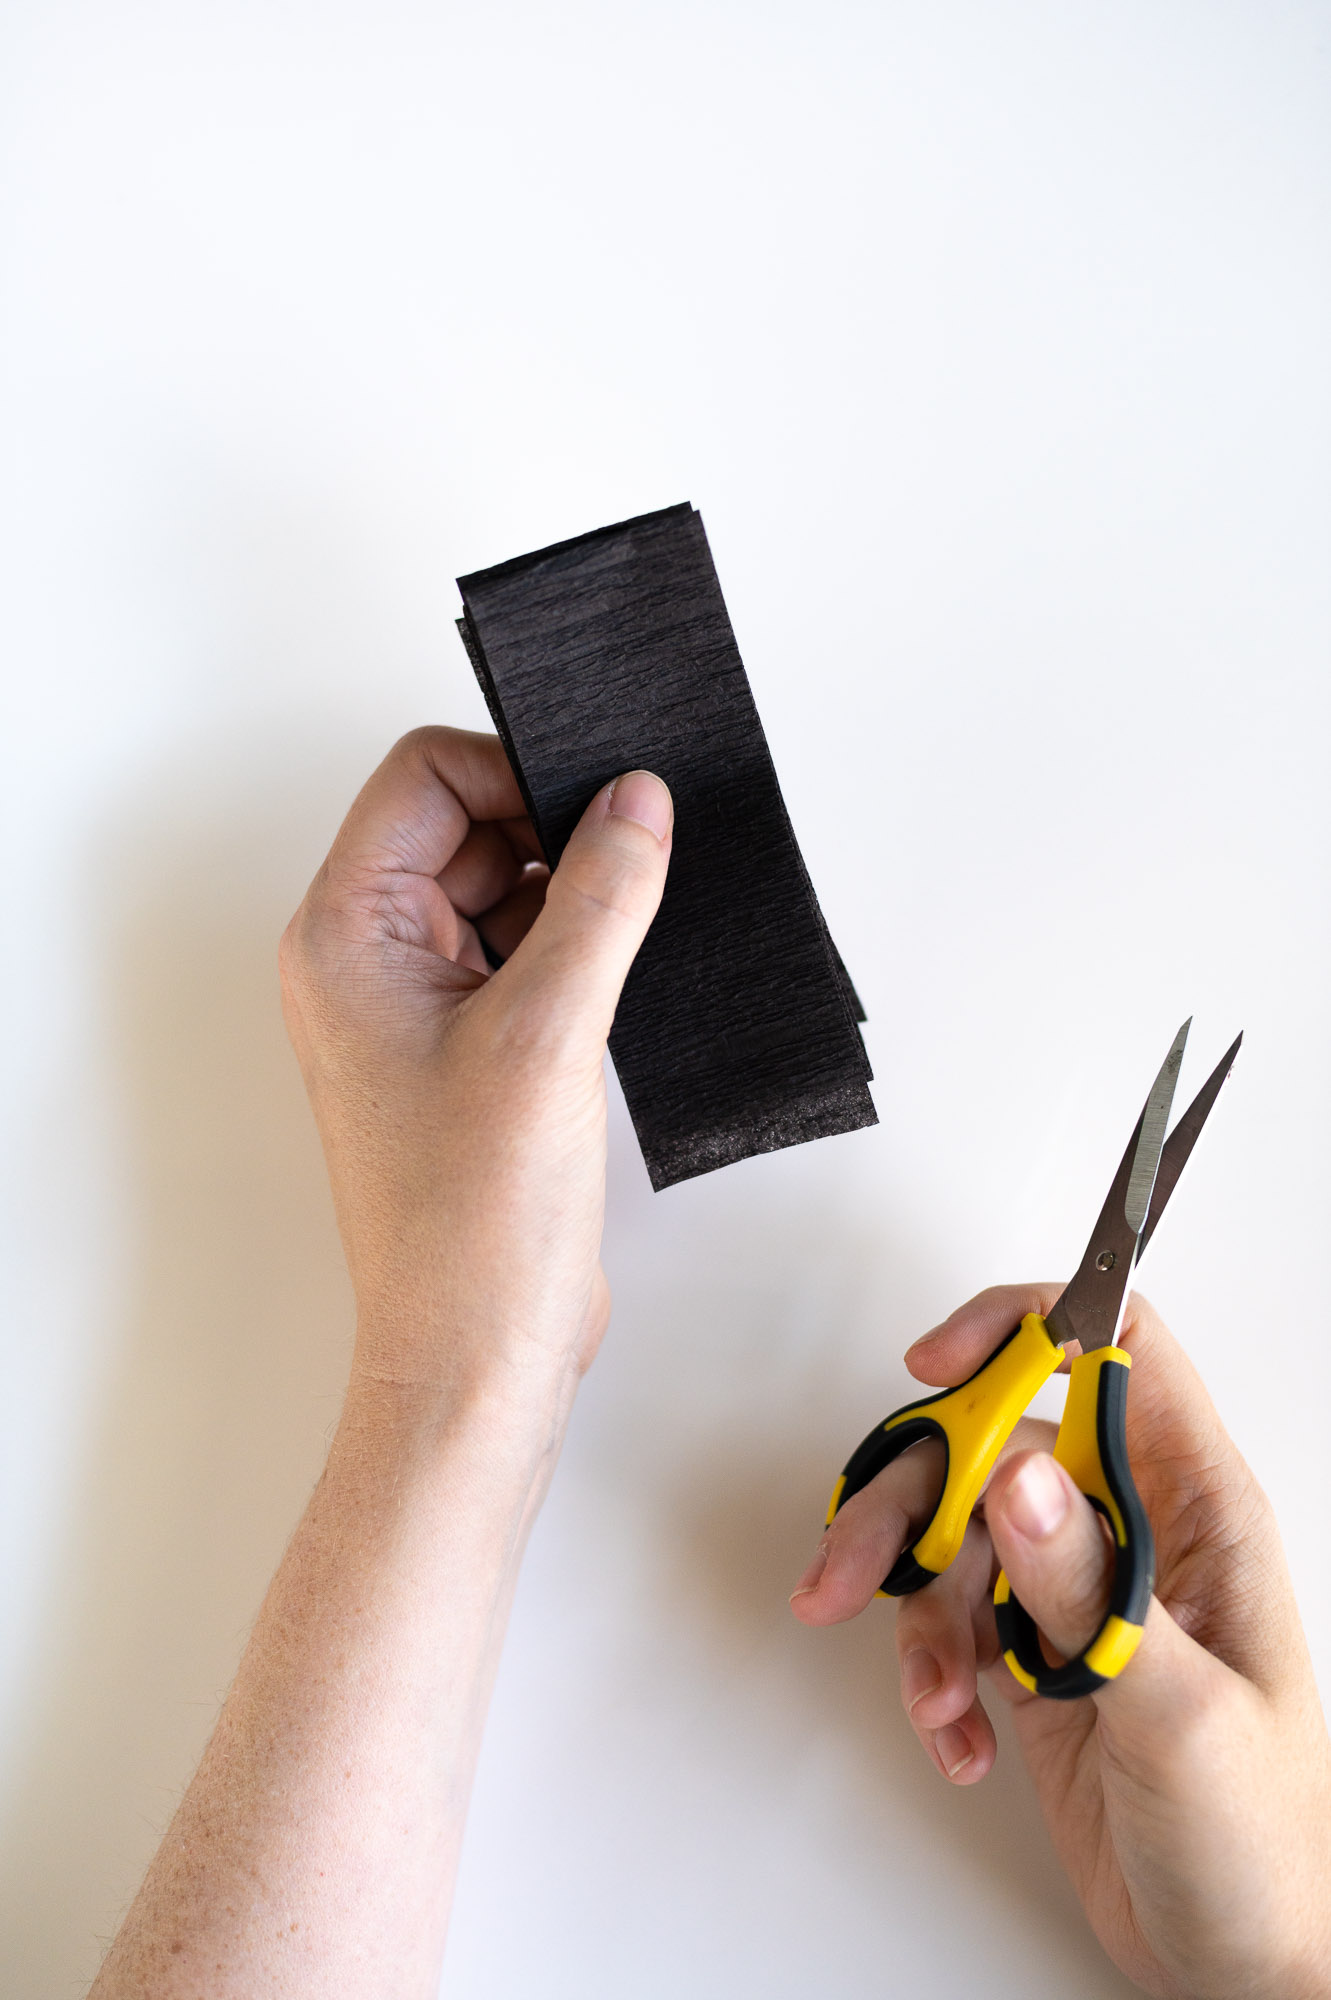
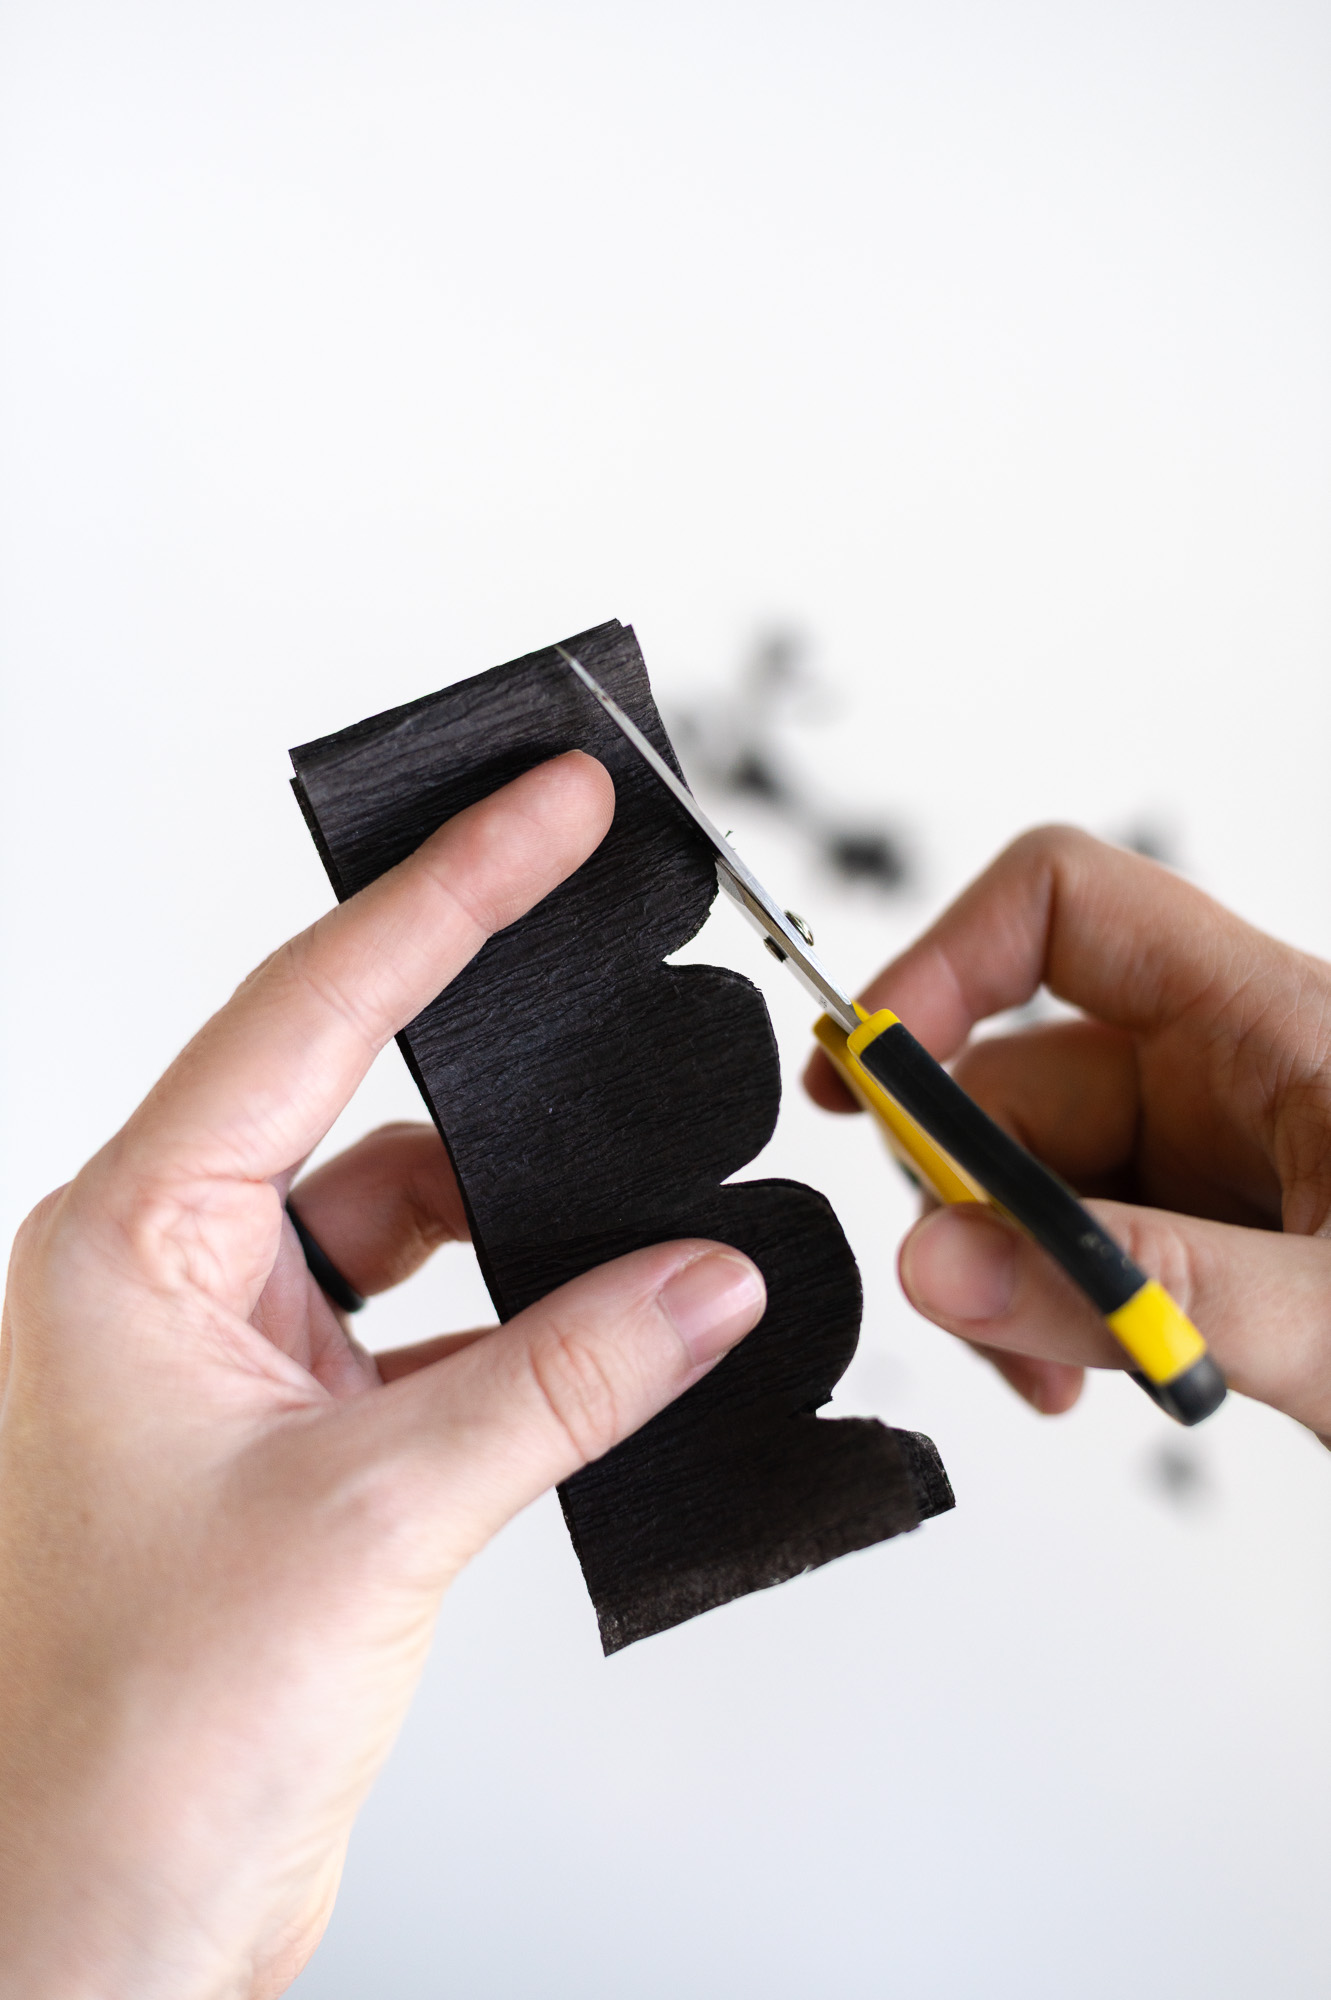
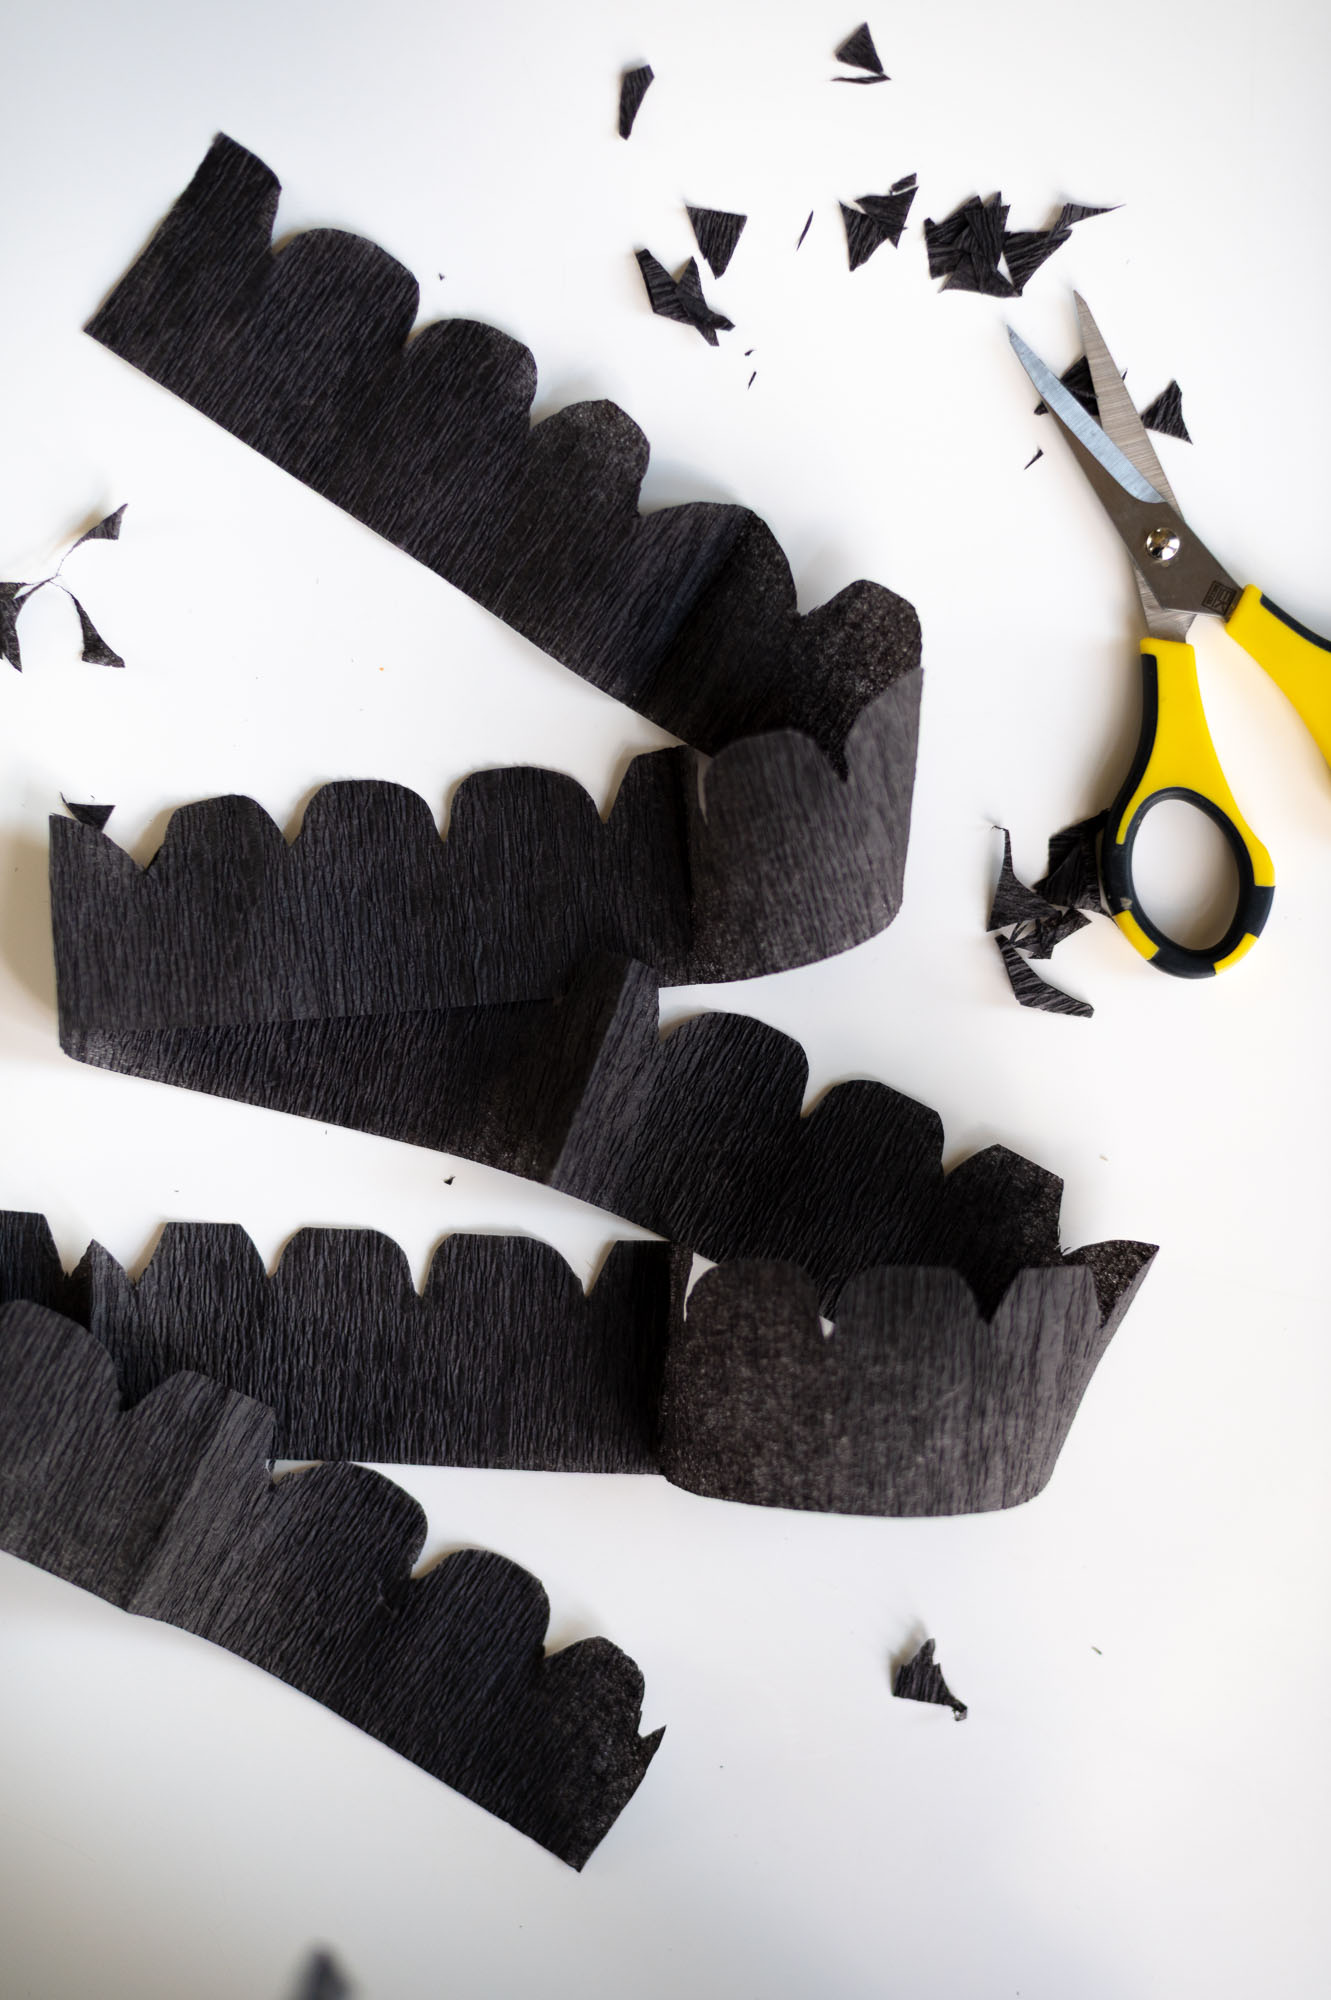
Step 2: Cut Scallops Along One Edge Of Your Folded Streamer
Keep your folded bundle tidy, then cut a row of scallops along one edge. Try to end with half-scallops on each side so that, when unfolded, you’re left with a row of full scallops.
If your scallops aren’t perfect, don’t stress too much. You can always trim any noticeable mistakes later, but honestly, small imperfections won’t show once the flower is assembled.
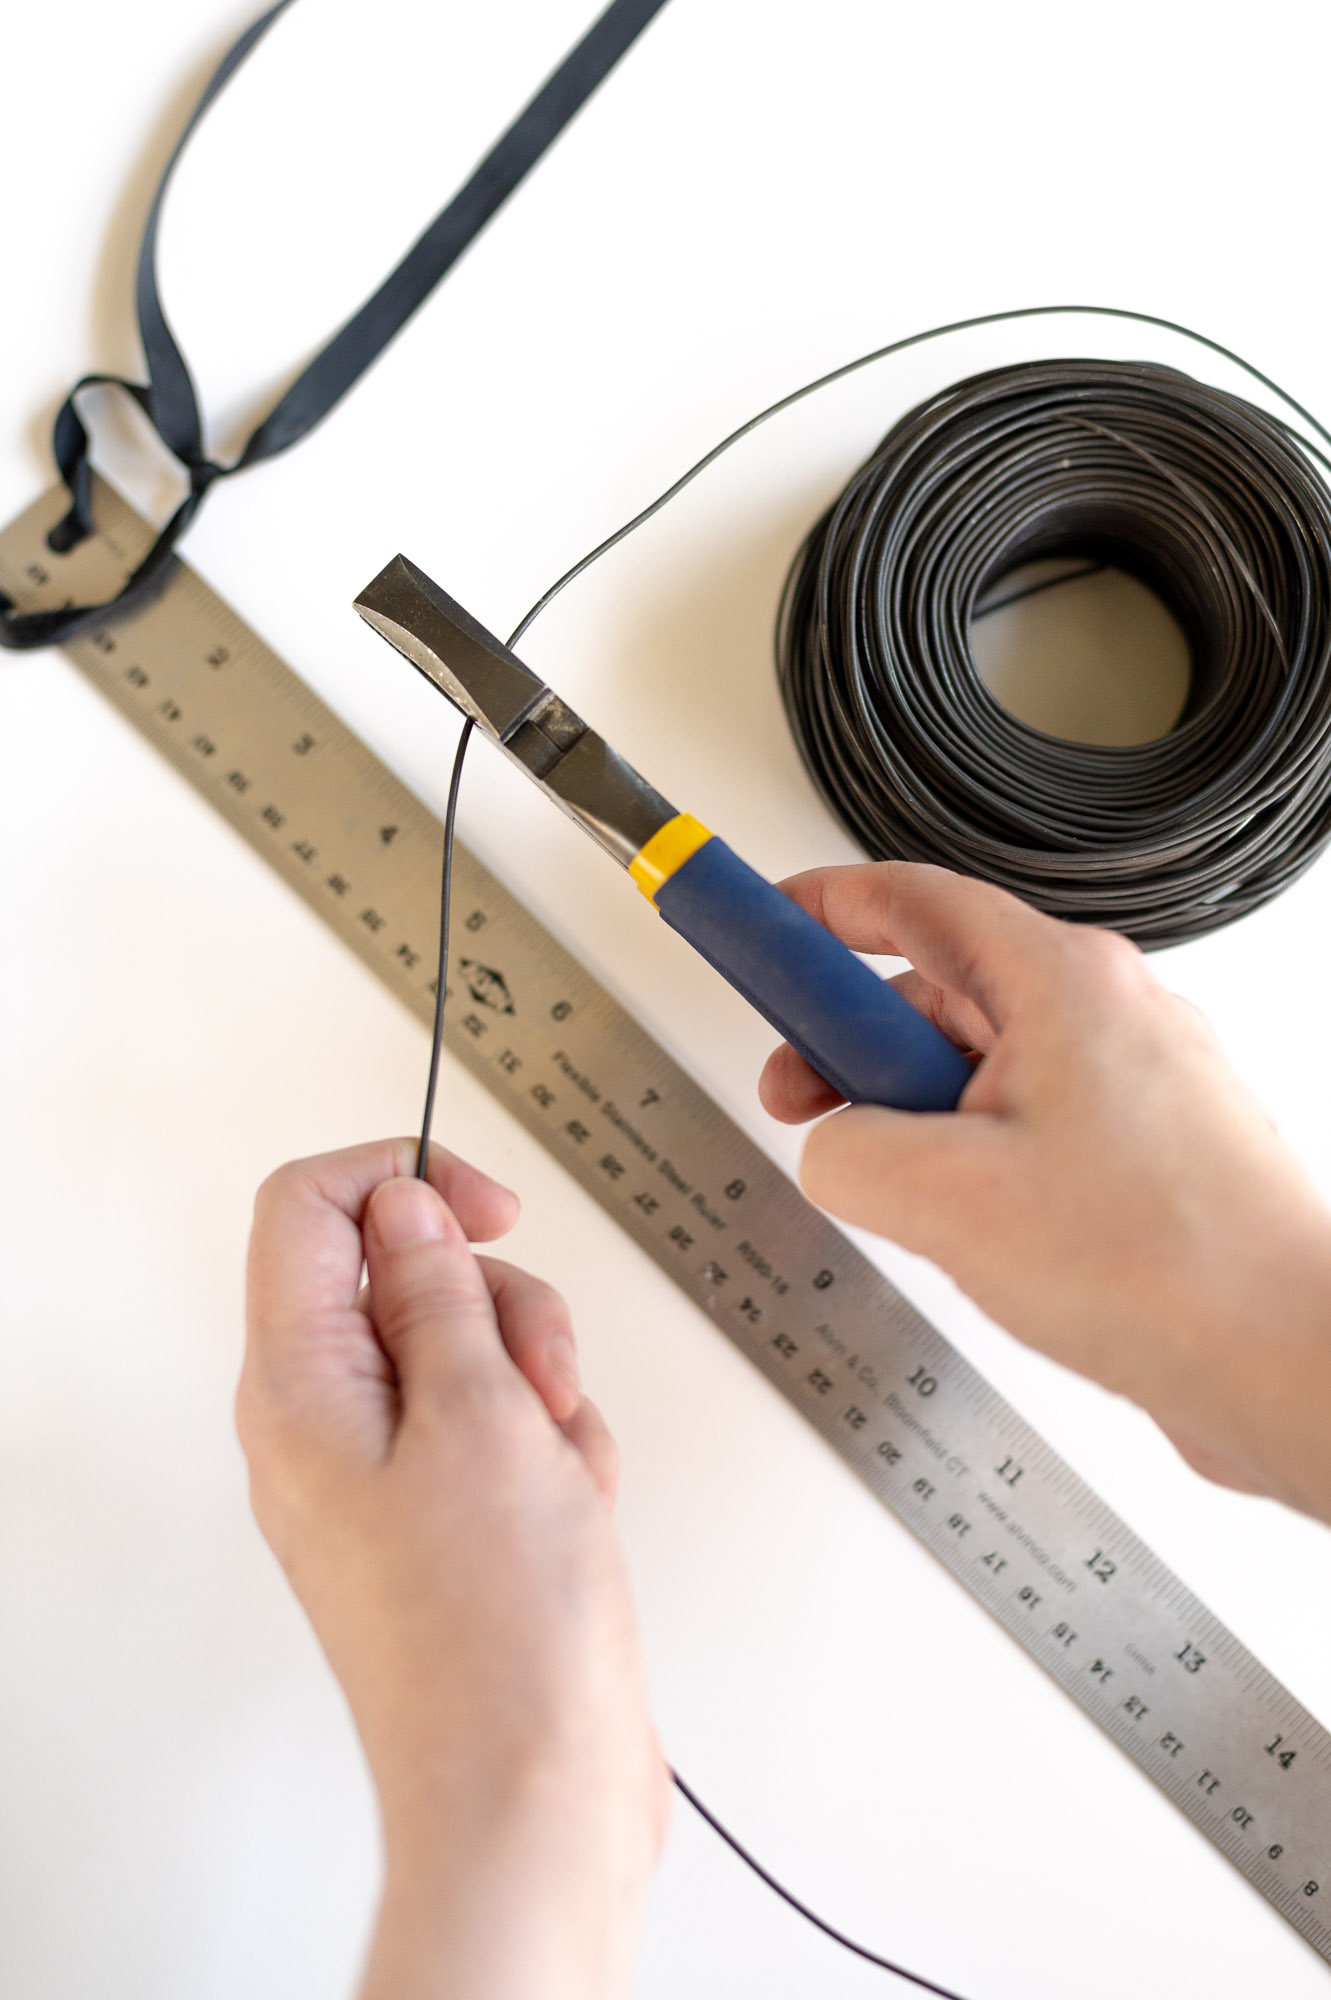
Step 3: Cut Your Wire & Attach It To The Streamer
Cut your wire to your desired stem length. You can go as long as you like, but I recommend no shorter than 10” if you want your flowers to stand on their own. I used 10”, 14”, and 18” lengths for mine.
Once your wire is cut, use your hot glue gun to attach it to the non-scalloped edge of your streamer.

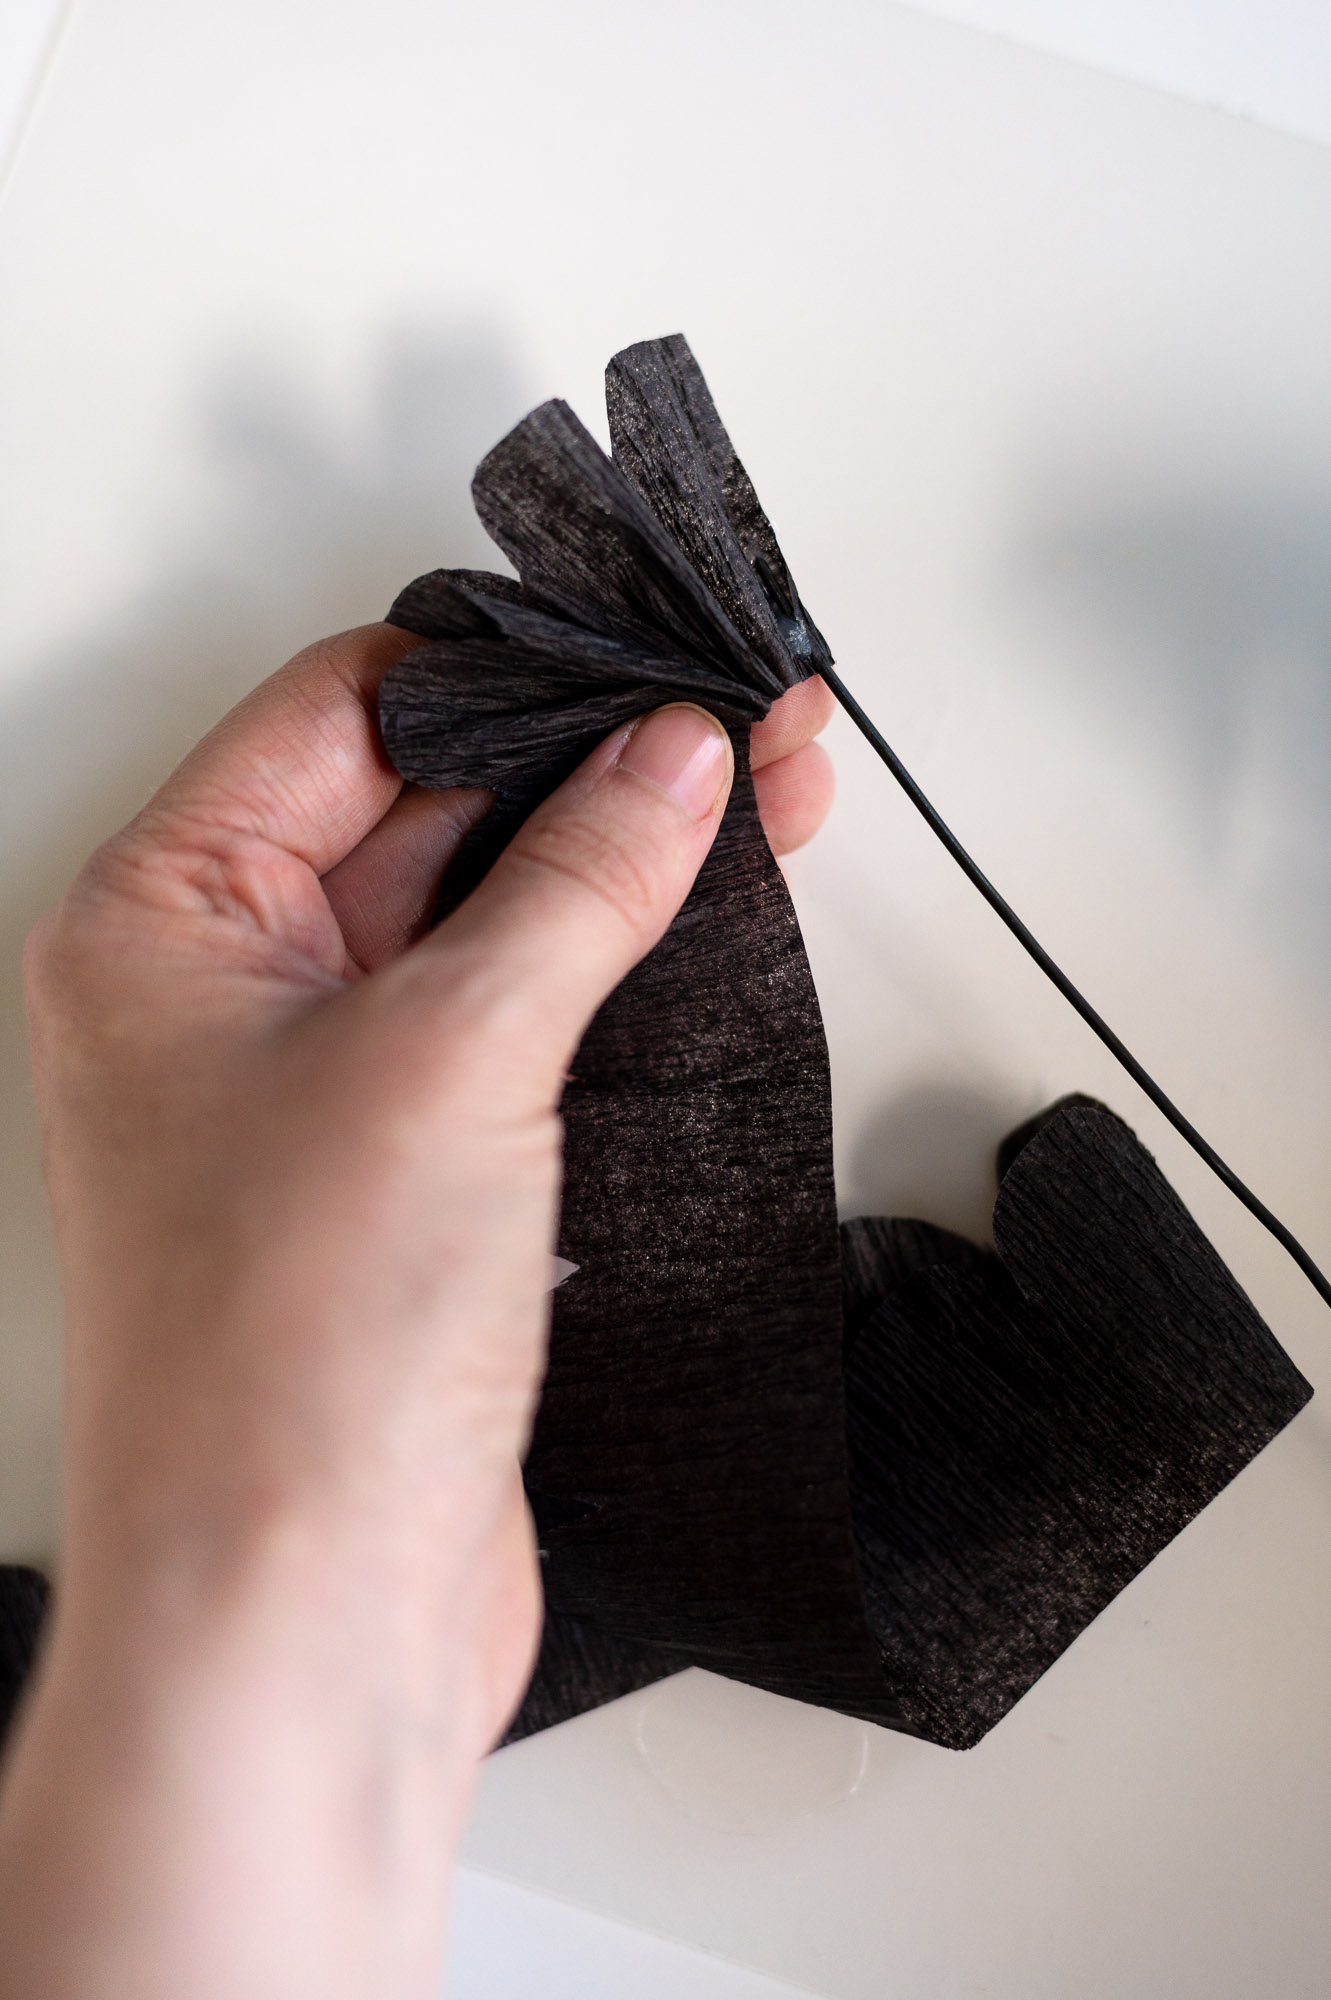
Step 4: Gather The Streamer & Attach With Hot Glue
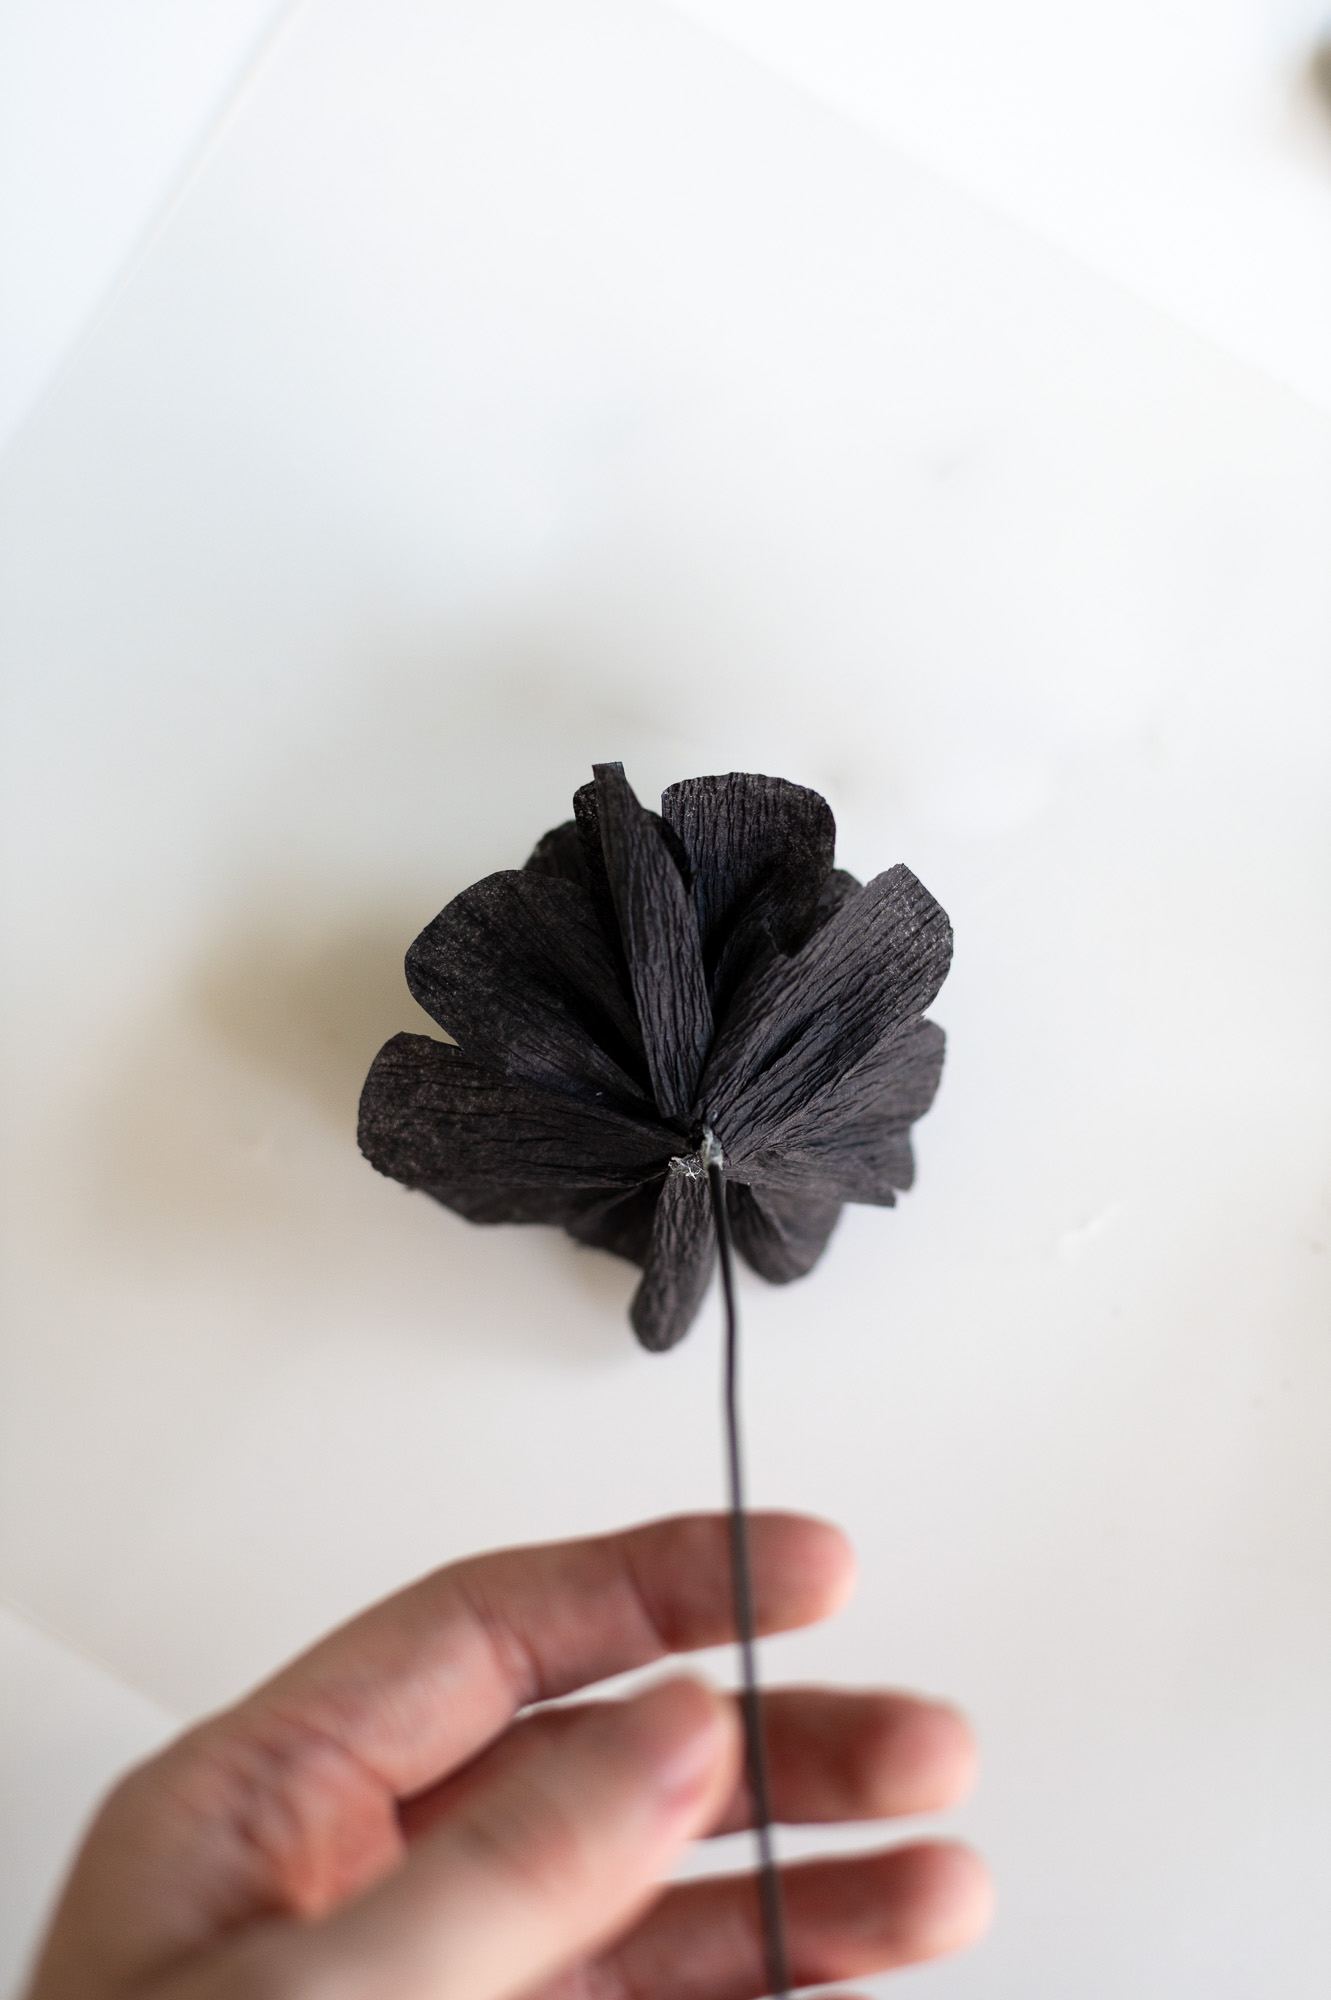
To create the rose center, gather the non-scalloped edge of your streamer like an accordion and hot glue the bundle to your wire.
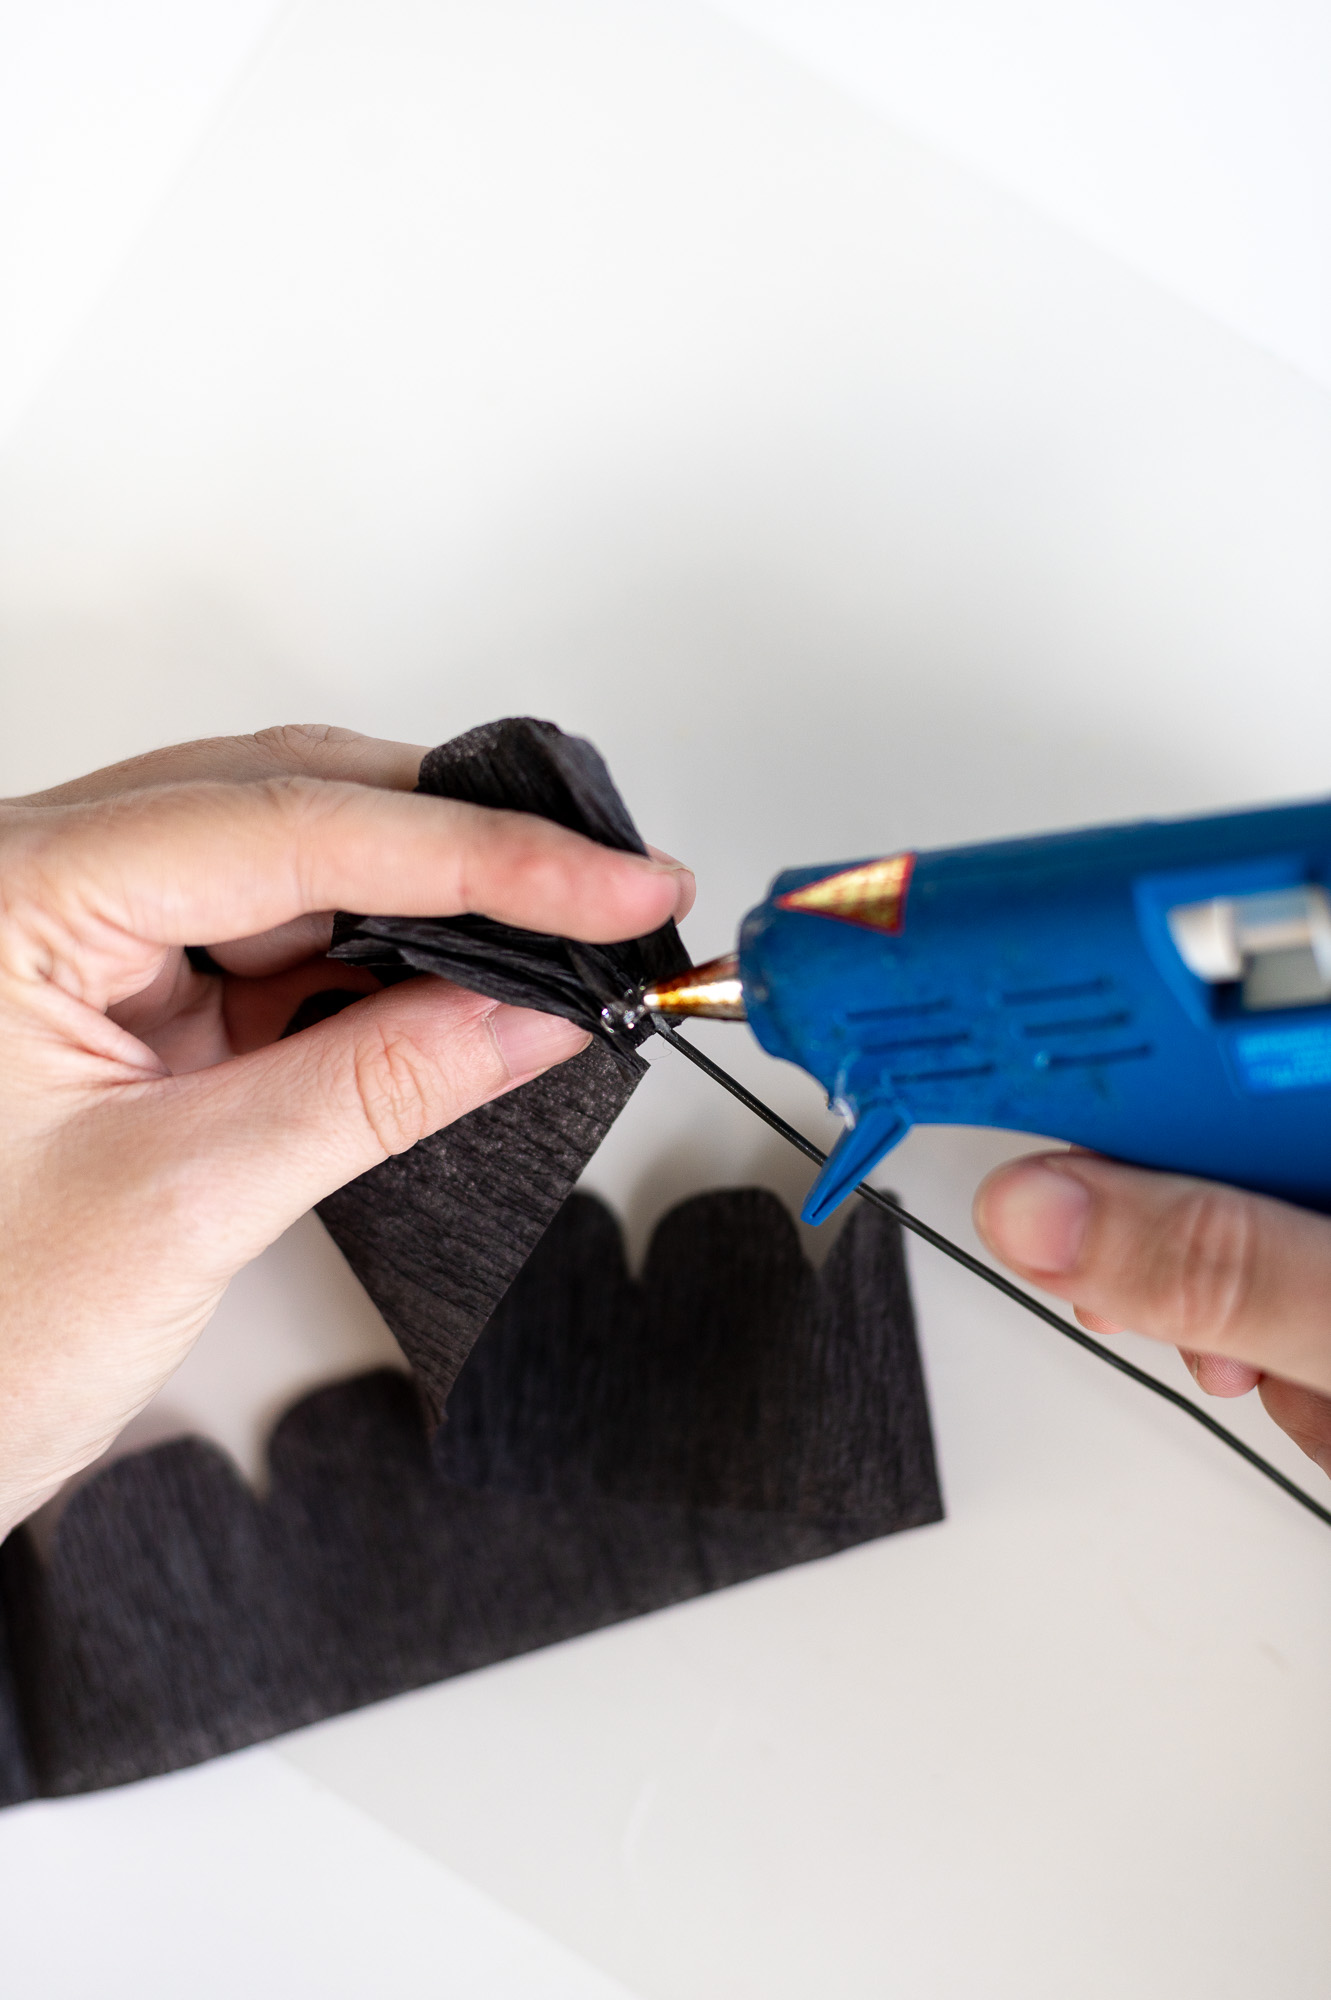
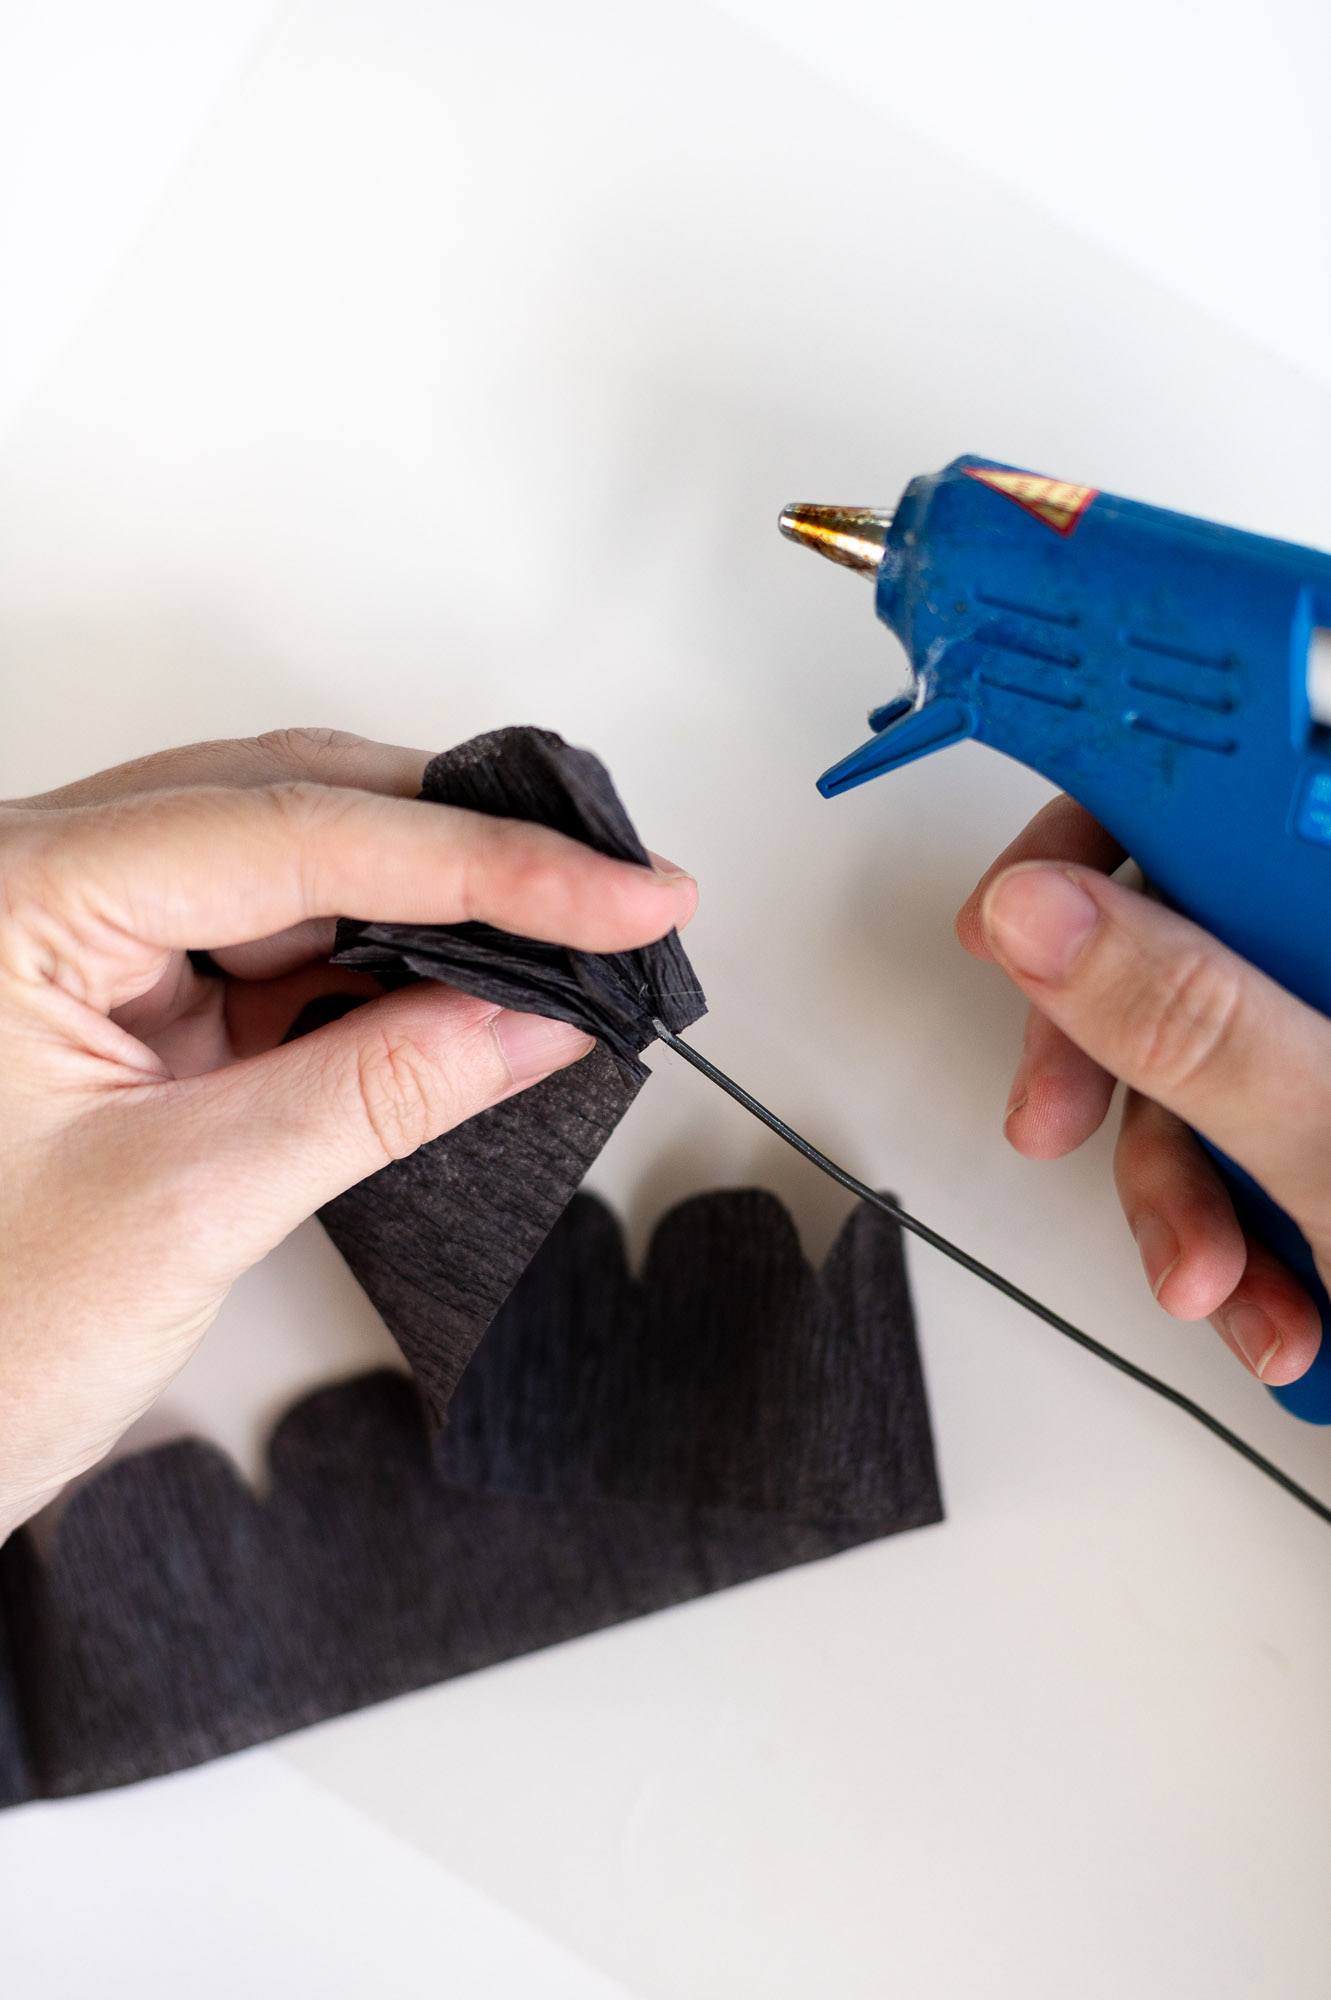
Step 5: Continue Gathering & Gluing Until the Streamer Runs Out
Keep repeating the process: gather the bottom straight edge into small folds and glue them around the flower base. Continue until you’ve used the full length of streamer.

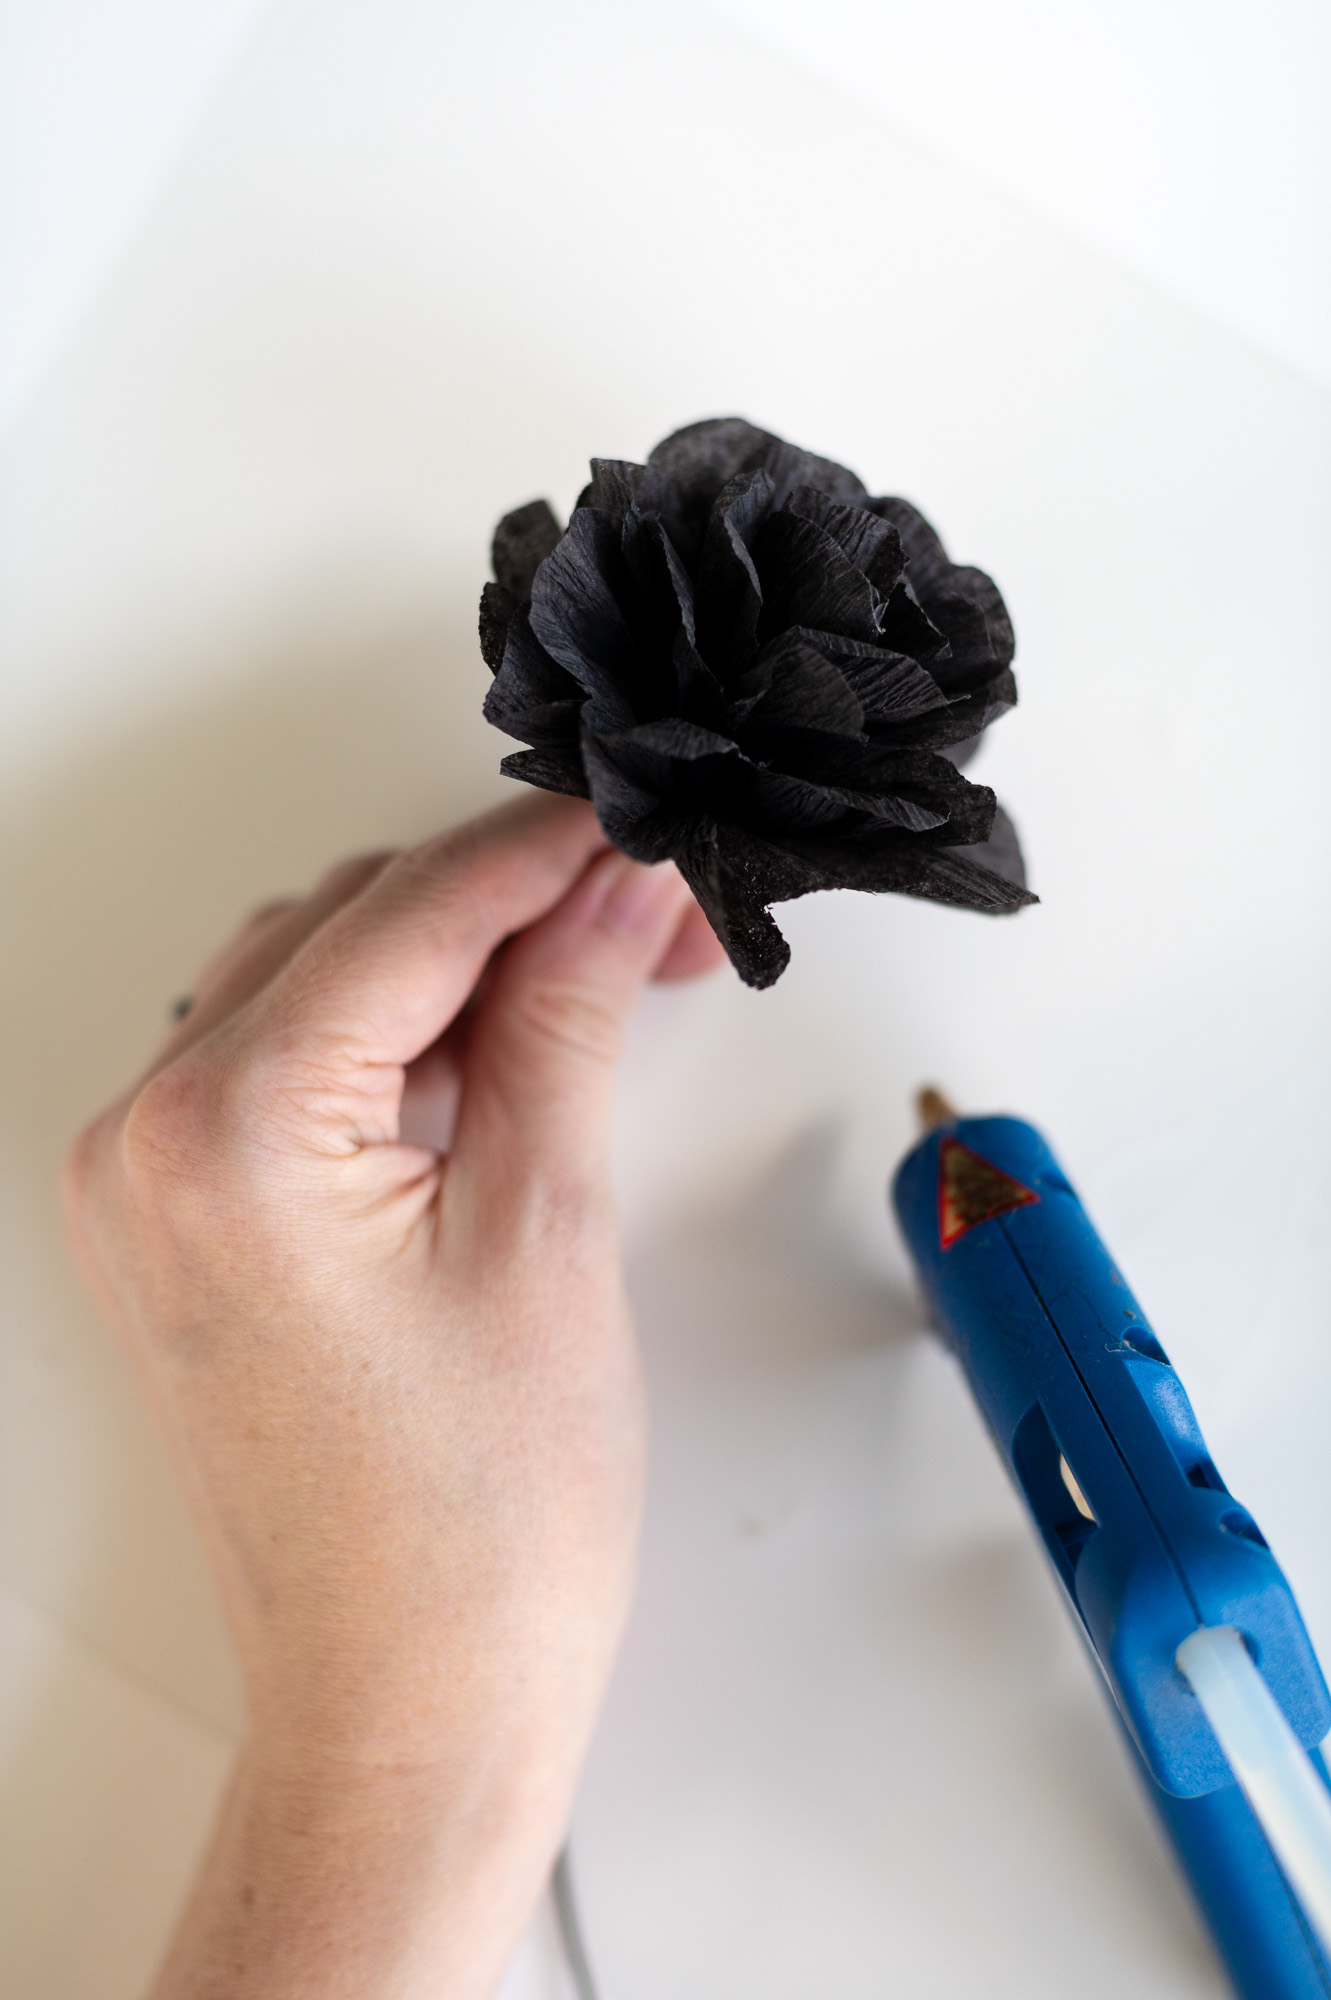
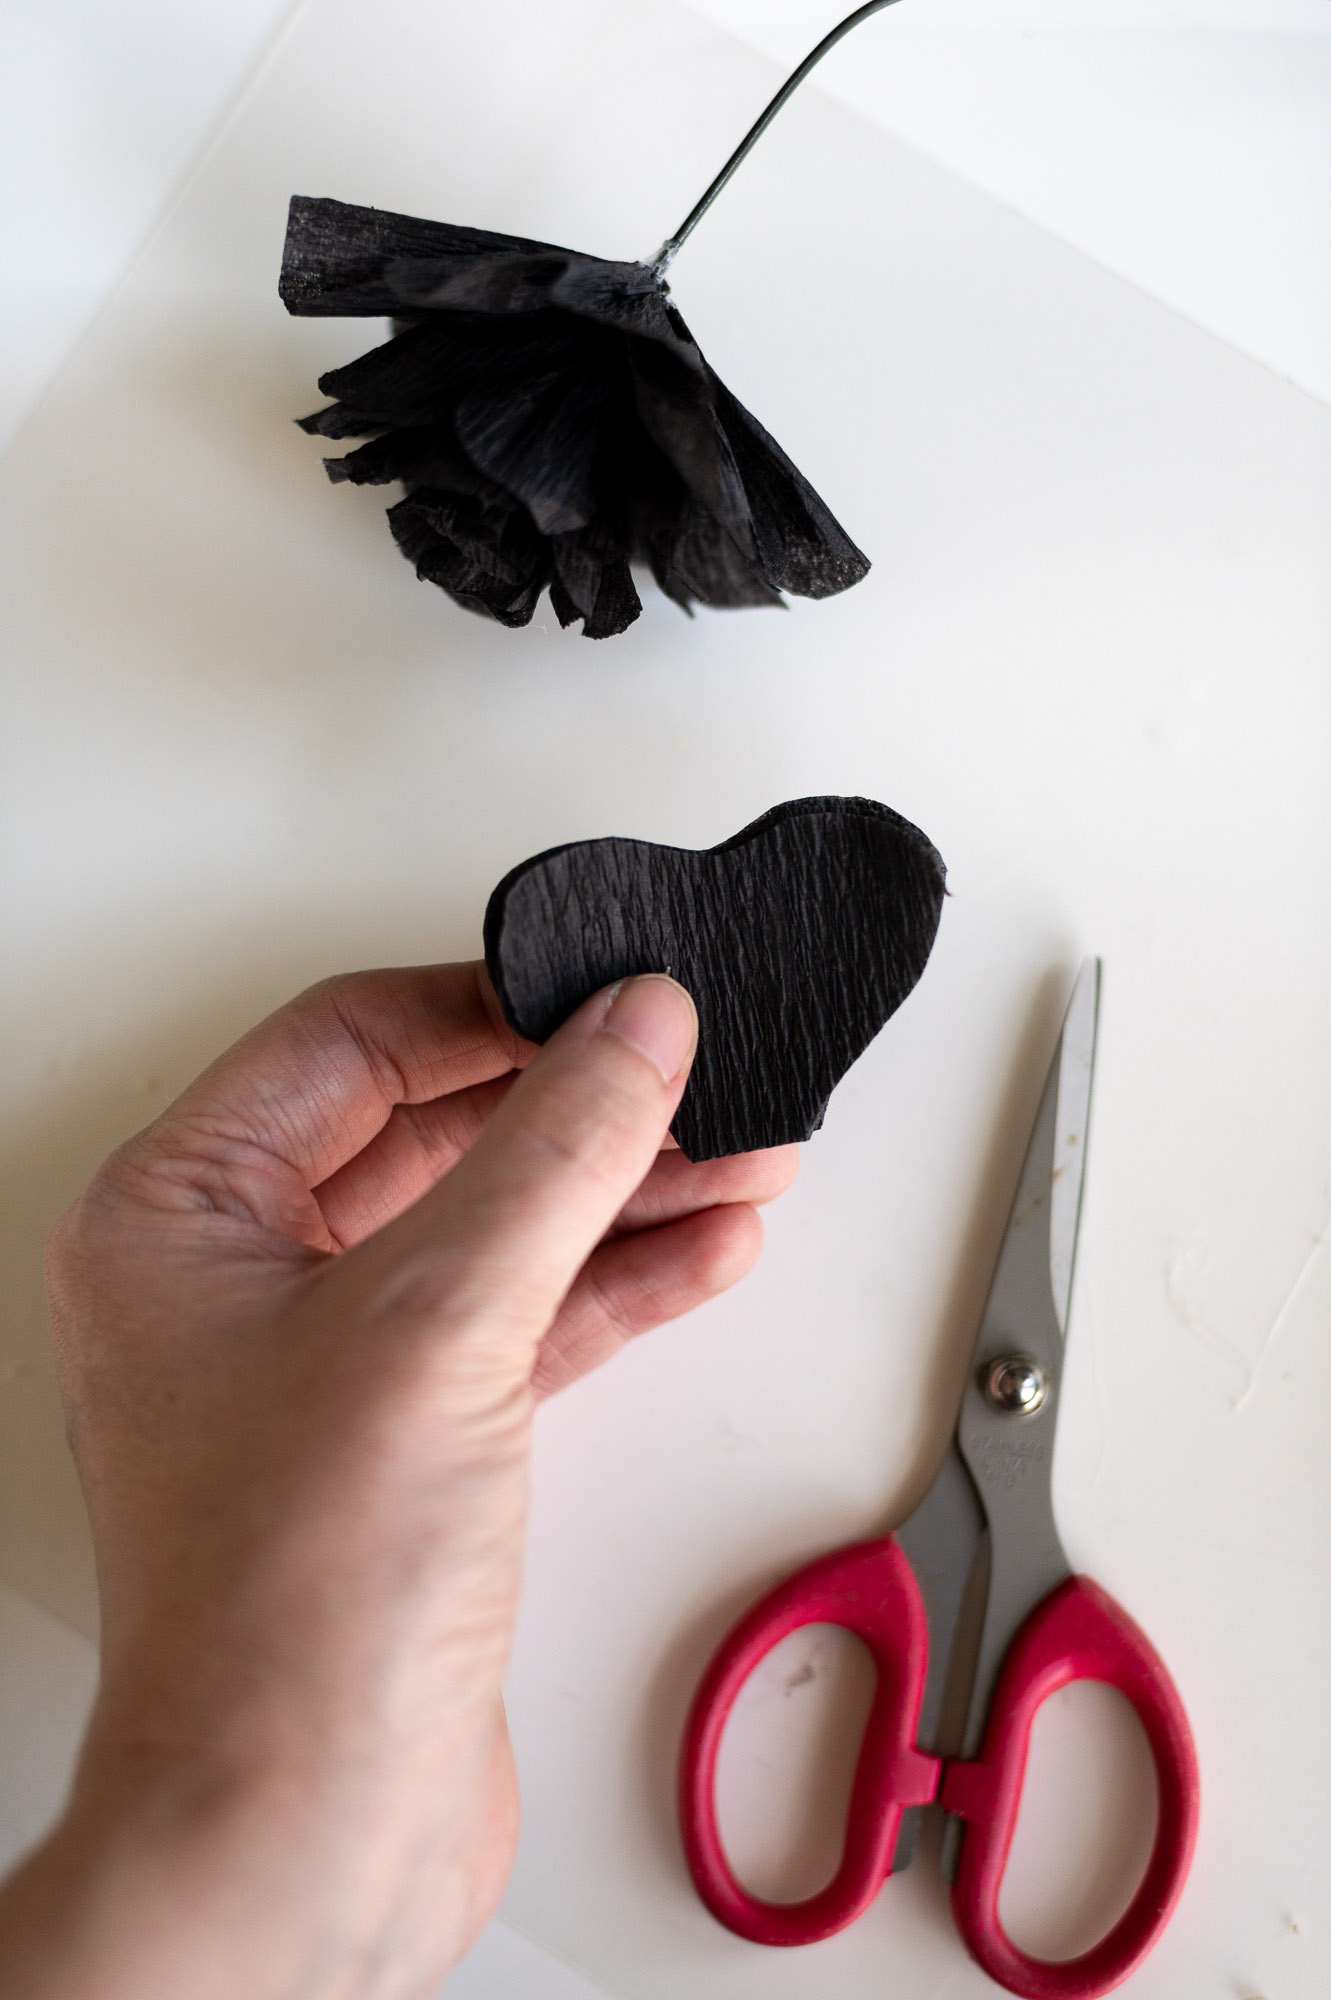
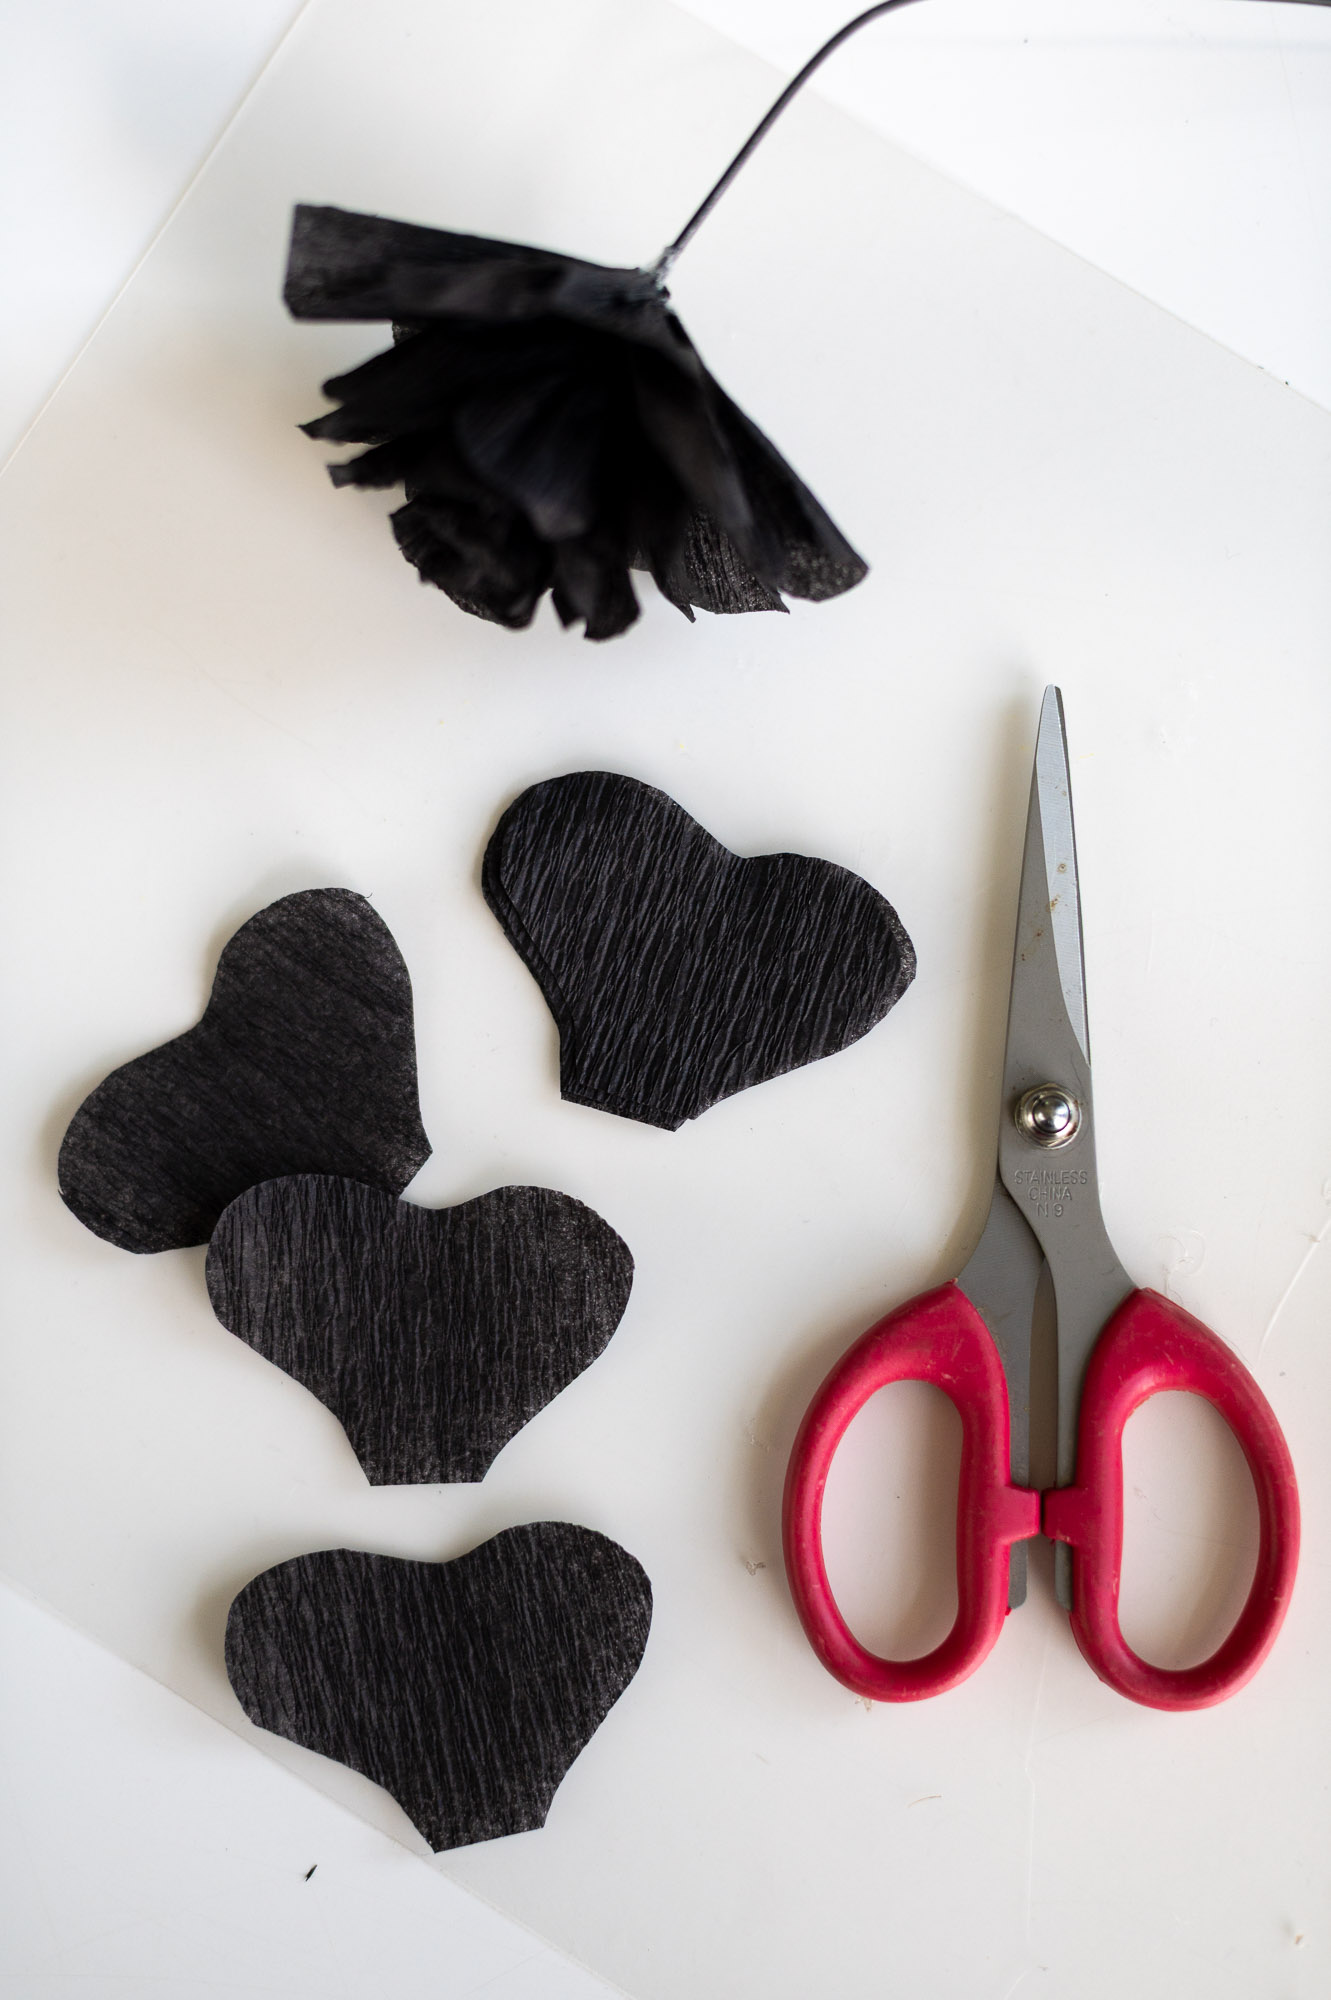
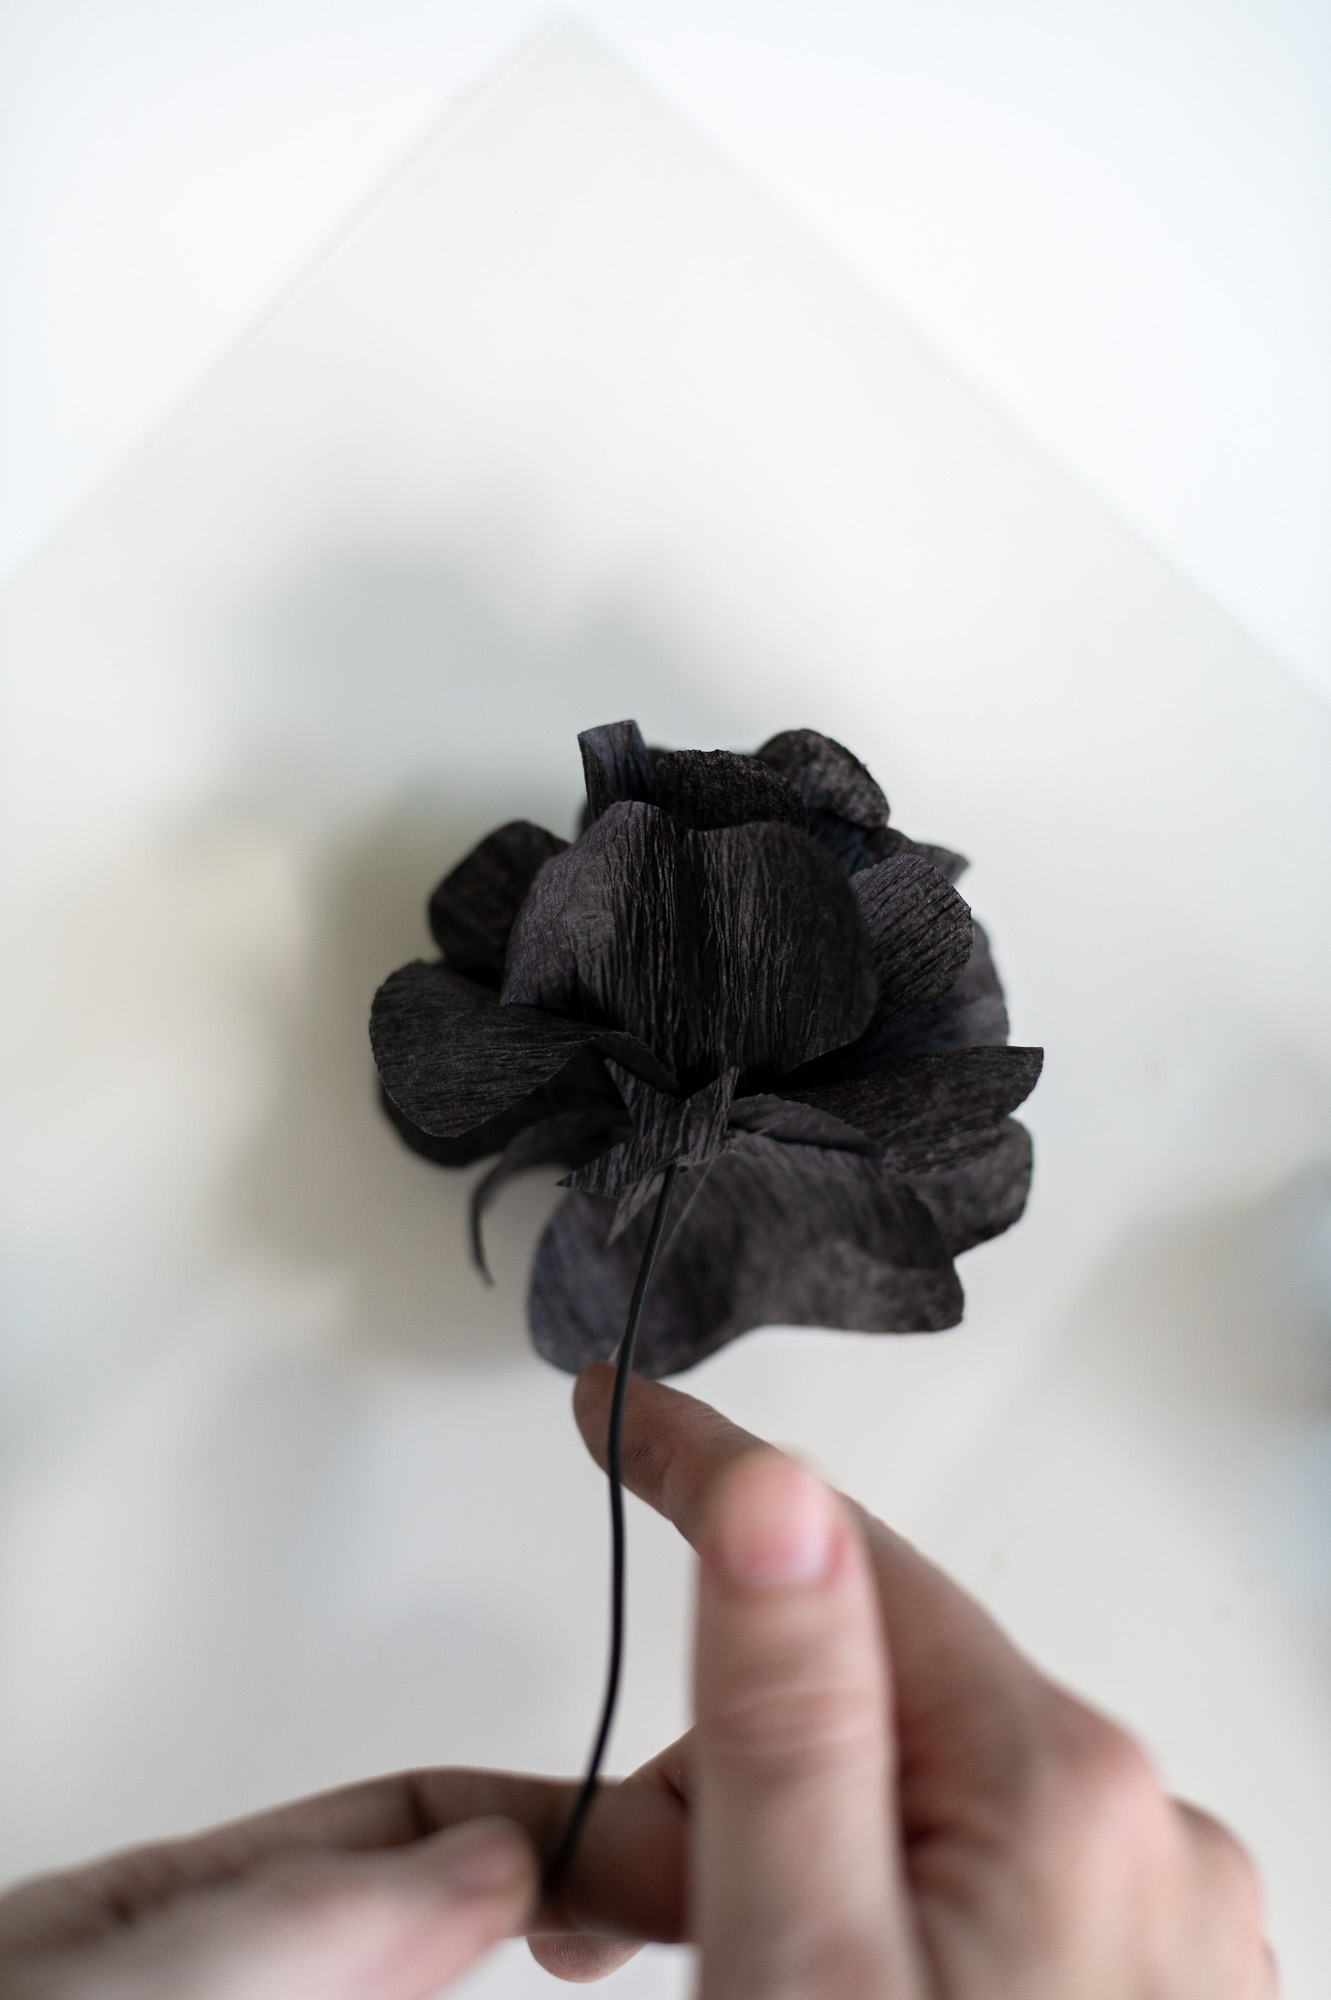
Step 6: Cut Individuals Petals From The Streamer
By now, your flower should already look pretty good, but we’re going to take it a step further by adding a few large individual petals to make it even more realistic.
You can cut several at once by folding the streamer, like we did earlier, or cut them individually if you prefer. Aim for a wide heart shape with a narrow, flat base. You’ll need about 6–8 petals.
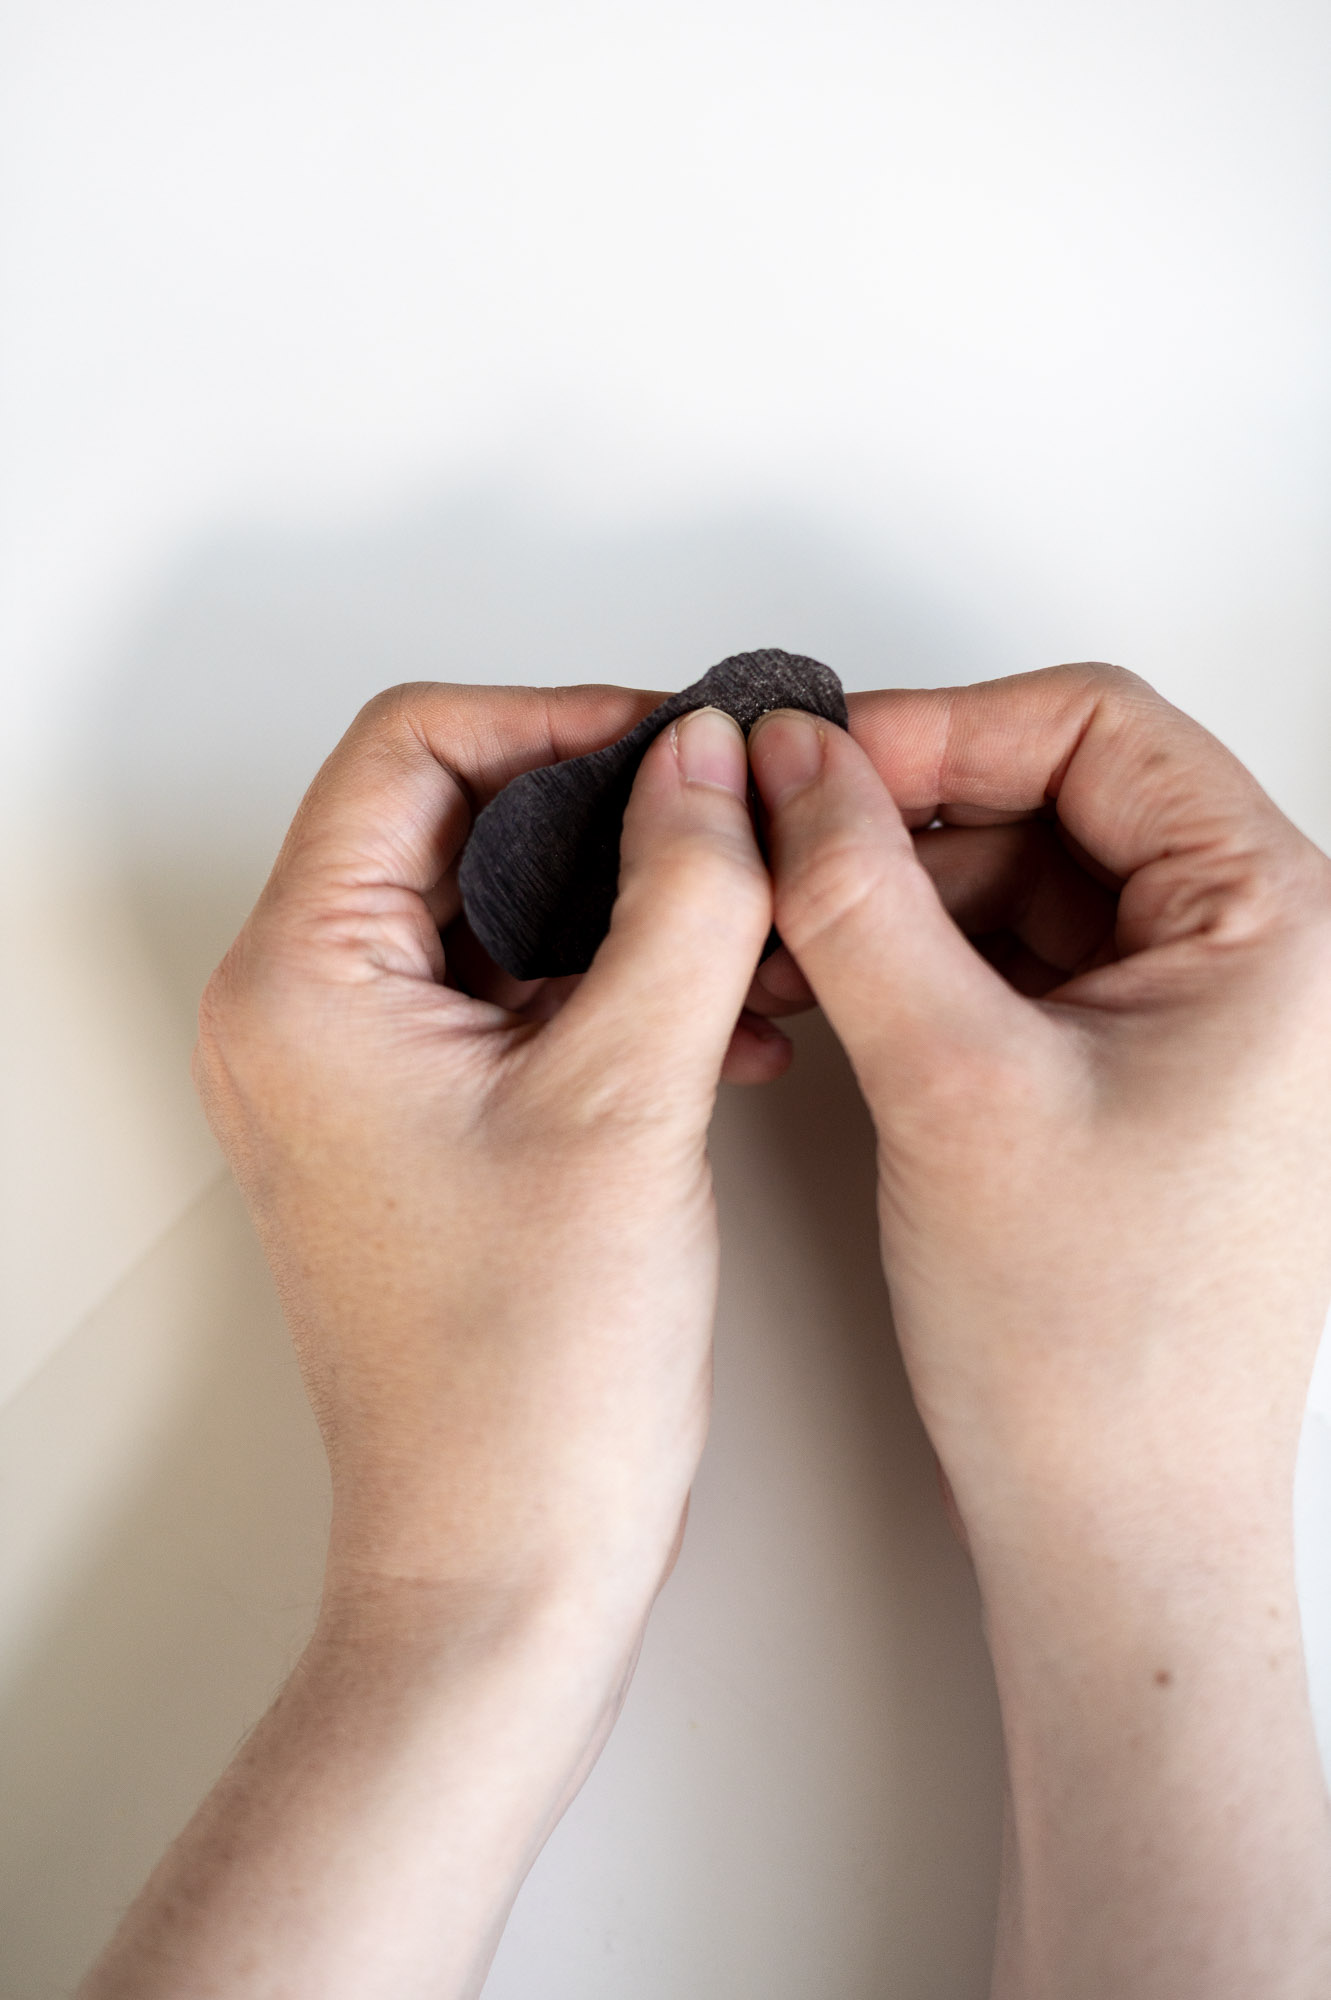
Step 7: Gently Shape the Petals by Stretching the Tops
This next step is tricky to photograph, so I’ll do my best to describe it clearly.
We don’t want these petals to lay flat—we want them to have a bit of a curved shape, like a real flower petal.
To do this, take one scallop of your heart-shaped petal and pinch the paper near the center with your thumbs close together. Then gently stretch outward, pulling your thumbs apart. This should cause the top of the petal to gently curve or cup upward.
Repeat that process on the other scallop of your petal as well.
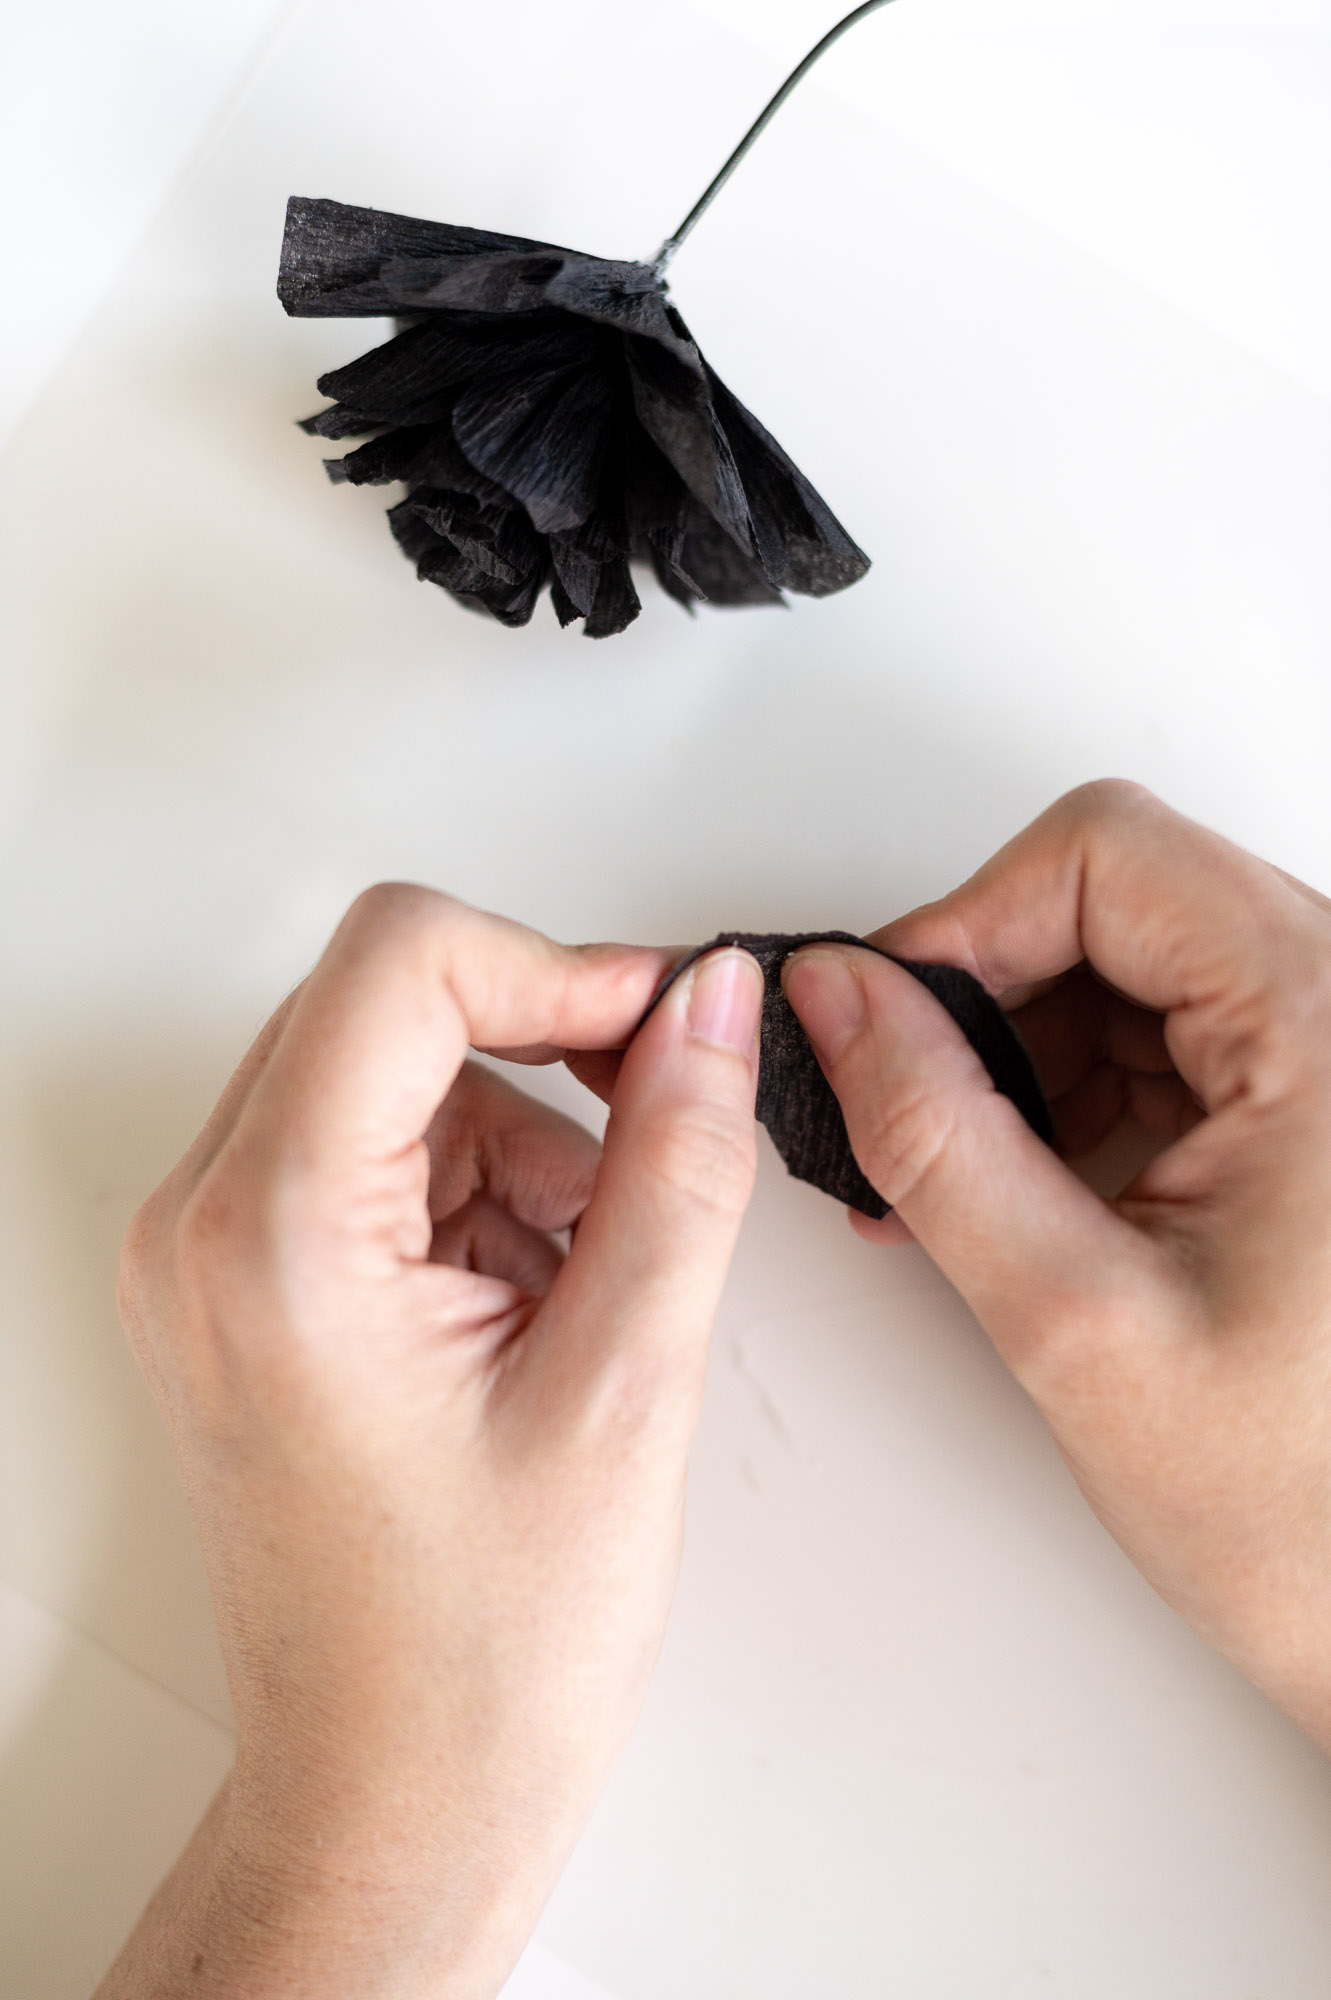
Step 8: Attach The Petals One At A Time
Once your petals are ready, attach them one at a time with hot glue around the base of your flower. Be sure the curved “cup” of each petal is facing downward.
Continue adding petals until your flower looks full and finished.

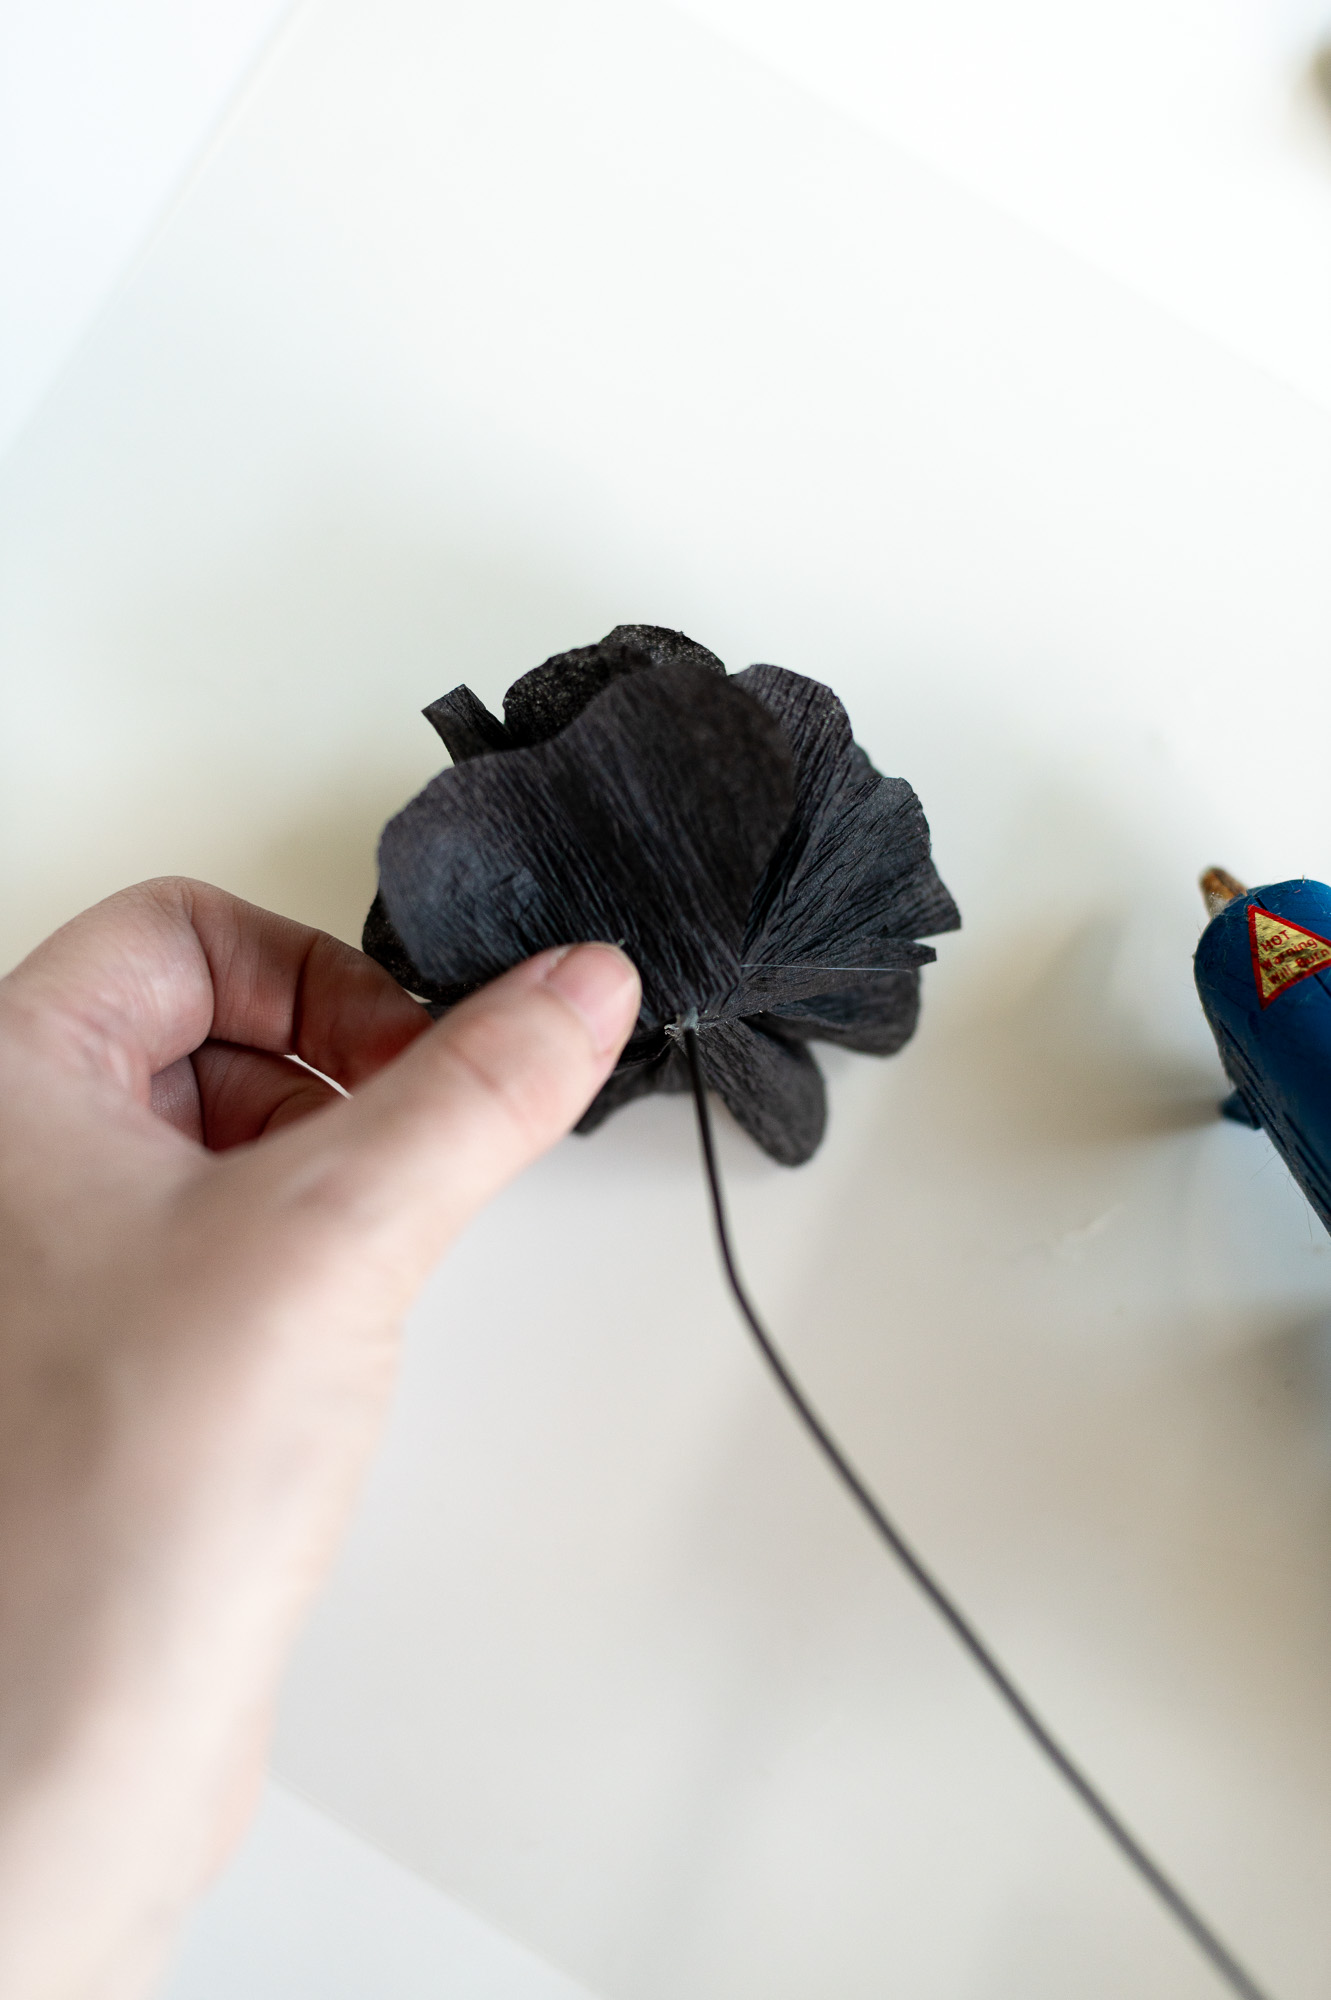
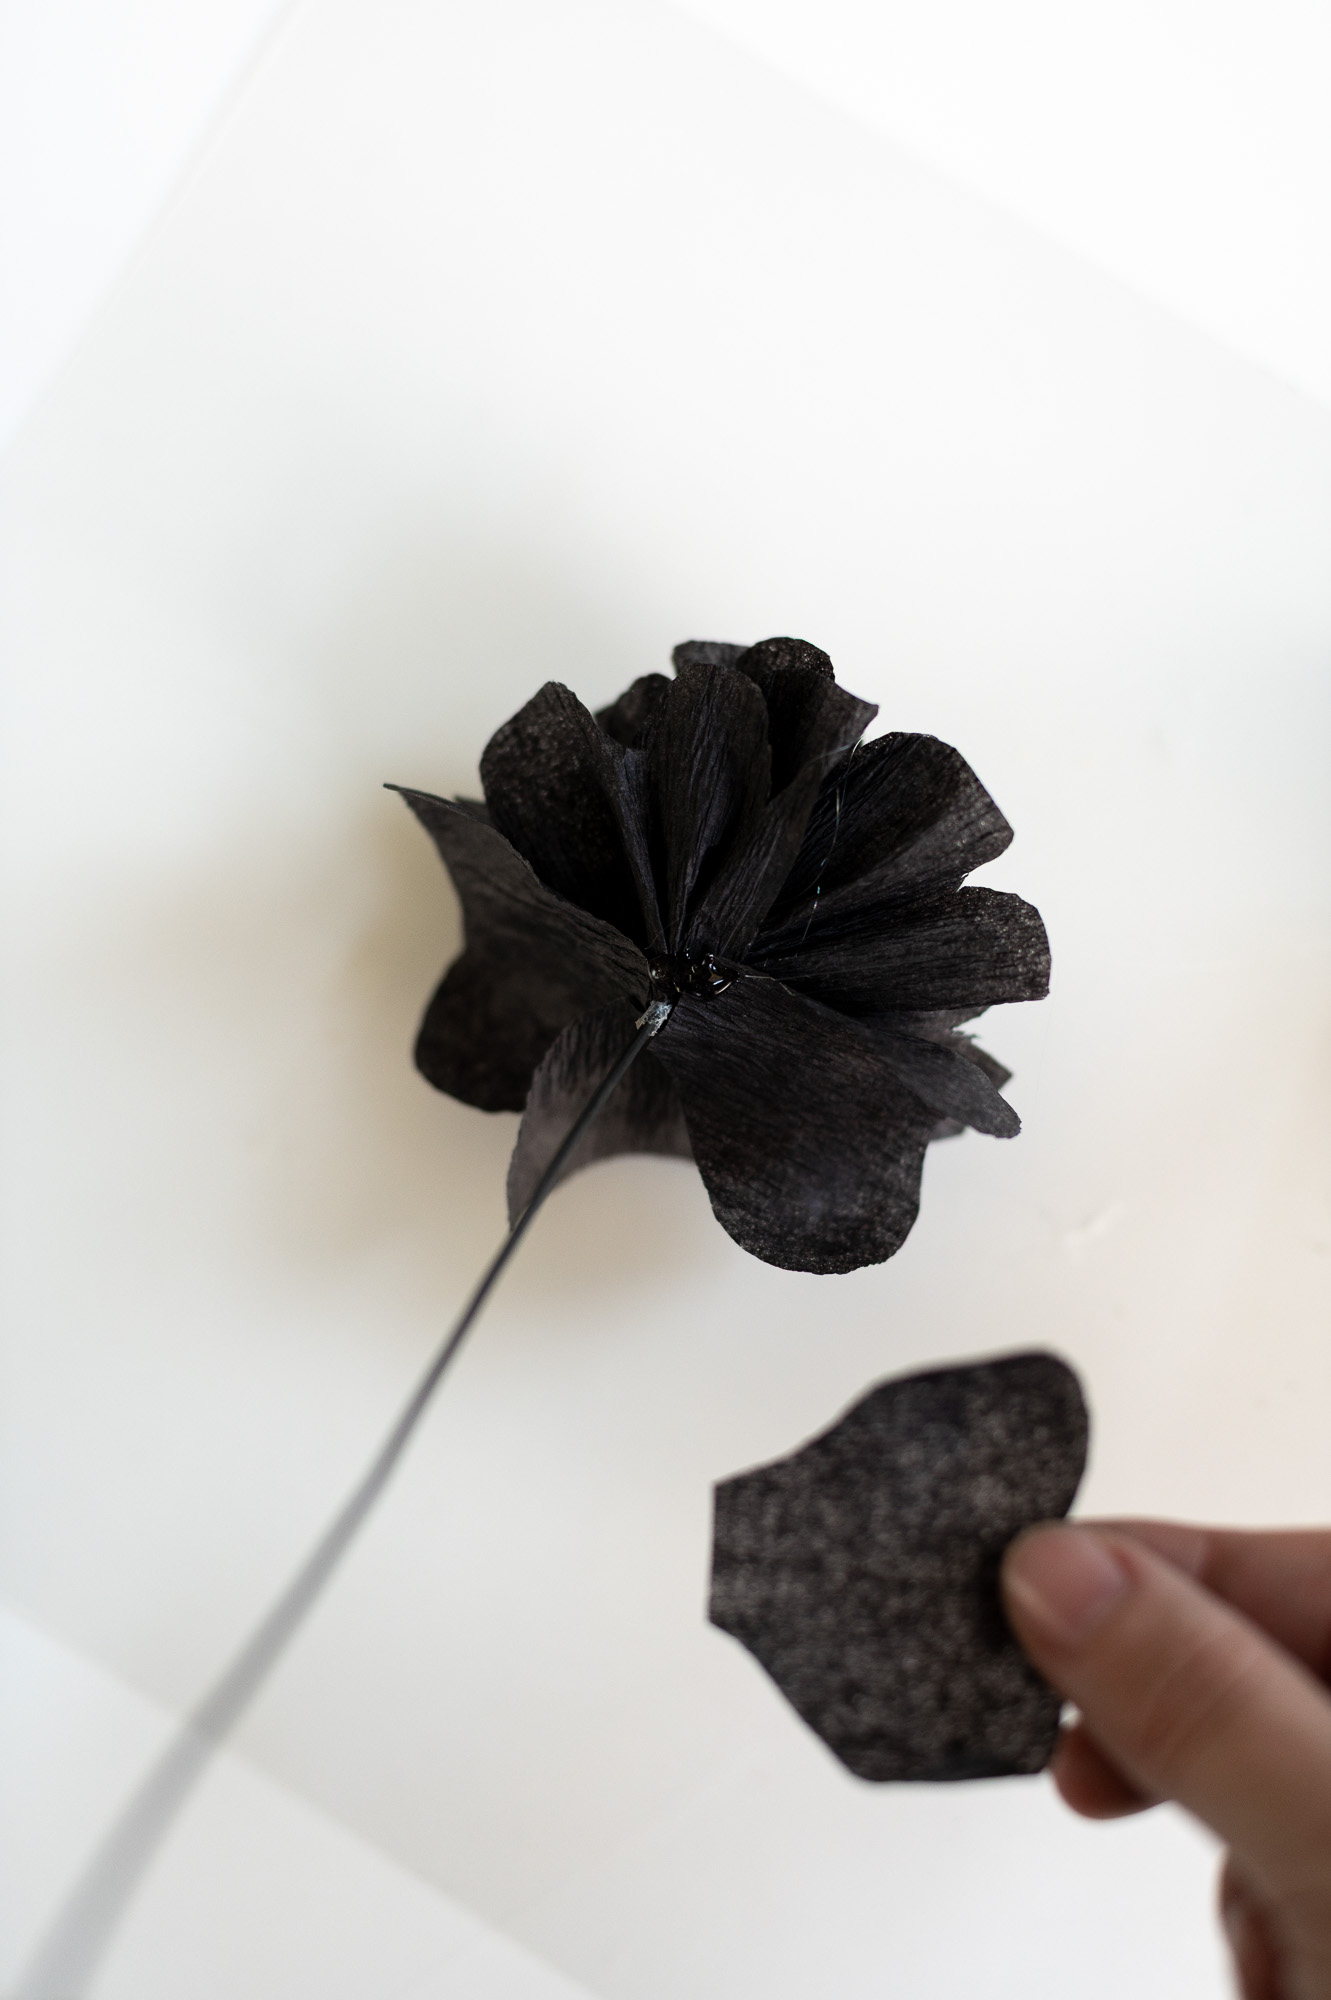

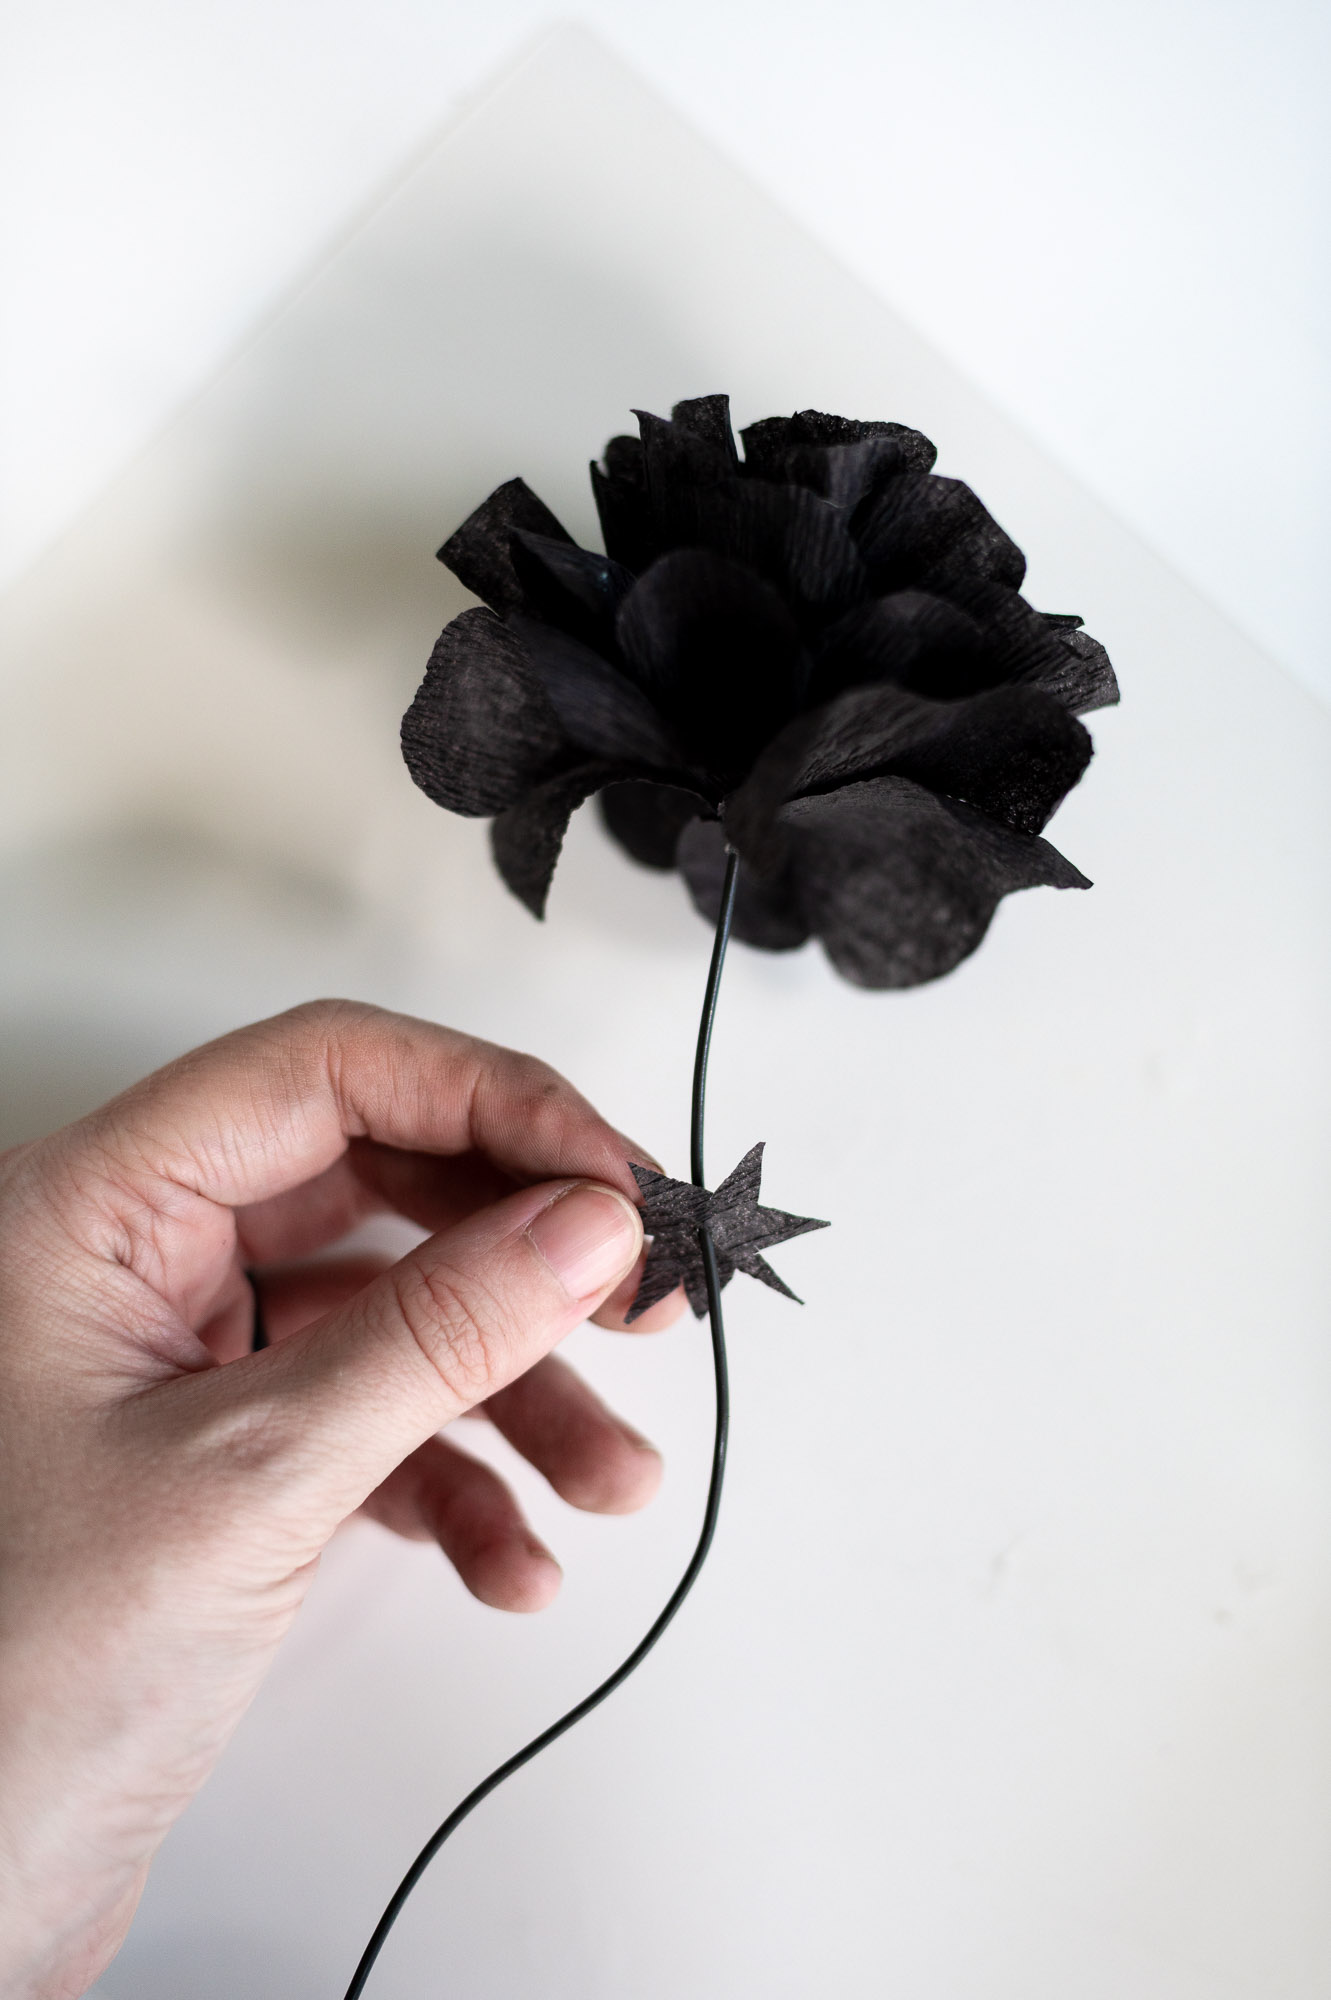
Step 9 (Optional): Cut a Compass Shape to Cover the Base
If the base of your flower looks a bit messy, you can clean it up by cutting a small star or compass shape from your streamer. Poke a hole in the center, thread it onto your wire stem, and glue it in place at the base.
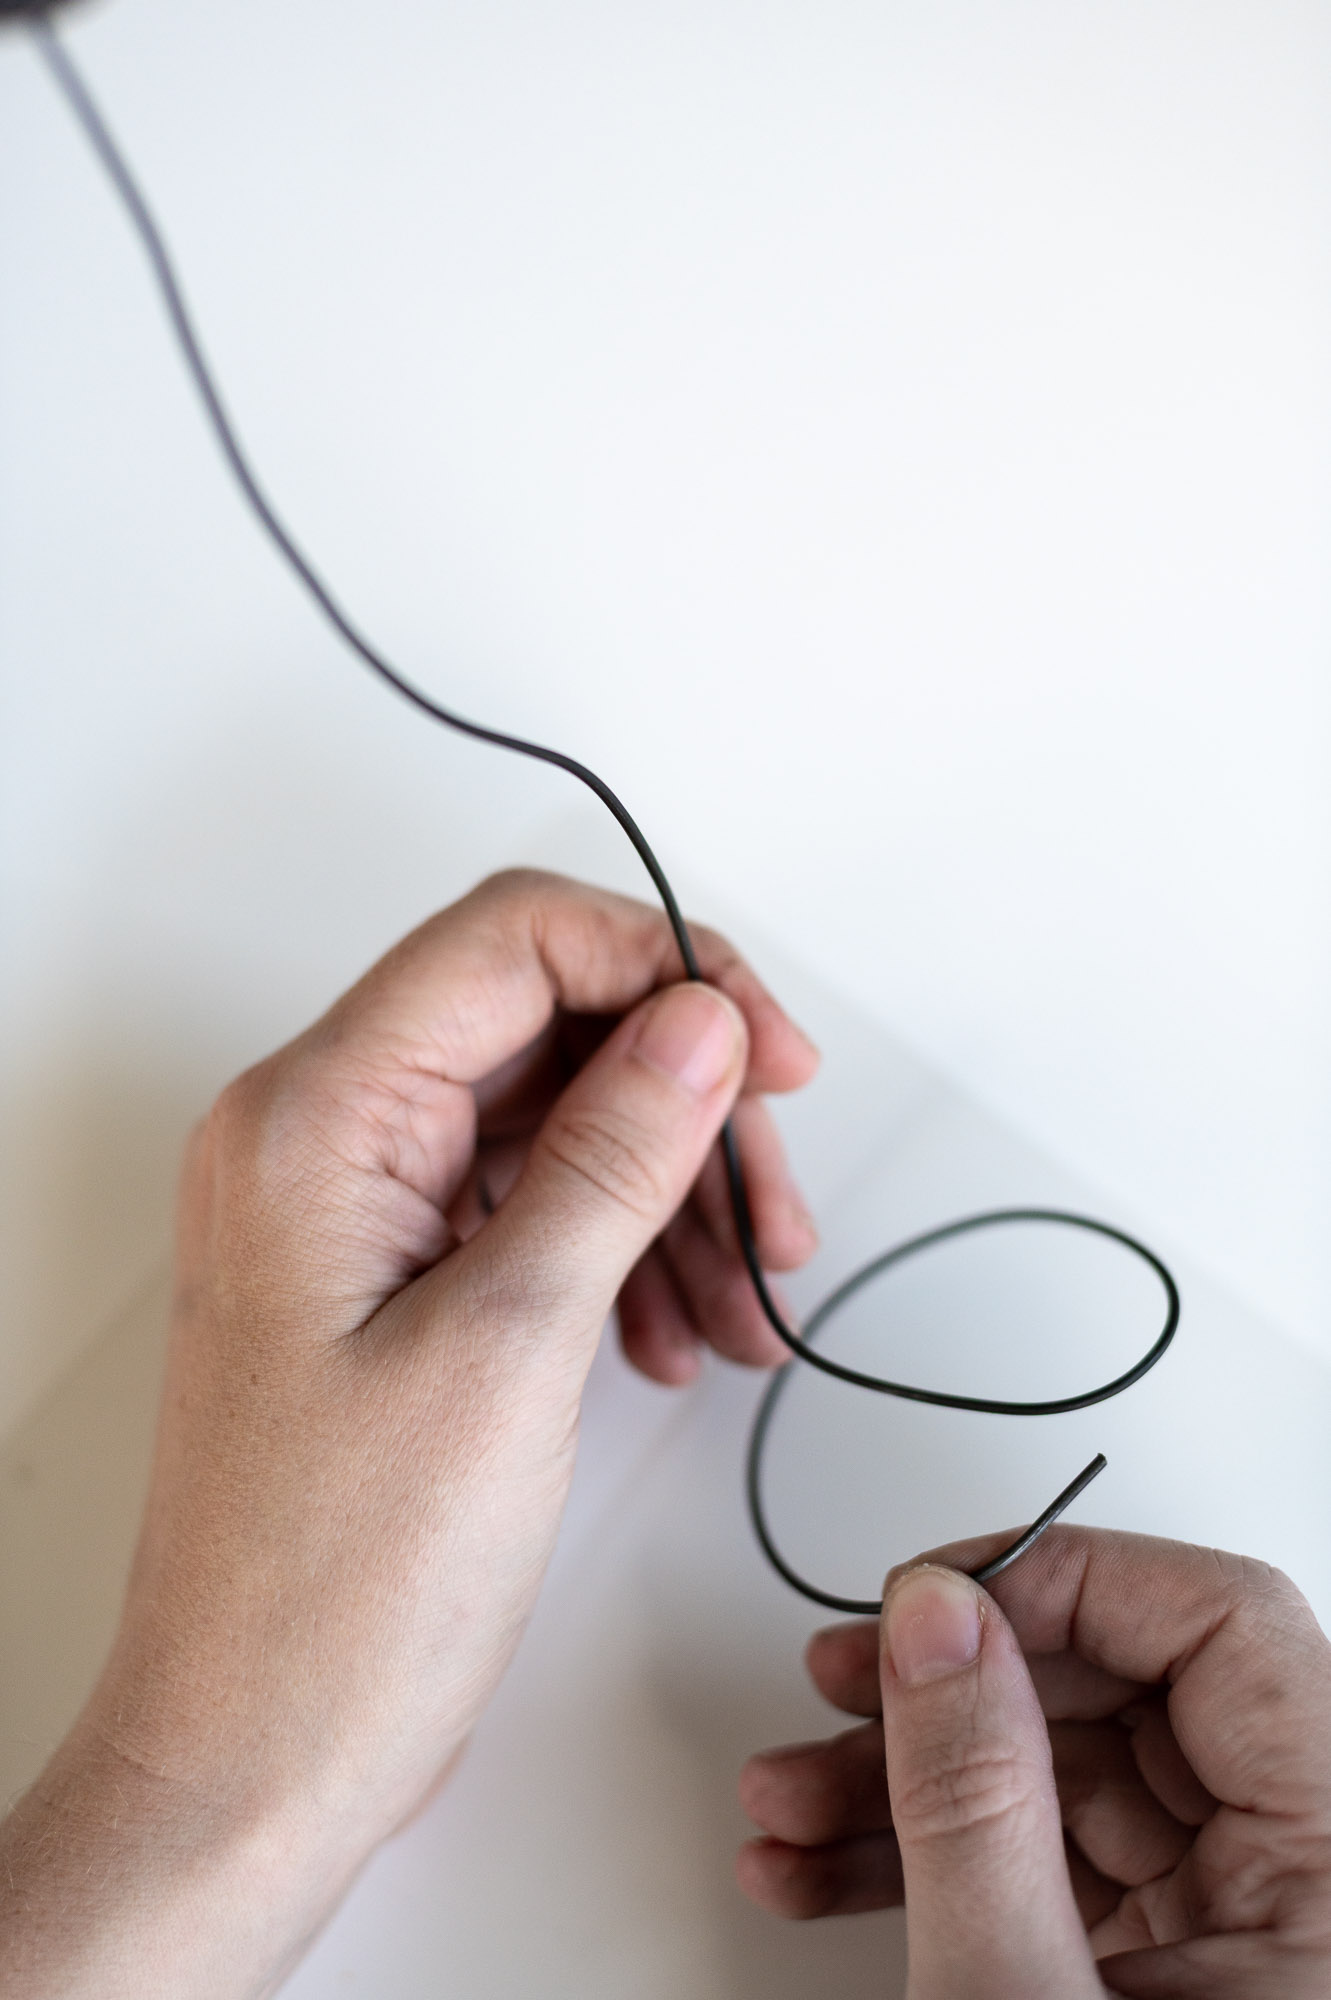
Step 10: Curl The End Of The Wire To Make A Base
Once your flower is finished, curl the end of the wire into a small circle to form a base. This helps it stand on its own! (You may need to adjust the curl a bit to get the flower to balance properly.)
I also like to give the stem itself a little shaping at this point to make it look more organic.
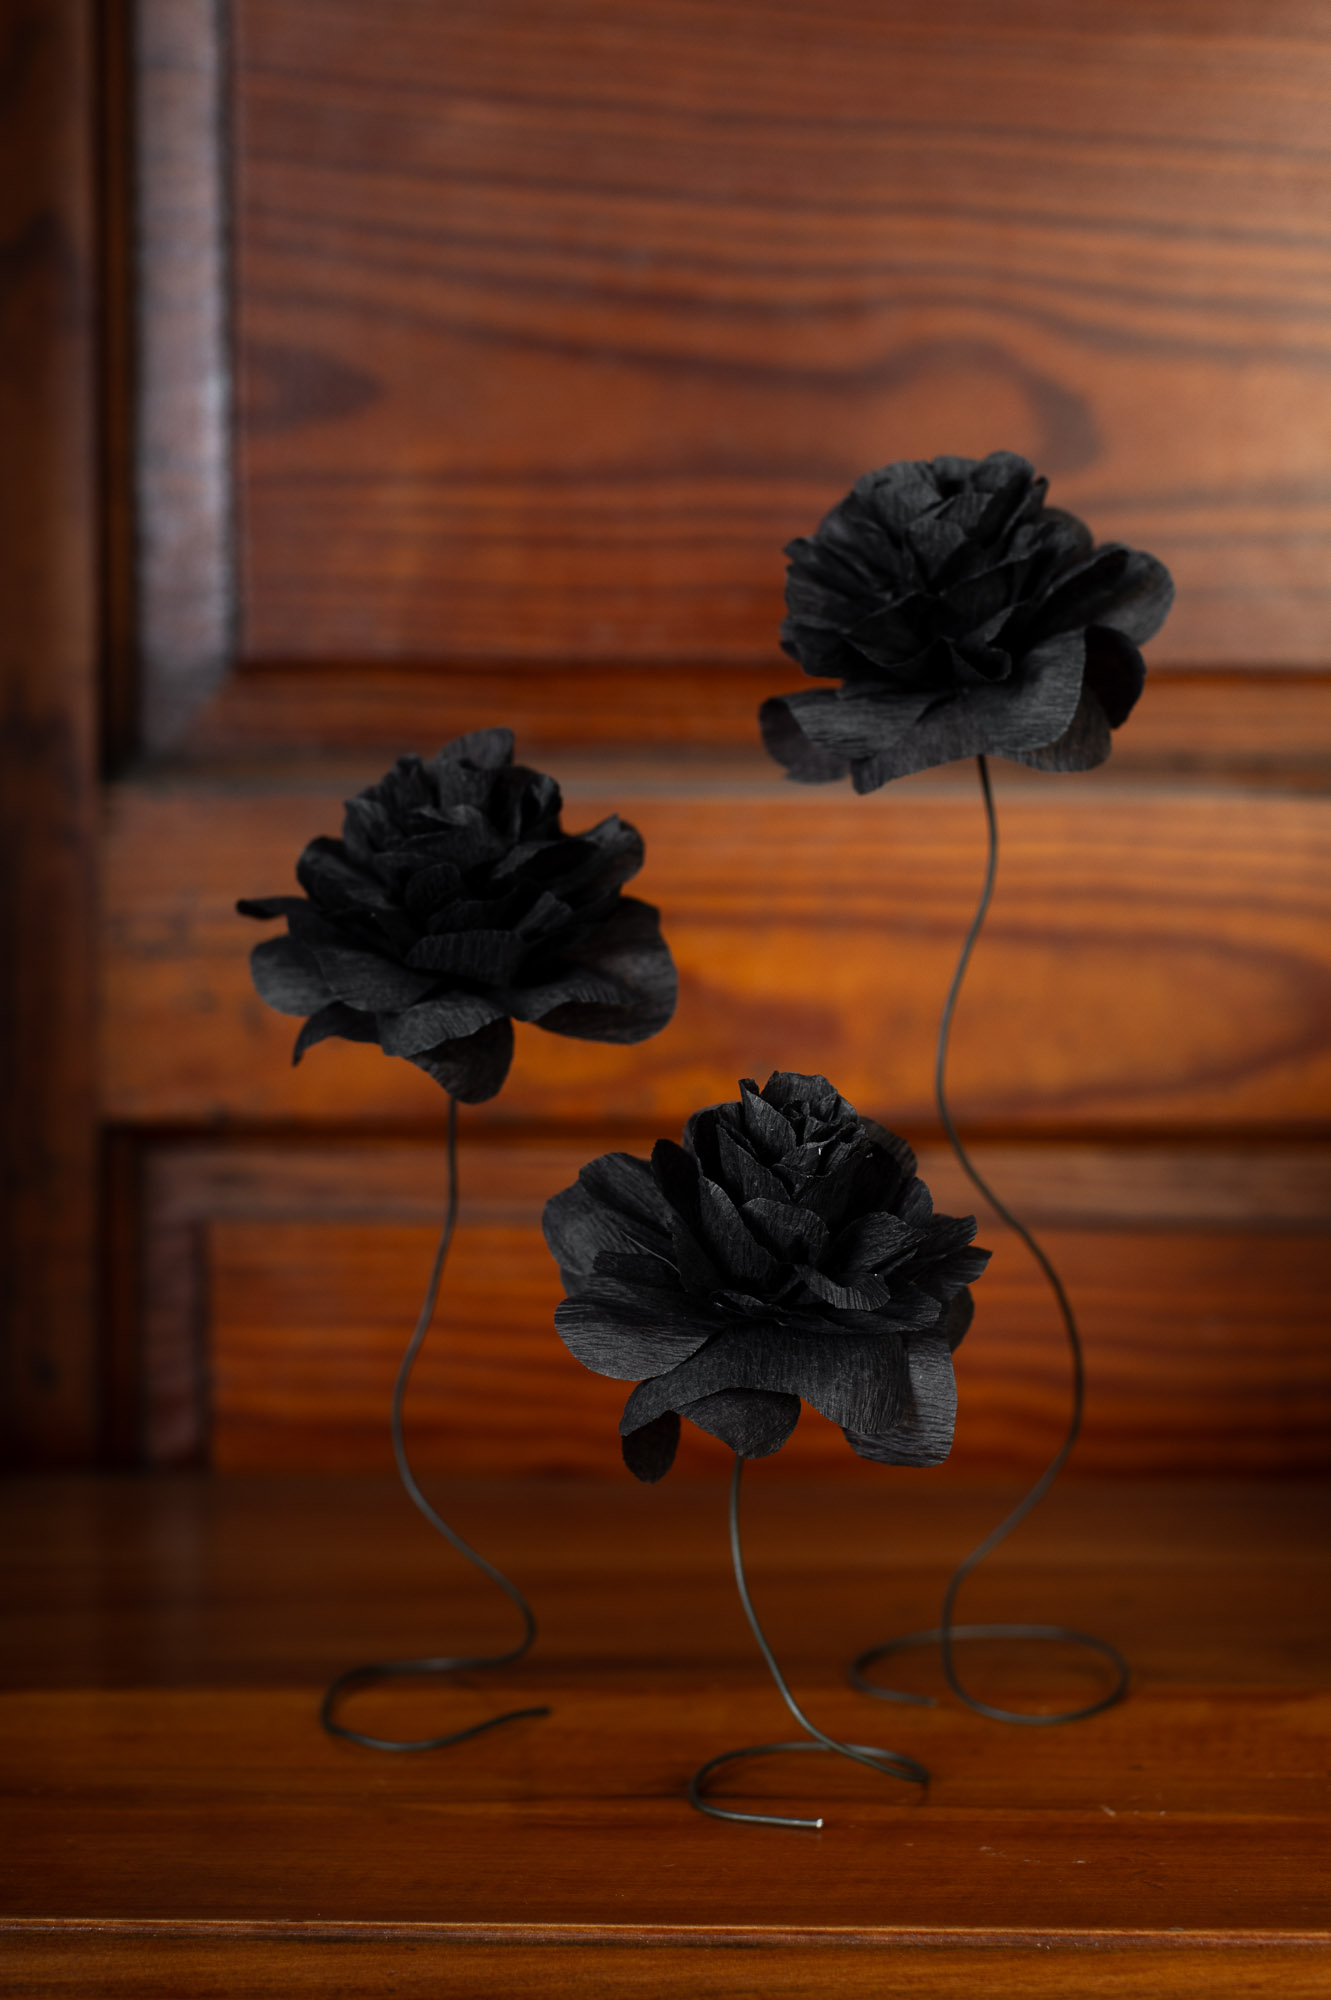
Style Your New Elegant Halloween Decor Paper Flowers & Enjoy!
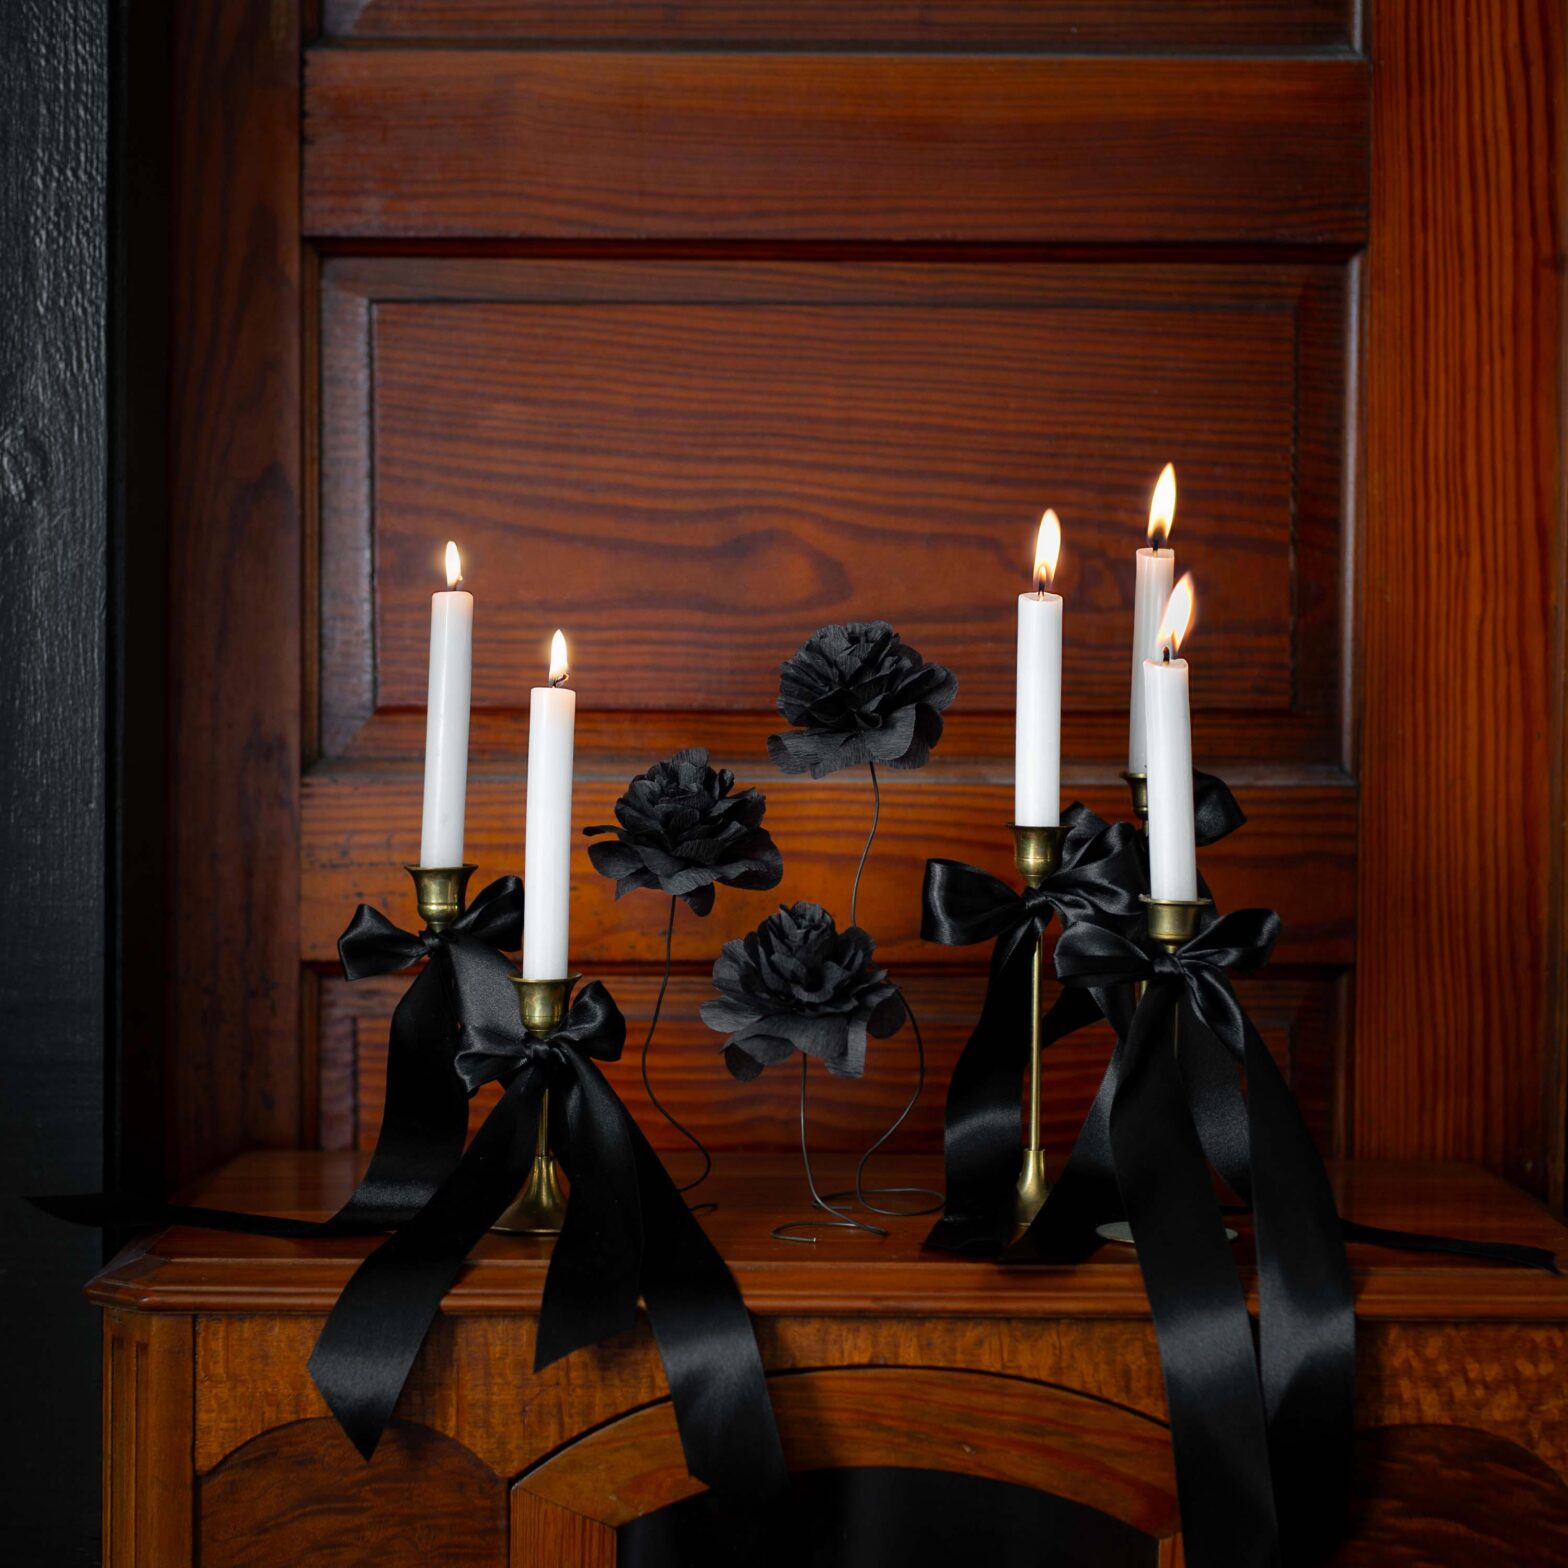
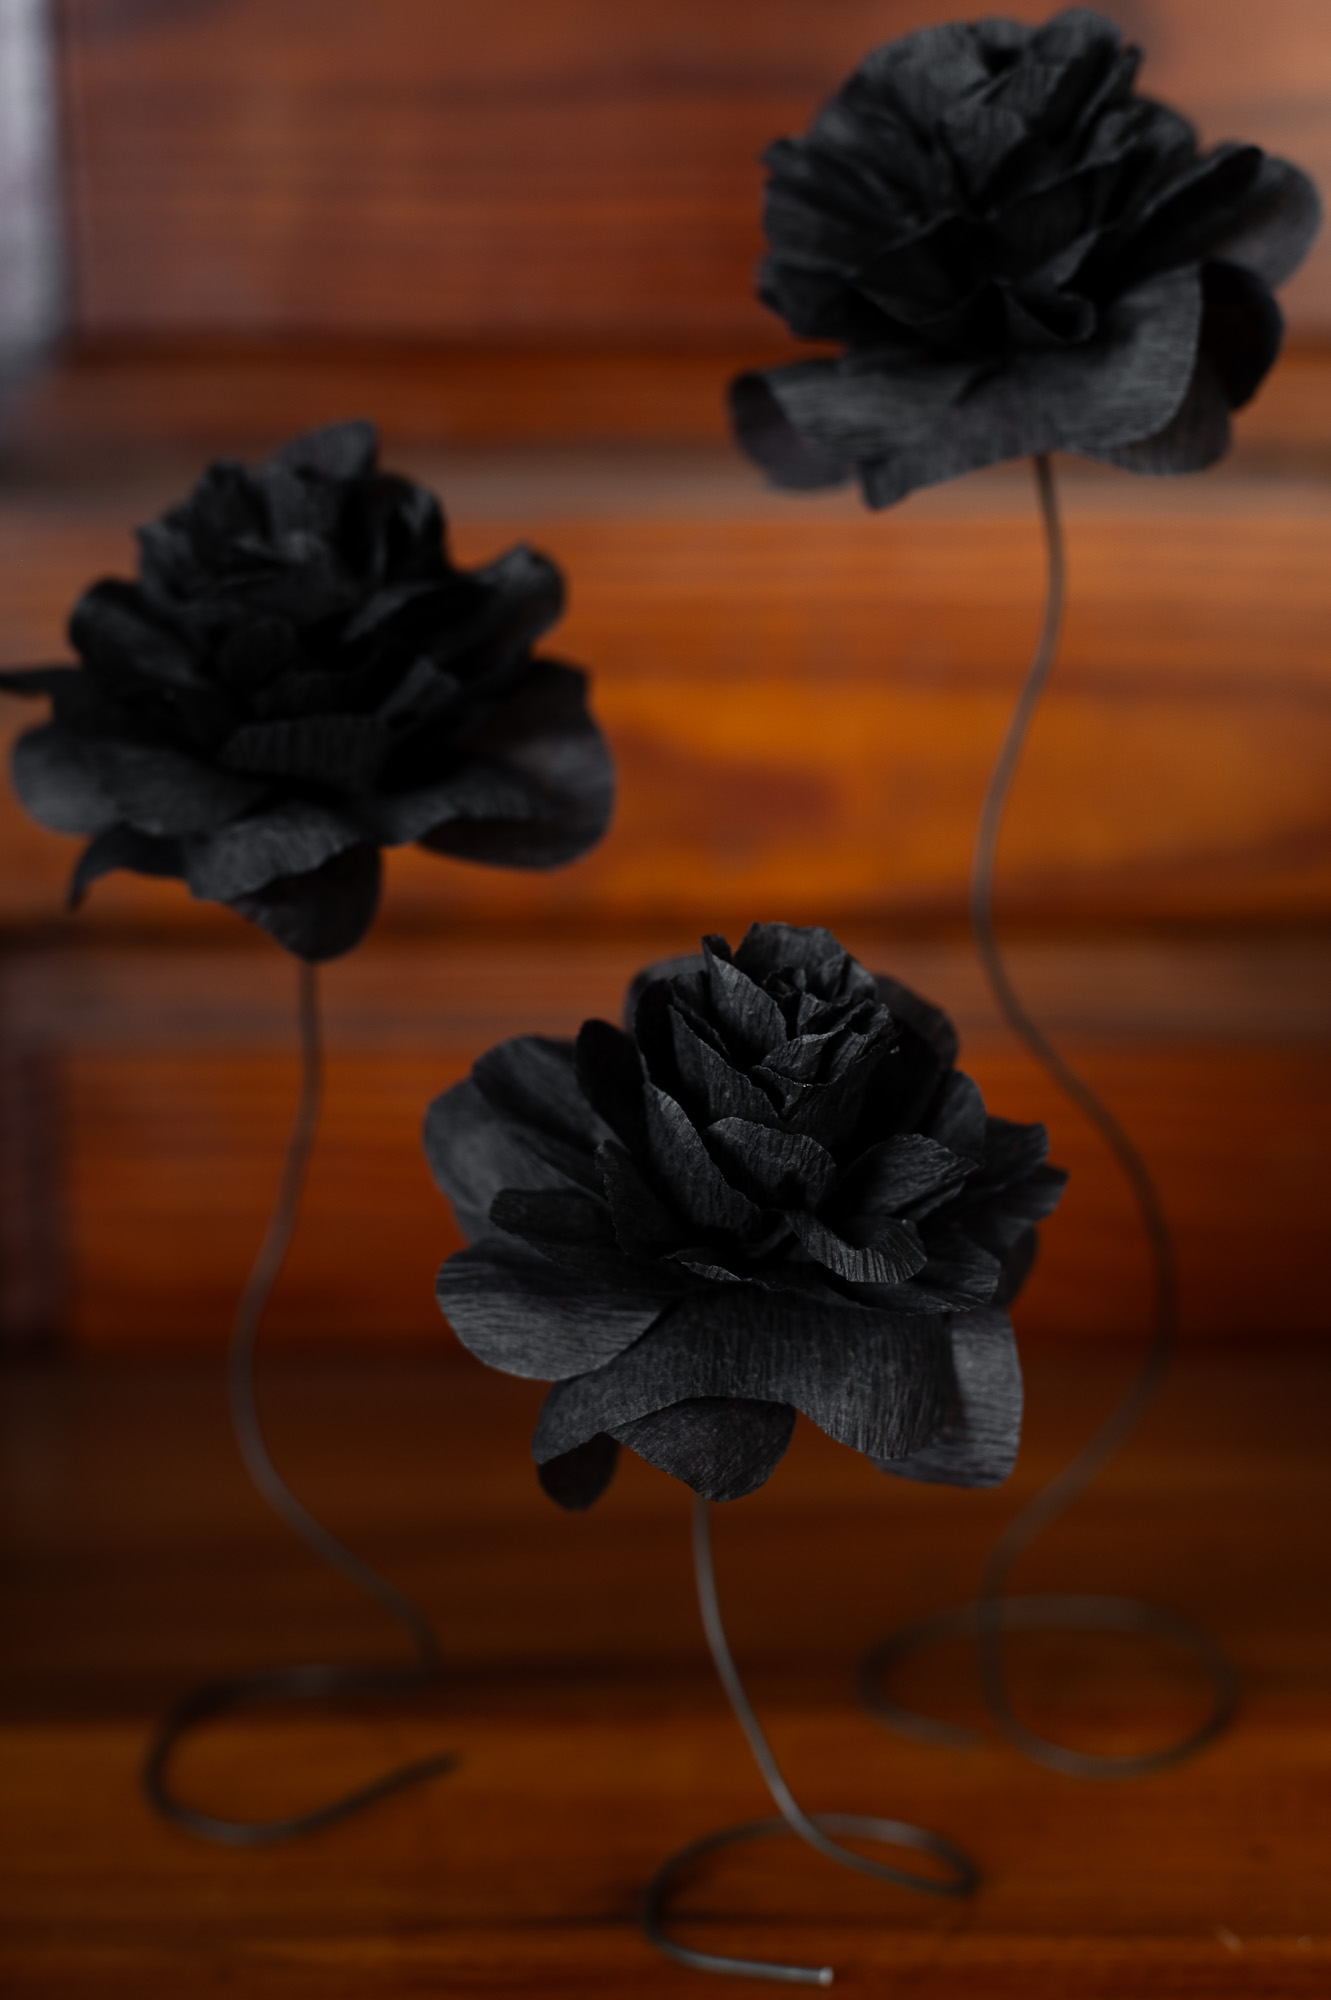
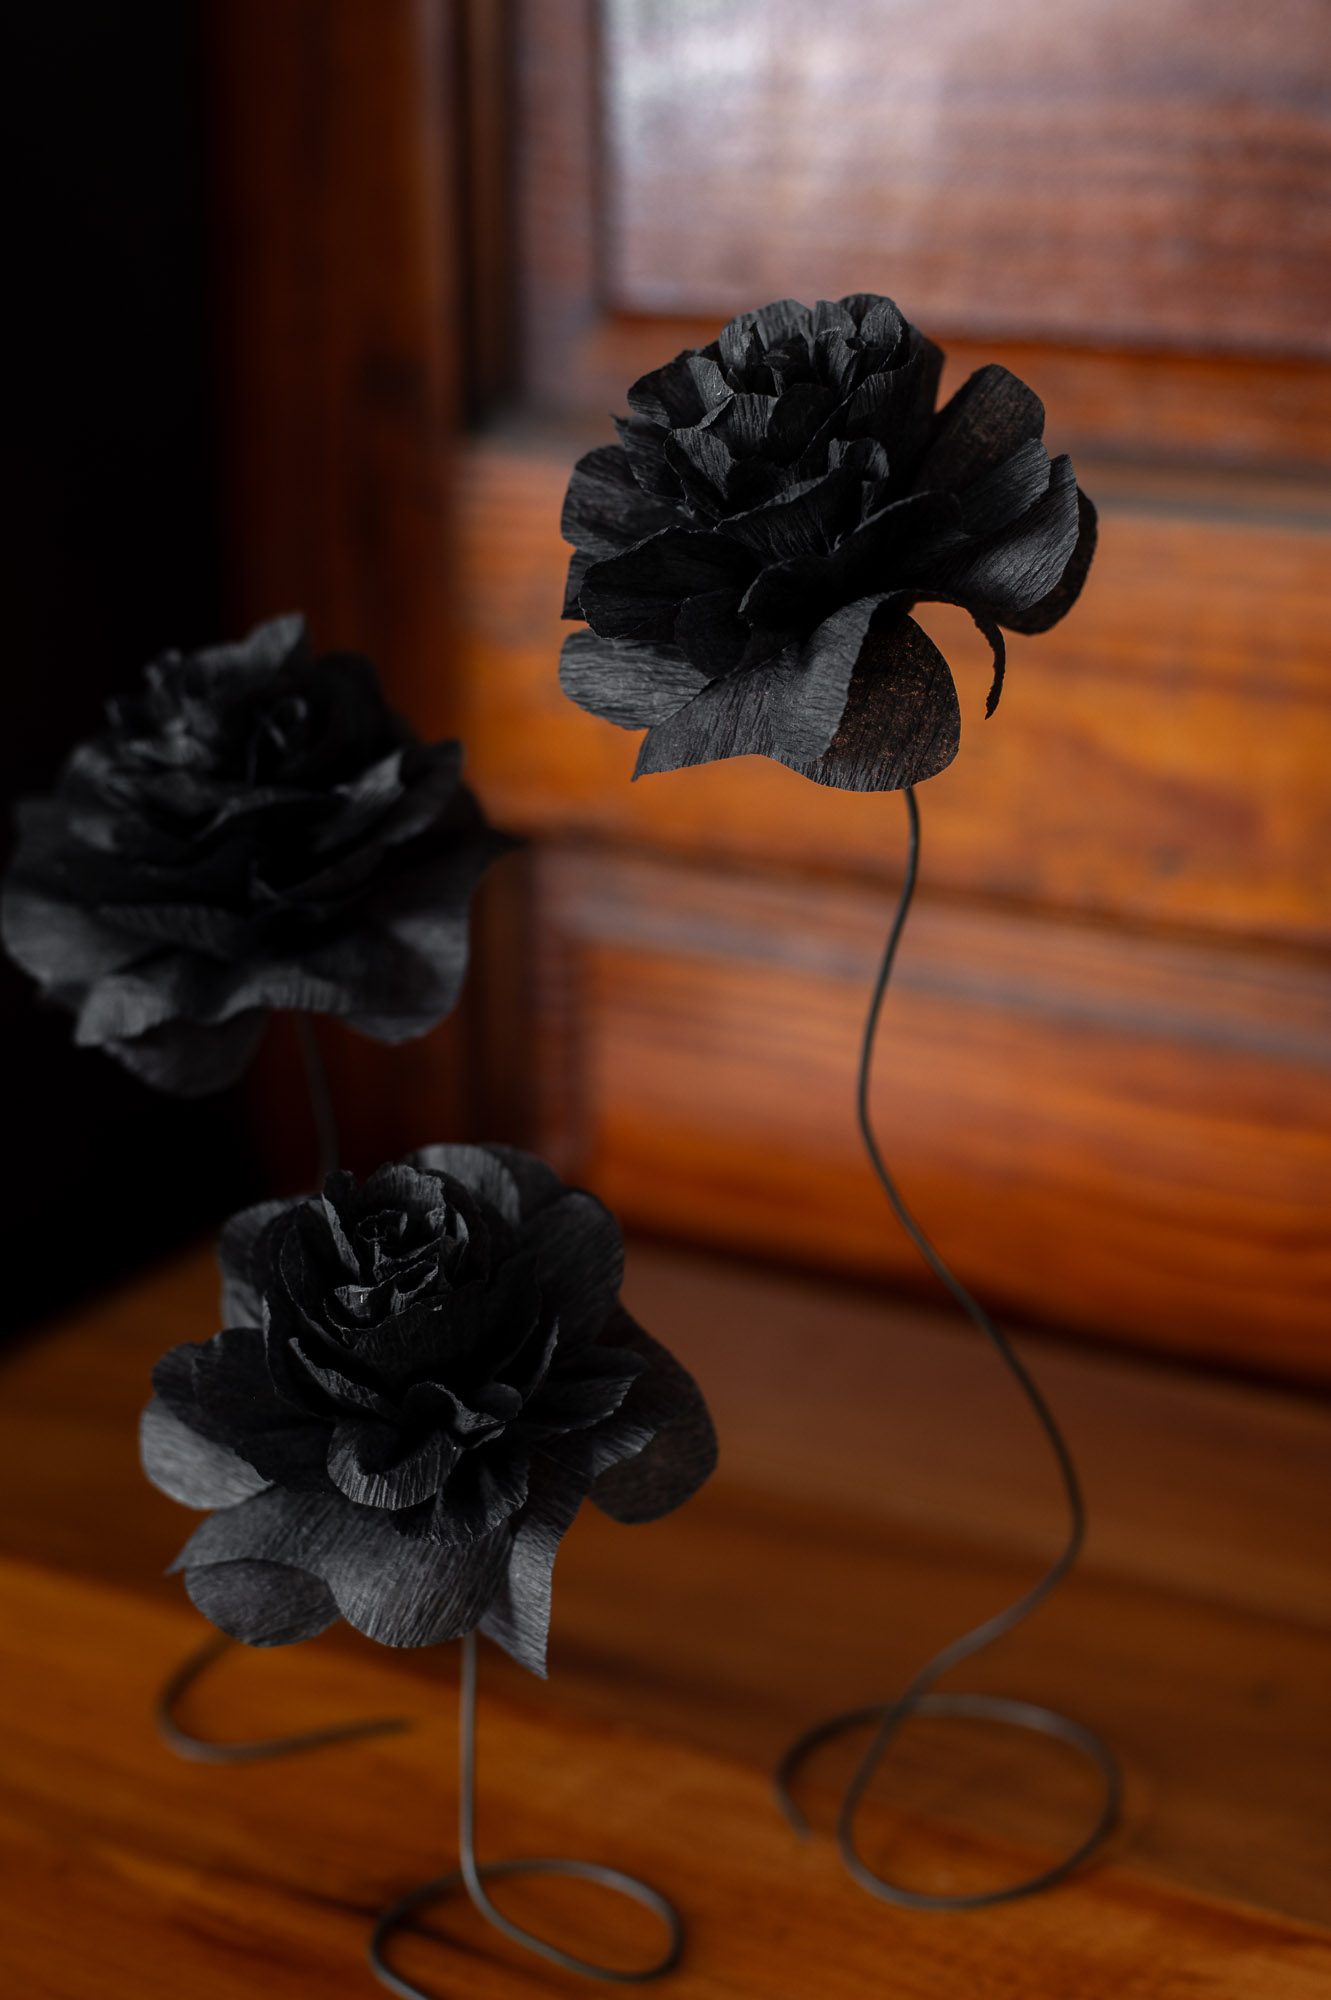
You can use these black paper rose Halloween flowers in so many different ways, but I found that a little grouping of them at various heights next to a collection of brass candlesticks tied with black satin ribbon made the perfect elegant Halloween decor!
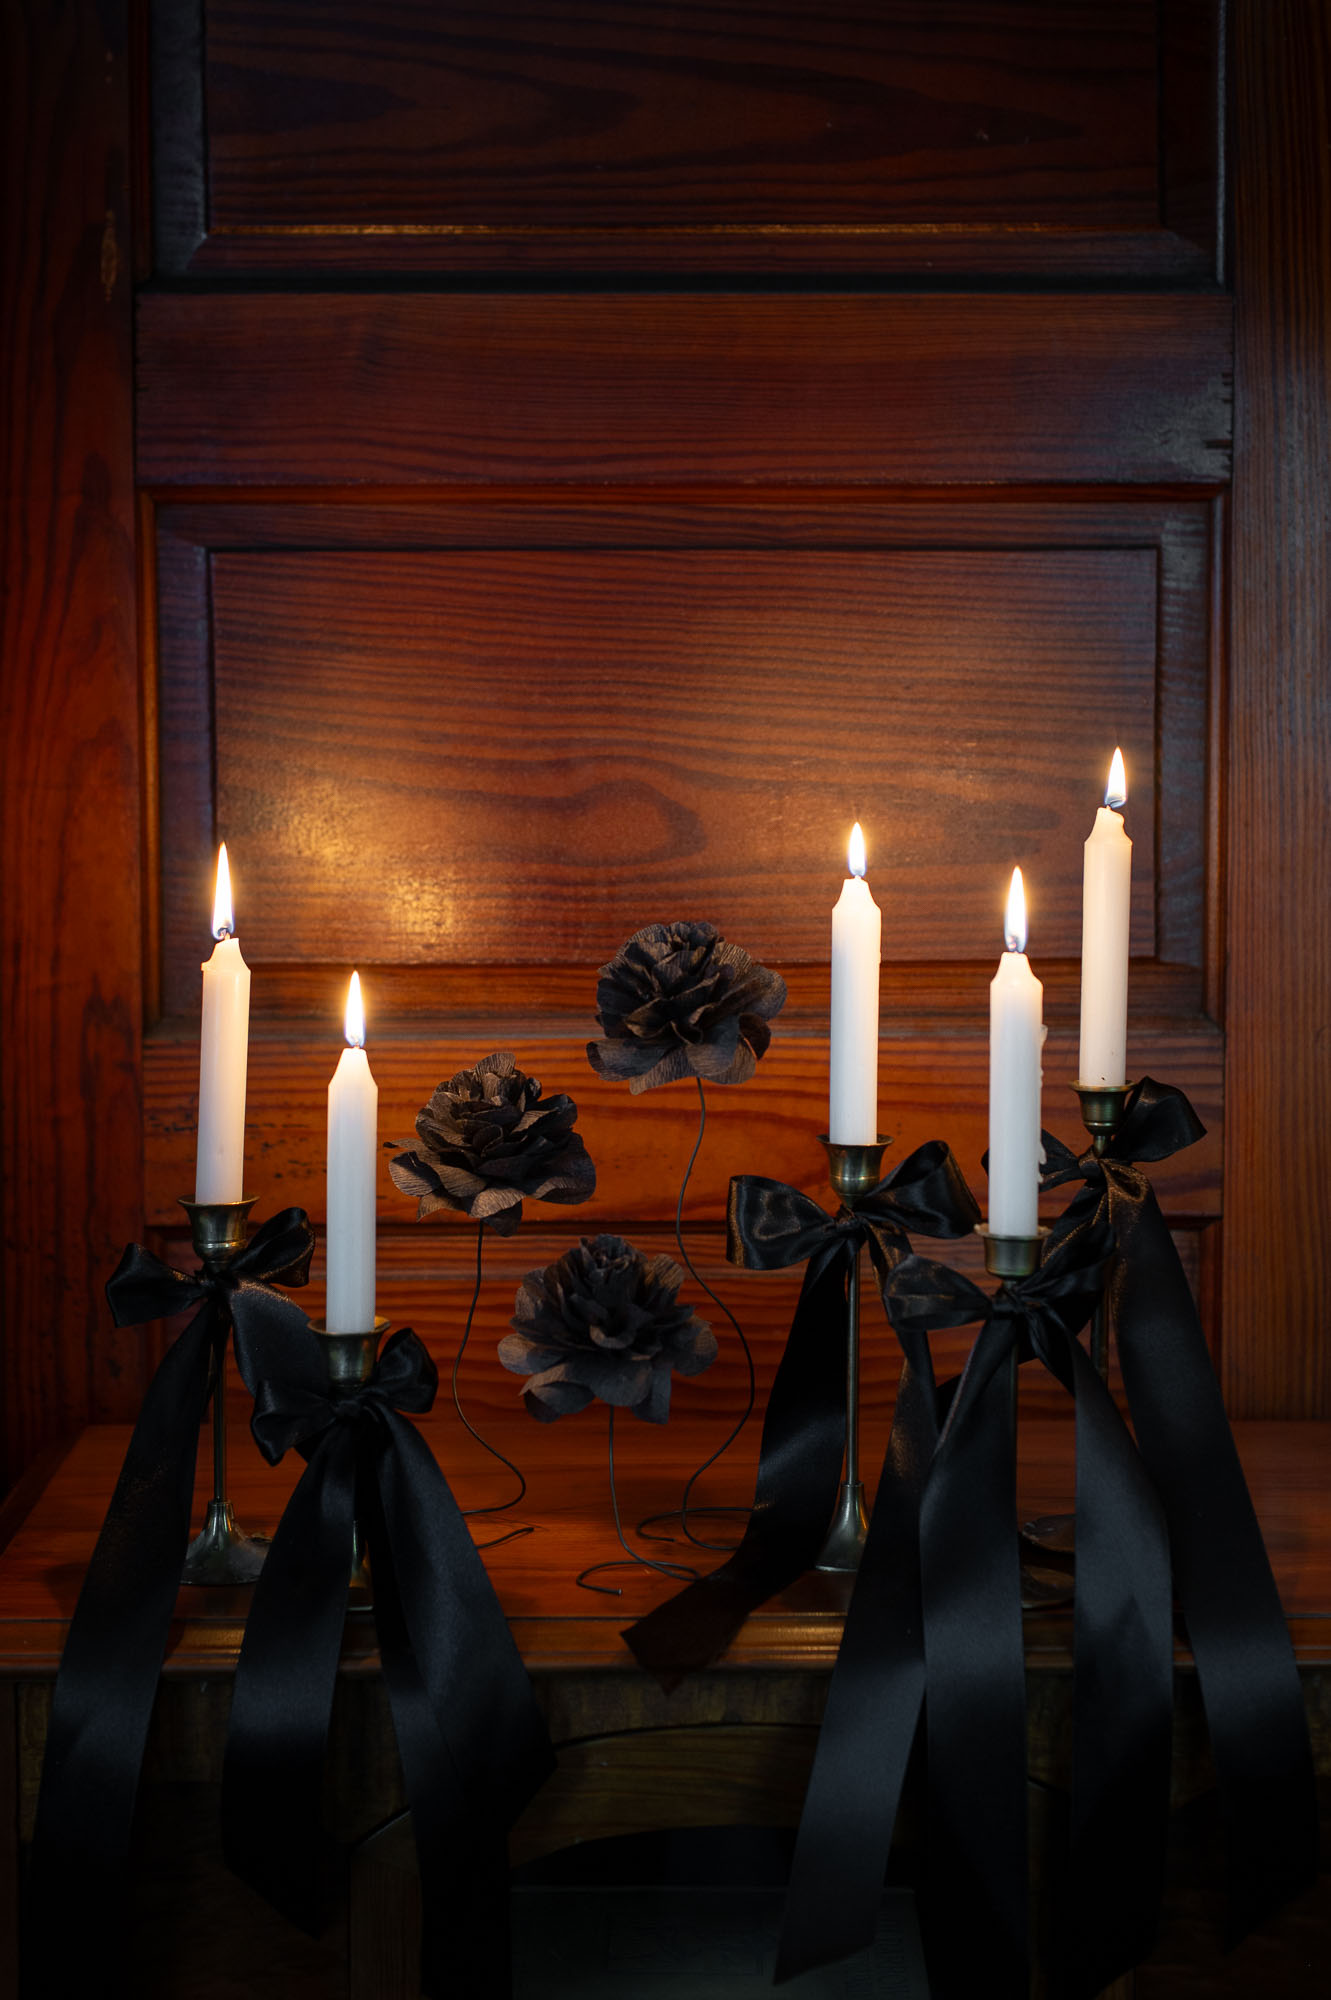
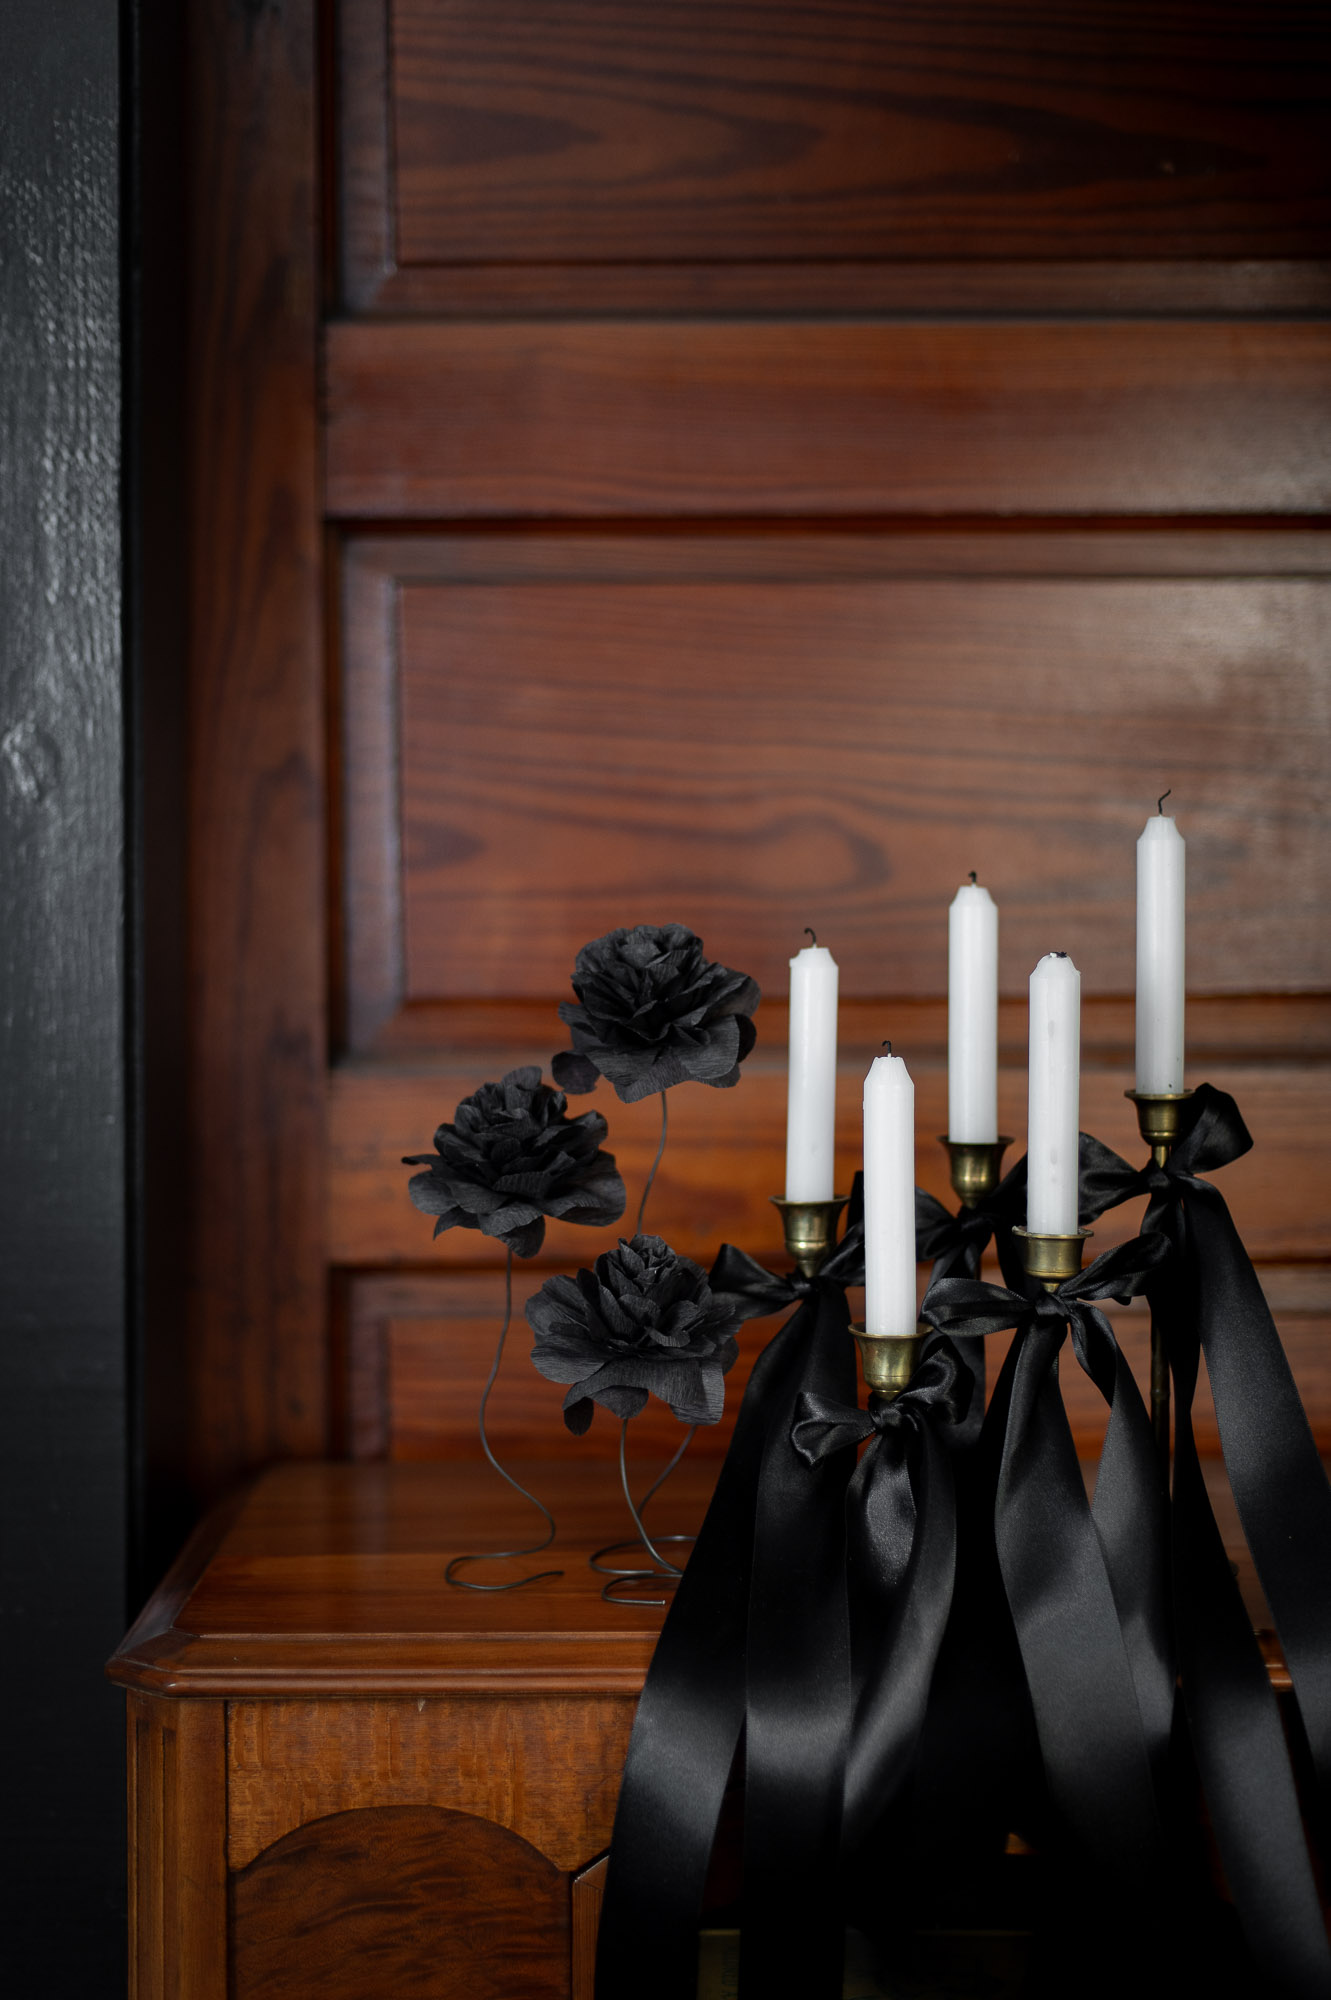
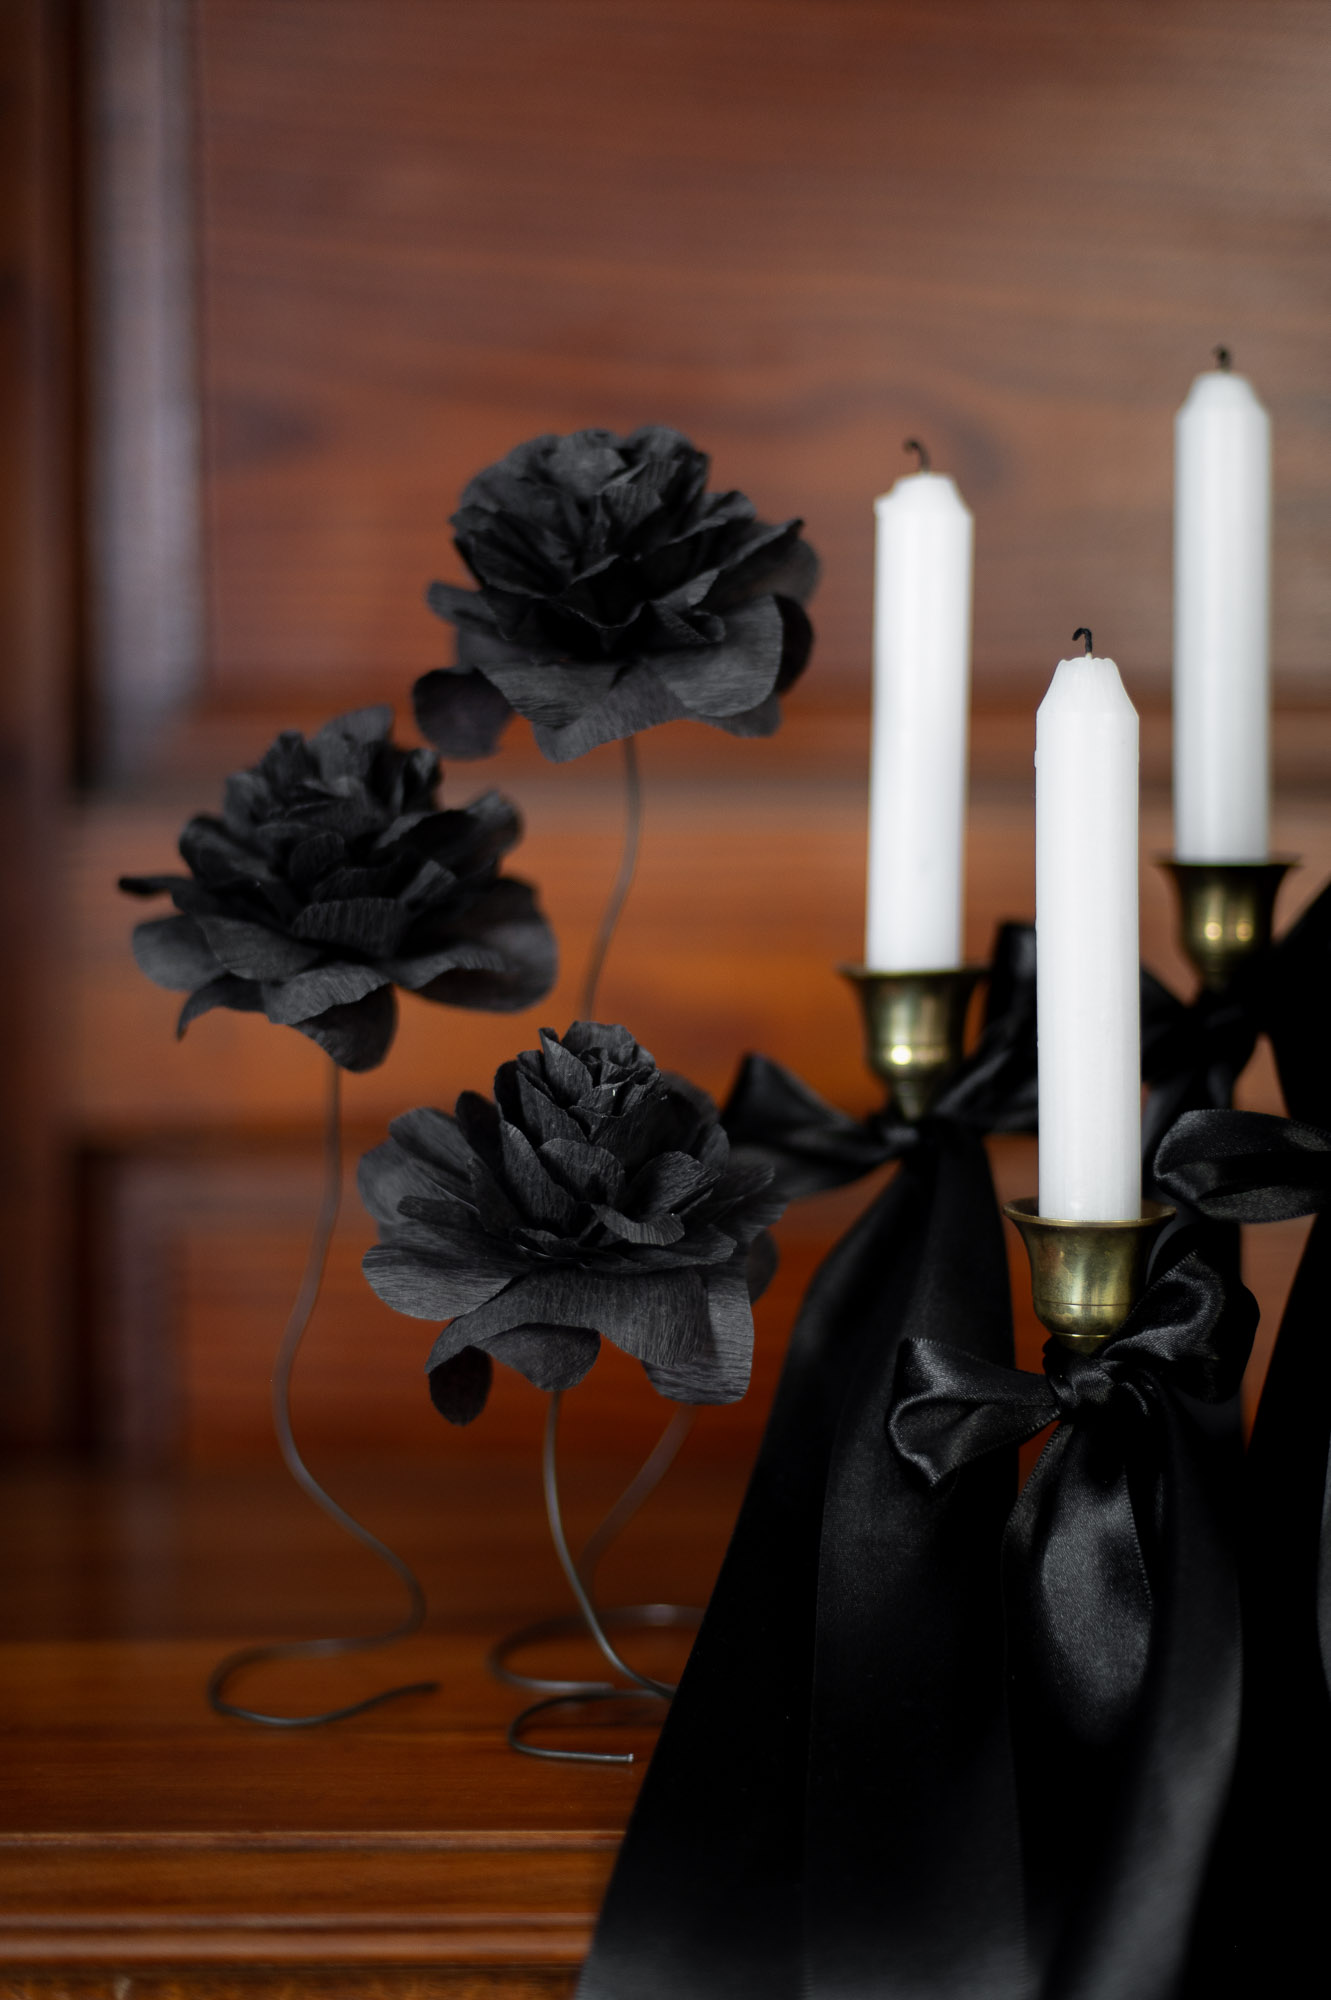
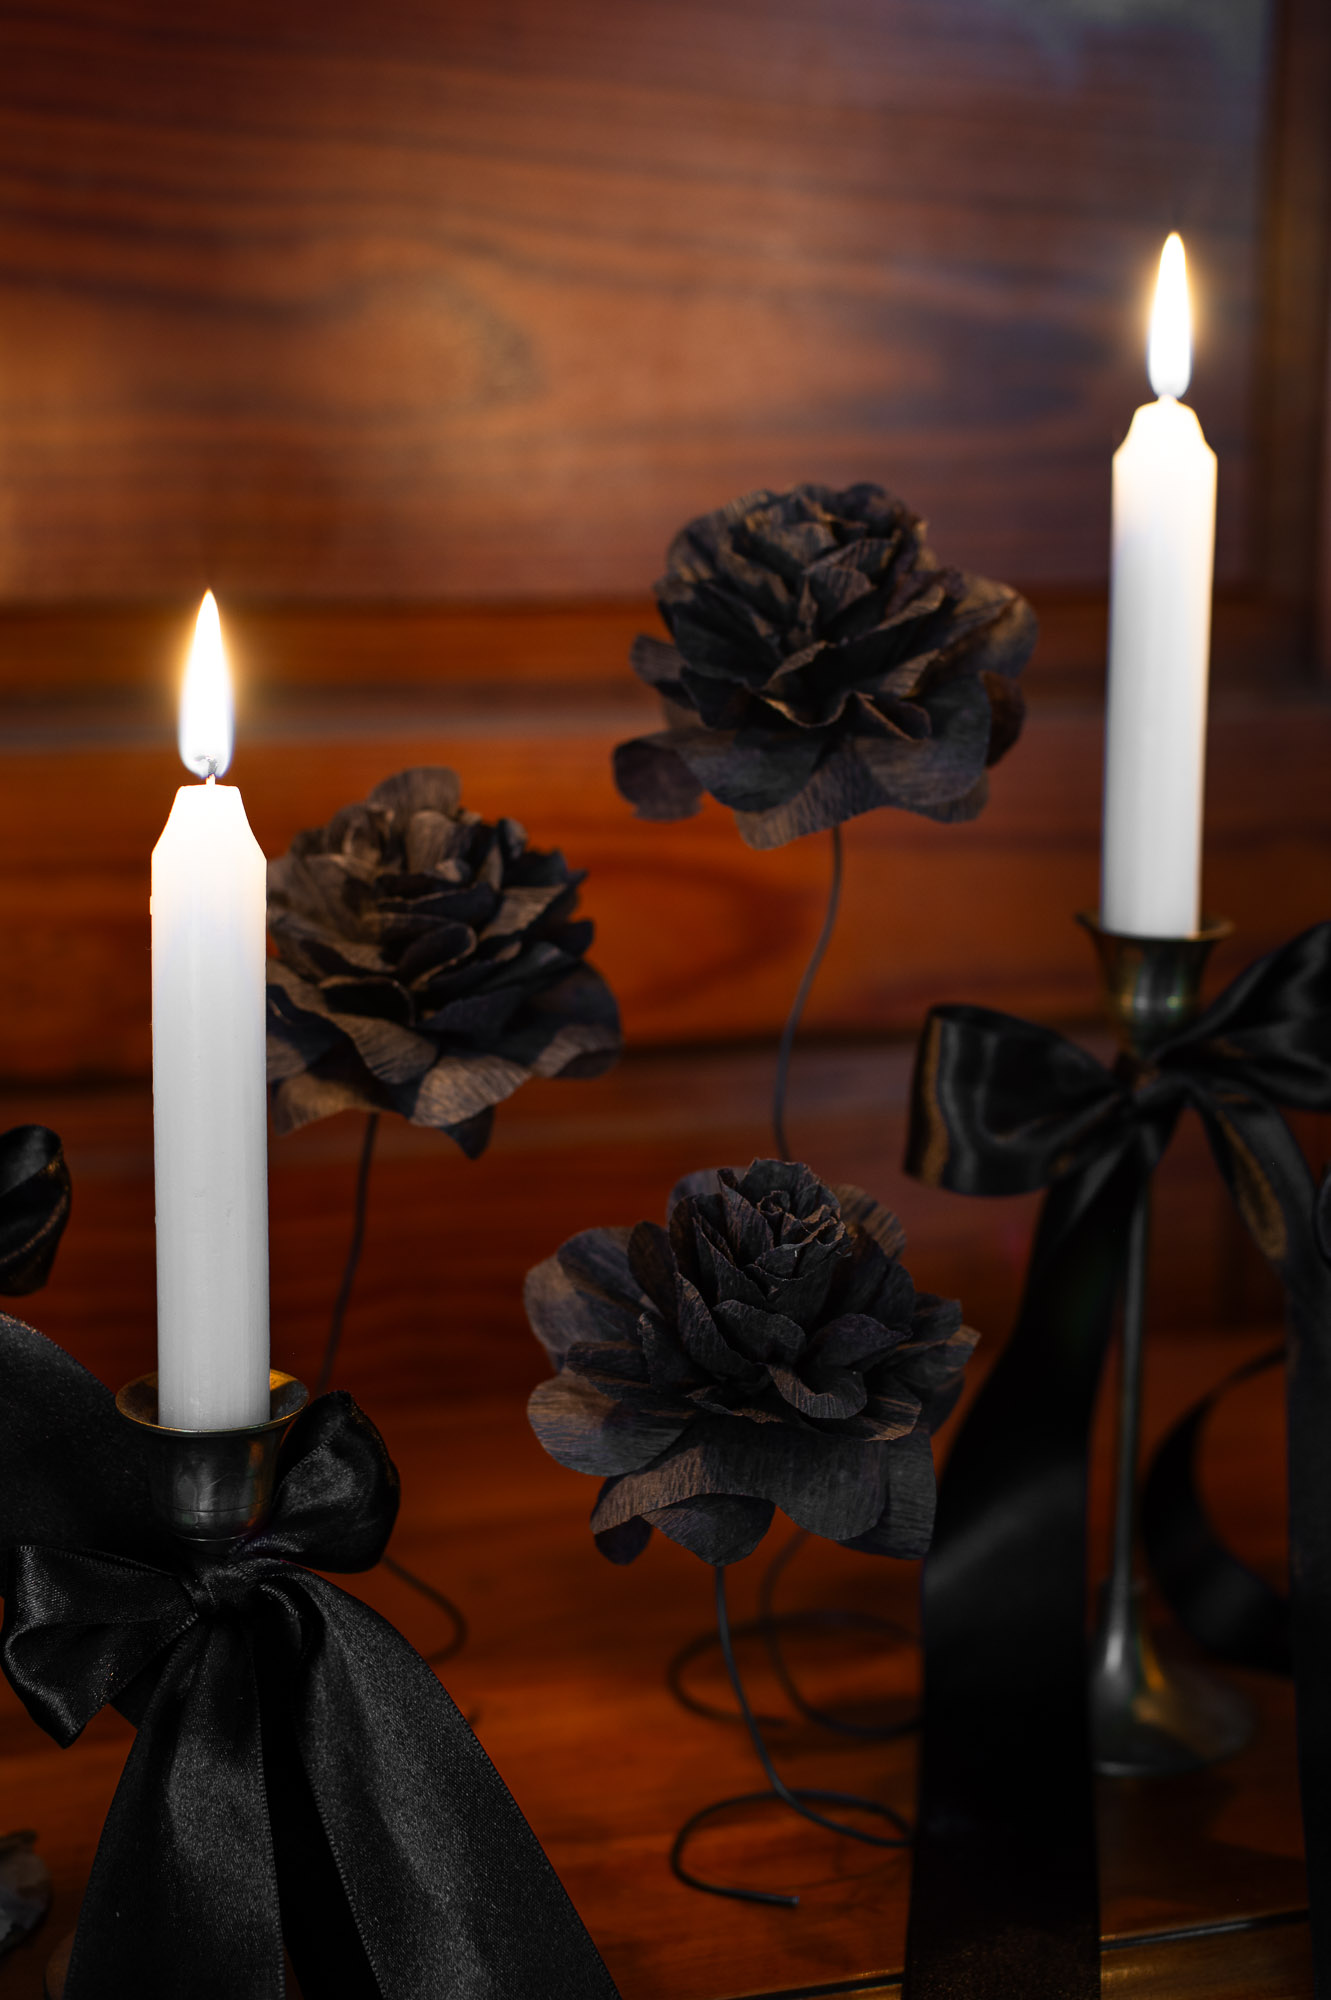
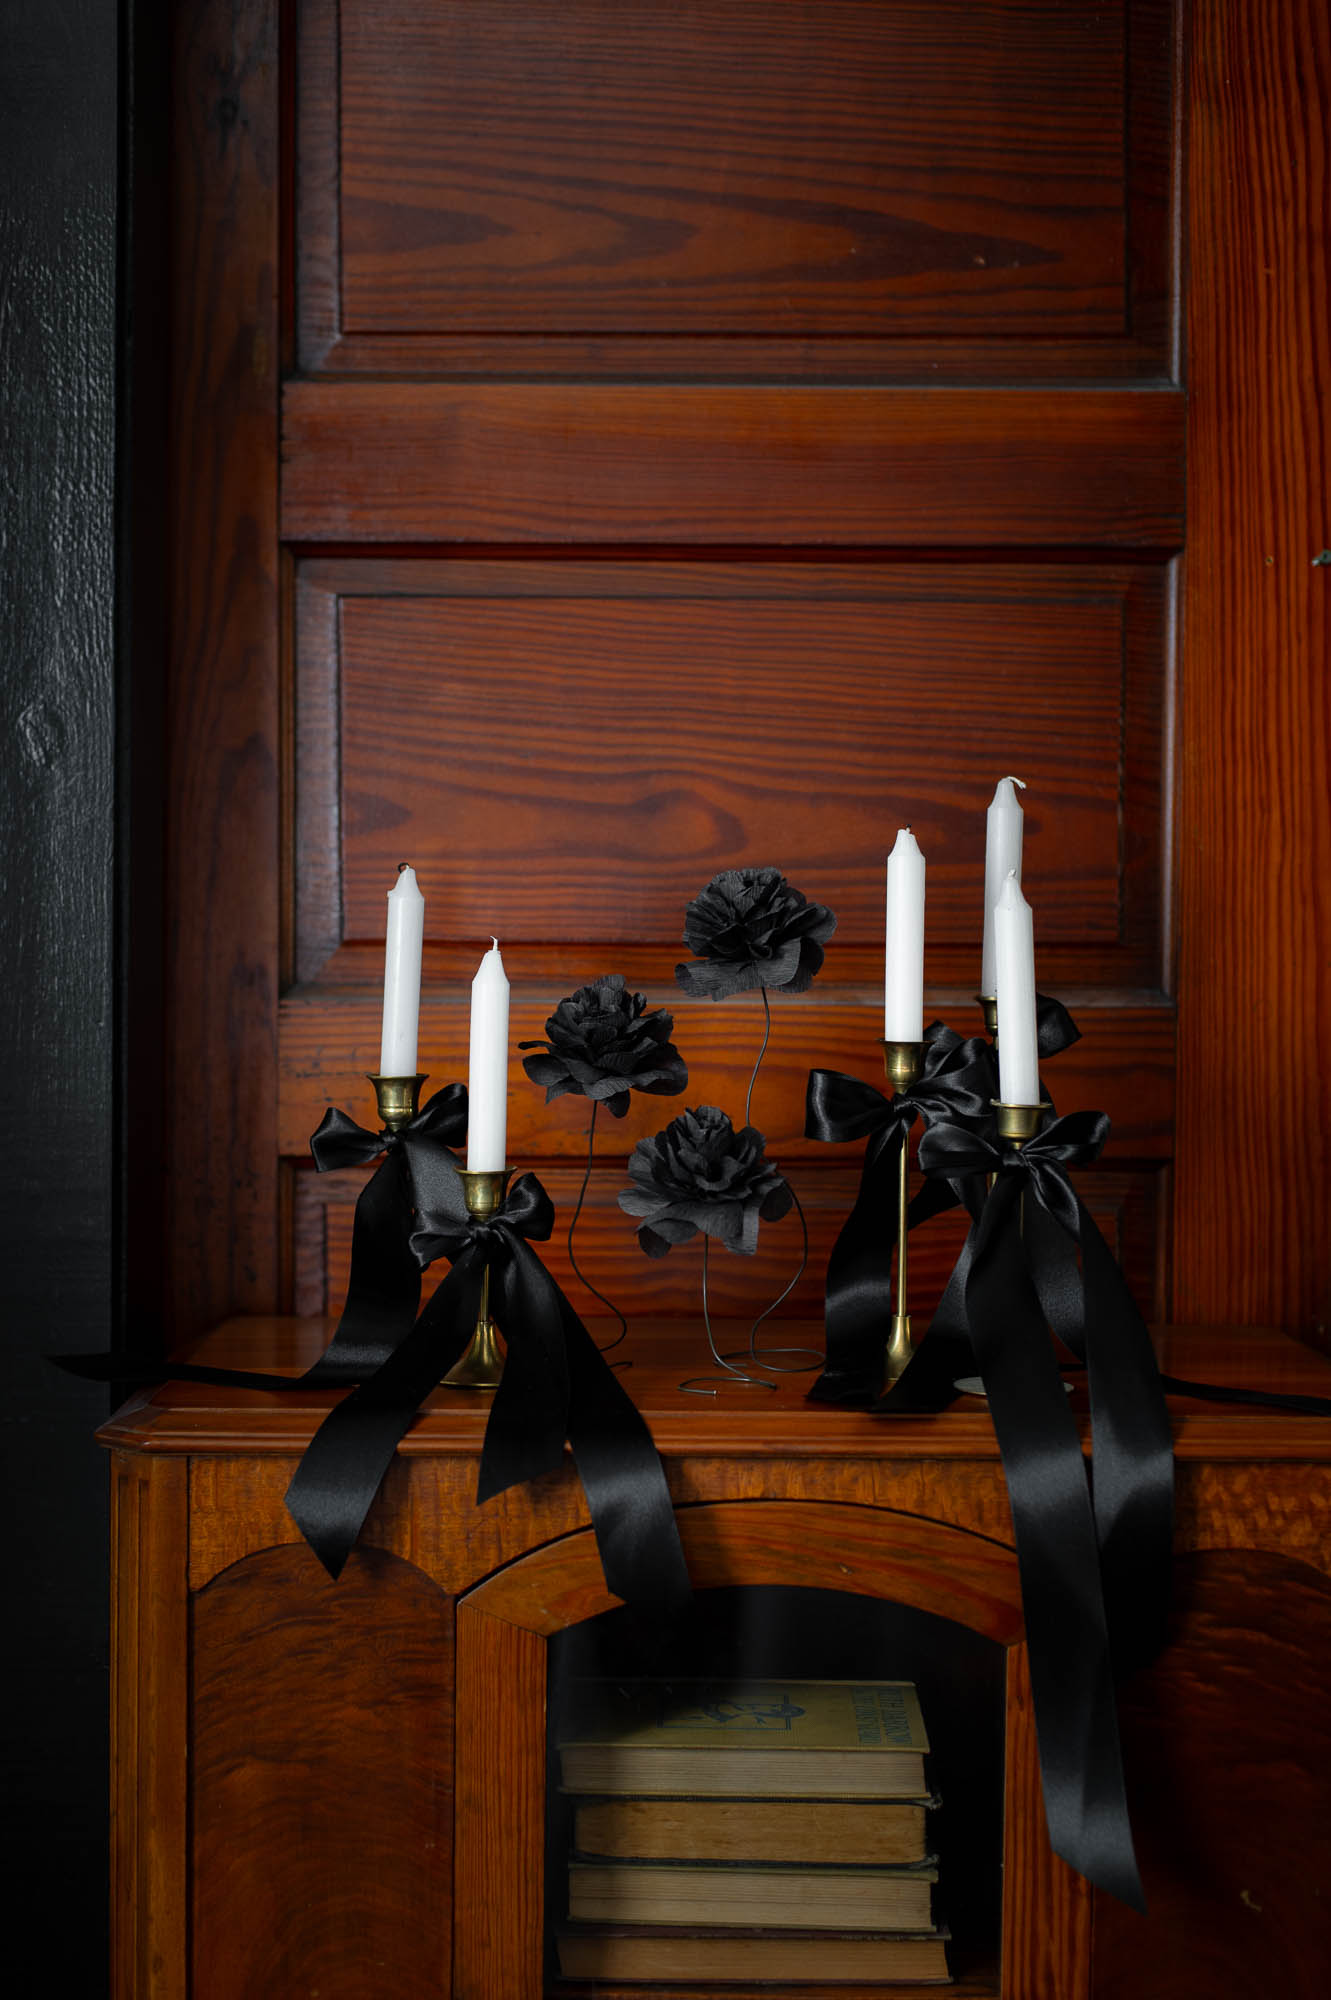
BONUS TIP: Need budget-friendly taper candles? Dollar Tree sells packs of six half-size “emergency candles” for just $1.25. They drip more than higher-quality tapers—but honestly, for Halloween, that only adds to the spooky effect.
Final Thoughts
While I LOVE how perfect these black paper rose flowers were for my elegant Halloween decor, you could also use this same method to make paper flowers out of any color streamer you like!
I think these would be especially cute in the spring to use as tablescape decor in shades of yellow and white too! If anyone does that please send me a pictures so I can see how it turns out!
Don’t Forget To Pin This Post & Subscribe!
Want to keep getting more DIY home decor inspiration, thrifting tips & tricks, free art downloads, reading recommendations, and home renovation tutorials? Then don’t forget to pin this post for later so you can follow me on Pinterest and then subscribe to my blog so you can get links to my newest content as soon as it hits the blog!