
Sometimes a single YouTube video is all it takes to become truly obsessed with a new craft. That’s exactly what happened to me when I came across someone decorating Easter eggs with wax using a simple pin-drag technique.
I’ve admired traditional pysanky for years, but this simple pin-drag method looked like such an easy way to finally try making wax resist Easter eggs without any special tools.
A few weeks (and a truly unreasonable number of eggs) later, I can confirm: I am fully down the rabbit hole. So if you’ve ever wanted to try decorating Easter eggs with wax, I’m breaking down everything I’ve learned so you can join me down here, just in time for Easter!
Want more Easter egg decorating ideas? Check all my other Easter egg decorating tutorials here!
*This blog post contains affiliate links, meaning that if you purchase any of the items using the links I provide I, as the author of this website, will receive a very very small commission from that sale. This is a great way to help support your favorite bloggers at no cost to you. Think of it like a tip jar that costs you nothing!
What Are Wax Resist (Pysanky) Easter Eggs?
Wax resist Easter eggs are eggs decorated by applying melted wax to block color, either as a final design or as part of a layered dyeing process.
Traditional pysanky egg decorating originates in Ukraine, where artisans have long used this wax-resist technique to create intricate, multi-layered designs. A specialized tool called a kistka is most commonly used to apply the beeswax in these traditional methods.
In this tutorial, we’re using a simplified, beginner-friendly variation known as the pin-drag (or drop-pull) method, which uses a simple pin or stylus to apply wax in small drops that are pulled into delicate shapes. This approach reflects the same core principles of pysanky, while making the technique much more accessible as it uses no specialized tools.
While traditional pysanky typically involves multiple dye baths to build up color, this method can also be used to decorate eggs with wax alone, creating beautiful designs with or without dye.
How To Decorate Eggs With Wax (Easy Pin-Drag Method)
Whether you want to dye your eggs or leave them au natural, you can create beautiful designs on your Easter eggs using hot wax! Here’s everything you need to know about how to use wax on Easter eggs so you don’t make all the mistakes I did.
Supplies Needed For Decorating Easter Eggs With Wax
I tested a lot of different tools, supplies and methods during the creation of this tutorial, and this is what I found worked best after a lot of trial and error:
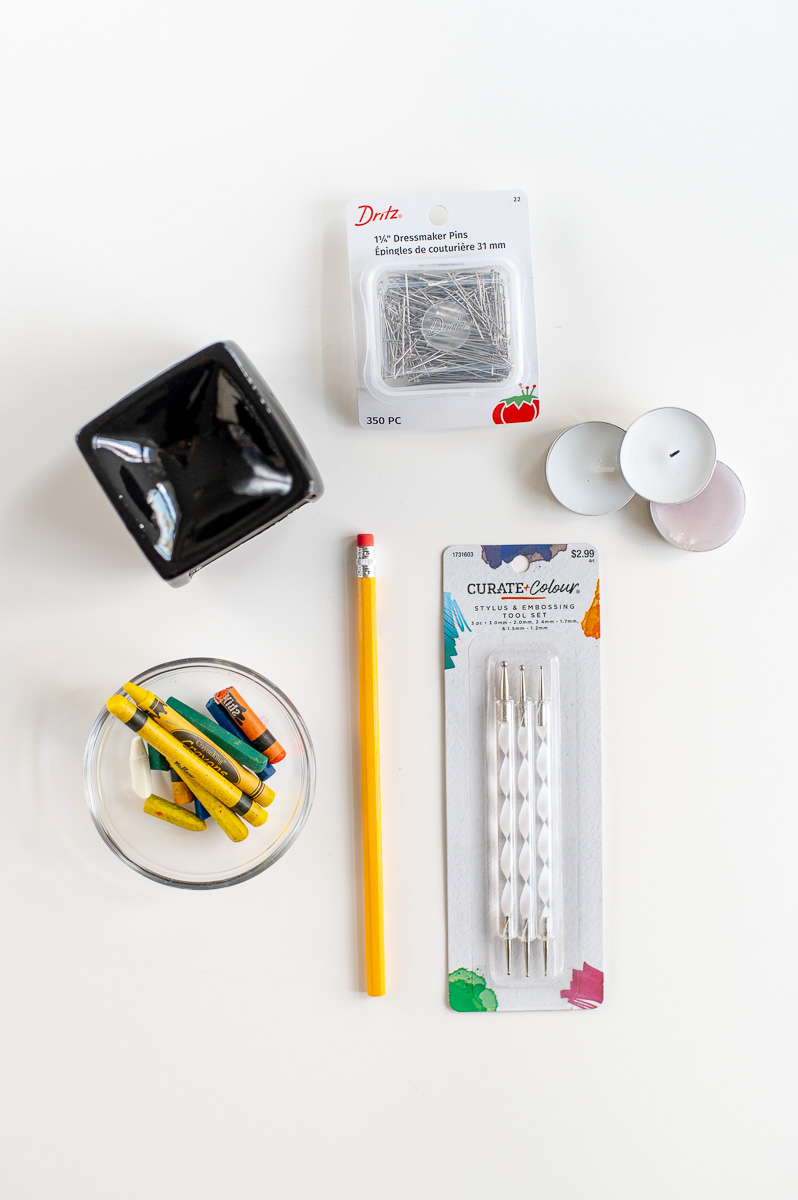
- A Water Soluble Marking Pencil (Or Normal Pencil)
- Crayons
- You can use any type of crayon except “washable” ones
- A Ceramic Fragrance Warmer
- You can also DIY your own with a muffin tin, cooling rack & spent tea light!
- Tea Lights
- Pin Drag Tool of Choice
- Pencil & Dressmakers Pins
- Embossing Stylus (Not traditional, but I much prefer this one)
- Hard-Boiled Eggs (Or blown out and dried if you’re feeling extra ambitious)
- Pysanky Egg Dye (Optional-Not Suitable For Edible Egg)
- Paper Towels
- Olive Oil or Clear Spray Enamel (Optional)
Step One: Decide On A Base Color For Your Eggs
In some pin-drag decorating traditions, eggs are often dyed by the children of the household prior to Easter, then given to a parent to apply design onto with the hot-wax. These wax designs are then often left on the egg and never removed.
However, you can also apply the hot wax to the eggs prior to dying them. The wax will preserve the white of the egg and resist any dye to that area. Repeating this process over and over again, starting with your lightest color dye to your darkest, applying more wax between each dye bath, can result in beautifully intricate and colorful eggs.
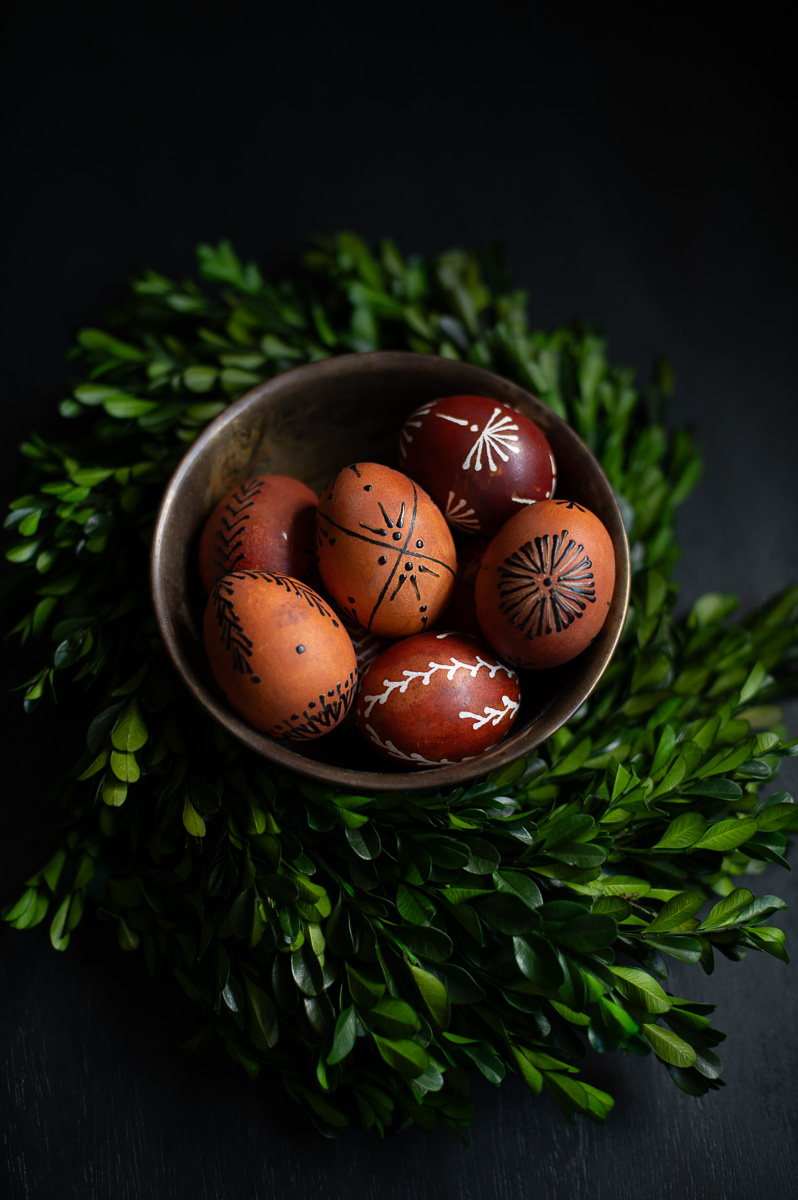
Or, you can choose to leave your eggs free of dye and simply apply drop-pull wax designs. This is a great way to decorate brown eggs for Easter!
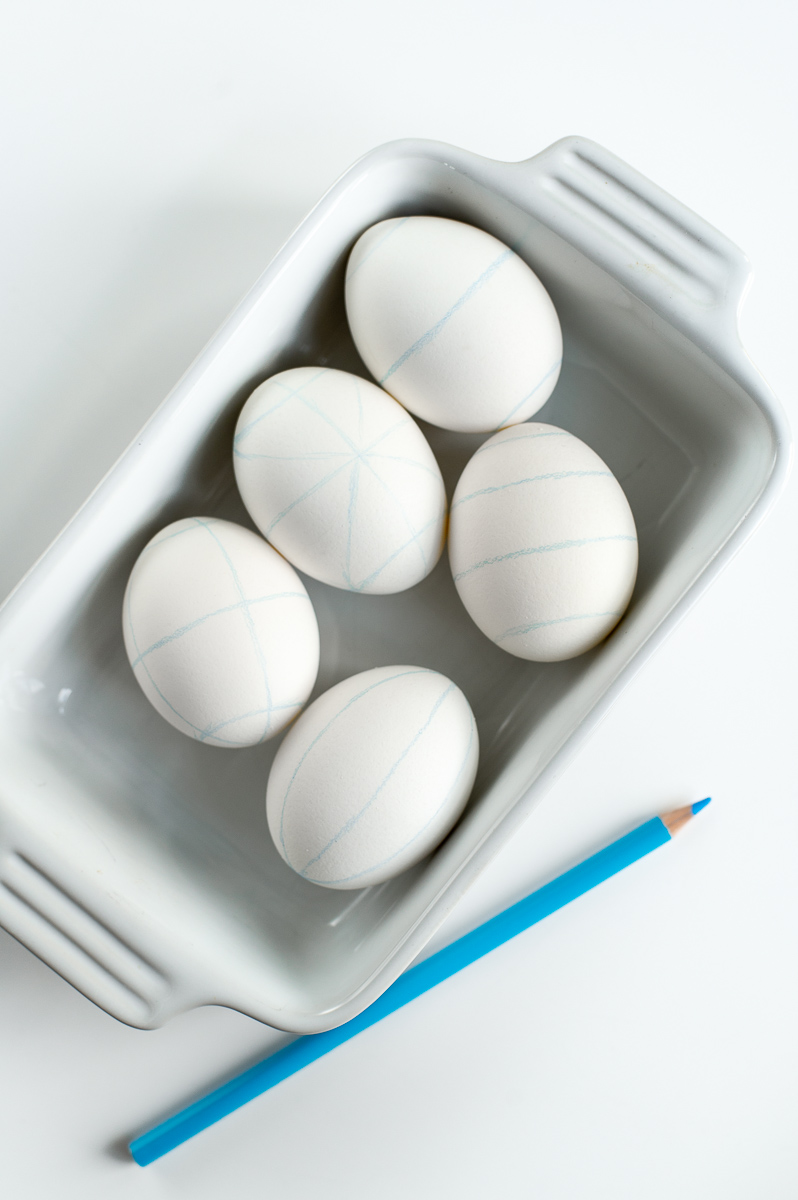
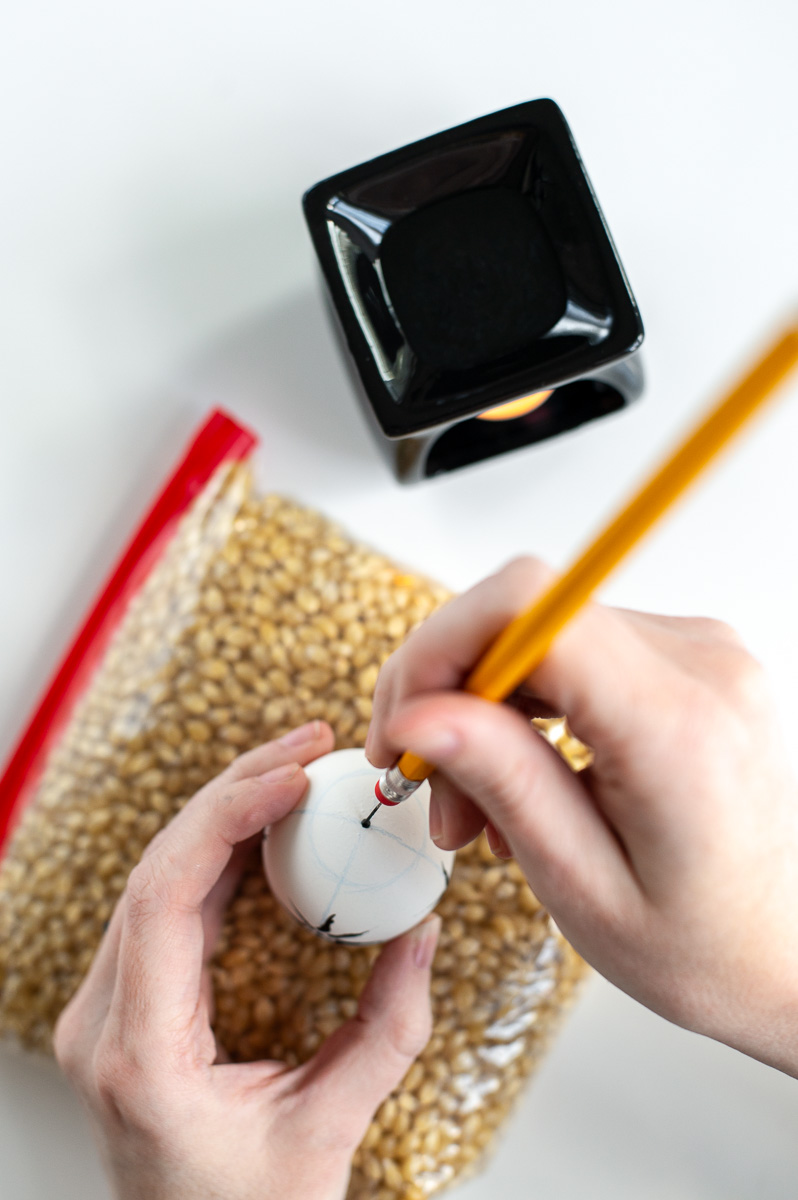
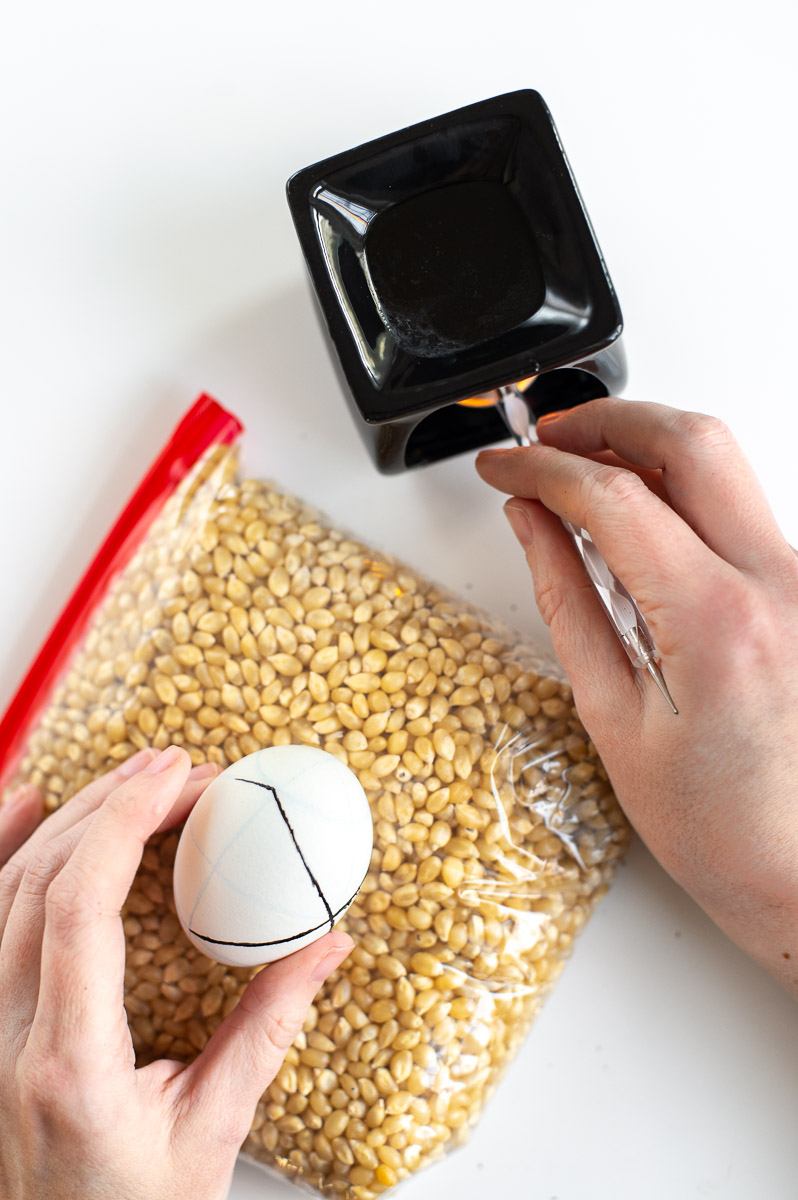
Step Two: Draw Guidelines On Your Eggs
Once you have decided on the base color for your eggs, it’s time to draw on some guidelines. These will help us make the traditional wax-pull designs we’re going to create in a moment.
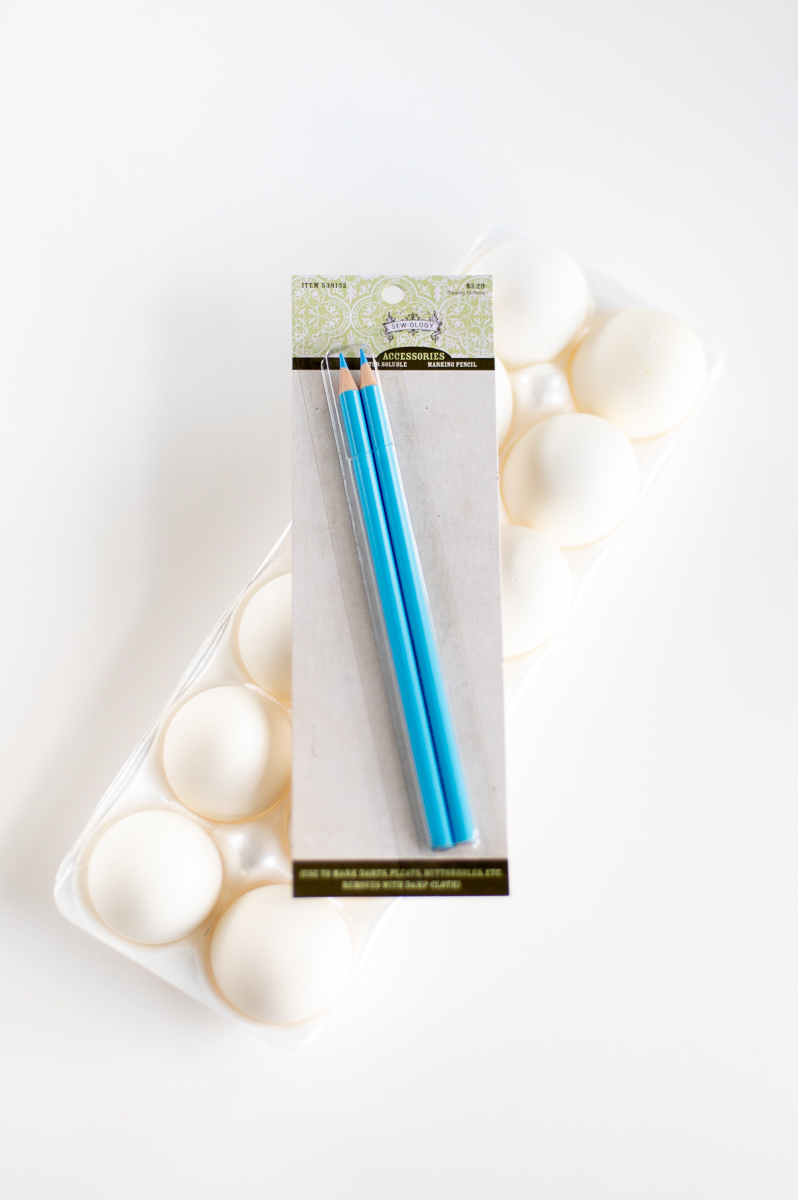
Most traditional methods have you use a plain pencil, but I found using a water soluble marking pencil (found in the sewing section of most craft stores) worked MUCH better for my purposes.
NOTE: Since this pencil is water soluble, all your marks will disappear when the egg is placed in the dye bath. If you need the guidelines to stay on during multiple rounds of dye, then you’ll want to use a regular old pencil.
I found resting my hand on the egg and the spinning the egg around while the pencil dragged along it was the easiest way to create these rings.
Here’s a few examples of the types of guidelines you might like to use:
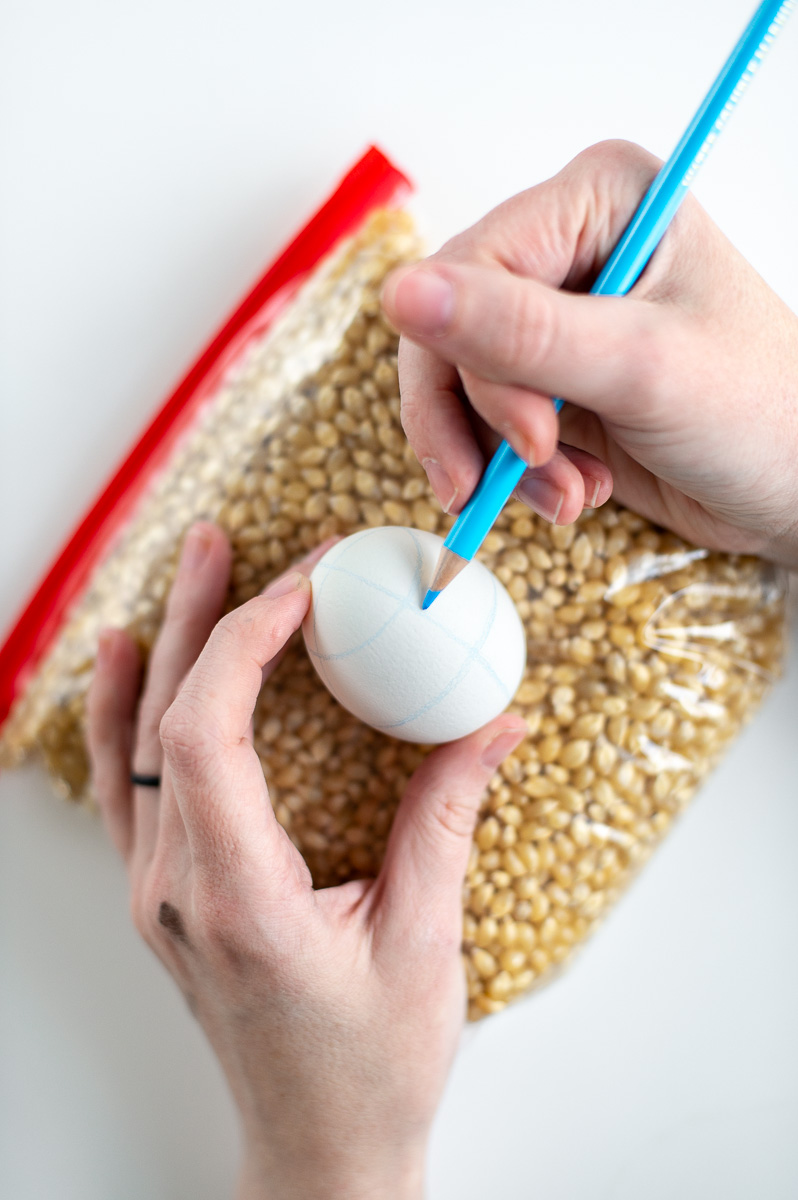
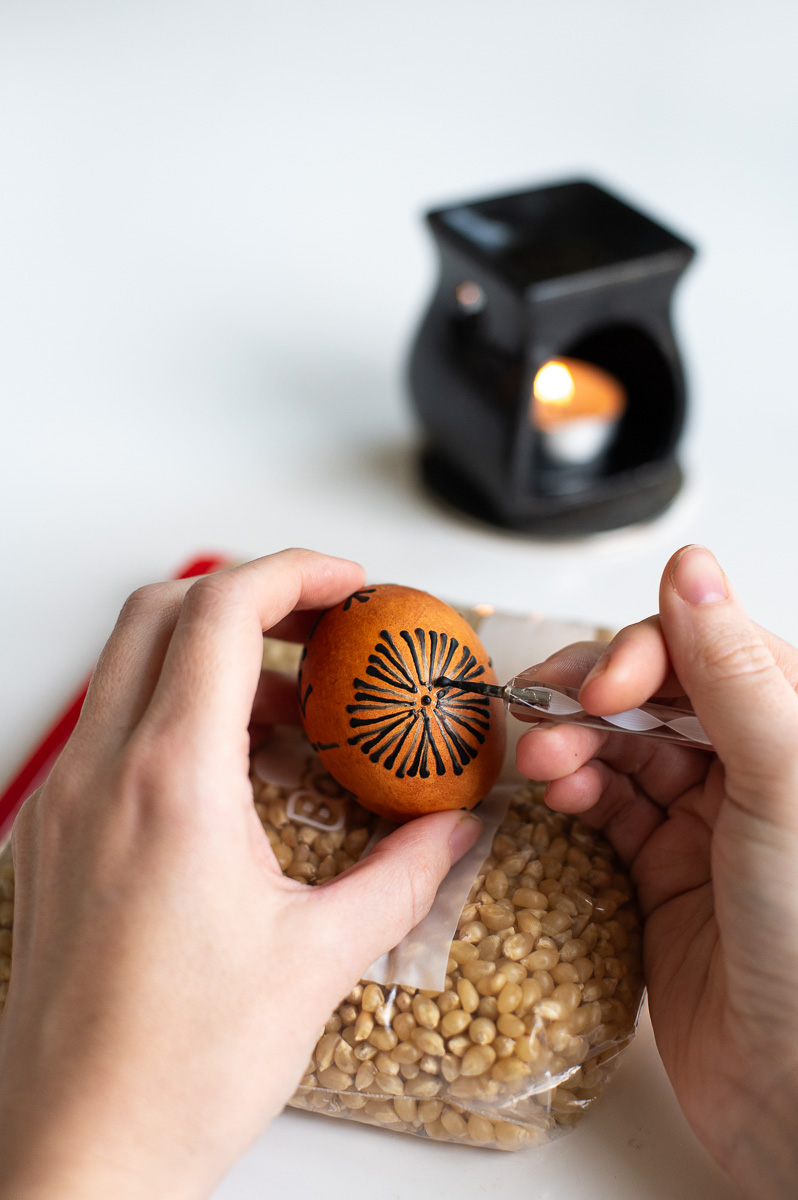
Pro Tip: I found it helpful to fill a bag about 60% full with corn or rice or whatever you have on hand to make a little nest to rest my egg on while I worked. This helped the egg not roll around and kept me from accidently banging it on the table and cracking the shell.
Step Three: Melt Your Wax & Let It Get HOT
I tested a lot of different types of wax while making this tutorial, but found straight crayola crayon wax to be the easiest to work with. (Spent candle wax just didn’t adhere to the eggs quite as well or go on as smoothly.)
To kept things budget-friendly by using a bunch of broken crayons we had lying around the house for this project.

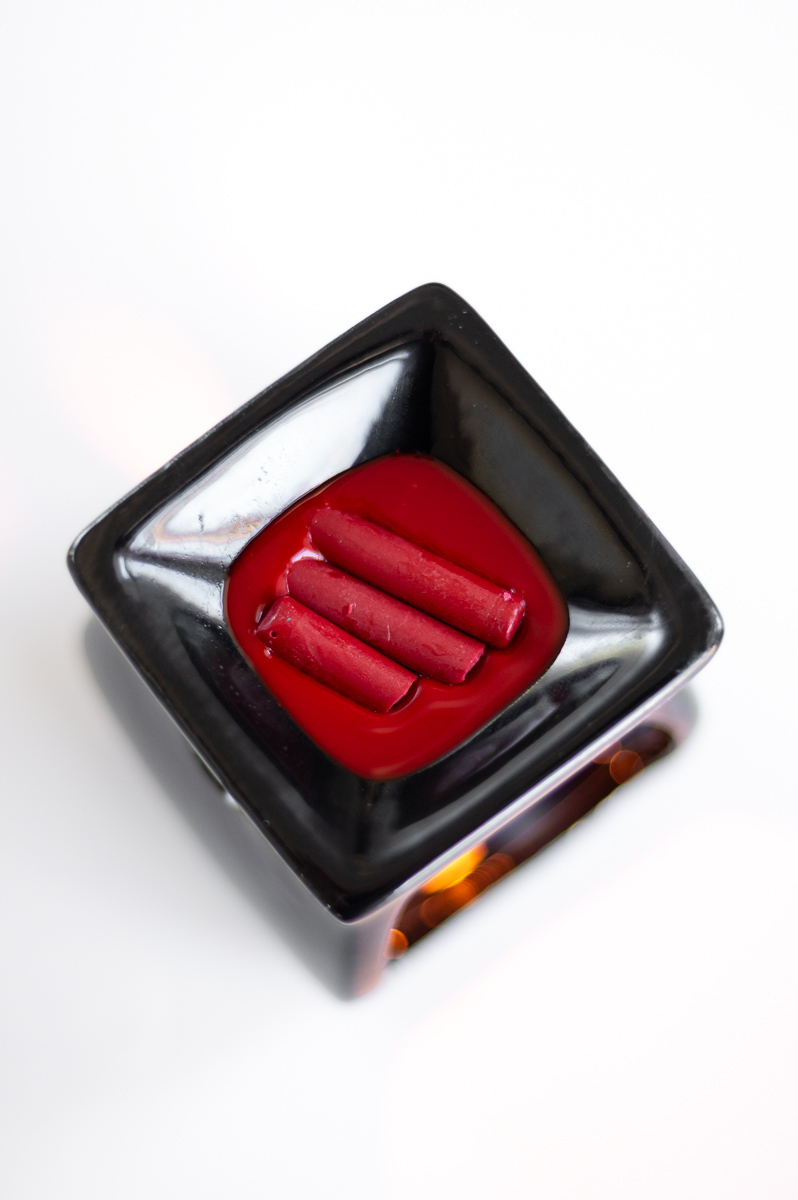
Start by breaking up your crayon into small pieces and placing them on top of your fragrance warmer. (You can snag these at The Dollar Tree!) Then place a lit tea light inside the warmer to melt the wax.
Pro Tip: Just because the wax is fully melted doesn’t mean it’s hot yet! Be sure and let the wax sit long enough to reach its max temp before moving onto the next step.
If the wax isn’t heating up hot enough, you can place a small riser under your tealight to bring the flame closer to the wax.
How To Make A DIY Wax Warmer
If you don’t own a fragrance warmer, you can easily make one using a muffin pan, a metal cooling rack and a spent metal tea light candle cup.
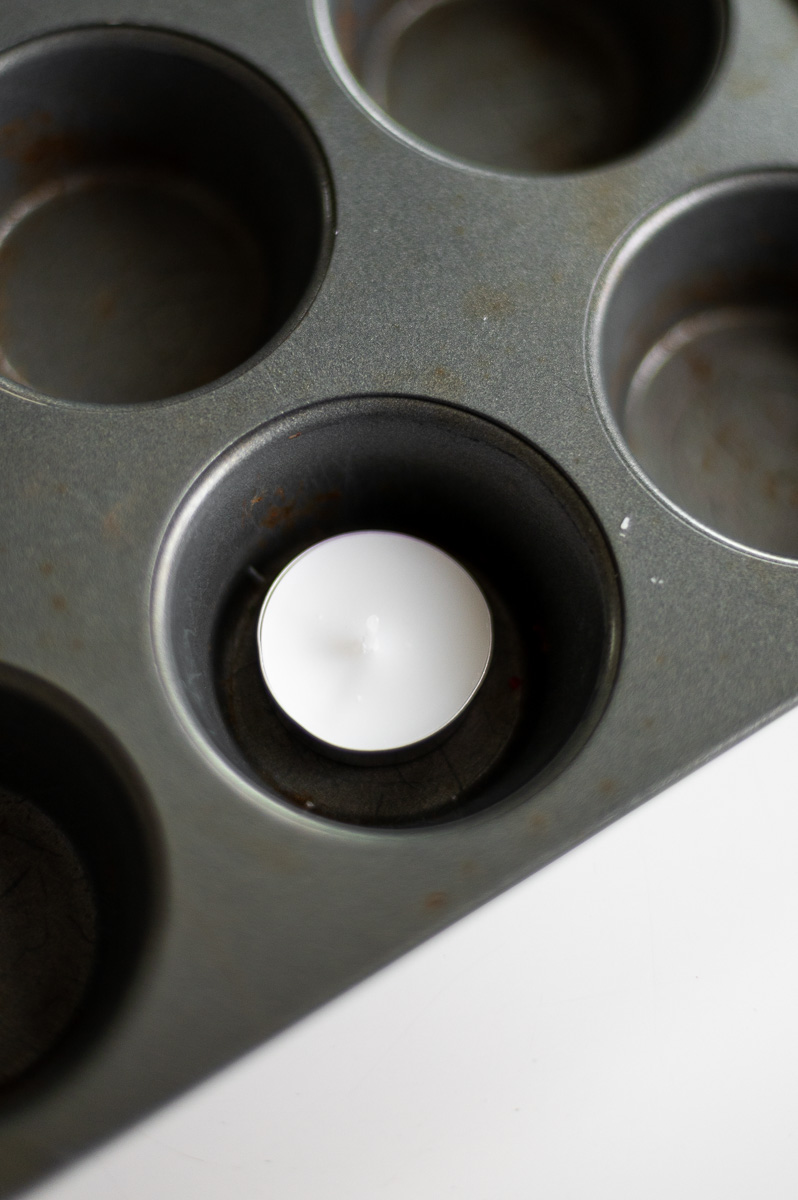
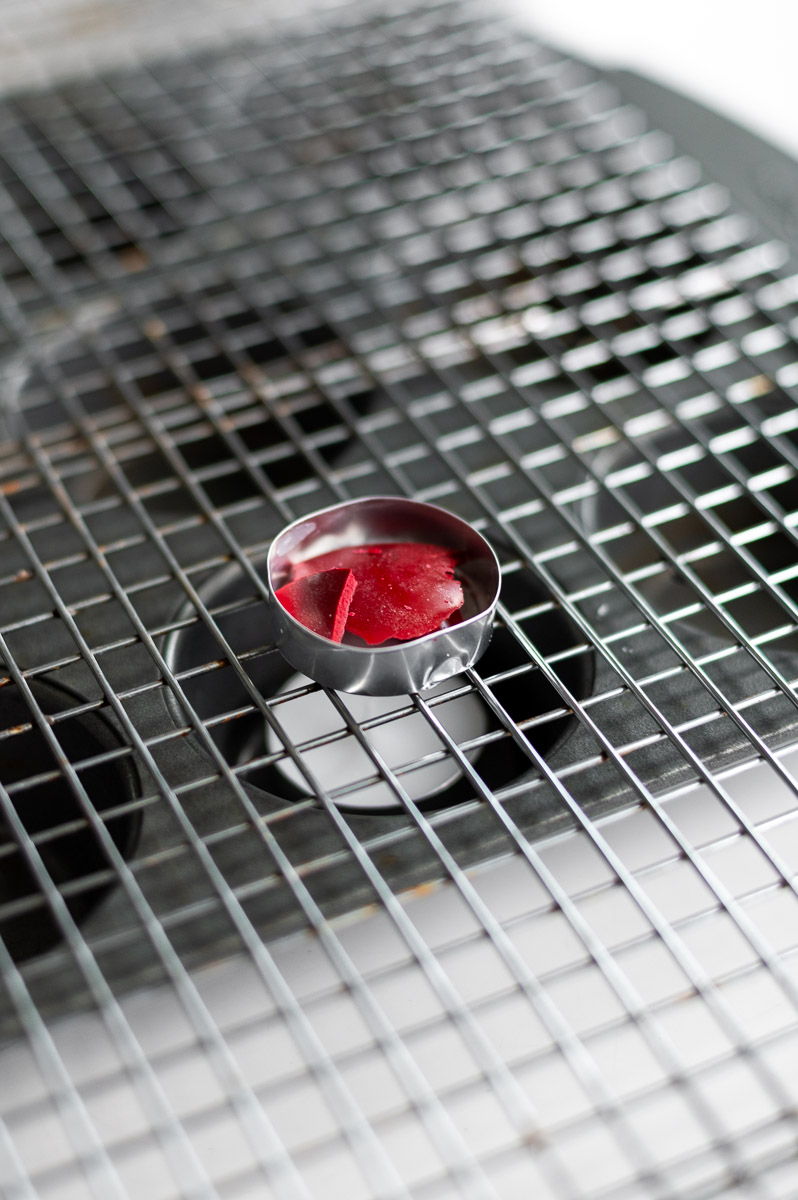
Pop a tea light into one of the slots in your muffin tin, set a cooling rack on top and then place your spent tea light filled with crayon wax on top of your cooling rack.
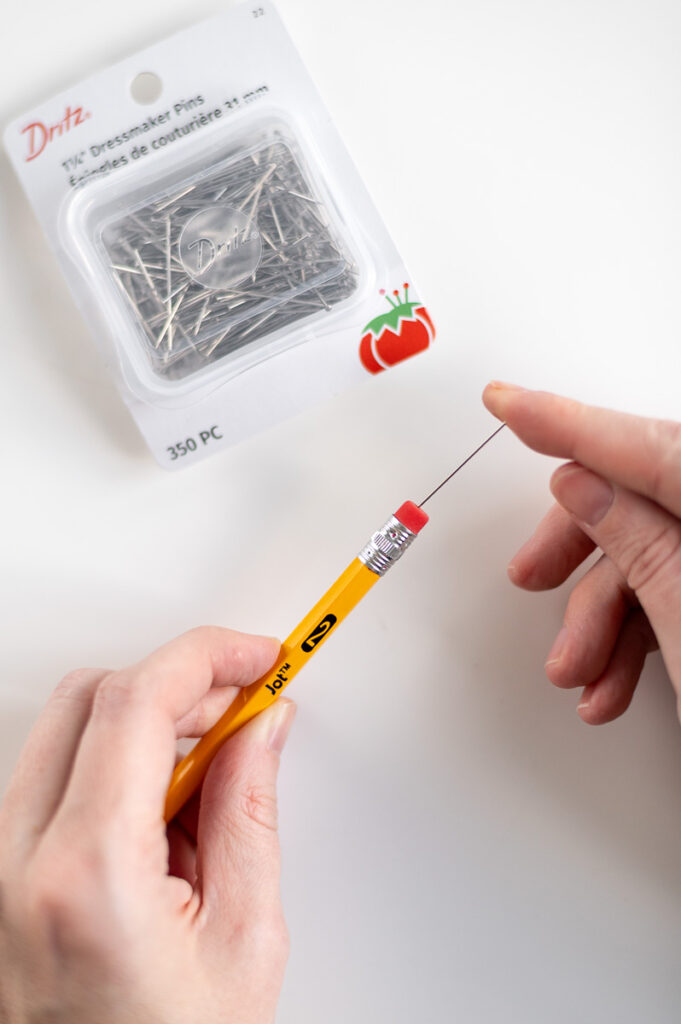
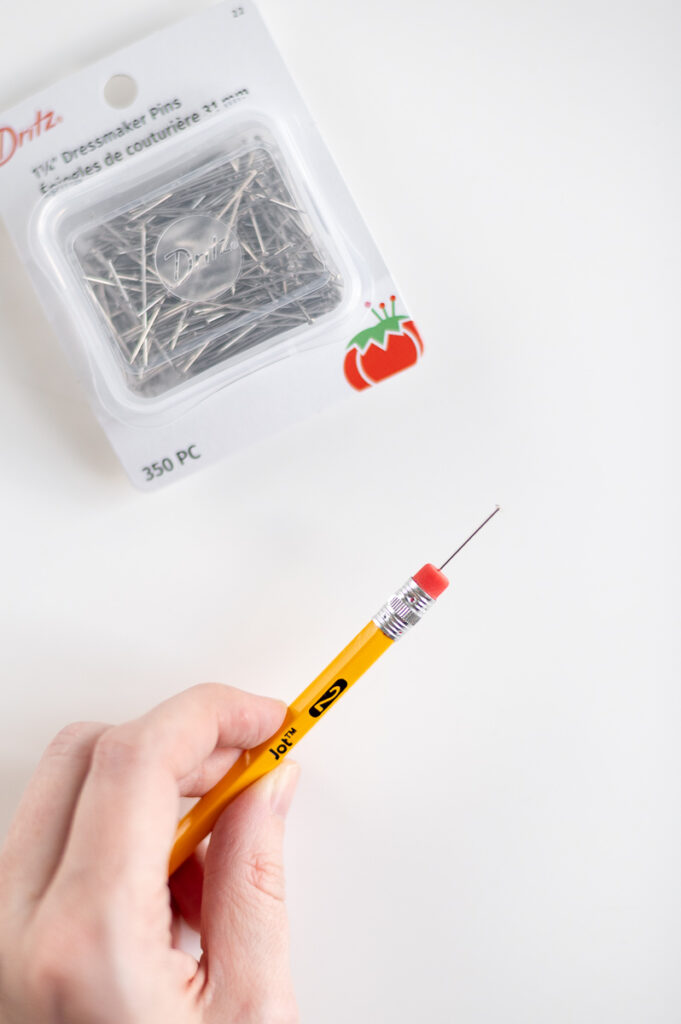
Step Four: Make Your Tool & Warm Up The Tip
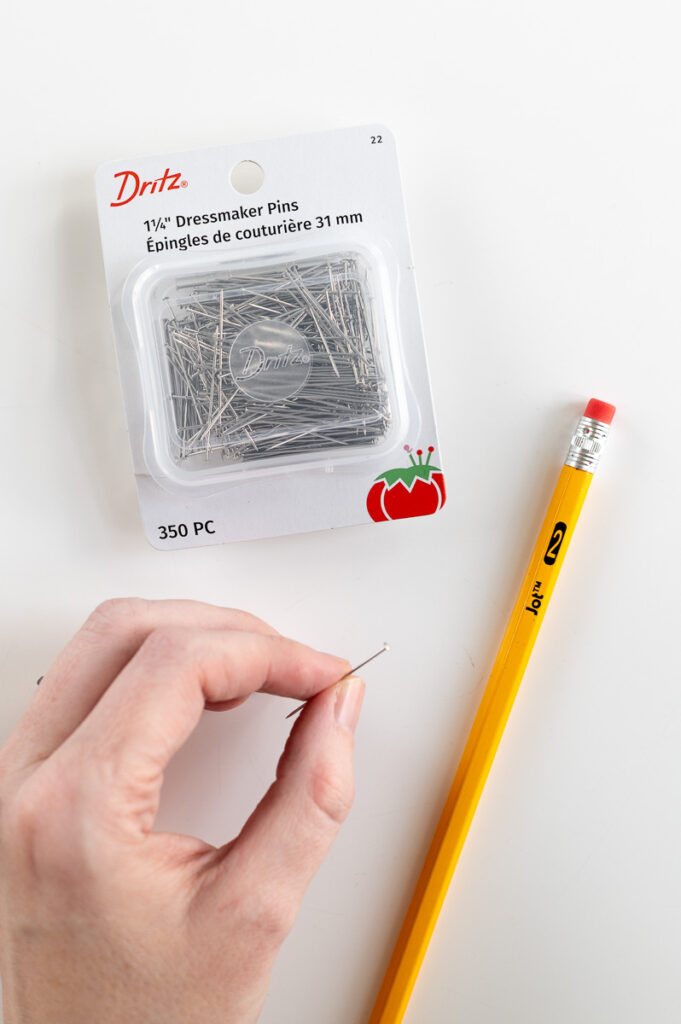
While our wax is heating up we need to make the little tool we’re going to use. For that you’ll simply insert a single dressmakers pin (the kind with a metal head) into the eraser end of a pencil like this:
Next we need to heat up the pin head.
The number one problem you are going to run into while making this craft project is cold wax. For the wax to work properly, it needs to stay HOT.
Which means we don’t want anything it comes in contact with to cool it down before we can get it onto the egg.
One way to help minimize this is to heat up the head of your pin, or stylus tool, in the flame of the tea light BEFORE dipping it into the wax.
Pro Tip: Be sure your pin tool is made of metal before placing it in contact with the fire. You won’t want to accidently light a plastic pin head on fire.
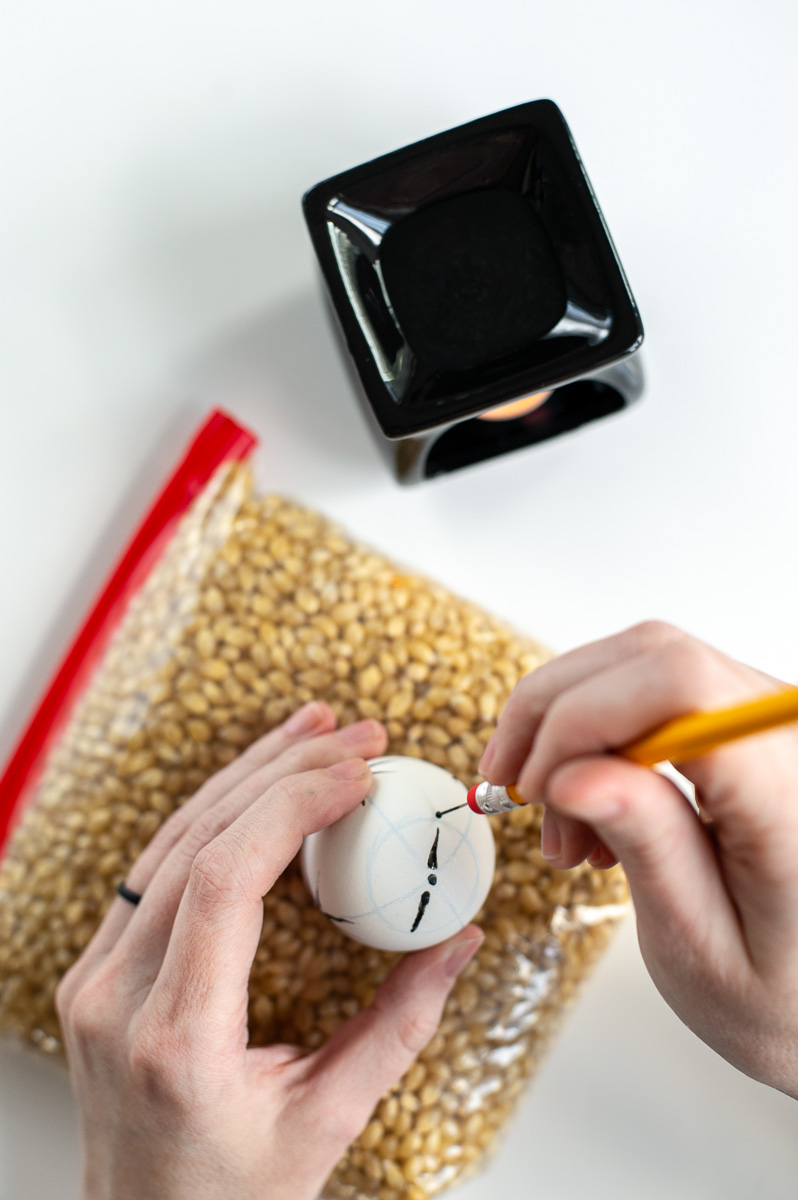
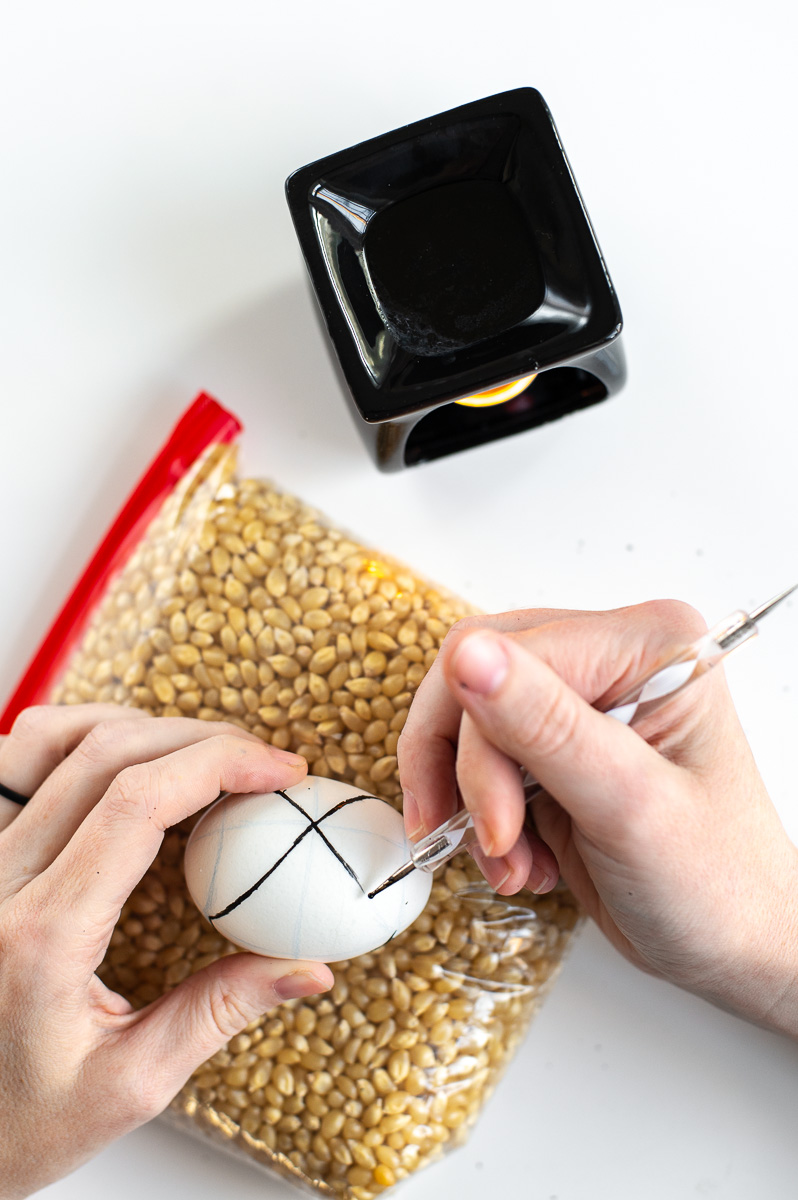
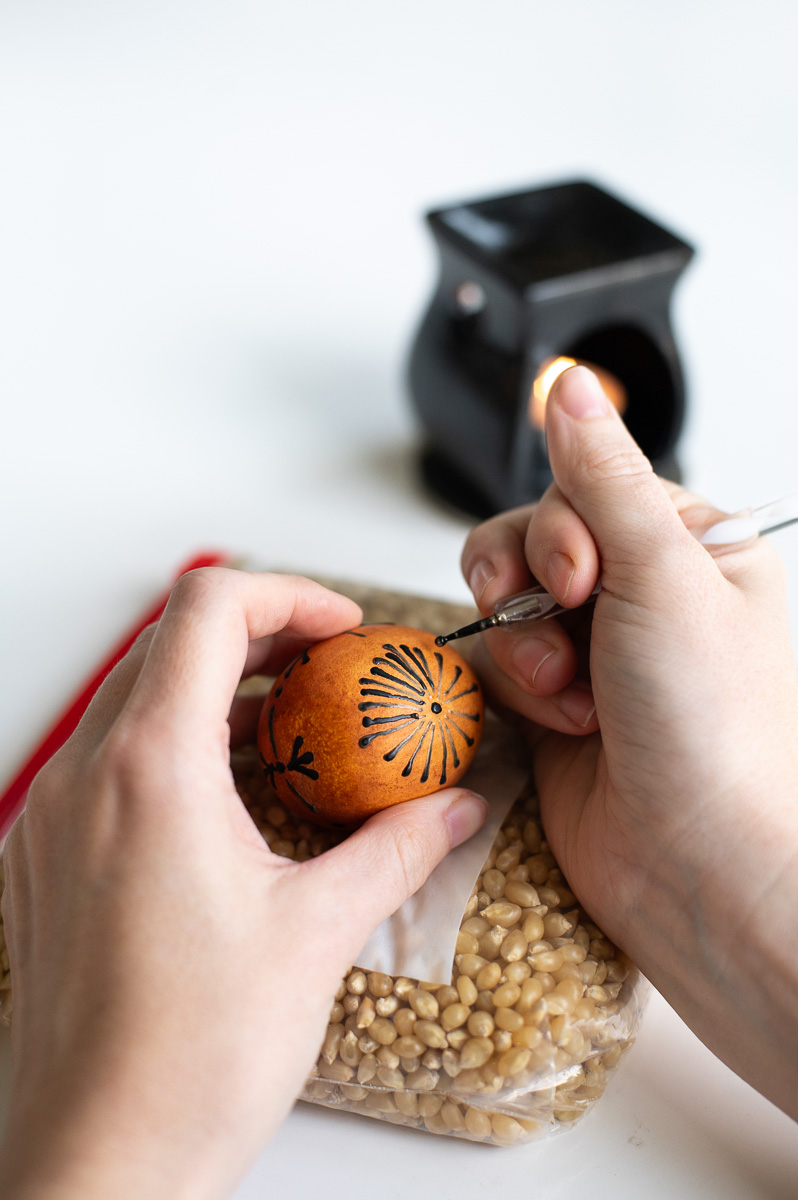
Step Five: Now Dip, Drop & Drag To Apply The Wax
Once your wax has fully heated up, and you’ve warmed up your pin head, you can dip the pin head in the wax, then quickly place a drop of wax on your egg and drag outwards to create a short tail.
The quicker your drag away from your drop the more pointed your tail will be.
If you are using the embossing tool I recommended, I found that you could also make straight lines with it by slowly dragging the wax along the egg as well.
Be sure and keep heating up the tip of your tool between wax applications to help the wax go on smoothly.
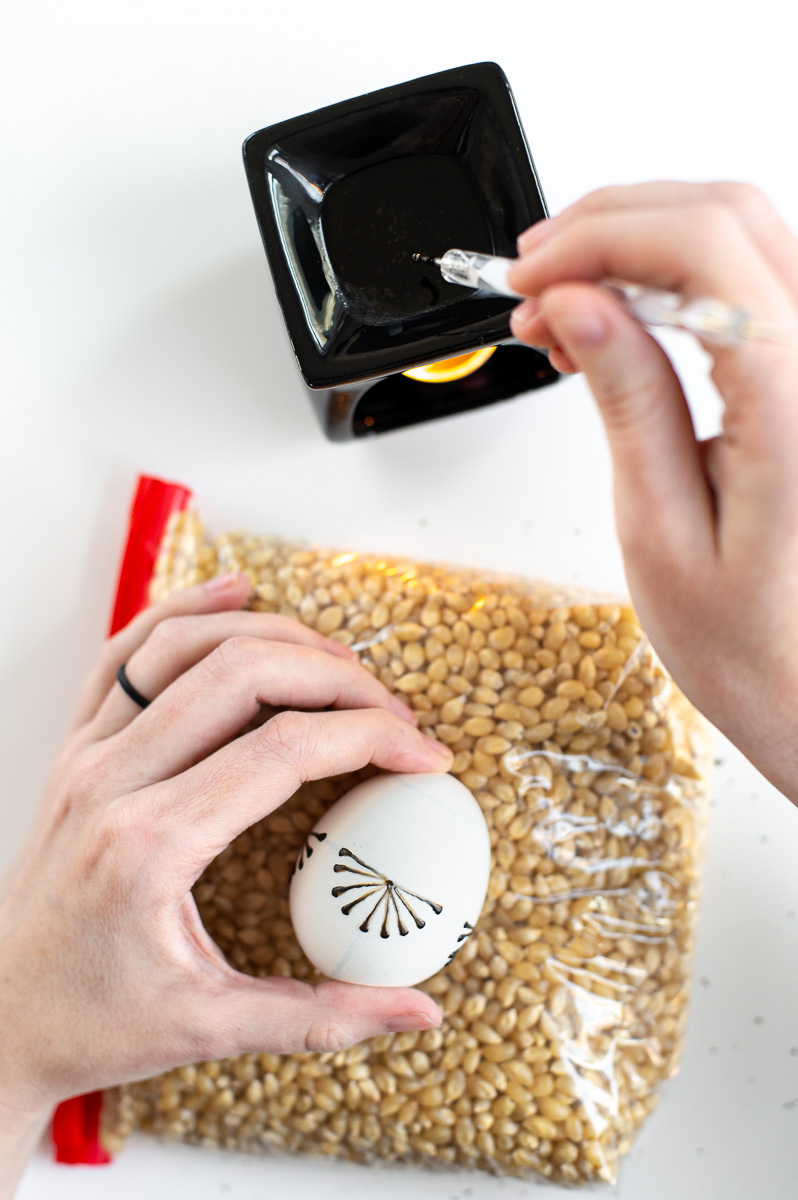
The guideline really helped all the designs go on the egg symmetrically and took a lot of the guesswork out of where to put things.
Pro Tip: Your wax will apply better to a room temperature egg than a cold one! So if your wax isn’t spreading out how you want, try warming up the surface of your egg a bit.
Traditional Pin-Drag (Drop-Pull) Designs To Try
During all my research I found a few helpful diagrams that I referred to a lot while making my drop-pull wax resist egg designs and so I wanted to share some of the most helpful ones with you too!

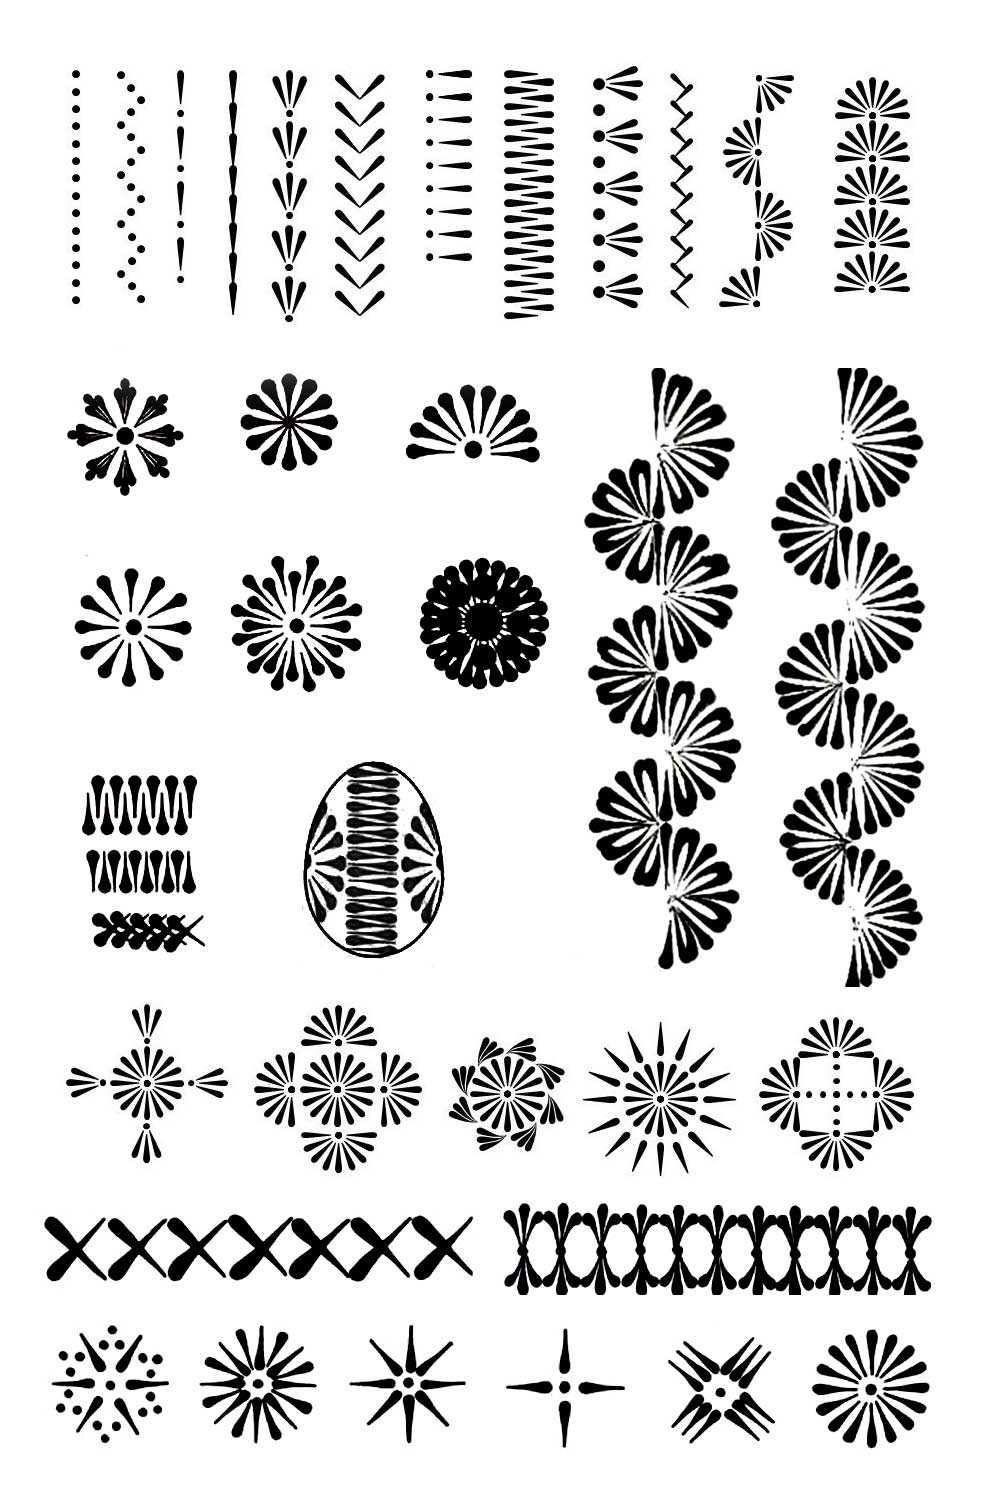
Hopefully these pysanky egg designs will give you some inspo for your own pin-drag wax designs.
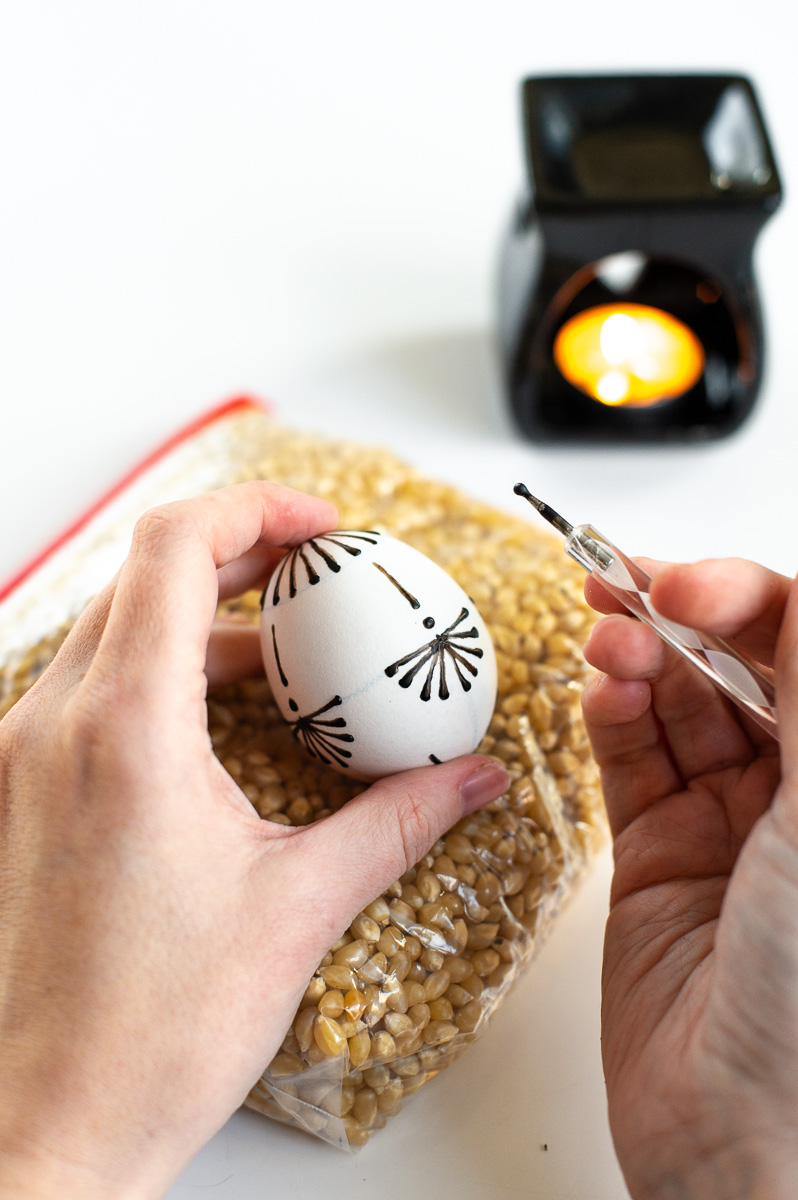
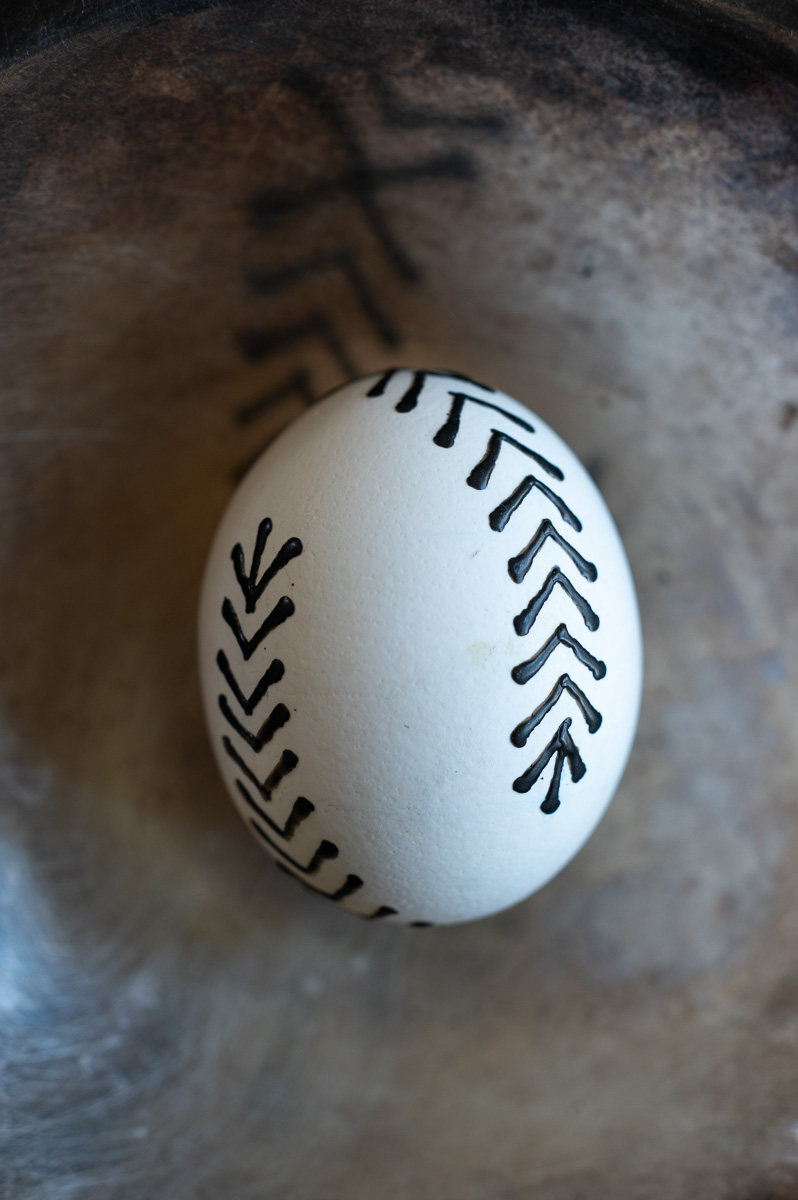
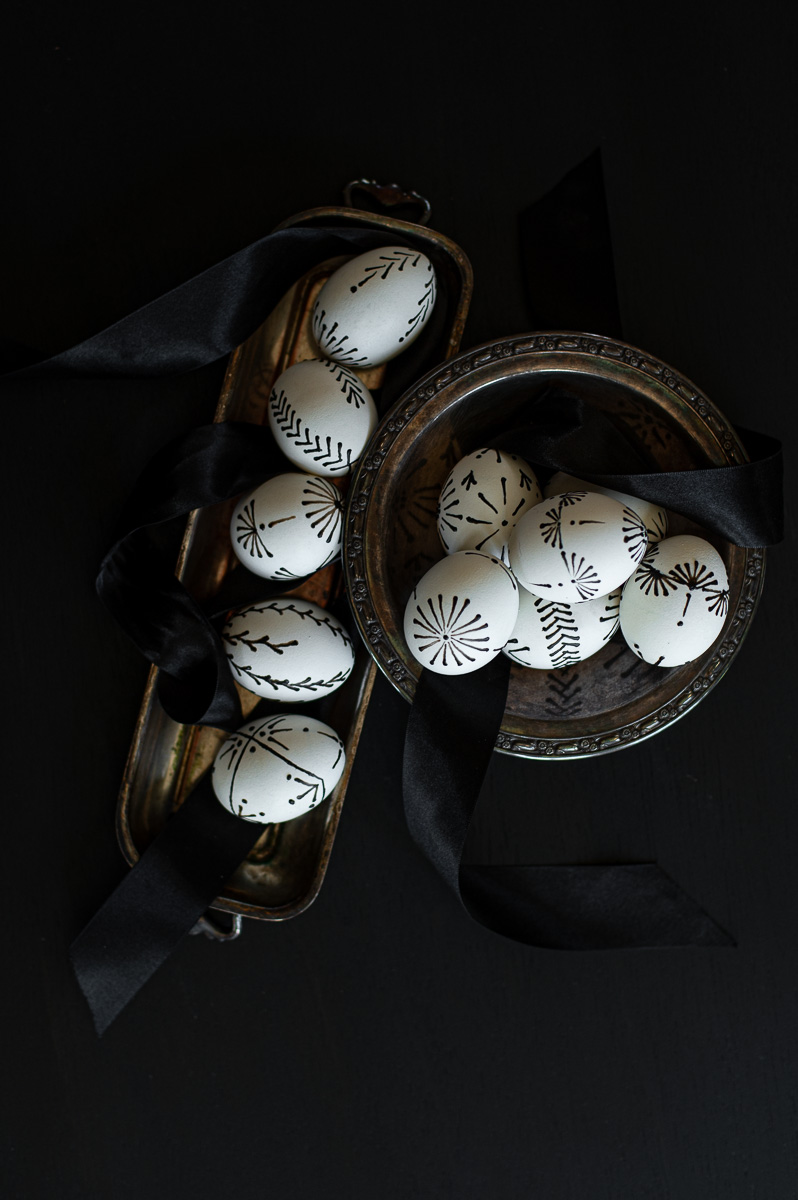
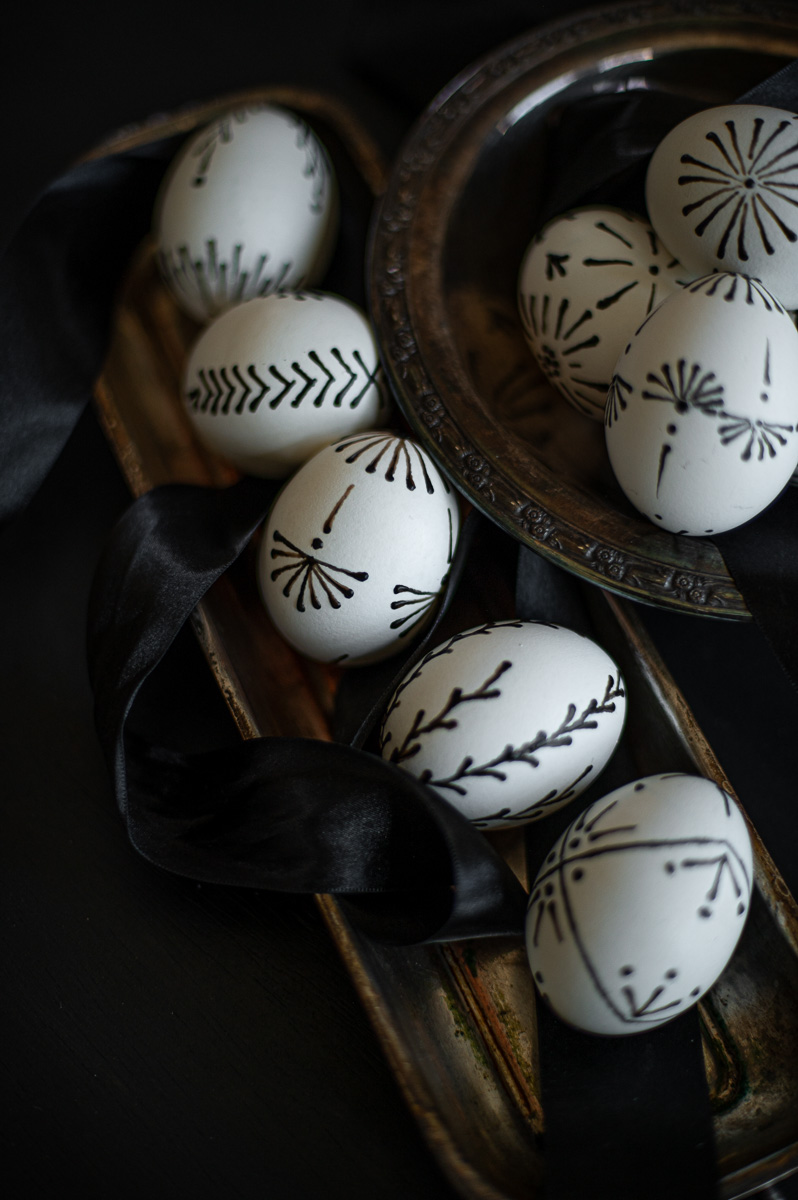
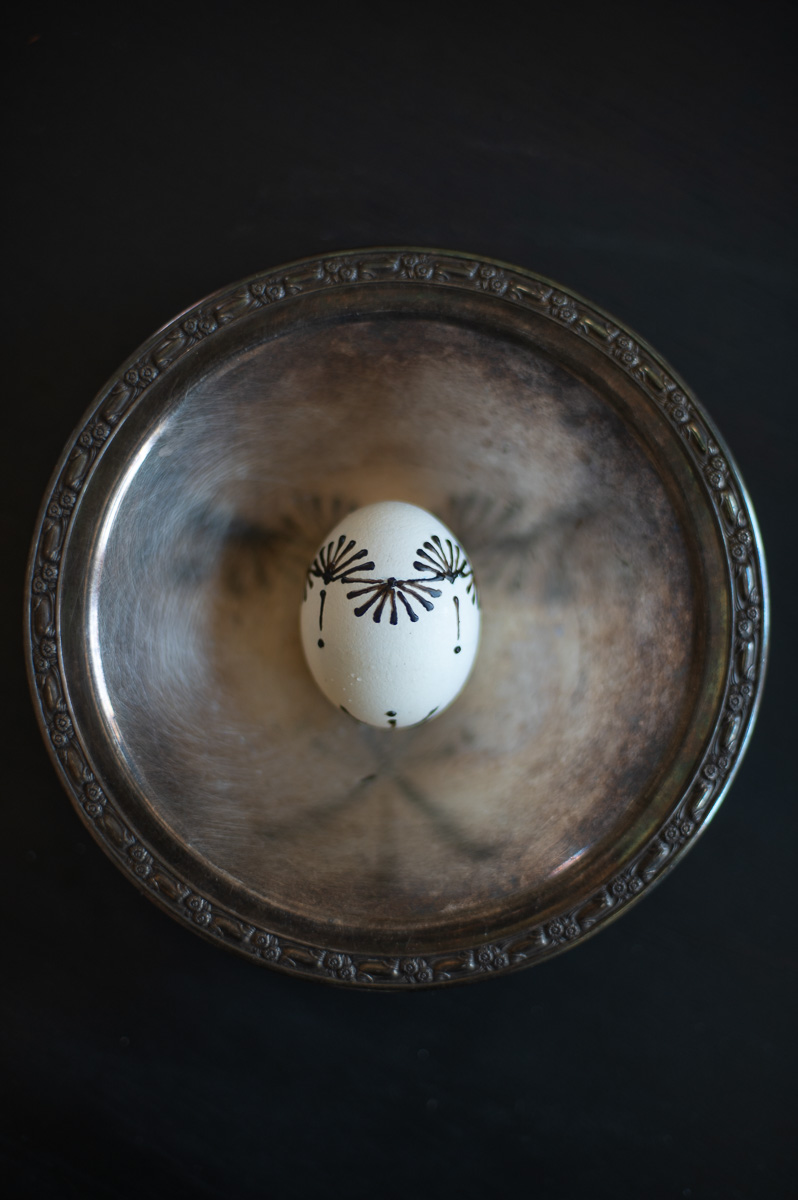
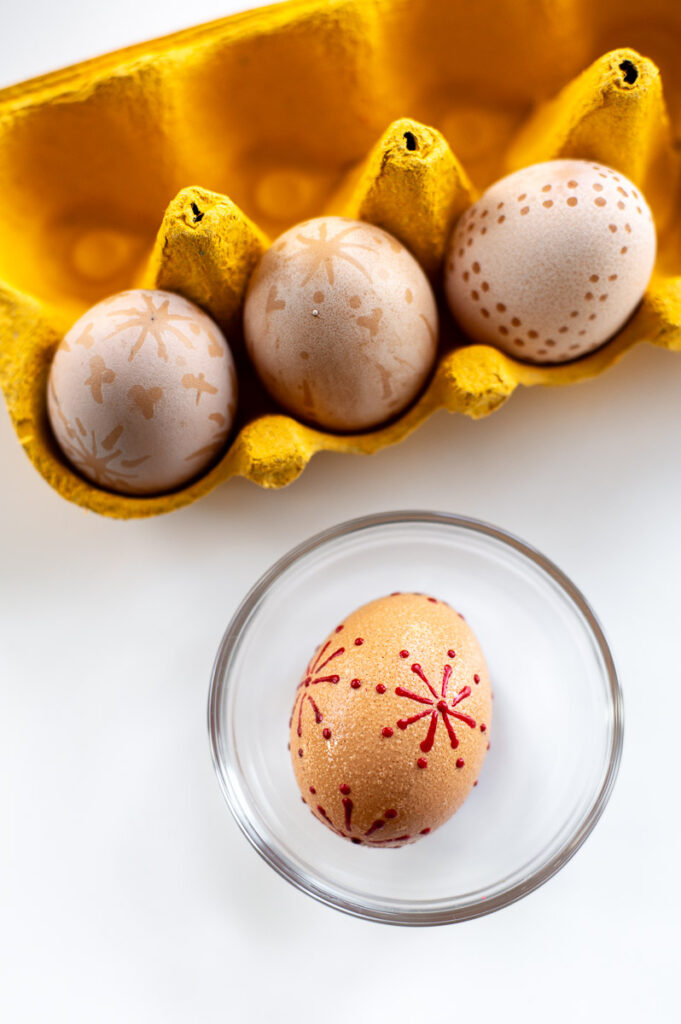
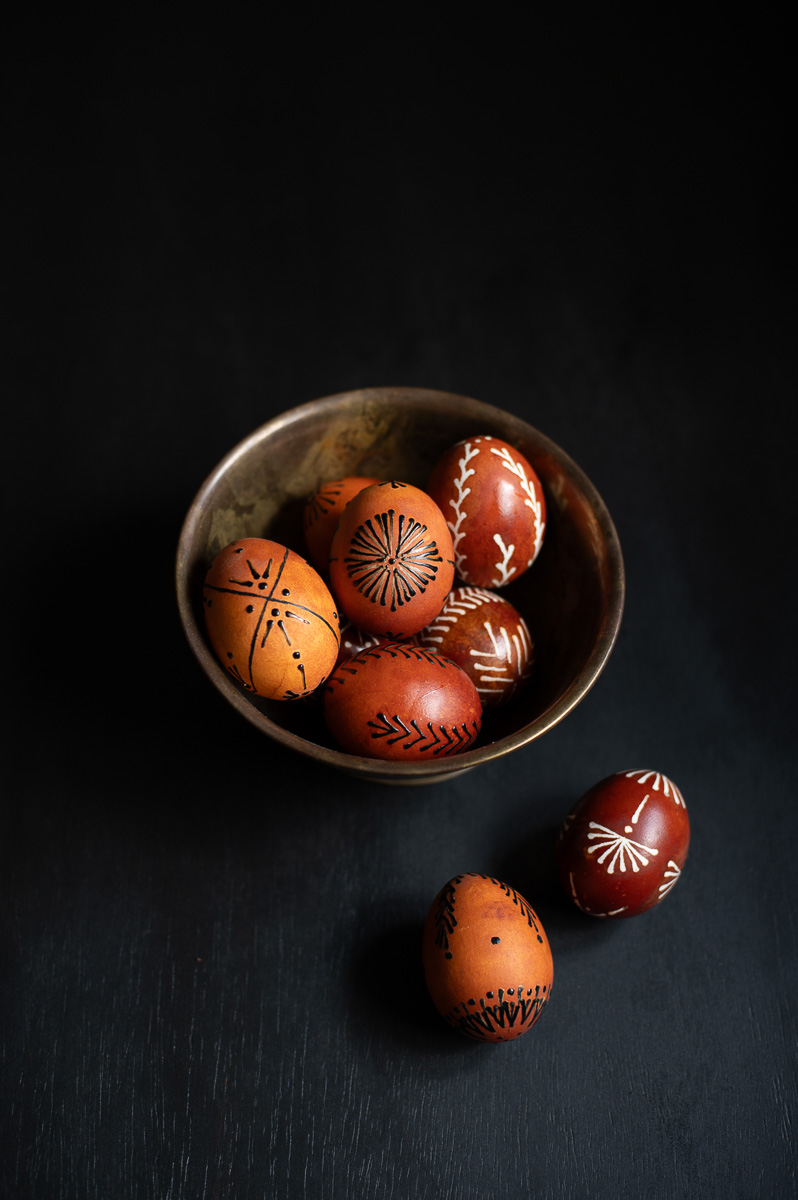
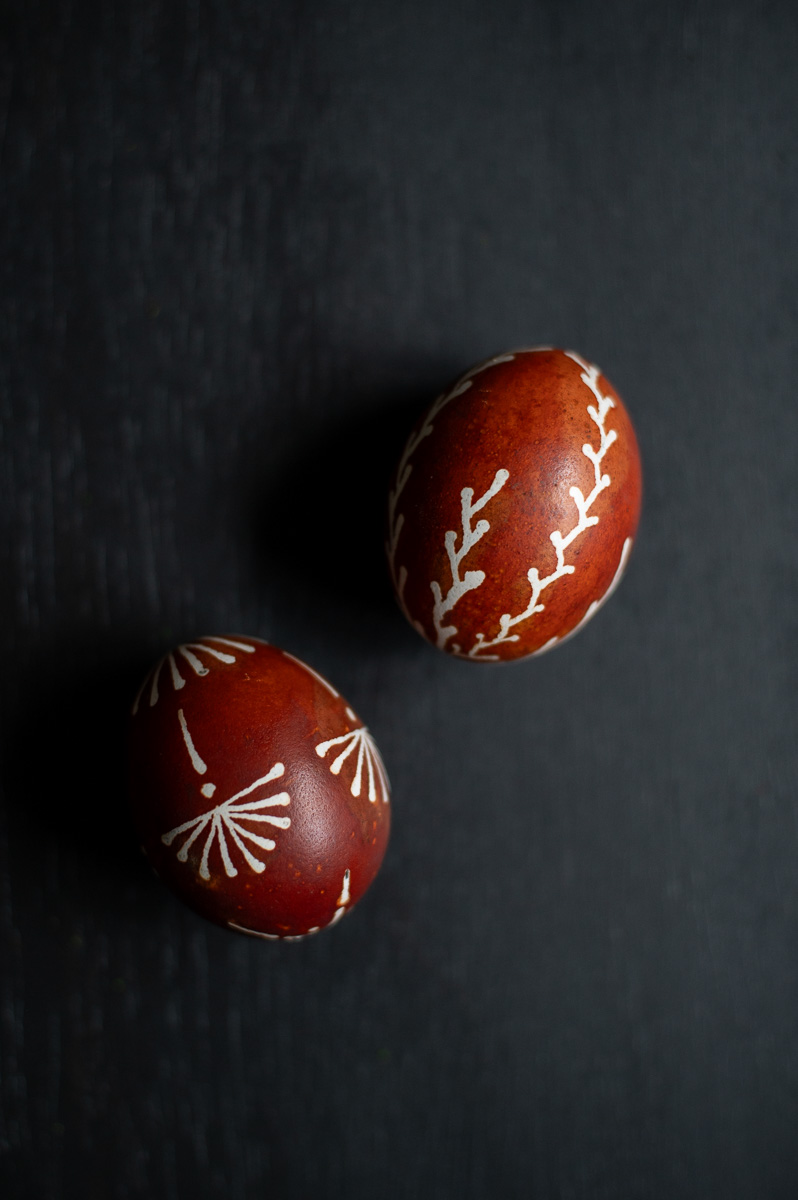
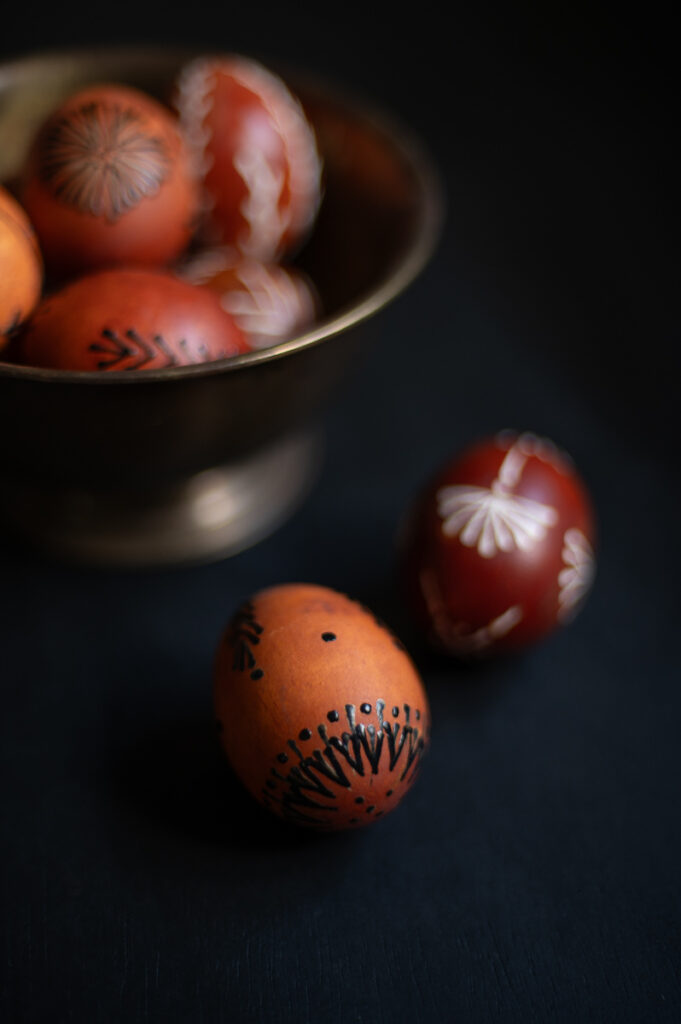
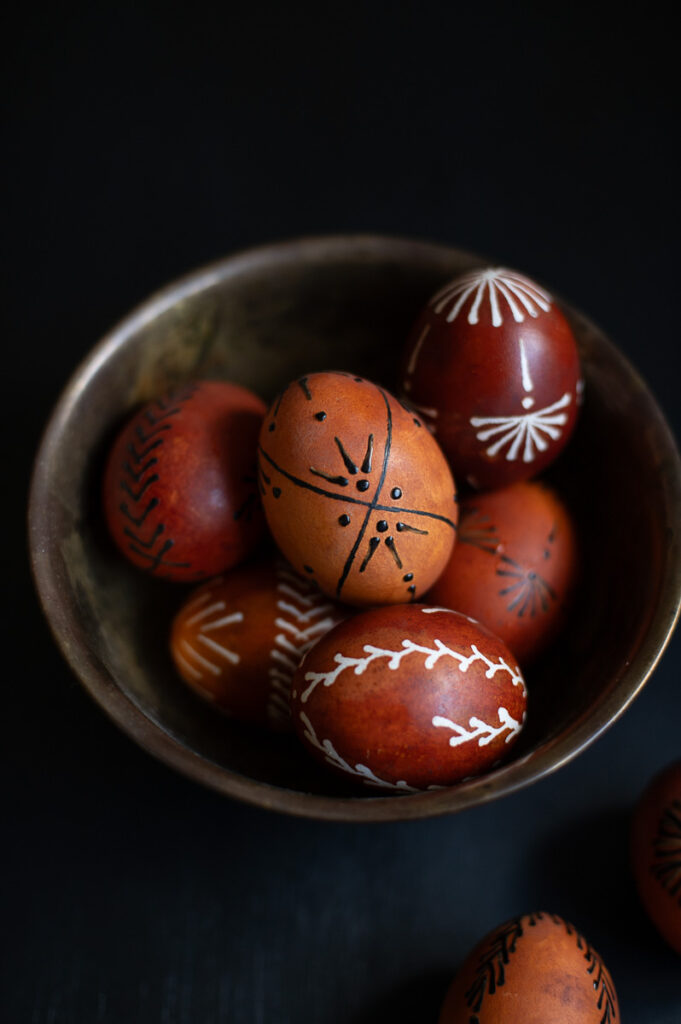
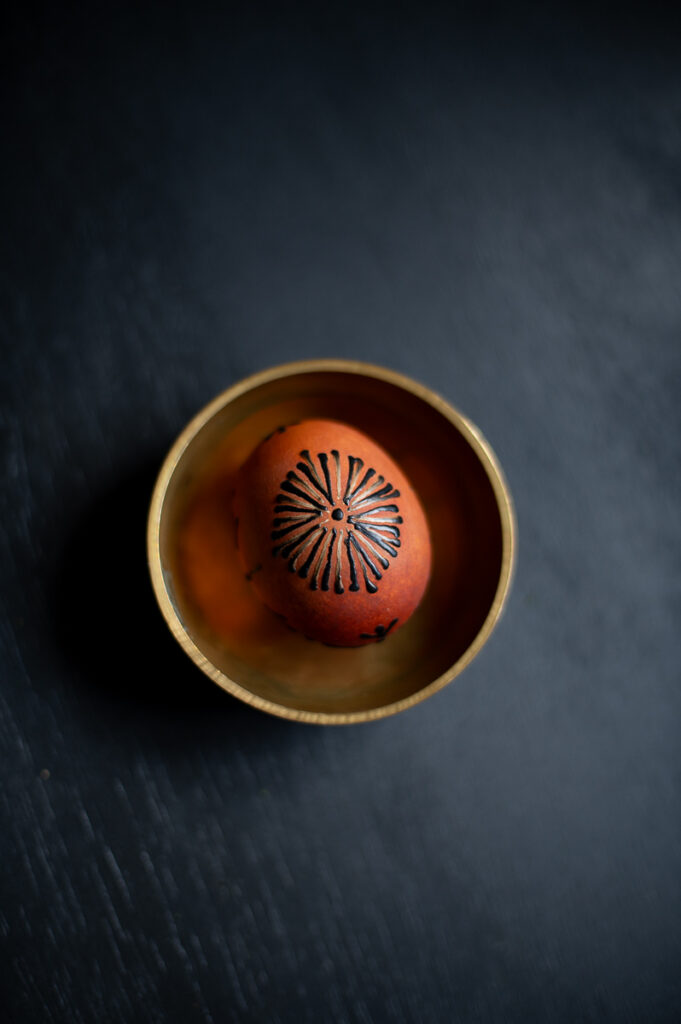
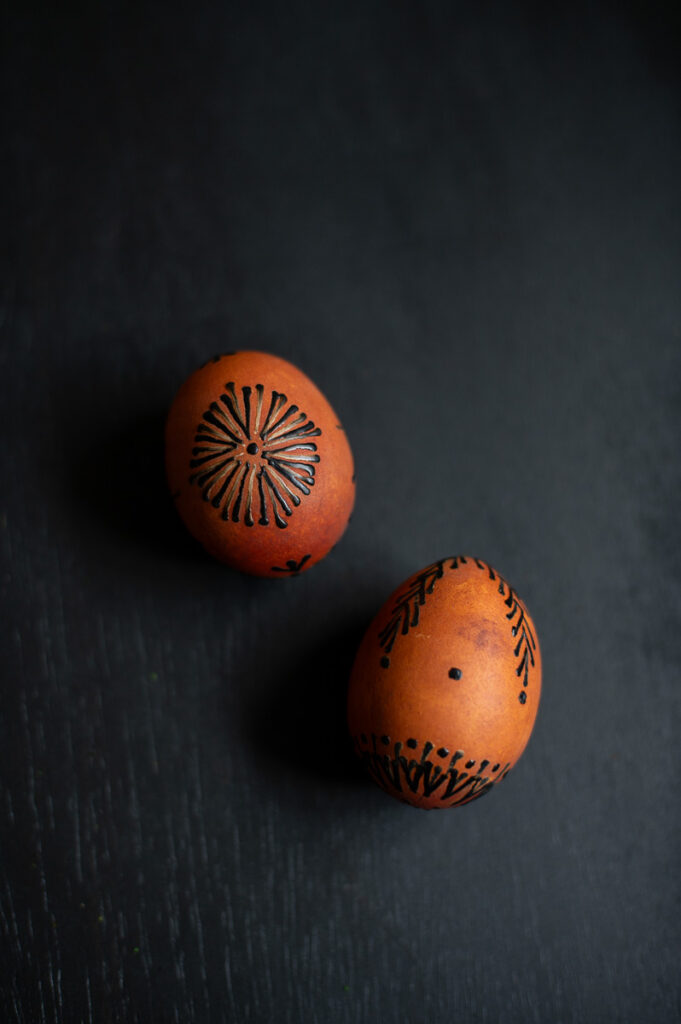
My Finished Drop-Pull Wax Decorated Easter Eggs
After getting done with the first round of wax on my eggs, I have to say I was tempted to leave them as is! They turned out so well! I love the classy black and white look, which would go so well with the black painted bow Easter eggs I made last year!
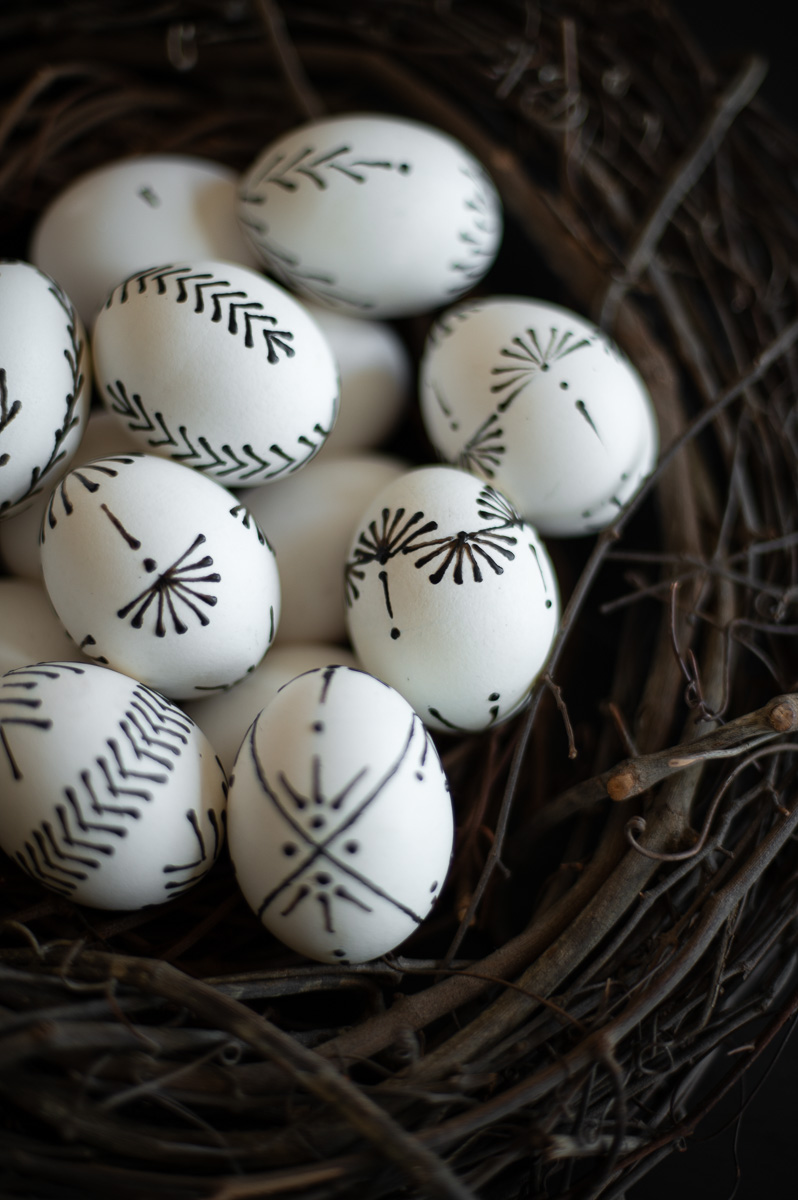
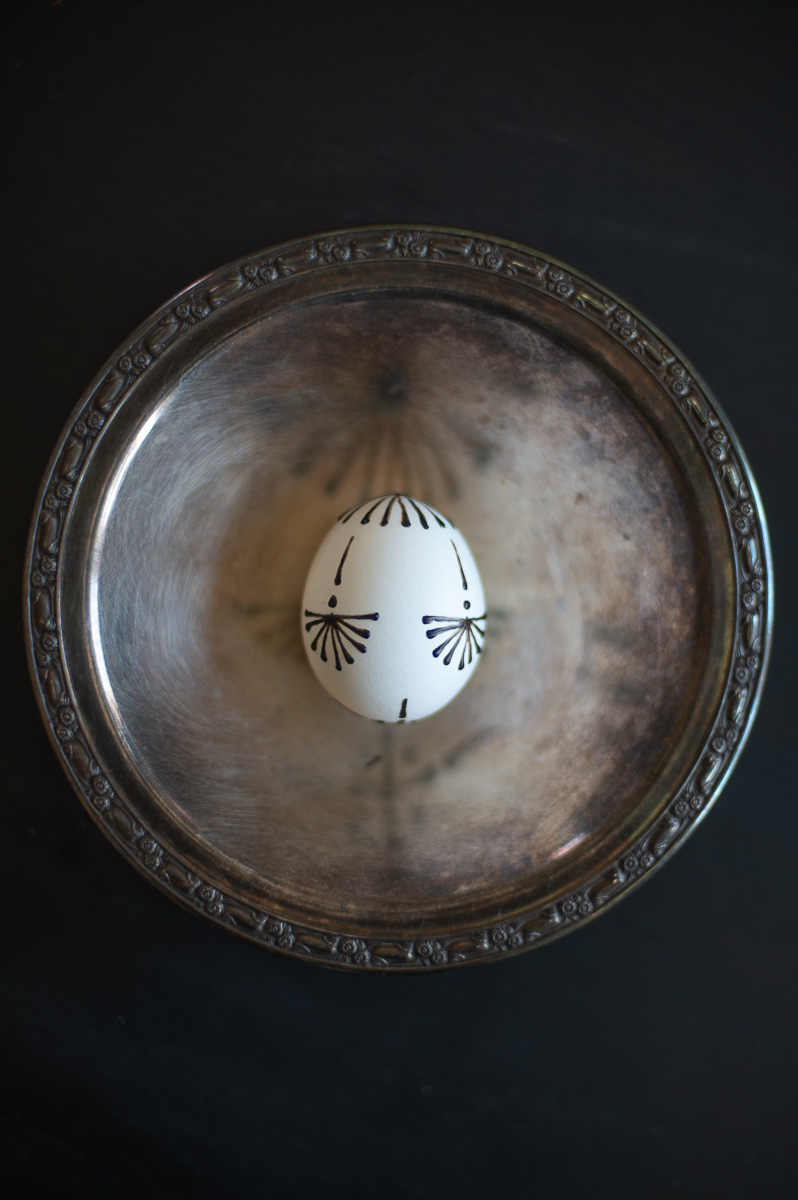
I definitely didn’t expect to love the look of the eggs with the wax on as much as I did.
Next time, if I plan to leave the wax on, I may experiment with applying a few different shades of colored wax to my egg designs in order to add more visual interest to them.
How To Dye Wax Resist (Pysanky) Eggs
Once your eggs are decorated with wax, it’s time to dye them! Remember that anything covered with wax will stay the color that was under the wax.
Single Dye Method
The easiest Easter egg dye technique is the classic single dye bath.
For this you’ll simply drop your eggs into your chosen dye for the length of time it takes them to reach your desired color.
Then take them out of the dye and set them off to the side to dry.
Pro Tip: Since we used wax to make our designs, you’ll need to be sure and use a cold dye bath so you don’t accidently melt your wax off your egg. This may mean you need to have much long dye times depending on the type of dye you chose to use.
Reverse Dying Brown Eggs With Vinegar
After figuring out how to make brown eggs white a few weeks ago, I wondered if it would work to reverse dye wax-resist Easter eggs, and it does!
Head over to this blog post to get all the details for how to lighten your brown eggs after applying you wax designs.
Multiple Dye Bath Technique
For a more complex design on your egg, you can use a series of dye baths either of the same color, darkening the hue each time, or using multiple color building on each other as you go.
Step One: Place Your Egg In The First Dye Bath
If you’re using just a single color: place the egg in the dye bath for a short period of time until it’s has achieved the lightest tone you desire for your egg. Then remove the egg and set it aside to dry.
If you’re using multiple colors: place your egg in your lightest color dye (usually yellow). Remove the egg from the dye bath once the desired color has been achieved and set it aside to dry.
Step Two: Apply More Wax To The Design
After your dyed egg has dried, it’s time to apply another layer of wax to your egg. Now anything you cover with the wax will stay the color you just dyed your egg.
Step Three: Place Your Egg In The Second Dye Bath
If you’re using just a single color: place the egg in the dye bath for a short period of time until it has achieved the darker tone you desire for your egg. Then remove the egg and set it aside to dry.
If you’re using multiple colors: place your egg in your second lightest color dye (usually light green). Remove the egg from the dye bath once the desired color has been achieved and set it aside to dry.
Step Four: Repeat The Process Until Done
After the second dye bath you’ll simply keep repeating the steps until you have finished your egg!
If you’re using multiple colors: remember to keep working from your lightest color to your darkest. -> White, Yellow, Light Green, Light Blue, Orange, Pink, Scarlet, Red, Dark Red/Brown, Dark Green/Royal Blue/Purple, Black
How To Remove Wax From Wax-Resist (Pysanky) Eggs
When you have finished dying your eggs, you can decide if you want to remove the wax, or leave them with the wax on. If you choose to remove it here are the two easiest ways to do so.
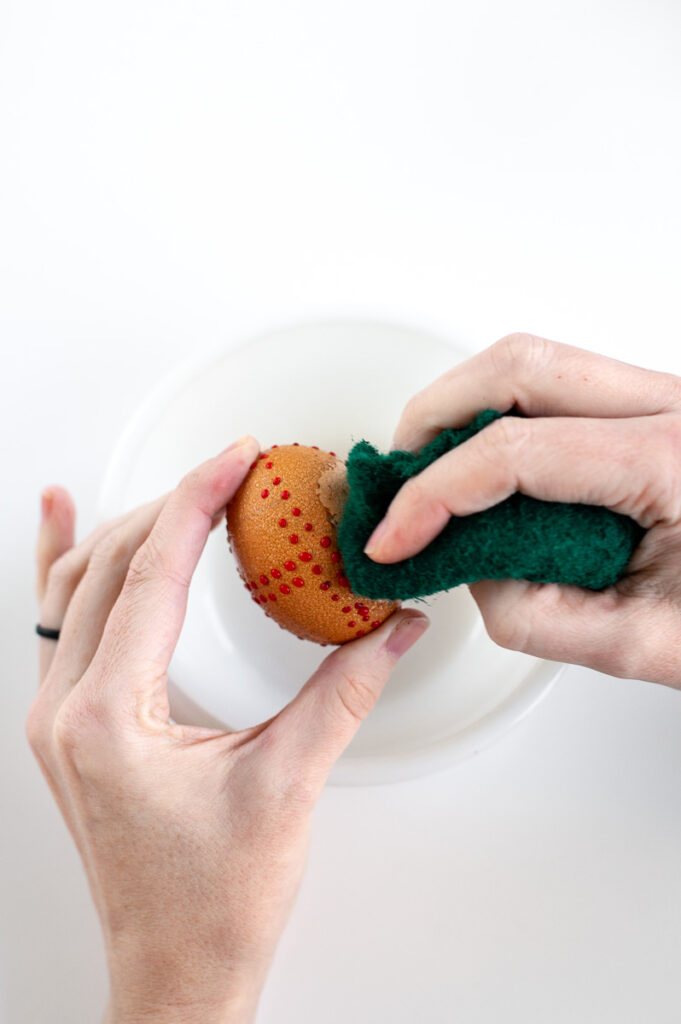
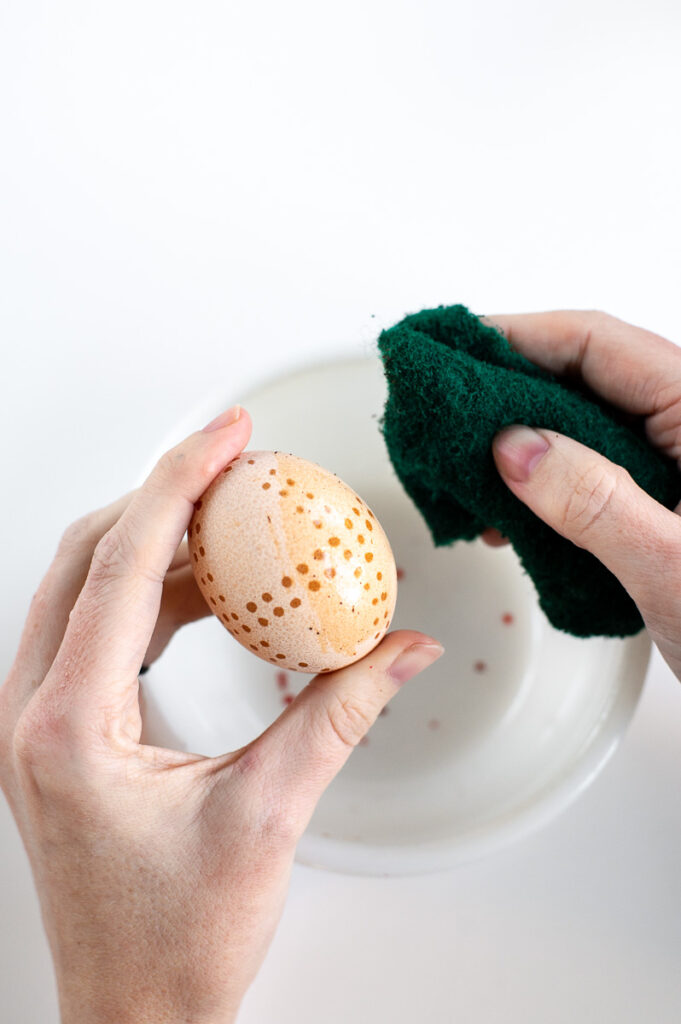
Method One: Soak In Hot Water
By far the fastest method to removing wax from your eggs is to soak your eggs in very hot water to soften the wax and then rub the wax off with a paper towel.
Pro Tip: Not all dyes hold up well to exposure to hot water, some natural dyes may flake off when exposed to hot boiling water. You also want to avoid putting cold eggs into boiling water as it may crack the shells.
Method Two: Use A Hair Dryer or Heat Gun
If you can’t soak your eggs in hot water, a hot gun or hair dryer is your next best option.
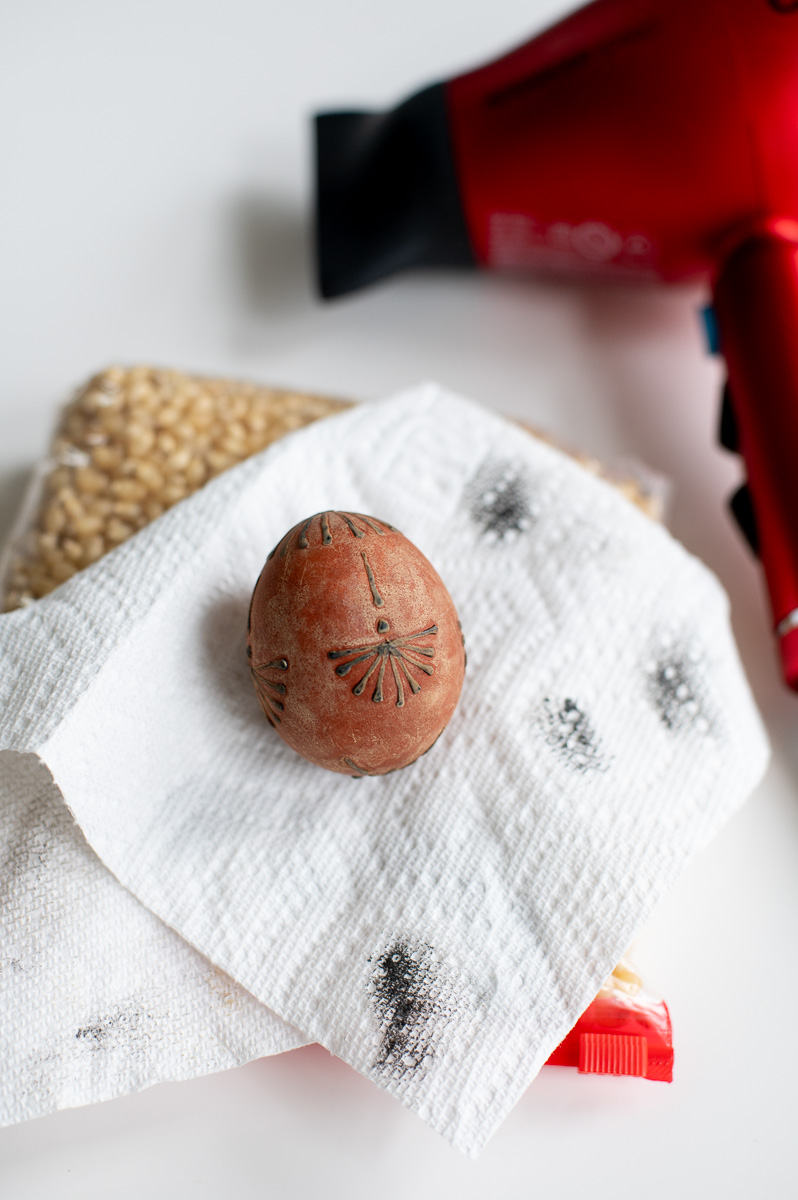
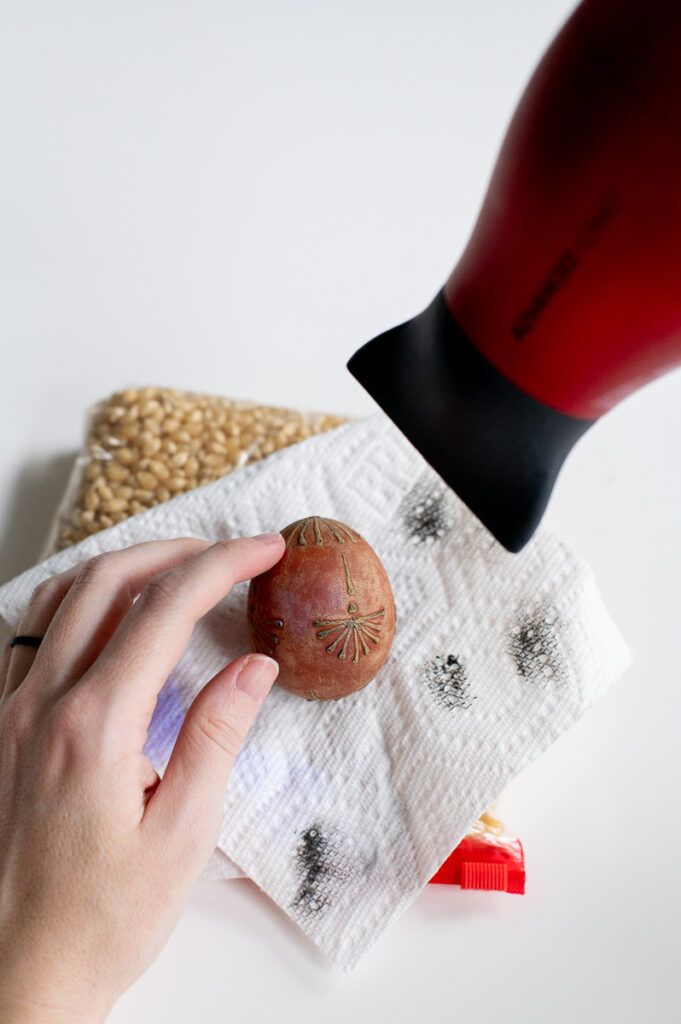
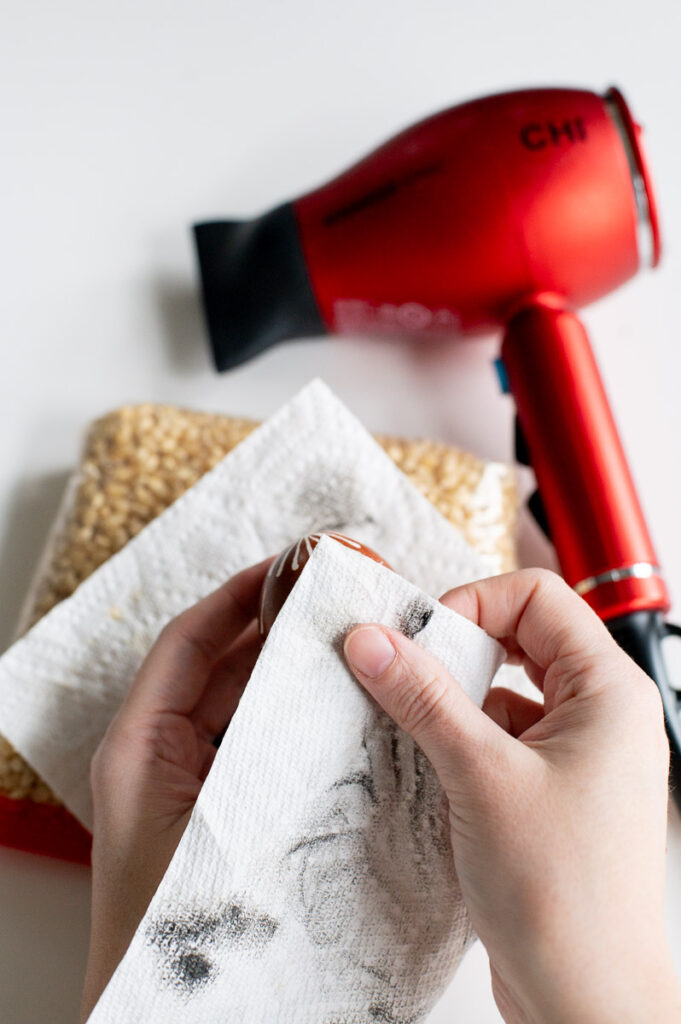
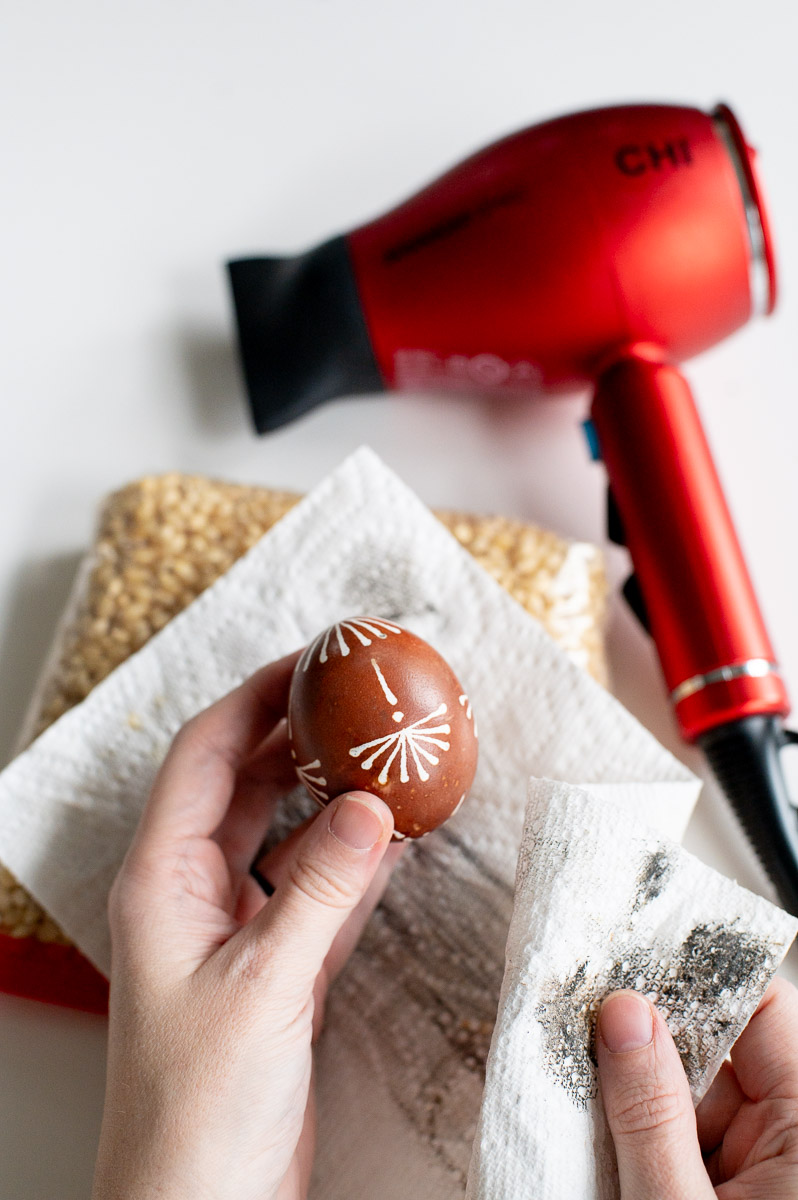
Simply warm the egg with hot air until the wax begins to melt, then wipe it away with a paper towel.
Pro Tip: If your hands get too hot trying to hold the egg while you warm it up, use some tongs to hold the egg in place.
How To Make Your Pysanky Easter Eggs Shine
When your eggs are exactly how you want them, there is one final step in this process that will literally make them shine.
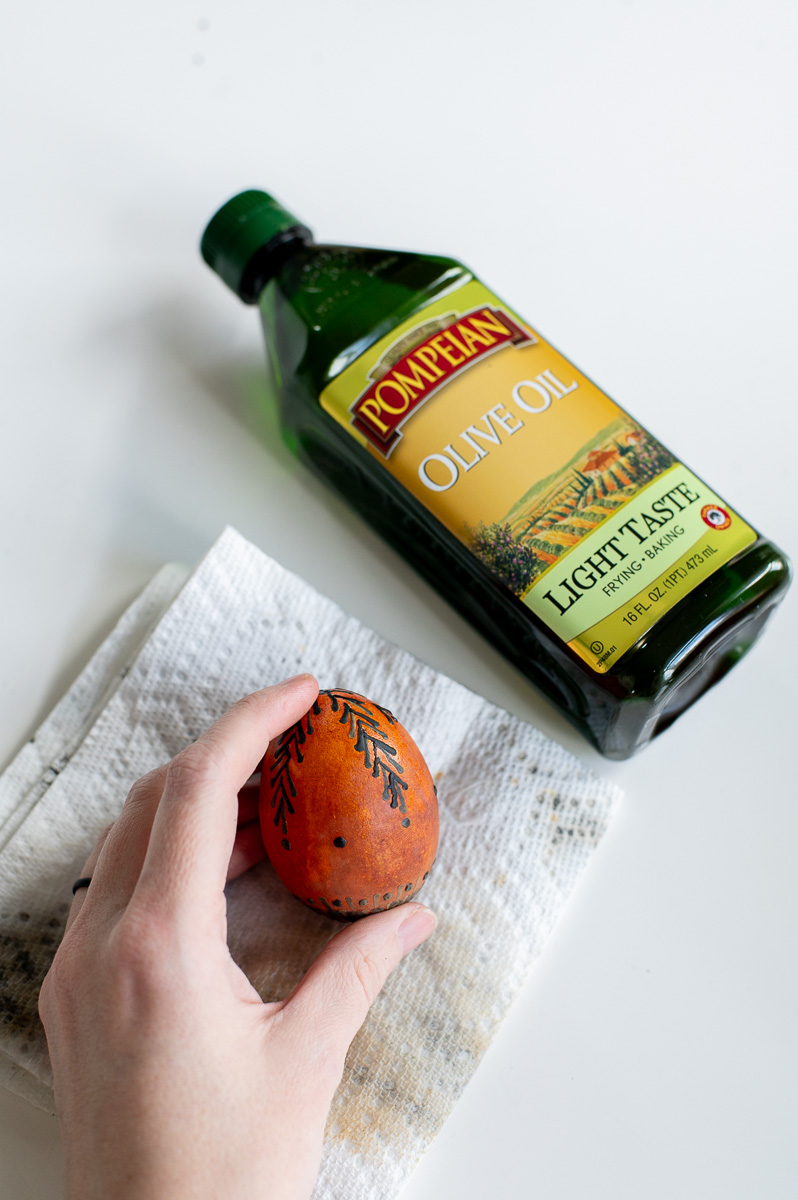
Coat Them In Olive Oil (Best For Edible Egg)
Place a small dollop of olive oil on a paper towel then gently rub the oil onto the surface of your egg, this will help hydrate the eggshell and give it a beautiful shiny finish (while still being edible).

Spray Them With Clear Enamel (Best For Preserving Blown Eggs For Years To Come)
If you want to help preserve the pysanky designs on your blown out eggs for years to come, simply give your eggs several quick coast of spray enamel! This will help harden the shell and protect it from easily breaking.
Frequently Asked Pysanky Drop-Pull Wax Resist Easter Egg Questions
Can I make pysanky eggs without a kistka tool?
Yes! You can easily create beautiful wax resist designs on your eggs with just a pencil and a pin. However more intricate designs will likely still require a kistka tool.
What is the best type of wax to use for making pysanky or drop-pull designs on Easter Eggs?
Traditionally pysanky uses beeswax to create designs. Drop-pull egg designs on the other hand often utilized colored wax most easily obtained using crayon wax. Most people use 100% crayon wax while other prefer a 50/50 mix of crayon wax and paraffin or beeswax.
What kind of pin or needle works best for wax deocrating eggs?
A dressmakers pin with a metal head is what is traditionally used, however I found a embossing stylus to be easier!
How do you keep the wax hot while working?
The wax is kept hot by placing a lit tea light underneath the wax while you work.
Is this a suitable easter craft for children?
No. The wax you are using to create the pysanky eggs is extremely hot. Therefore I would not recommend having children help with the pysanky process.
What is the best dye for wax resist eggs?
You can use any type of dye you like as long as it’s cold. Hot dyes will remove the wax designs from the egg.
Do you have to use dye when making drop-pull wax designs?
No. Wax can be used to decorate plain dyed easter eggs as well as for wax-resist design. If you choose not to dye your egg be sure and use color crayon wax though so you can see your designs!
How do you make fine lines with wax on eggs?
By either using a specialty tool like a kistka, or by using a very small pin head and dragging it slowly across the surface of your egg.
Can you layer colors with this method like traditional pysanky?
Yes, this method works to layer colors in the same way that traditional pysanky does.
How long to wax resist eggs last?
If you blow out and clean your eggs prior to decorating them, they can last forever! If you are using hard boiled eggs they can last up to a week when stored in the refrigerator and still be safe to eat. Hard boiled eggs left out at room temperature for more than 2hr should not be eaten.
Final Thoughts On This Wax Resist Drop-Pull Easter Eggs Tutorial
To be totally honest, this is a project you likely aren’t going to be perfect at the first time you try it. When I sat down for my first attempt, I quickly became frustrated that I couldn’t get my designs to come out as well as the examples I had seen online.
However, a lot of trial and error later helped me understand the mistakes I was making so I could improve my tools and technique.

Even so, this is a family tradition passed down through generations, and it’s probably understandable if my first attempt didn’t look like grandma’s who has probably made thousands of these over the length of her life.
I’m just excited that I figure out all the things NOT TO DO this year, so that YOU don’t have to and that next year I can get even better at it!
I am also excited to play around with making eggs I intentionally leave the wax on next year. I didn’t think I would love the wax on a much as I did but when it came time to remove the wax from some of the eggs I just couldn’t do it! I loved them too much as is!
Oh and if you want to know what started this whole rabbit hole, check out Mary’s Eggs on youtube!

Don’t Forget To Pin This Post & Subscribe!
Want to keep getting more DIY home decor inspiration, thrifting tips & tricks, free art downloads, reading recommendations, and home renovation tutorials? Then don’t forget to pin this post for later so you can follow me on Pinterest and then subscribe to my blog so you can get links to my newest content as soon as it hits the blog!