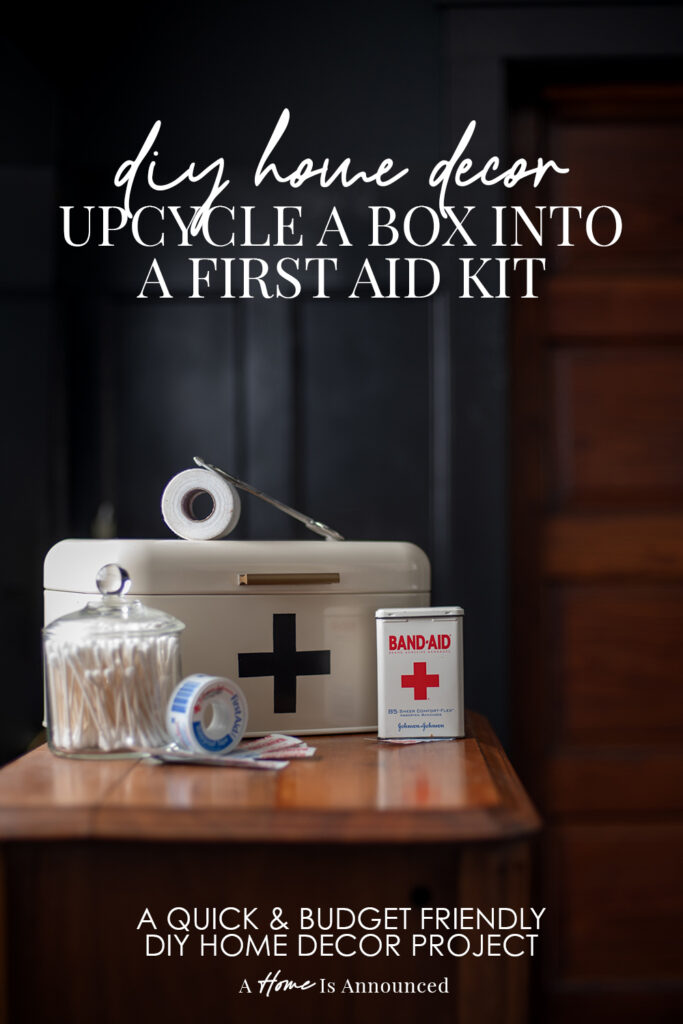
I’ve made it my mission in life to transform as many utilitarian objects in my home as possible to be as beautiful as they are functional. So when I saw an influencer share a gorgeous enamel first aid box they had picked up on Amazon, I knew I had to figure out a way to DIY my own vintage inspired one!
*This blog post contains affiliate links, meaning that if you purchase any of the items using the links I provide I, as the author of this website, will receive a very very small commission from that sale. This is a great way to help support your favorite bloggers at no cost to you. Think of it like a tip jar that costs you nothing!
The Supplies
The supplies to create your DIY first aid box are simple. I’ve gone ahead and linked what I could.
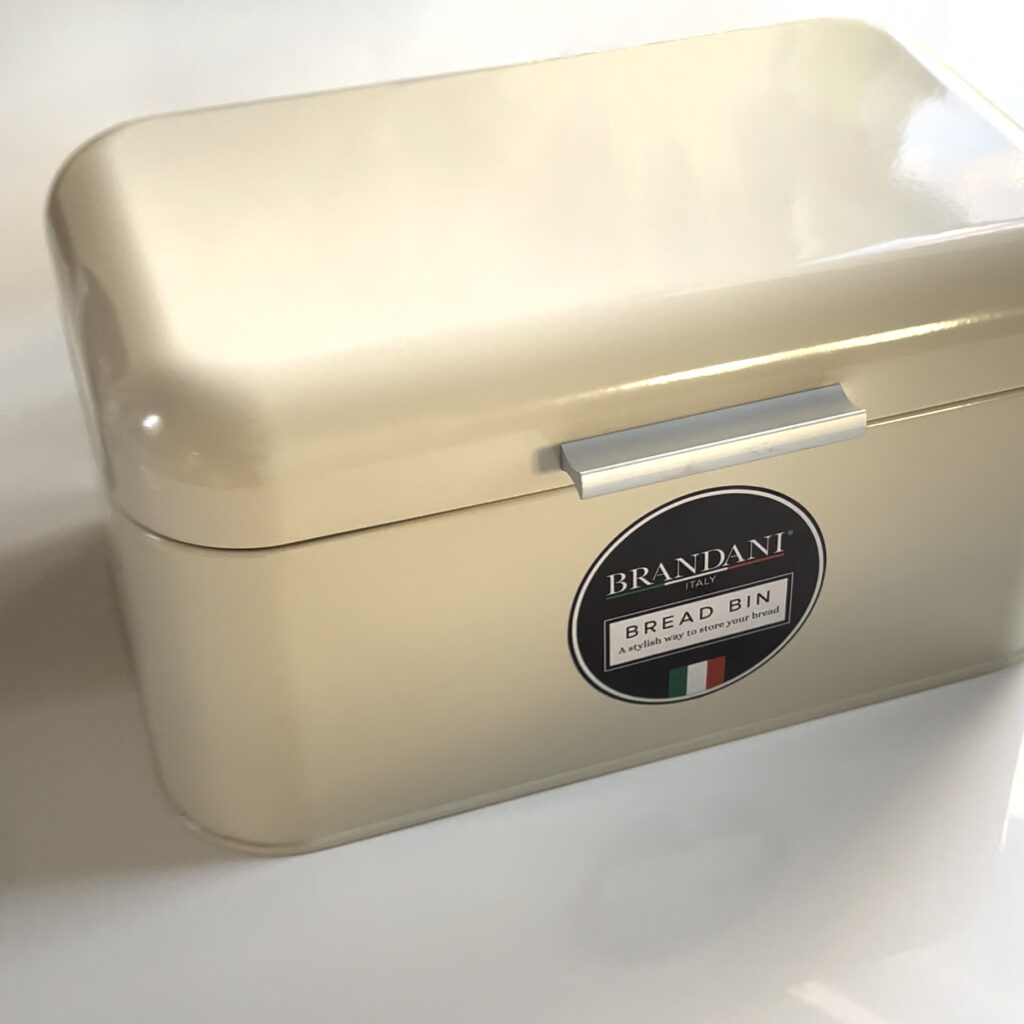
- A Box or Container
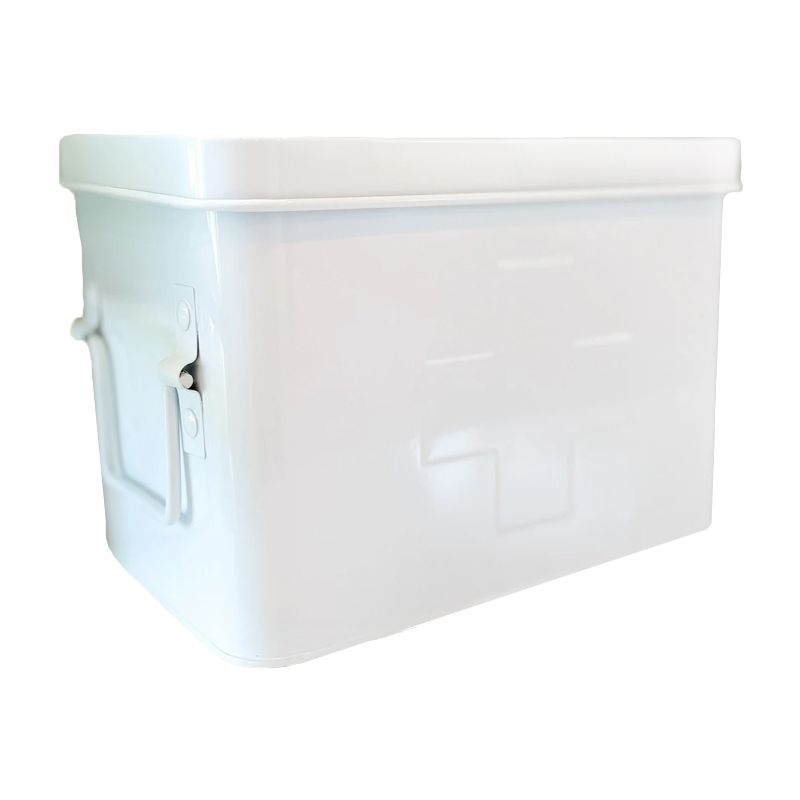
- Find one you like the shape of at a thrift store, or discount home furnishings shop. I ended up using a bread box (similar to this one) I found for an amazingly cheap price at HomeGoods.
- Painters Tape
- I really like this blue ScotchBlue Sharp Lines tape, but feel free to use whatever you have on hand!
- A Black Marker or Pen
- An X-Acto Knife
- Did you know X-Acto is a brand name and not the name of the knife itself? Like poptarts, or kleenex? I say this because, if you don’t own one yet, I’ve had my eye on this knife from Fiskars. The comfort grip looks so much better if you plan on using it alot!
- A ruled cutting mat and ruler is also very helpful if you have them, if not you can use a plain kitchen cutting board and any hard straight edge you can find.
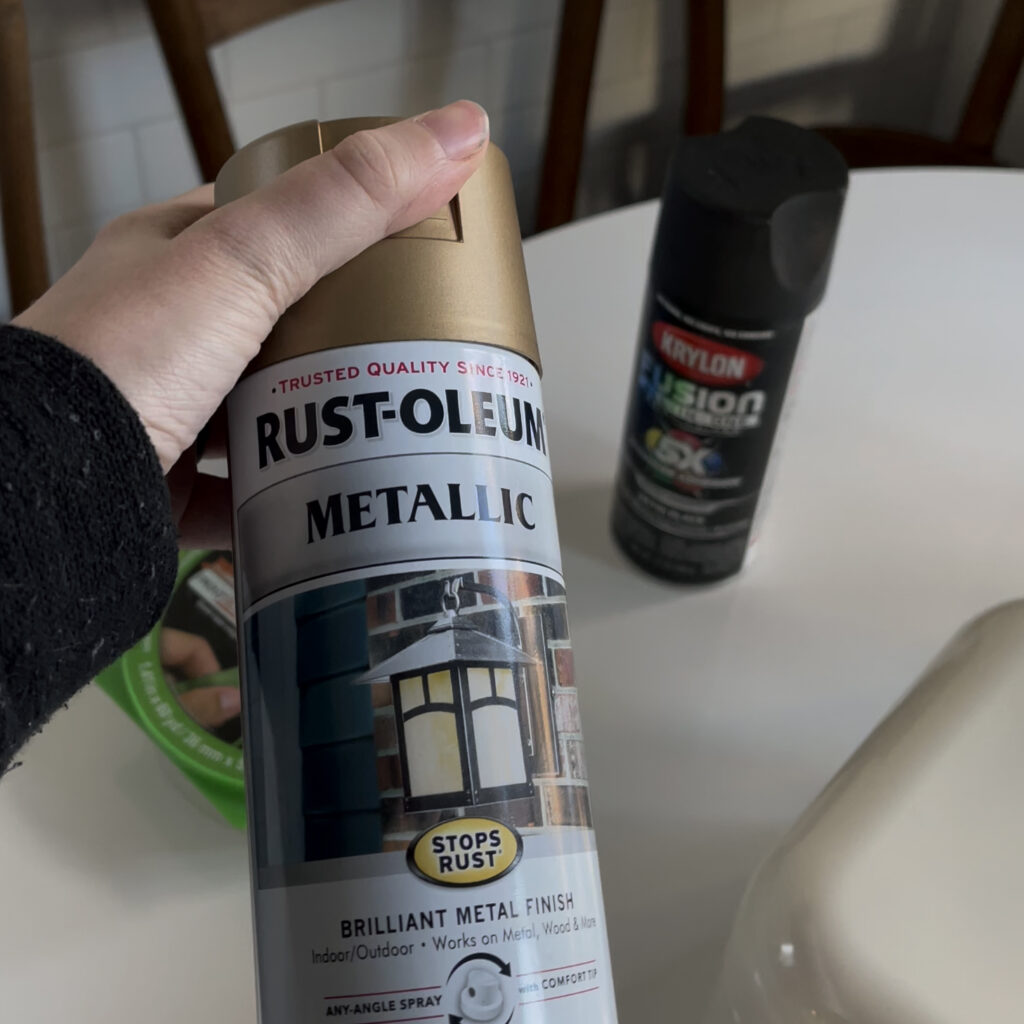
- Spray Paint
- I used this satin black for the swiss cross and then this champagne bronze (this paint looks much more soft brass/gold than bronze as a head up) for the handle of mine! I had these lying around the house already which made this project even cheaper!
- Plastic Grocery Bags
The Process
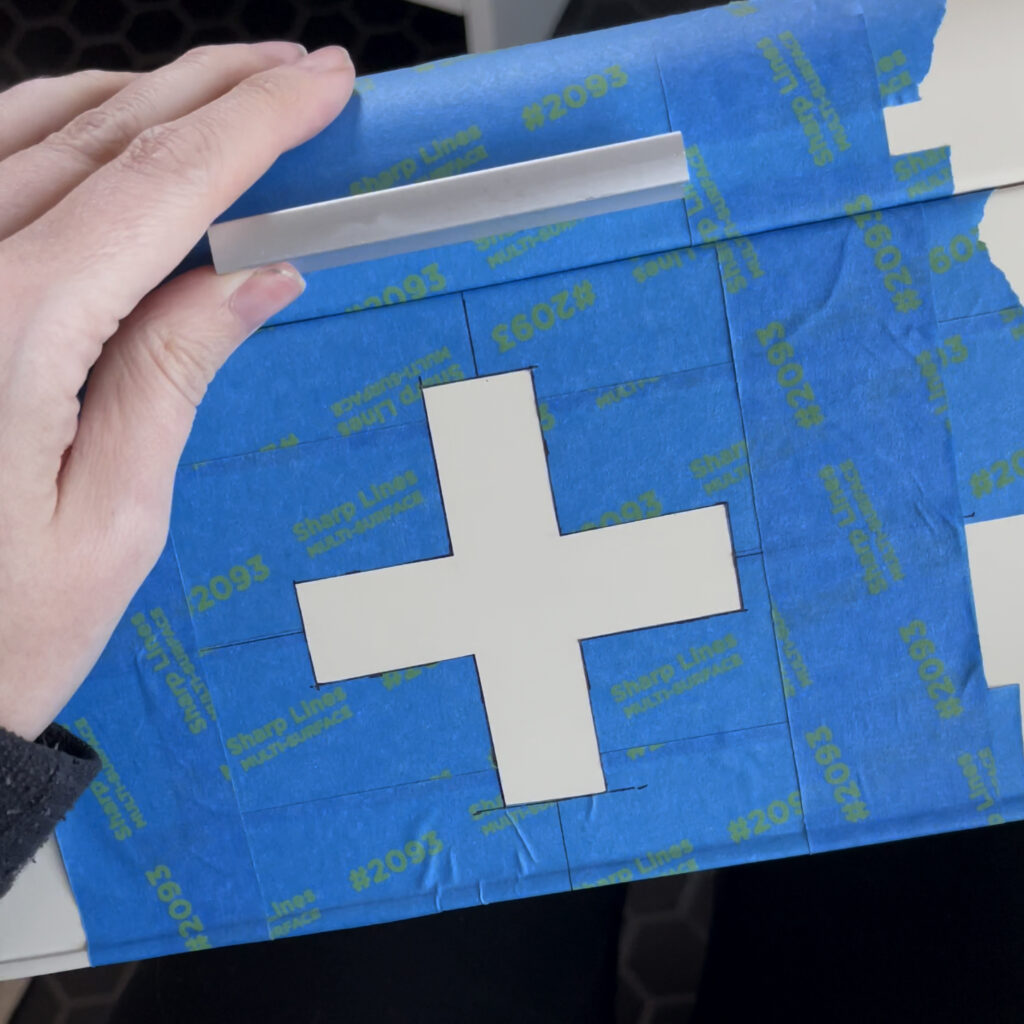
For my box, I wanted to change the color of the handle to brass. So my first step was taping off the area around the handle with painters tape to prep it for paint.
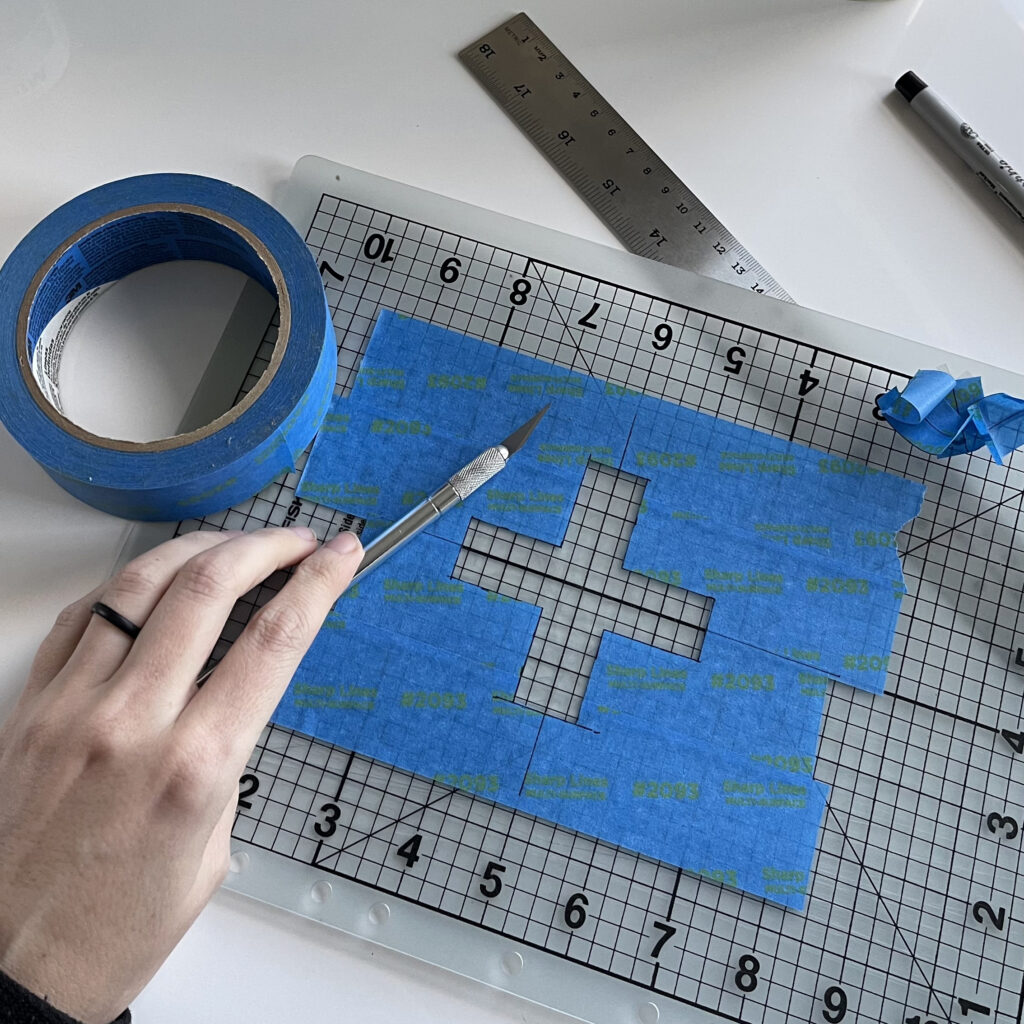
I then took my painters tape and overlaid pieces across my cutting mat until I’d created a sheet of tape large enough to cut my swiss cross out of. (You want to make sure the tape overlaps a good bit so it hold up for later steps.)
Next I drew the shape of my cross onto my painters tape with a marker.
Once everything was drawn, I carefully used my exacto knife to cut out the swiss cross design and remove the tape from that area of my sheet of tape.
Then I gently peeled up the tape and applied my new sticky stencil to the front of my box.
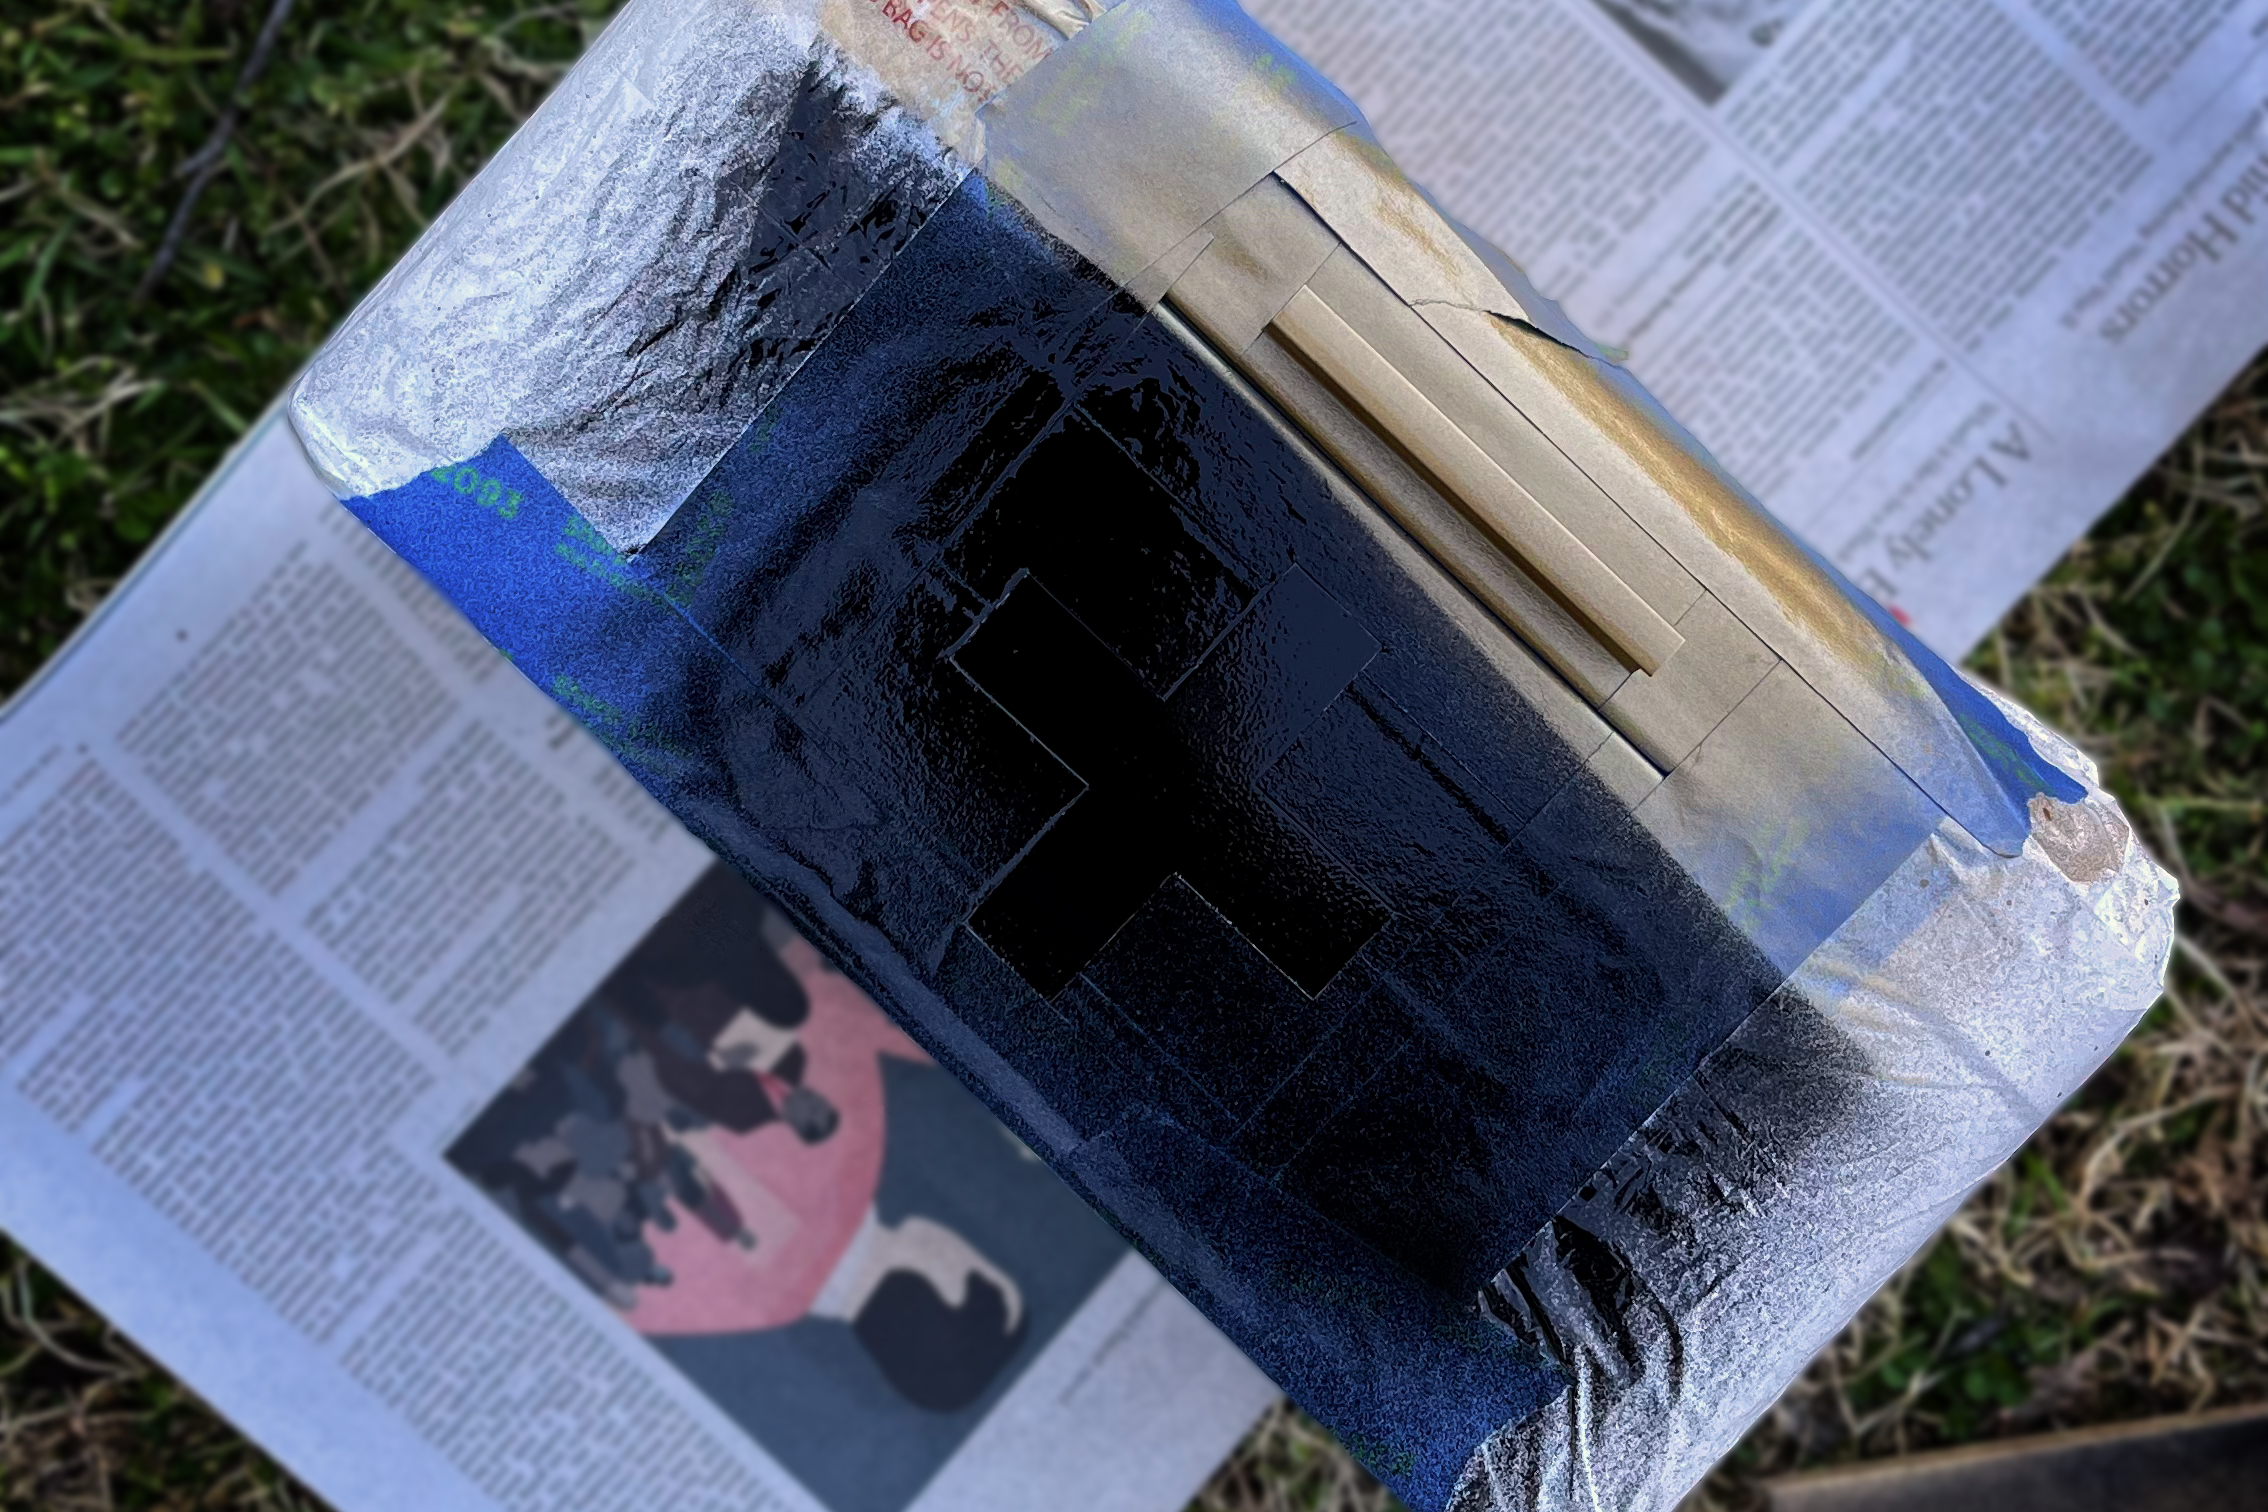
My final step before paint was to use some old plastic grocery bags to cover all the remaining exposed areas of the box I didn’t want to get paint on.
Finally, I took my box outside and gave it a good coat of gold and black spray paint, using a paper grocery bag to block the black area from the gold when spraying so I didn’t get paint where I didn’t want it.
The Final Result
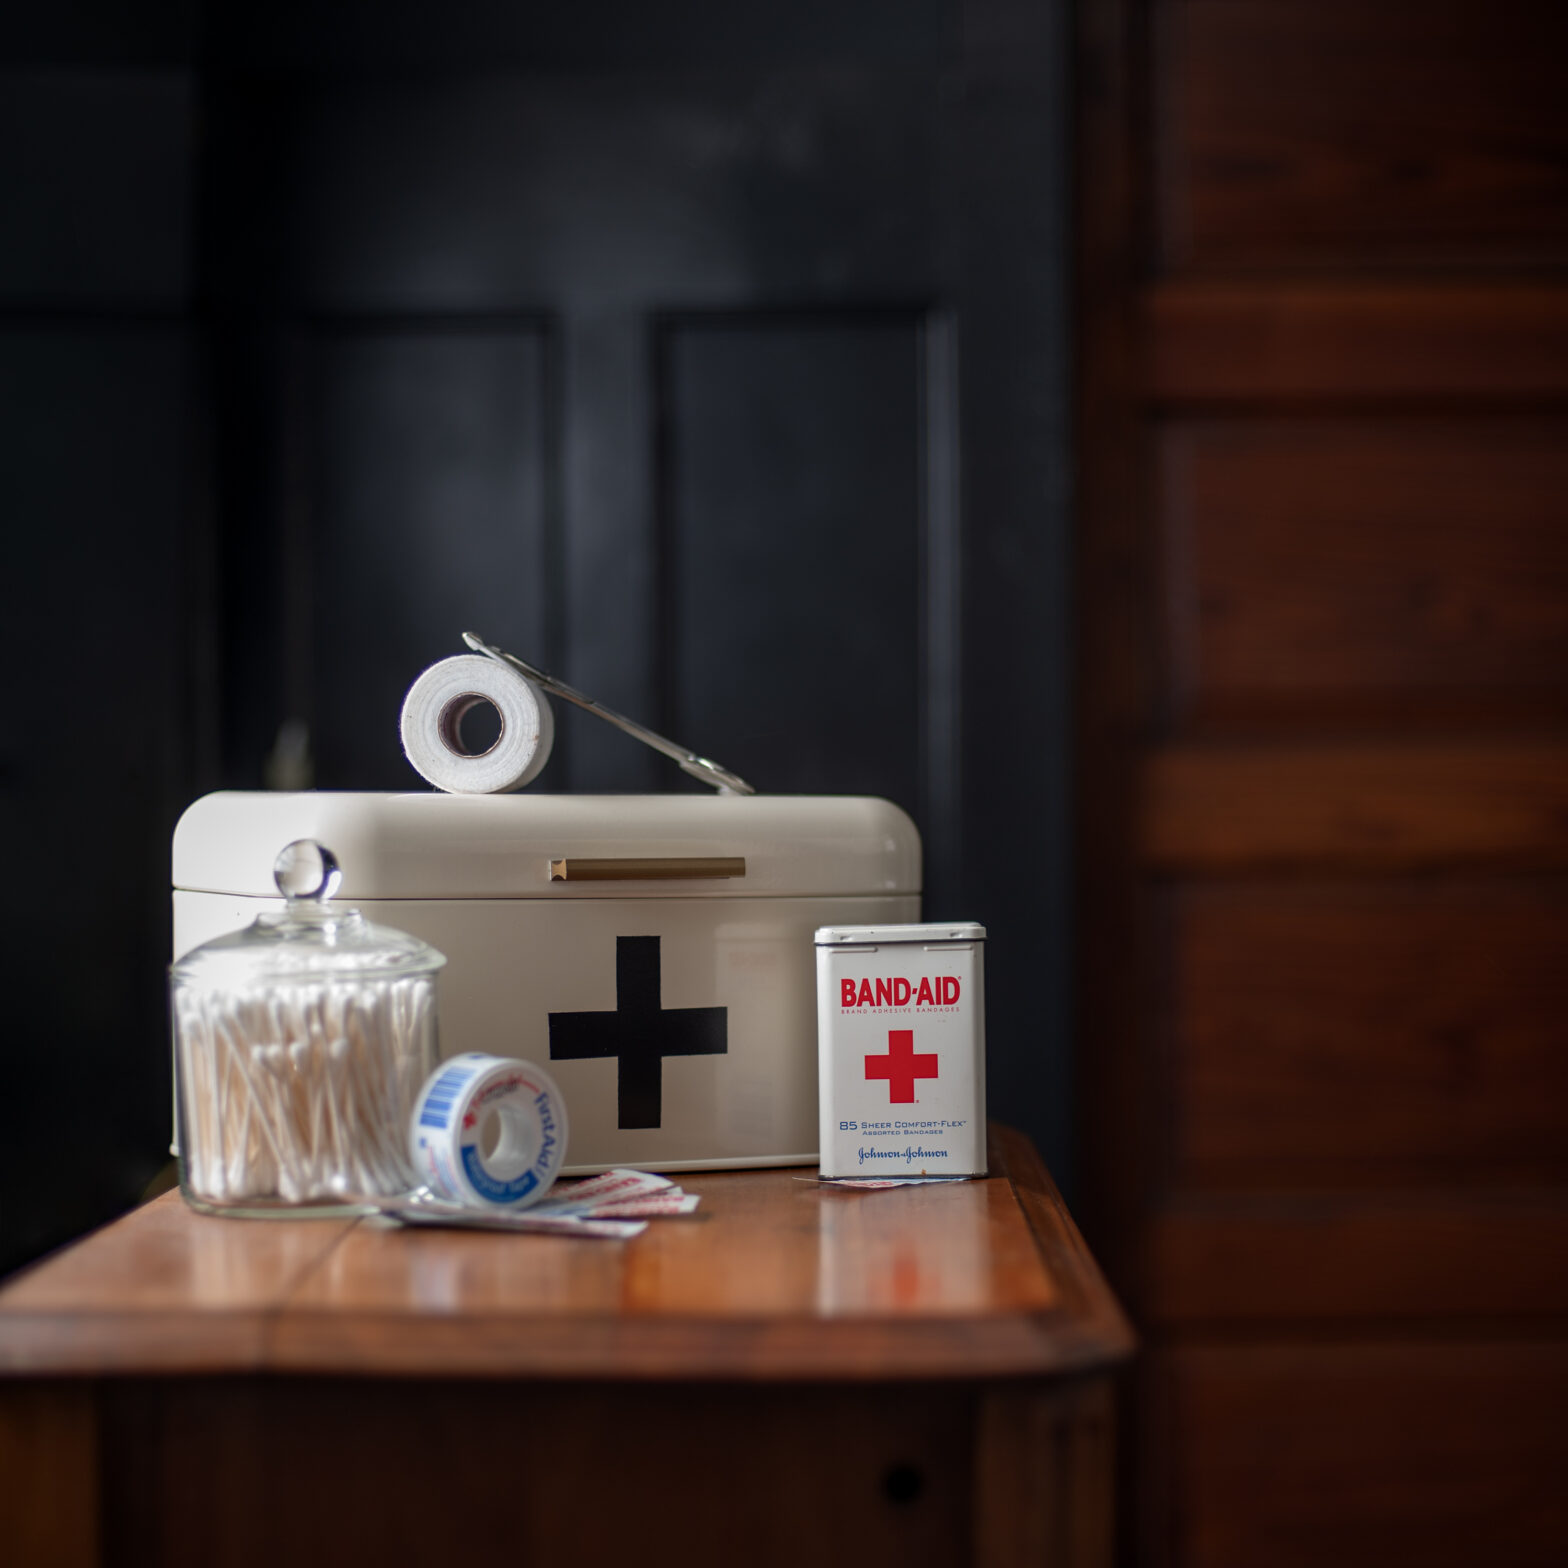
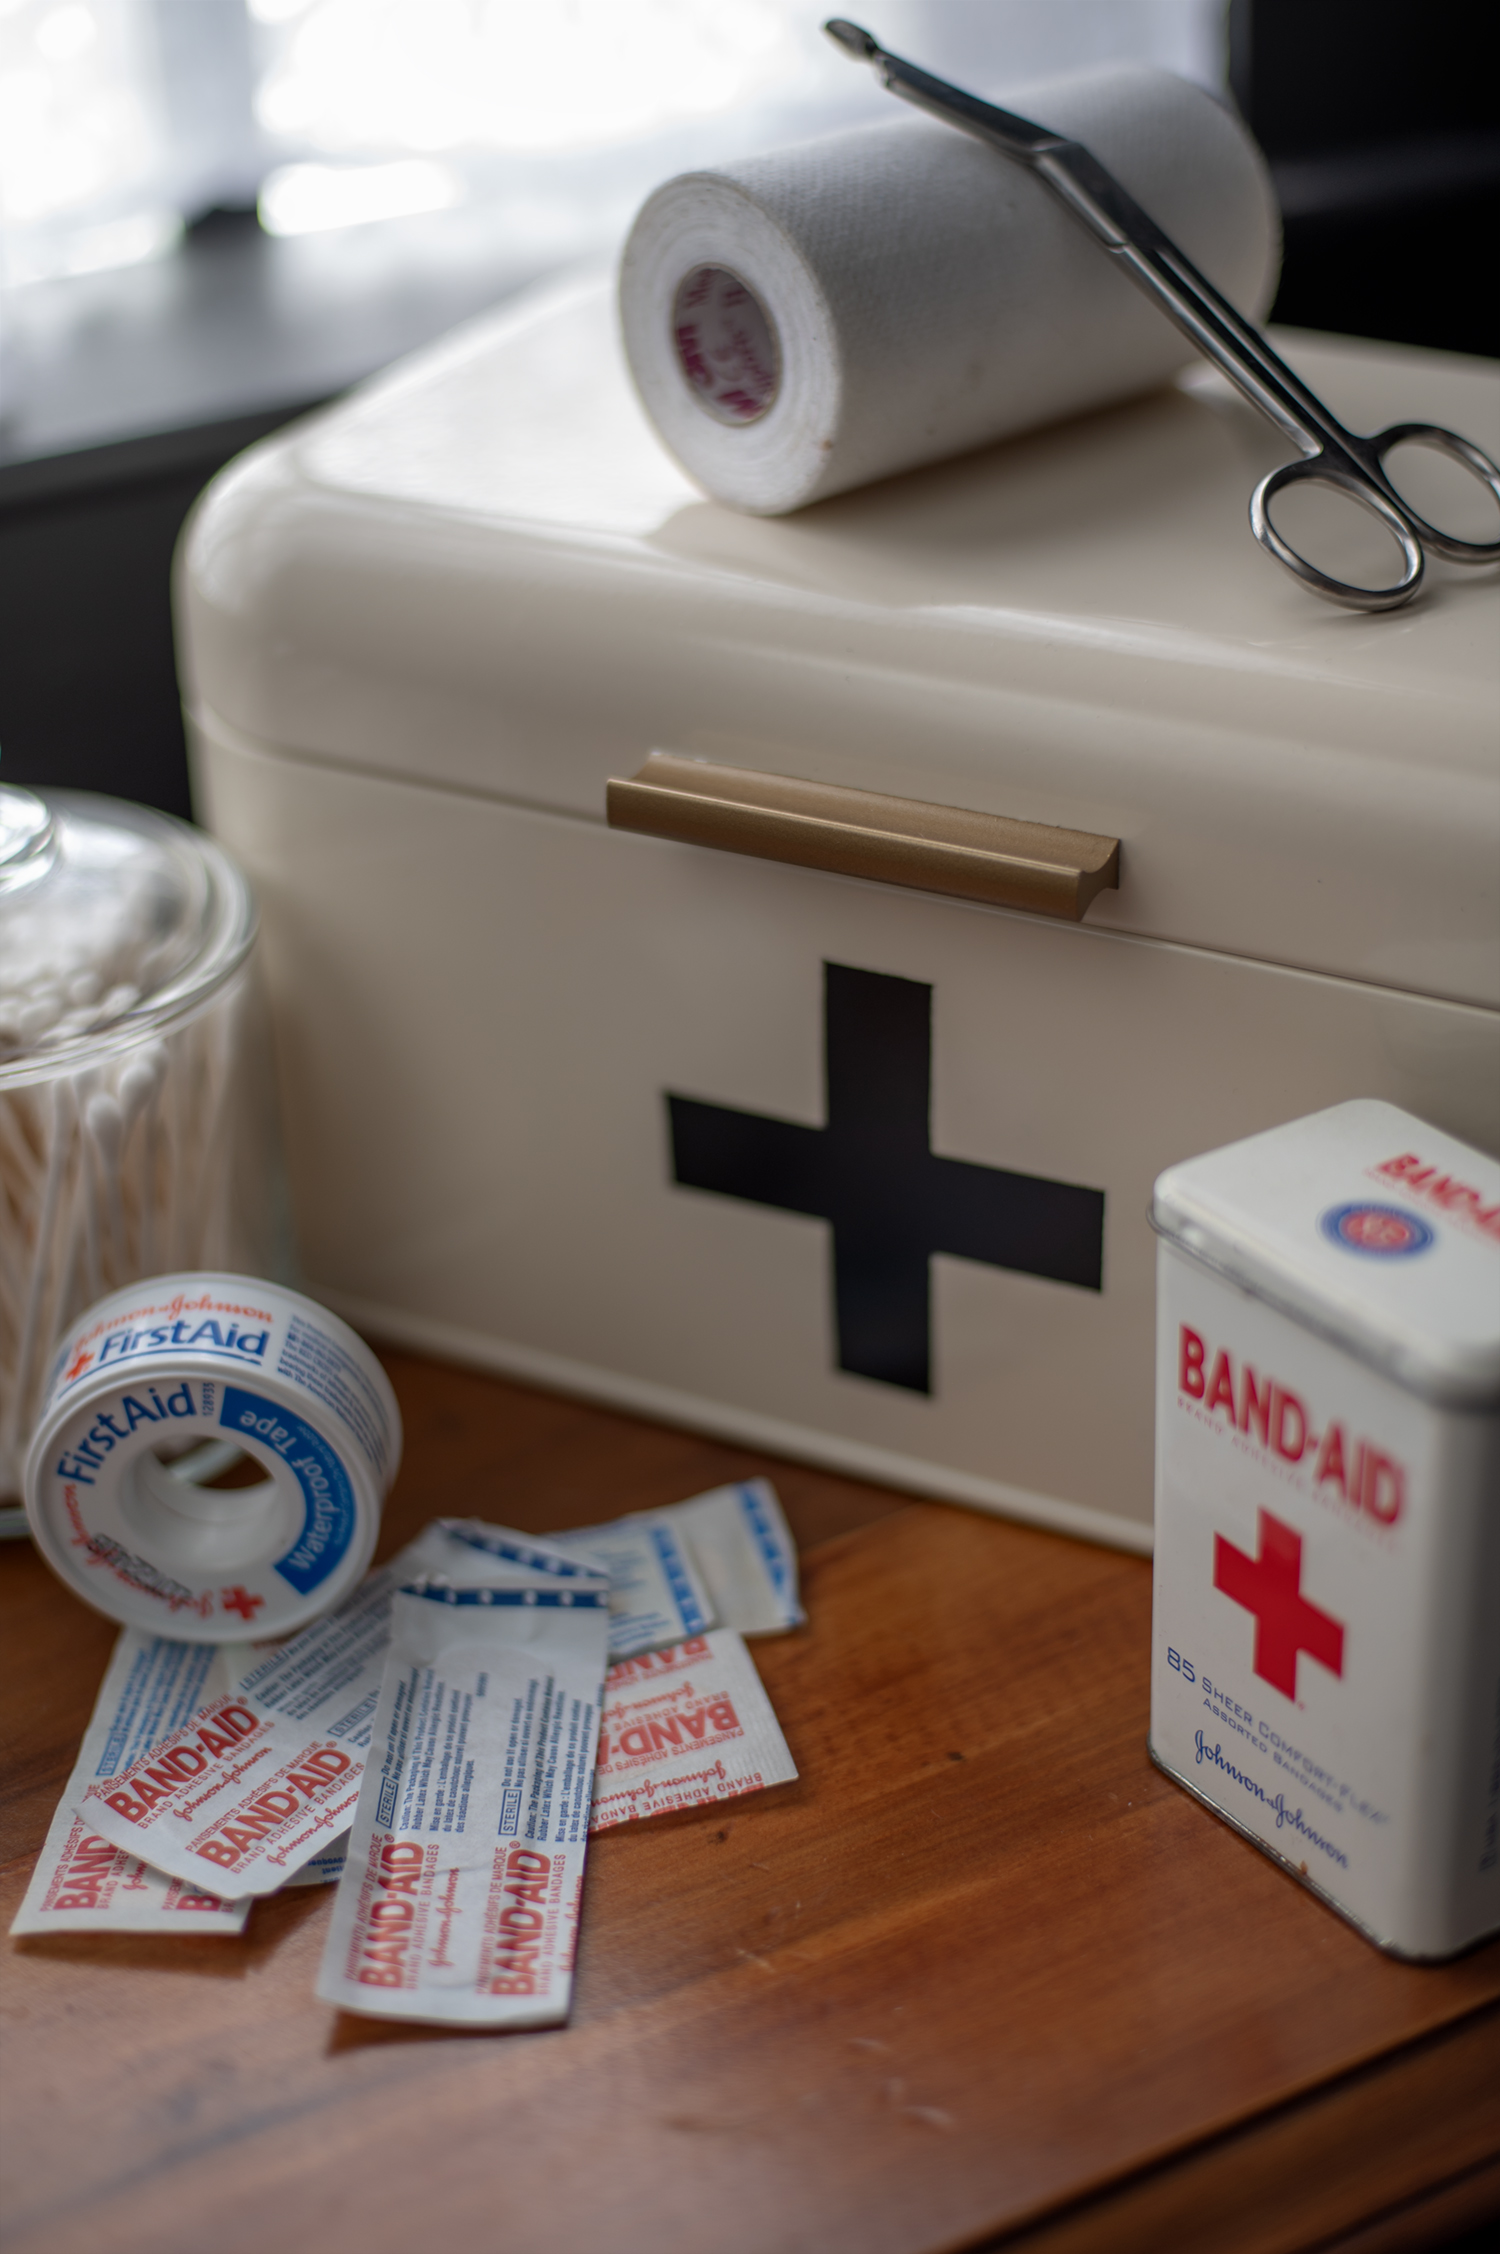
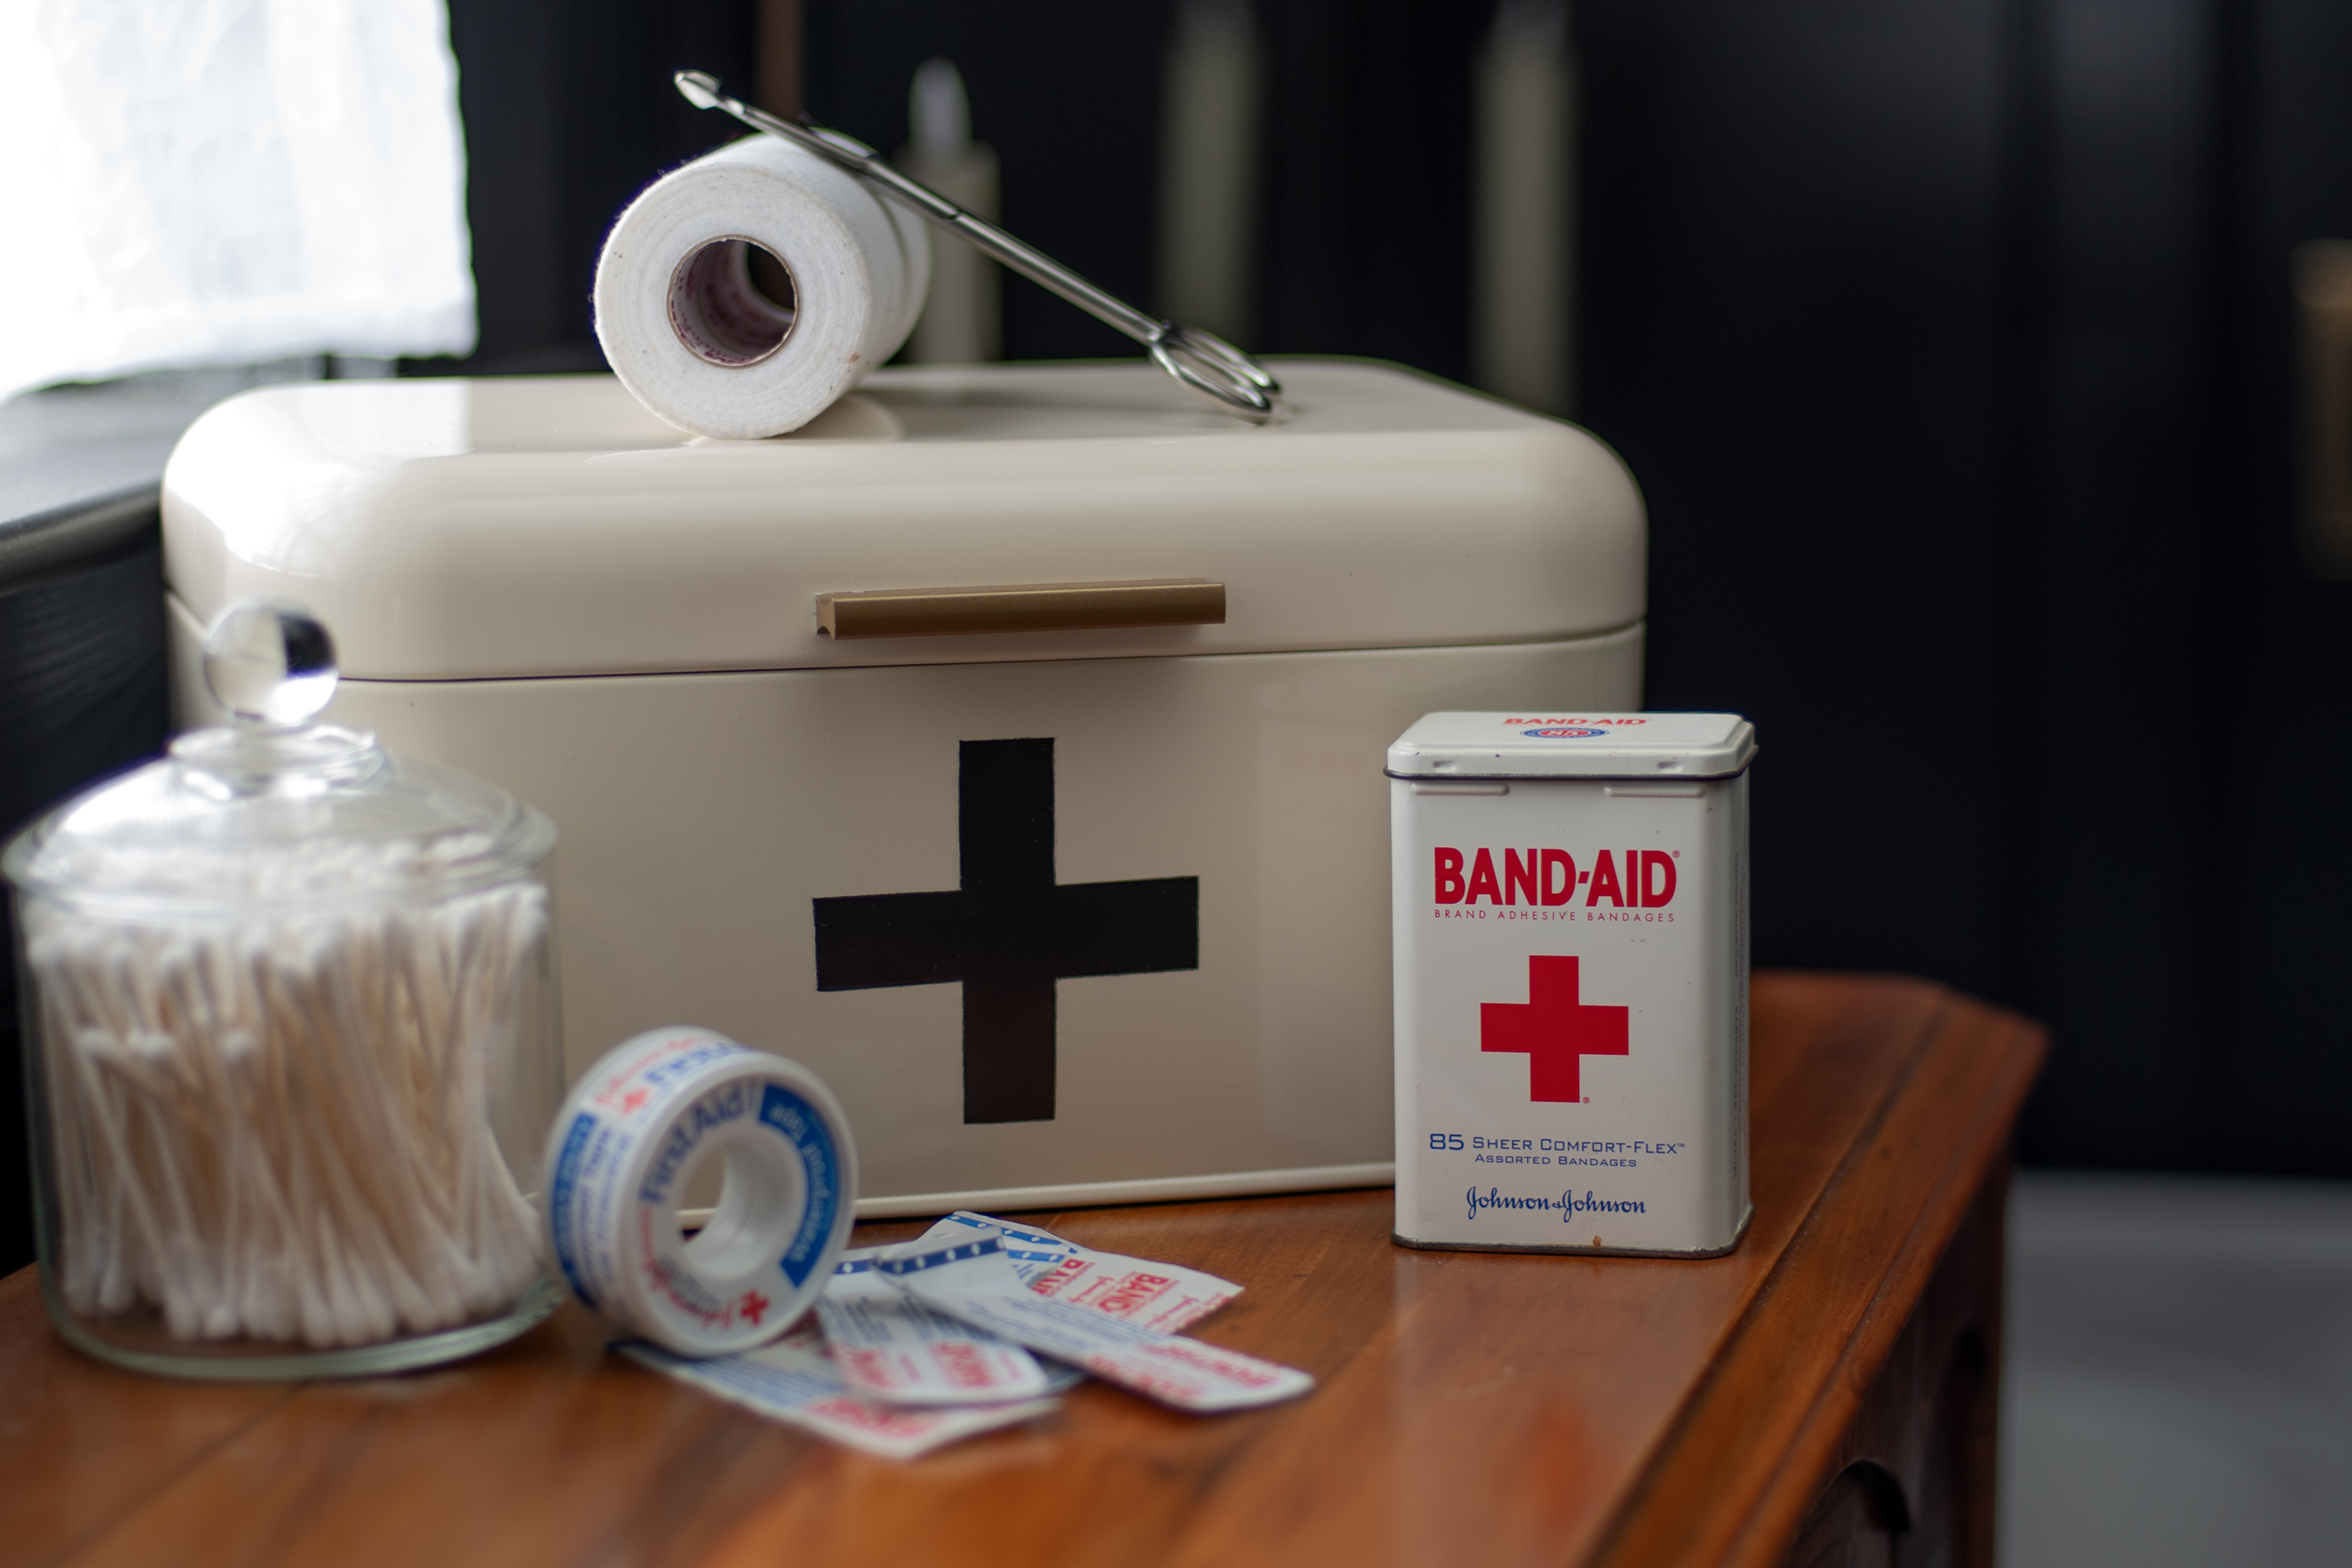
After my paint had fully dried I removed all the plastic and tape and had the vintage inspired enamel first aid kit box of my dreams for a fraction of the cost of the Amazon one.
I love how this project turned out so much, the black accents made it the perfect addition to our vintage 1930s bathroom we renovated!

Shop The Look Instead
Too busy to make your own and just want to purchase a similar vintage inspired enamel first aid kit box instead to save yourself some time? Here’s a round up of some of my favorites that are available for purchase. You can also score some beautiful vintage first aid boxes on Etsy here!


Don’t Forget To Pin This Post & Subscribe!
Want to keep getting more DIY home decor inspiration, thrifting tip & tricks, free art downloads, reading recommendations, and home renovation tutorials? Then don’t forget to pin this post for later so you can follow me on Pinterest and then subscribe to my blog so you can get links to my newest content as soon as it hits the blog!
Yay! So happy to see this in my inbox!