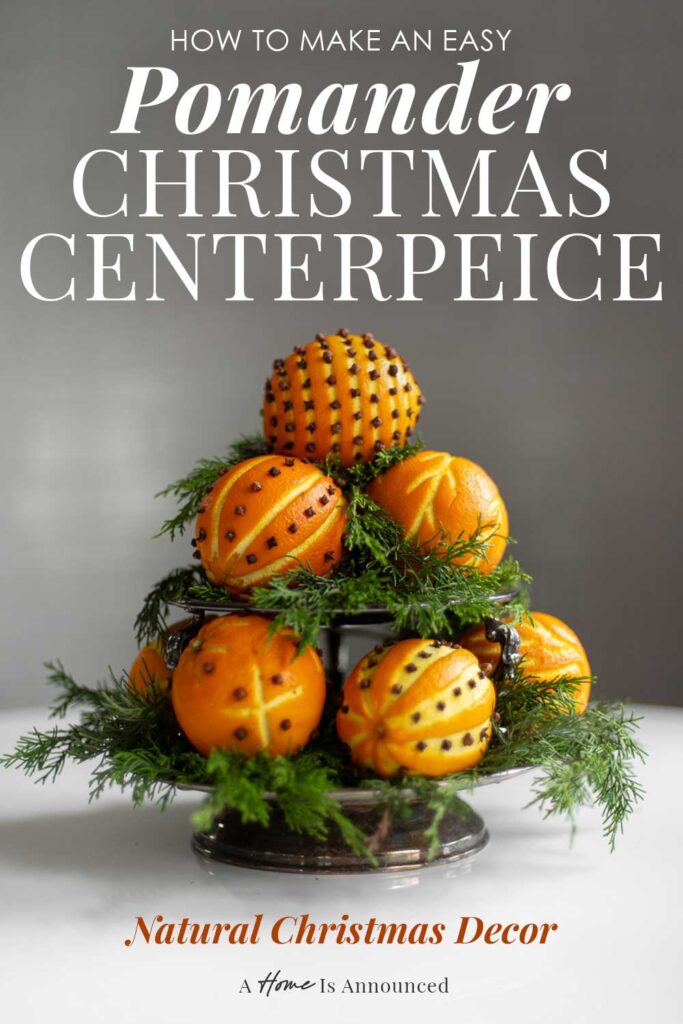
Scrolling through Pinterest the other night, I found the most beautiful image of a holiday centerpiece made entirely from orange pomander balls stacked into a tall tree shaped tower. Having just made a bunch of pomanders for my previous post, I instantly had an idea for how I could recreate that image in much more accessible and easy to DIY way.
So whether you’re here just searching for natural christmas table decor ideas, or simply want a budget friendly way to decorate for the holidays using natural materials, this simple old world Christmas centerpiece is a quick easy DIY you can create in under an hour.
How To Make A Simple Orange Clove Pomander Ball Topiary
Pomander ball topiary fruit arrangements have been a holiday tradition for hundreds of years. And while traditionally these traditional Christmas centerpieces would require a long list of floral supplies like specialty floral foam, wooden skewers, floral wire, etc. My version gets you the look without all that.
Supplies Needed For This Easy Pomander Centerpiece
- A tiered serving tray
- A handful of fresh (or faux) greenery
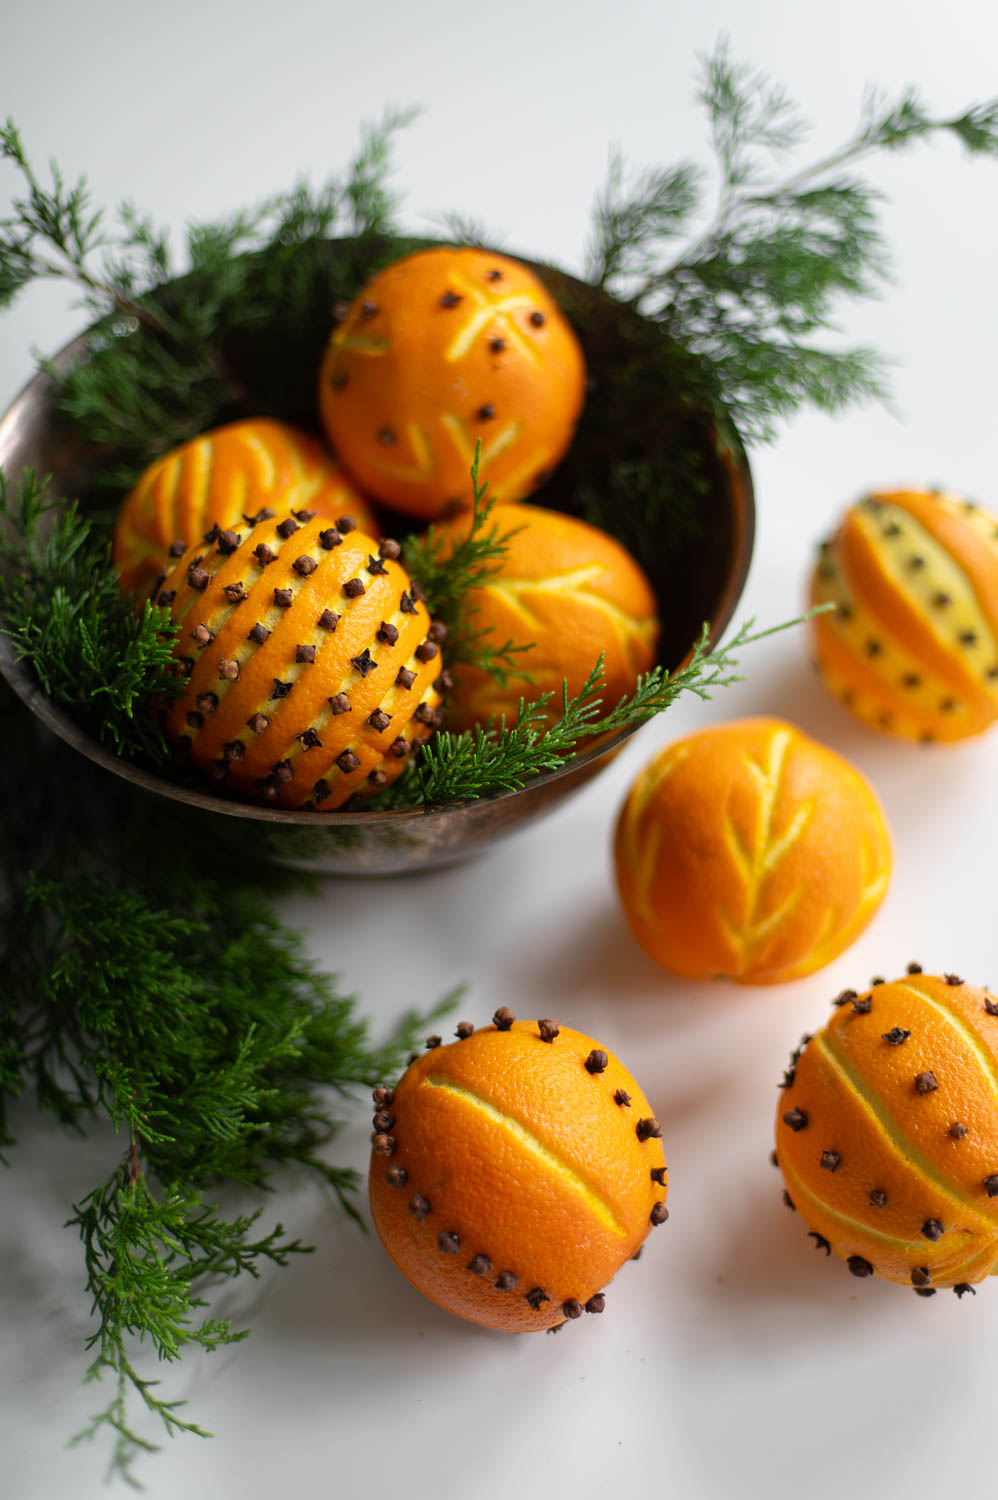
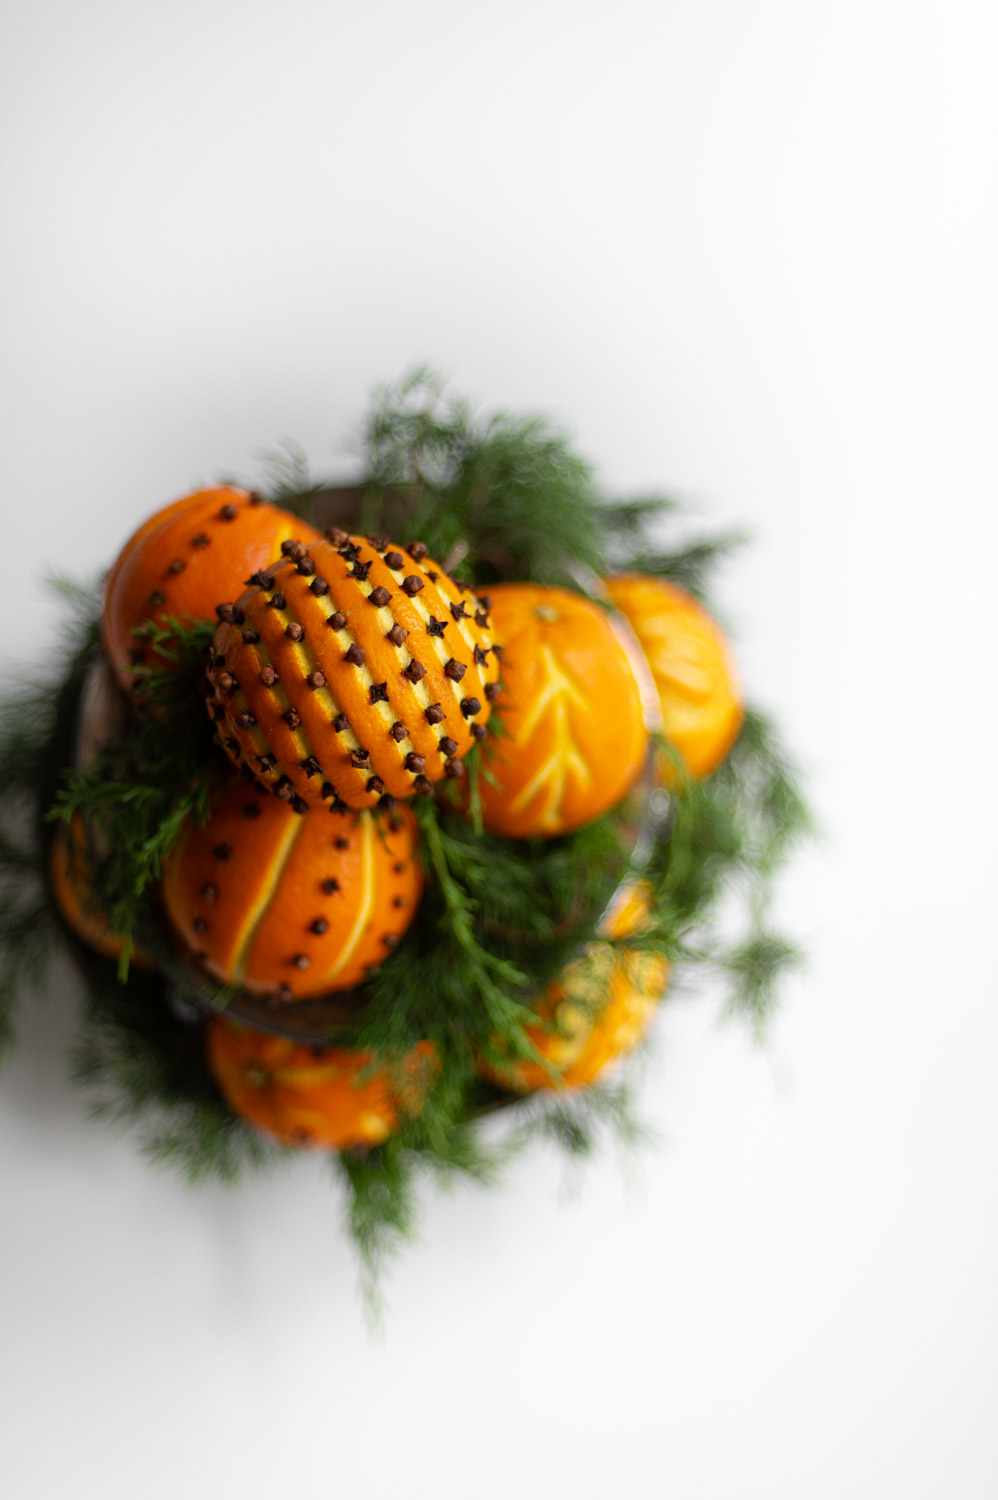
- A collection of orange clove pomander balls
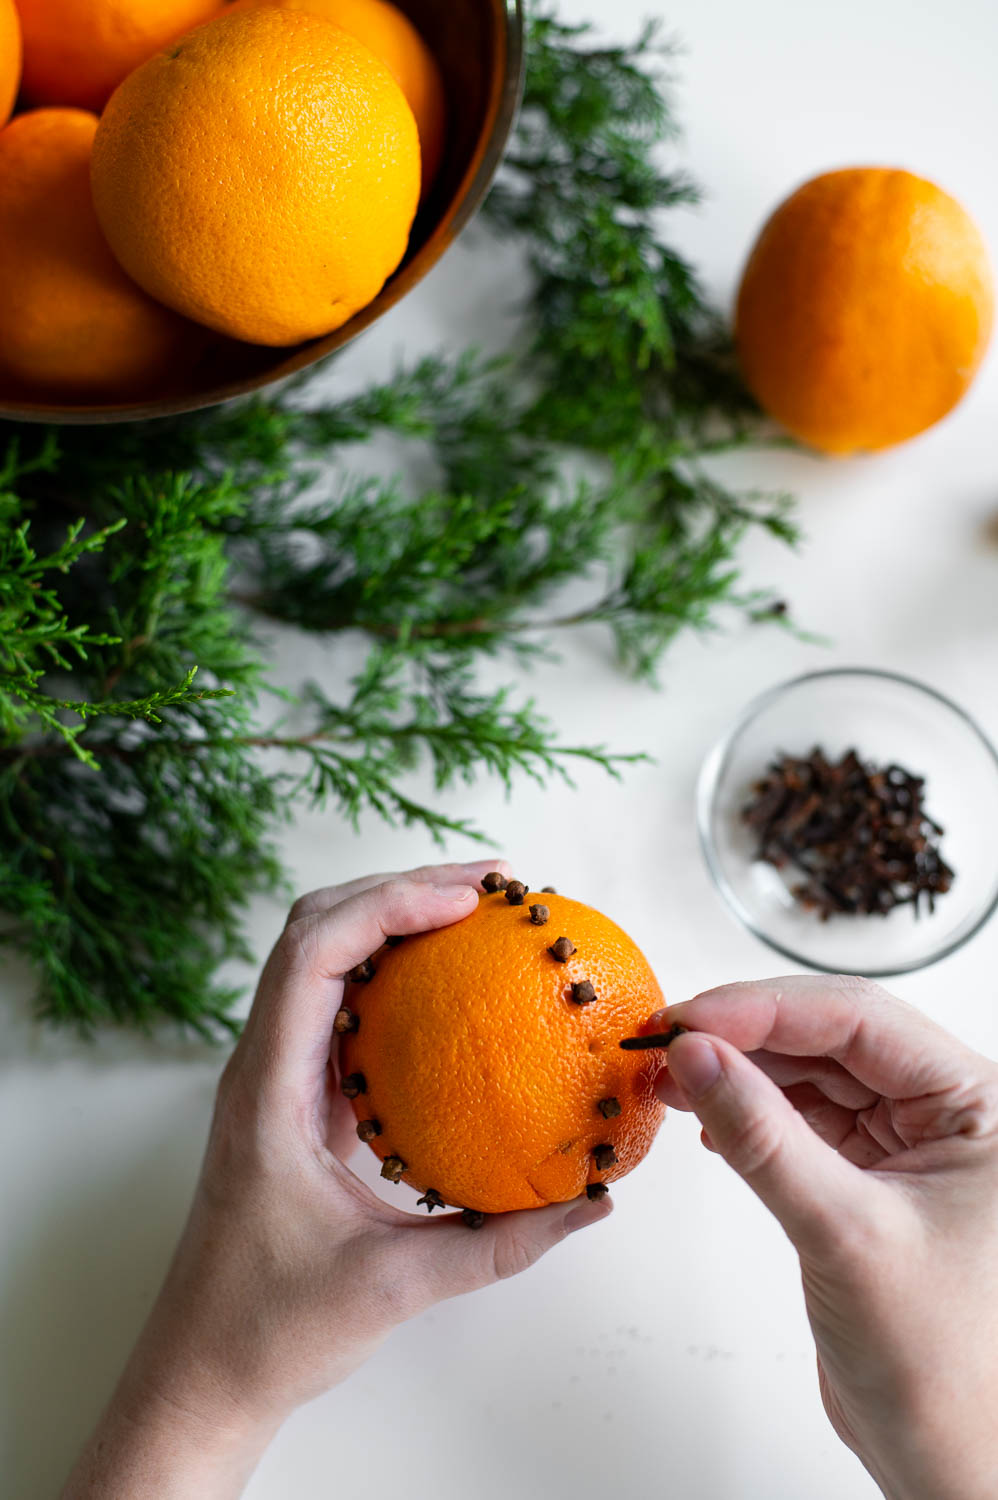
Step One: Make Your Clove-Studded Orange Pomander Balls
Before we can build our orange pomanders table decor, we’ll need to first craft a good collection of clove-studded oranges. If you’ve never done this before, or need a quick refresher on the basics, I have a full step-by-step tutorial that breaks down how to make orange pomanders here.
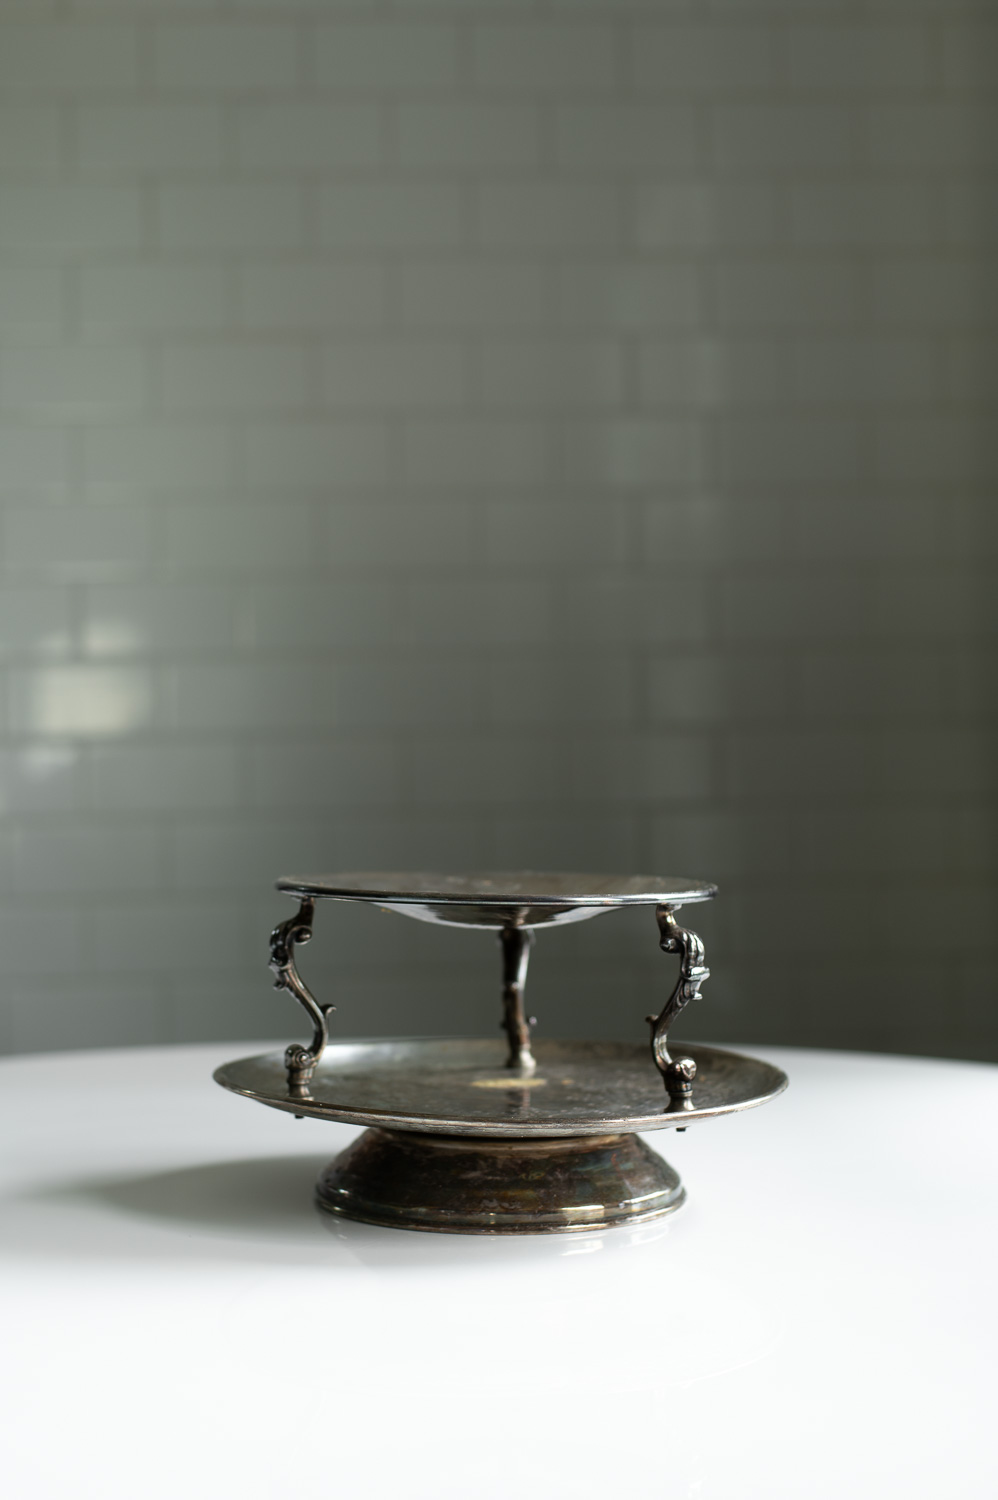
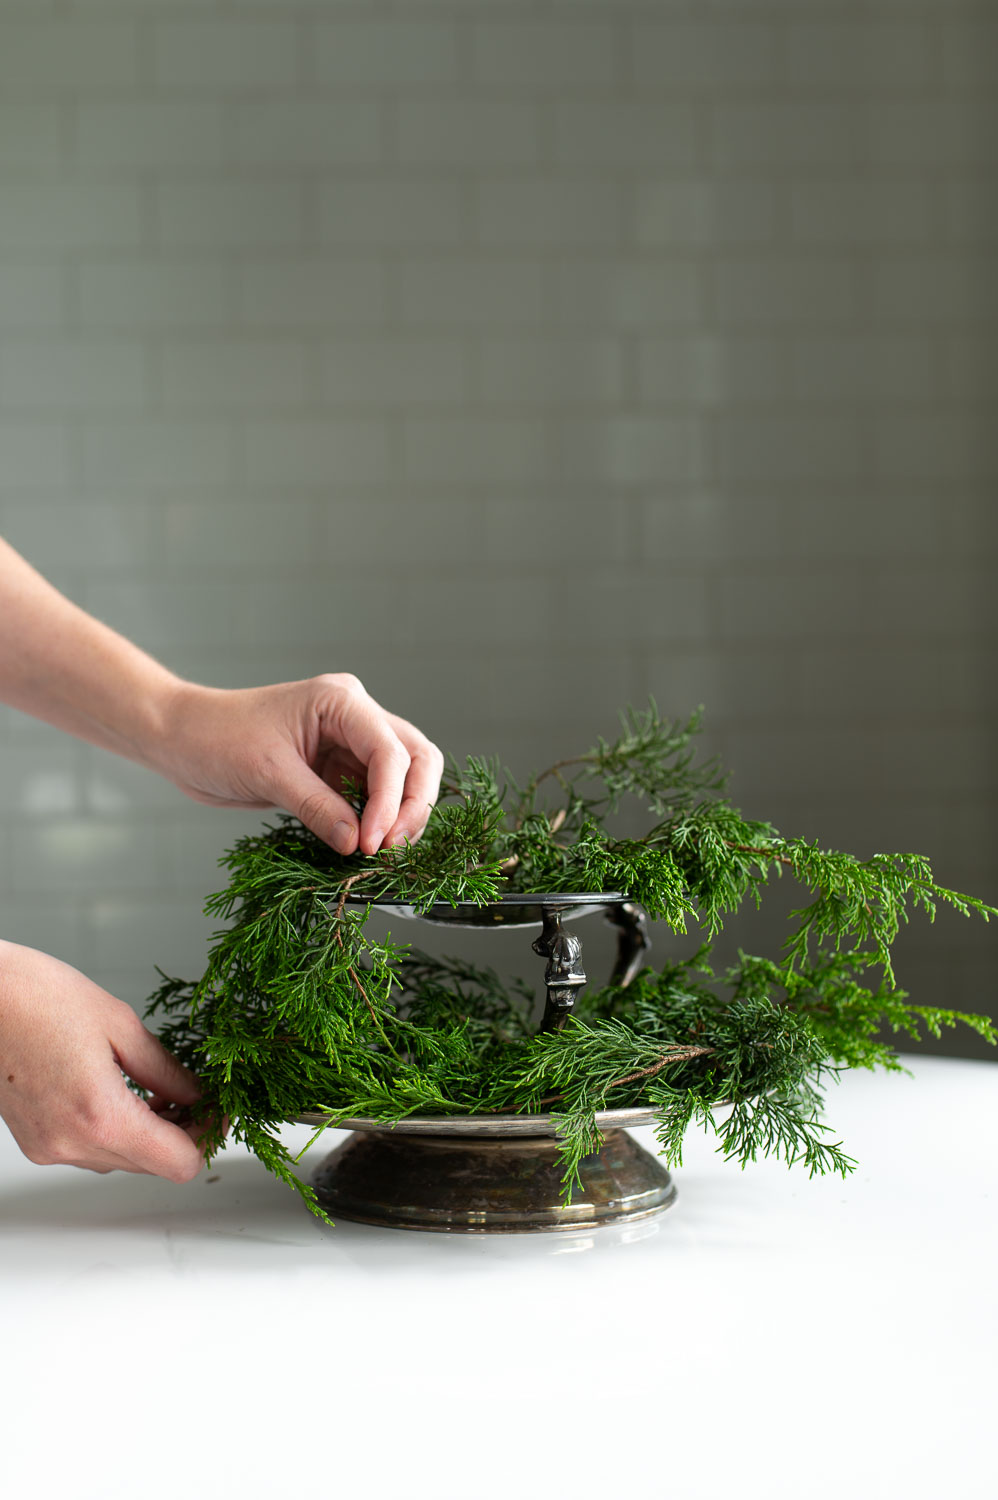
Step Two: Find A Tiered Serving Tray And Lay Down A Bed Of Greenery
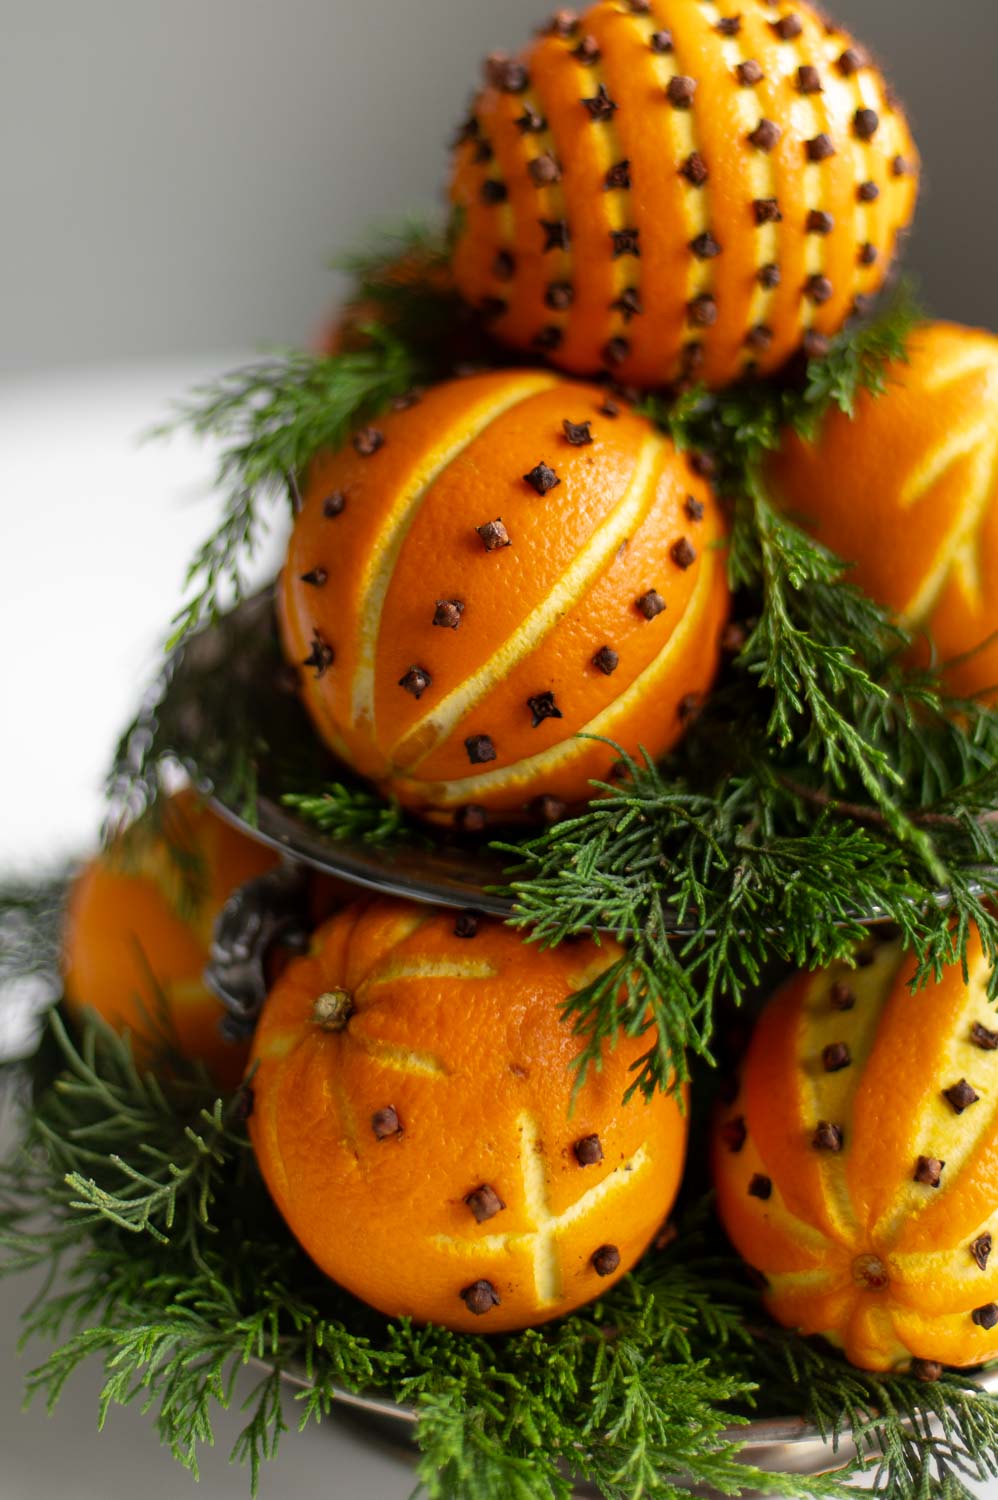
After you’ve created a good collection of orange pomanders, you’ll need to find yourself a tiered serving tray. I thrifted this silver one a few months ago and it was perfect for this project. (If you use a tiered tray with a center post, you will likely need to modify the top with a cap nut)
Once you have your tiered tray, you’re going to take sprigs of fresh (or faux) greenery and start laying them down to make a full fluffy bed for your orange pomanders to get nestled into.
I used free freshly foraged juniper branches for mine.
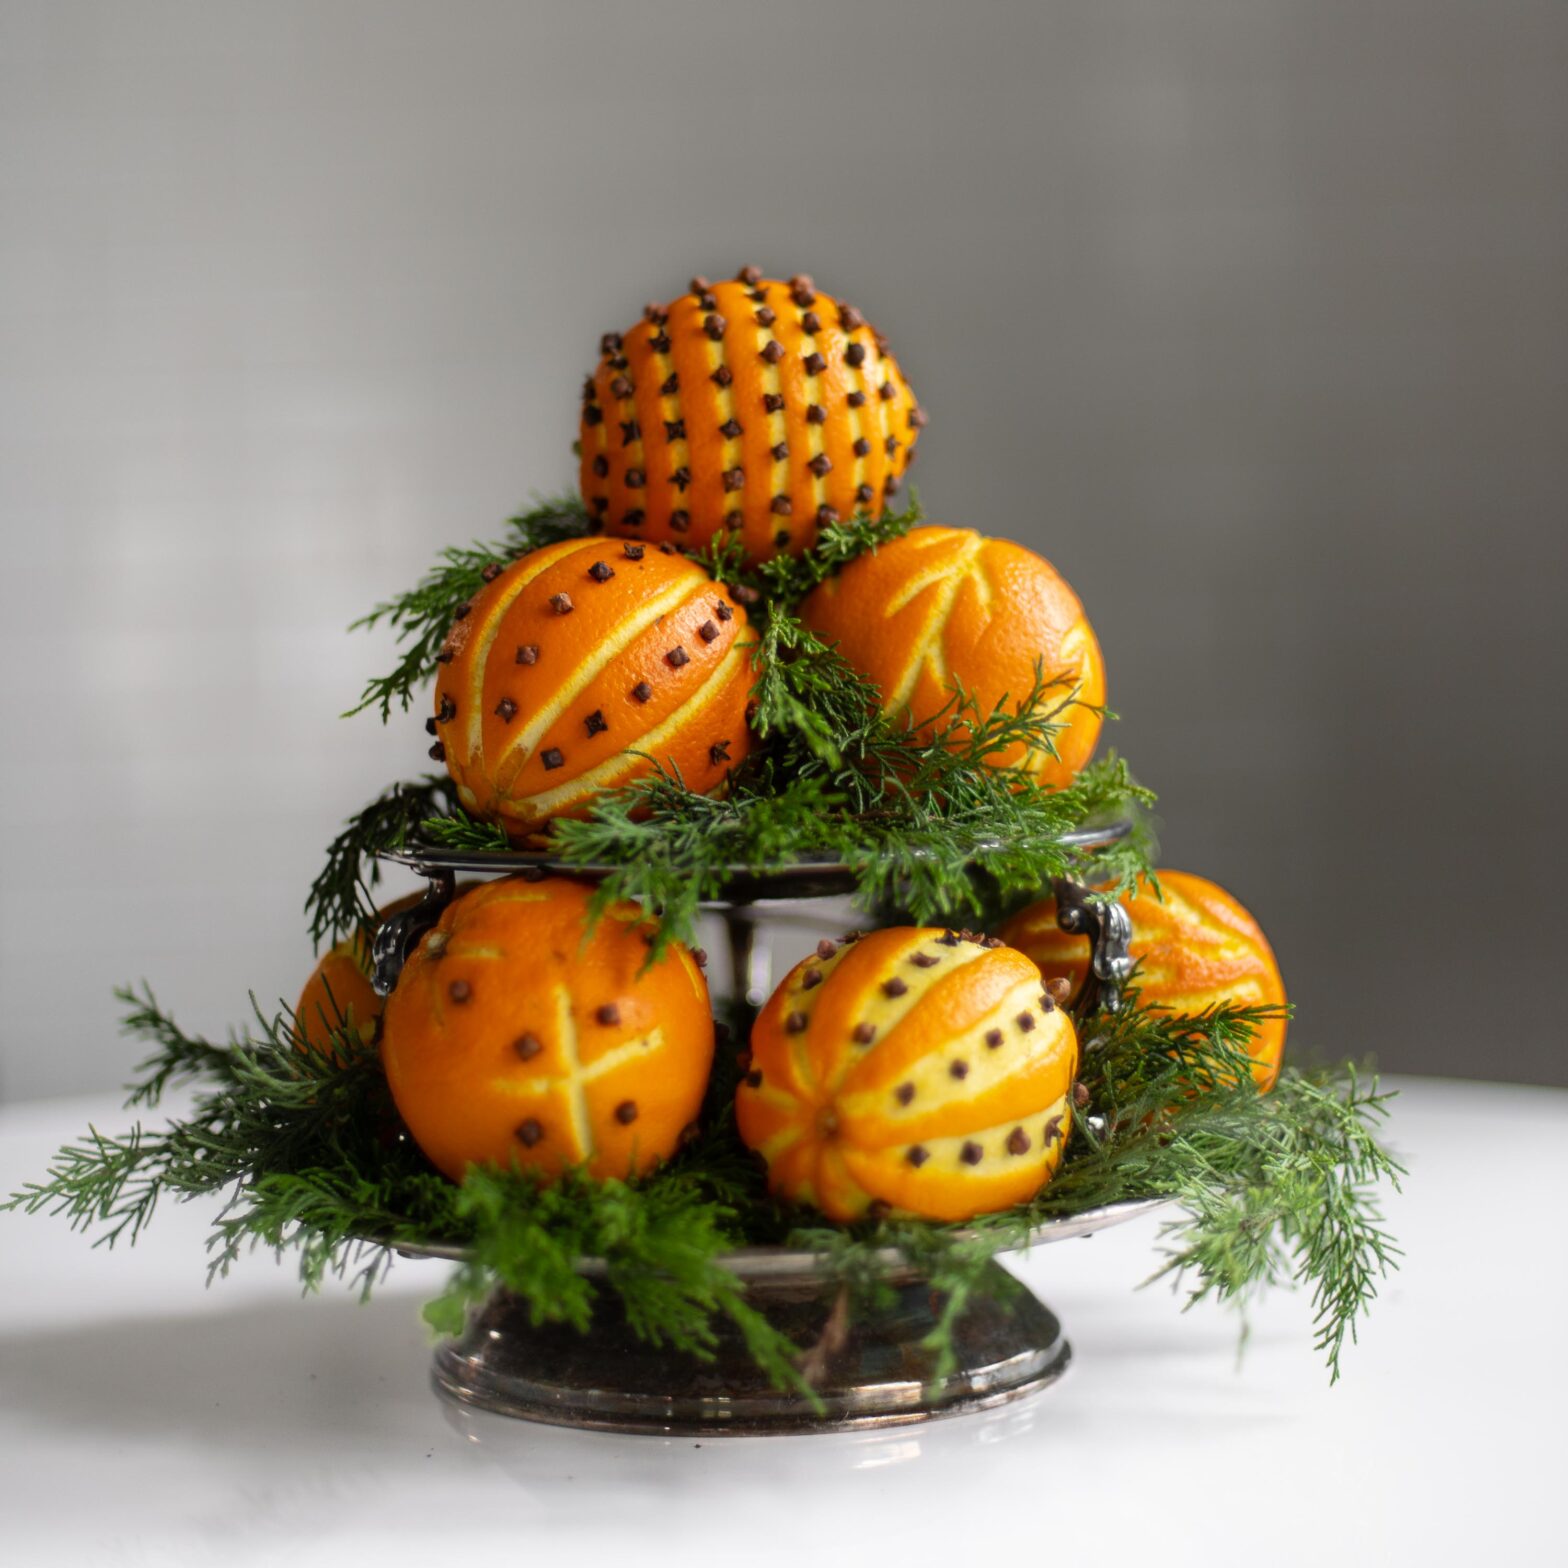
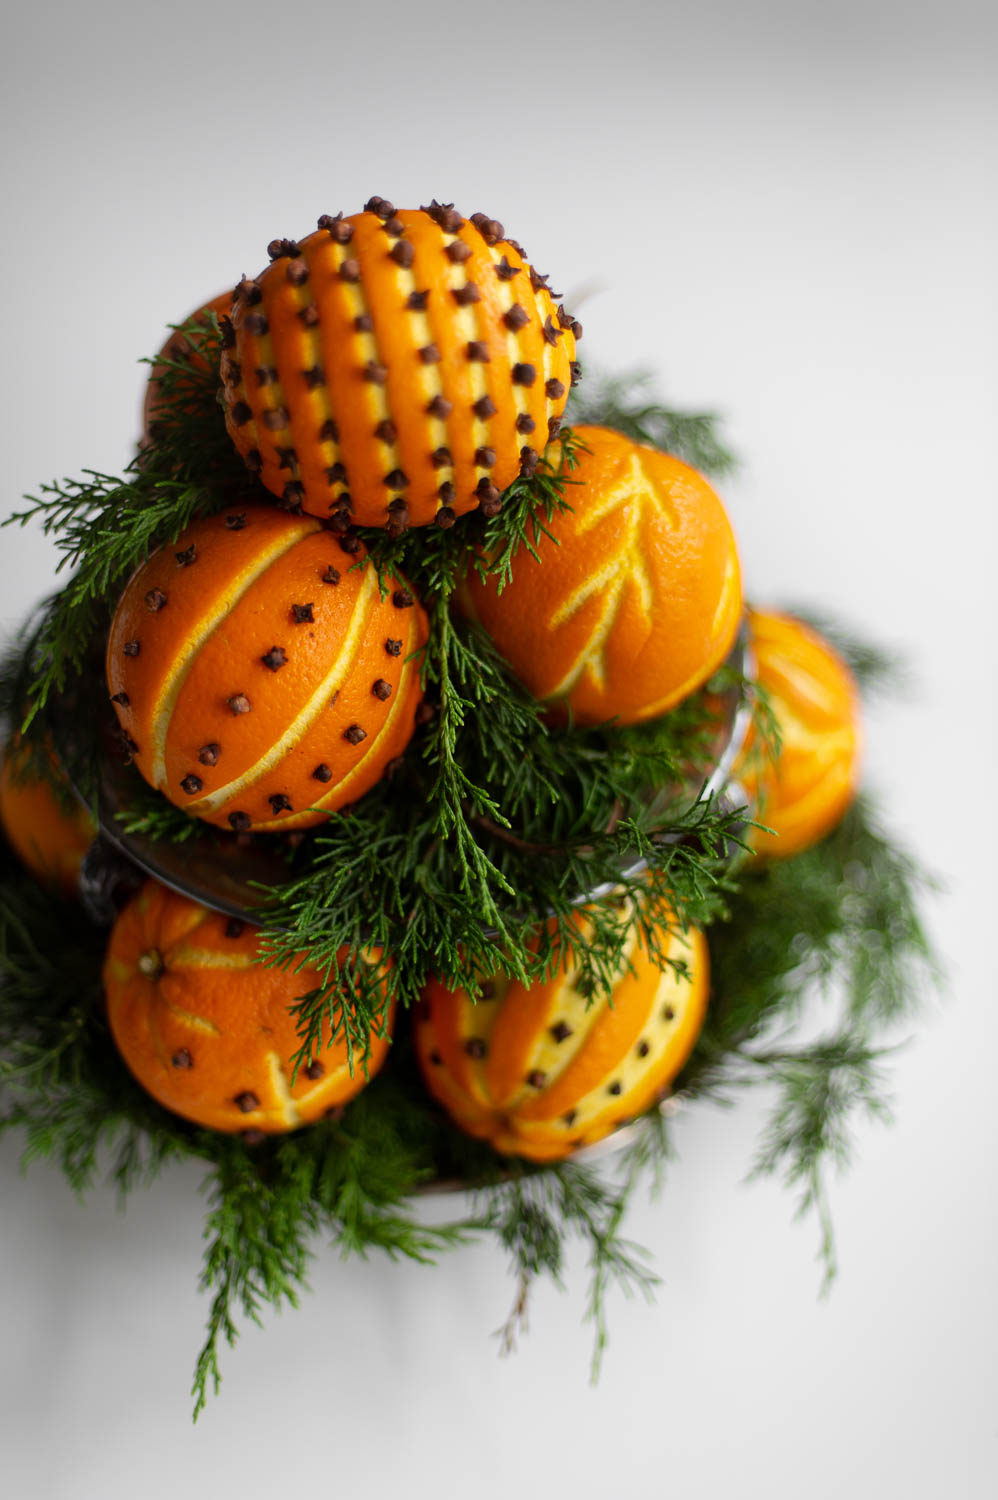
Step Three: Layer In Your Orange Pomanders To Create Your Pomander Ball Topiary
After your bed of greenery is laid, you can start nesteling your pomanders into your greenery.
For a traditional look, be sure and stack the oranges on the top layer in a pyramid shape. The greenery and the cloves should keep your stack fairly stable as is. However, if you are worried about them falling, you can use a few toothpicks to help secure the stack.
Important Note: Most tiered trays currently available for purchase will have a center post. This post will not allow you to stack your oranges in a pyramid shape on top like this. Luckily most of these trays can easily be modified. Simply unscrew the top post and replace it with a small cap nut of the appropriate size. This will clear the way for your orange pomanders to sit on top.

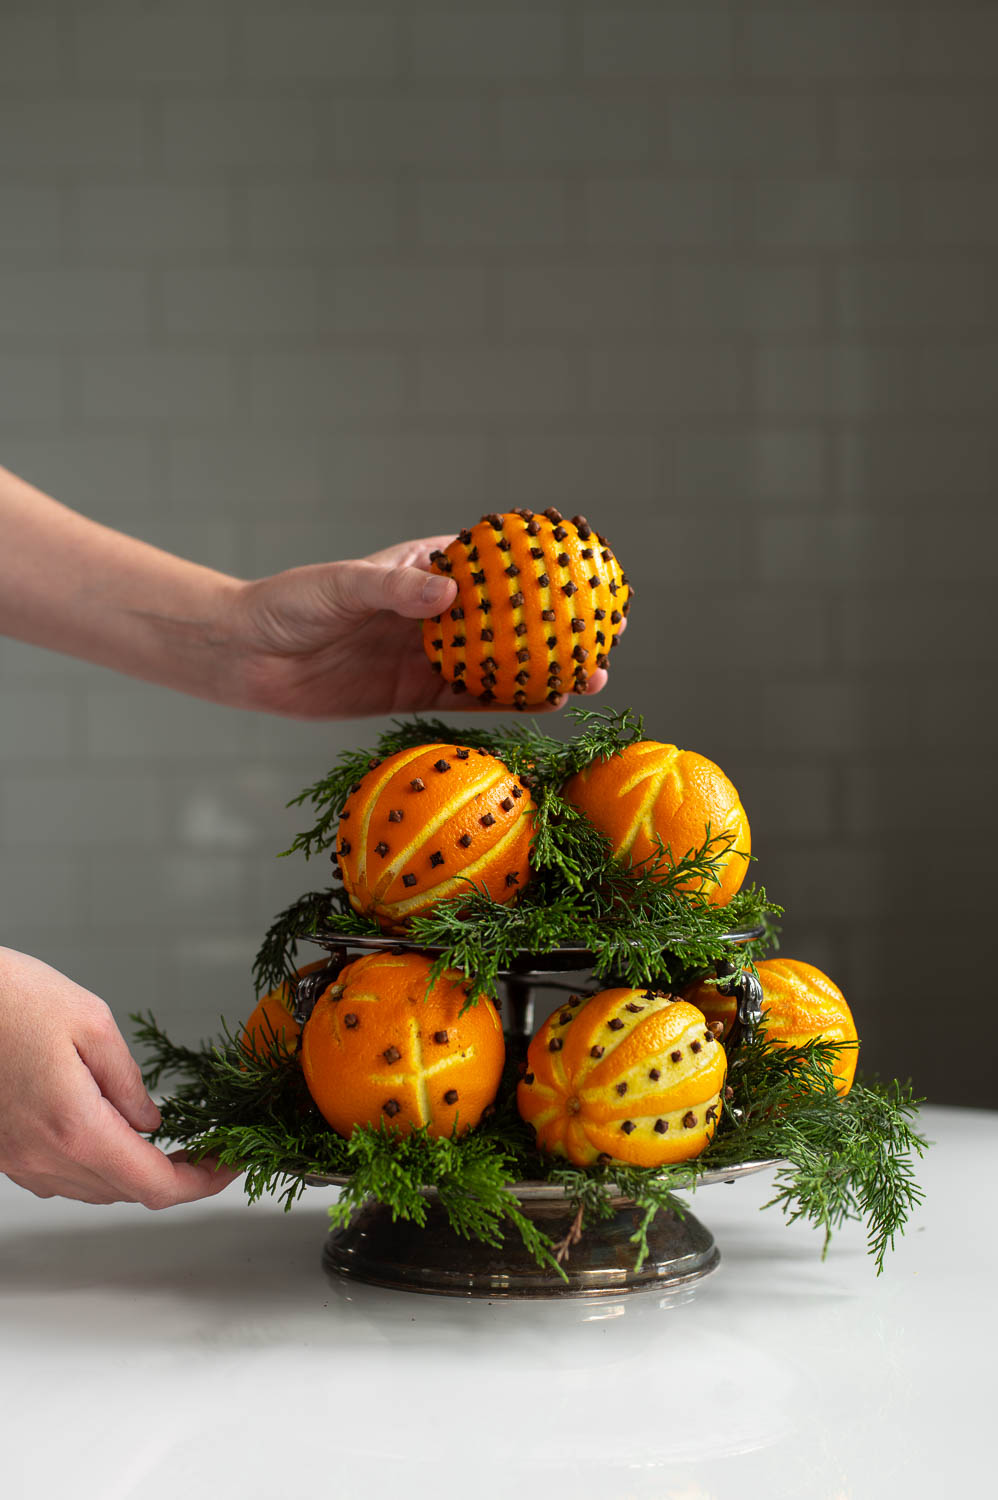
Finally, if you want an even more traditional look for your centerpiece, after all your oranges are places you can fill any gaps with more fresh greenery for a true topiary tree aesthetic.
I chose to leave some gaps in mine instead of filling it completely. I think the sparser look works just as well!
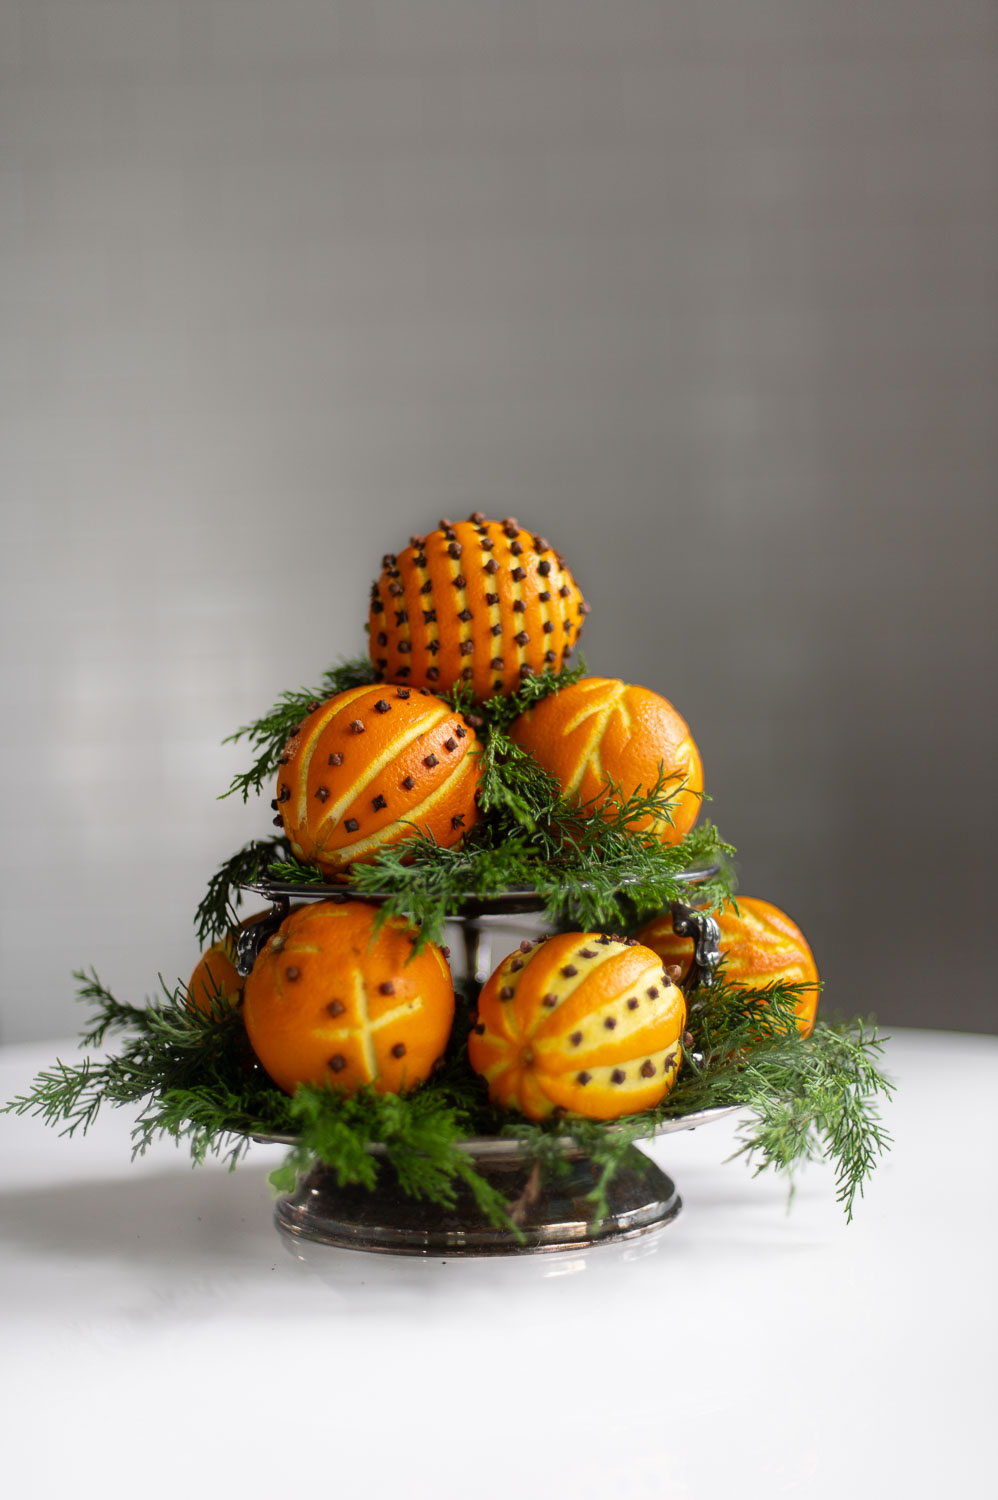
Step Four: Enjoy Your Easy DIY Christmas Centerpiece
How quick and easy was that to make? Best of all it was incredibly cost effective since the only items had to purchase (besides the tray I already owned) were the fresh oranges and cloves.
This is the sort of easy Christmas table decor I love to keep in my back pocket for those moments when you run short on time (and money) but still want to create a little Christmas magic for your guests.
Want More Vintage Christmas Decor Ideas?
Here are my favorite ways to bring a little old world Christmas magic into your home on a budget.
What handmade, old world Christmas decoration should I try recreating next?
Don’t Forget To Pin This Post & Subscribe!
Want to keep getting more DIY home decor inspiration, thrifting tips & tricks, free art downloads, reading recommendations, and home renovation tutorials? Then don’t forget to pin this post for later so you can follow me on Pinterest and then subscribe to my blog so you can get links to my newest content as soon as it hits the blog!