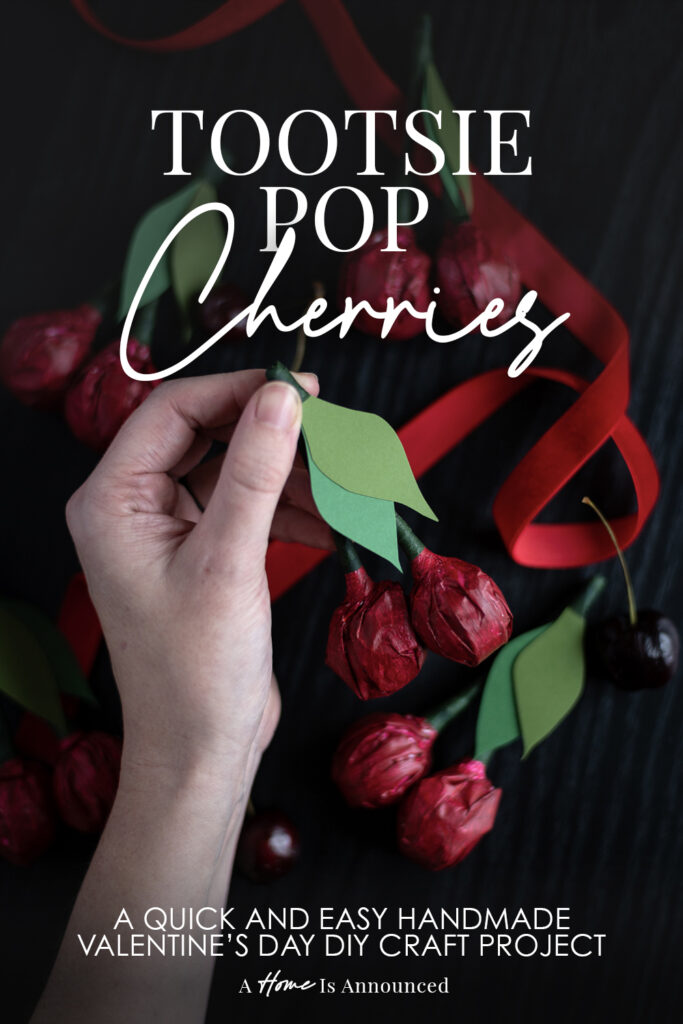
Looking for a fun, easy and Pinterest-worthy Valentine’s Day DIY? I’m obsessed with these Tootsie Pop cherry Valentines!
Whether you’re hosting a Galentine’s Day party for your girlfriends, throwing a big Valentine’s Day event, or just want a simple homemade Valentine you can craft with your child for their classroom Valentine swap at school, these are PERFECT (and adorable).
With just a few supplies, you can turn ordinary Tootsie Pops into charming cherry-themed treats that everyone will love. Let’s get crafting!
*This blog post contains affiliate links, meaning that if you purchase any of the items using the links I provide I, as the author of this website, will receive a very very small commission from that sale. This is a great way to help support your favorite bloggers at no cost to you. Think of it like a tip jar that costs you nothing!
CRAFT CREDIT: This project was originally created by The House That Lars Built. Full credit goes to her for coming up with this brilliant idea. This is my own version of her original craft which you can find here.
Supplies List
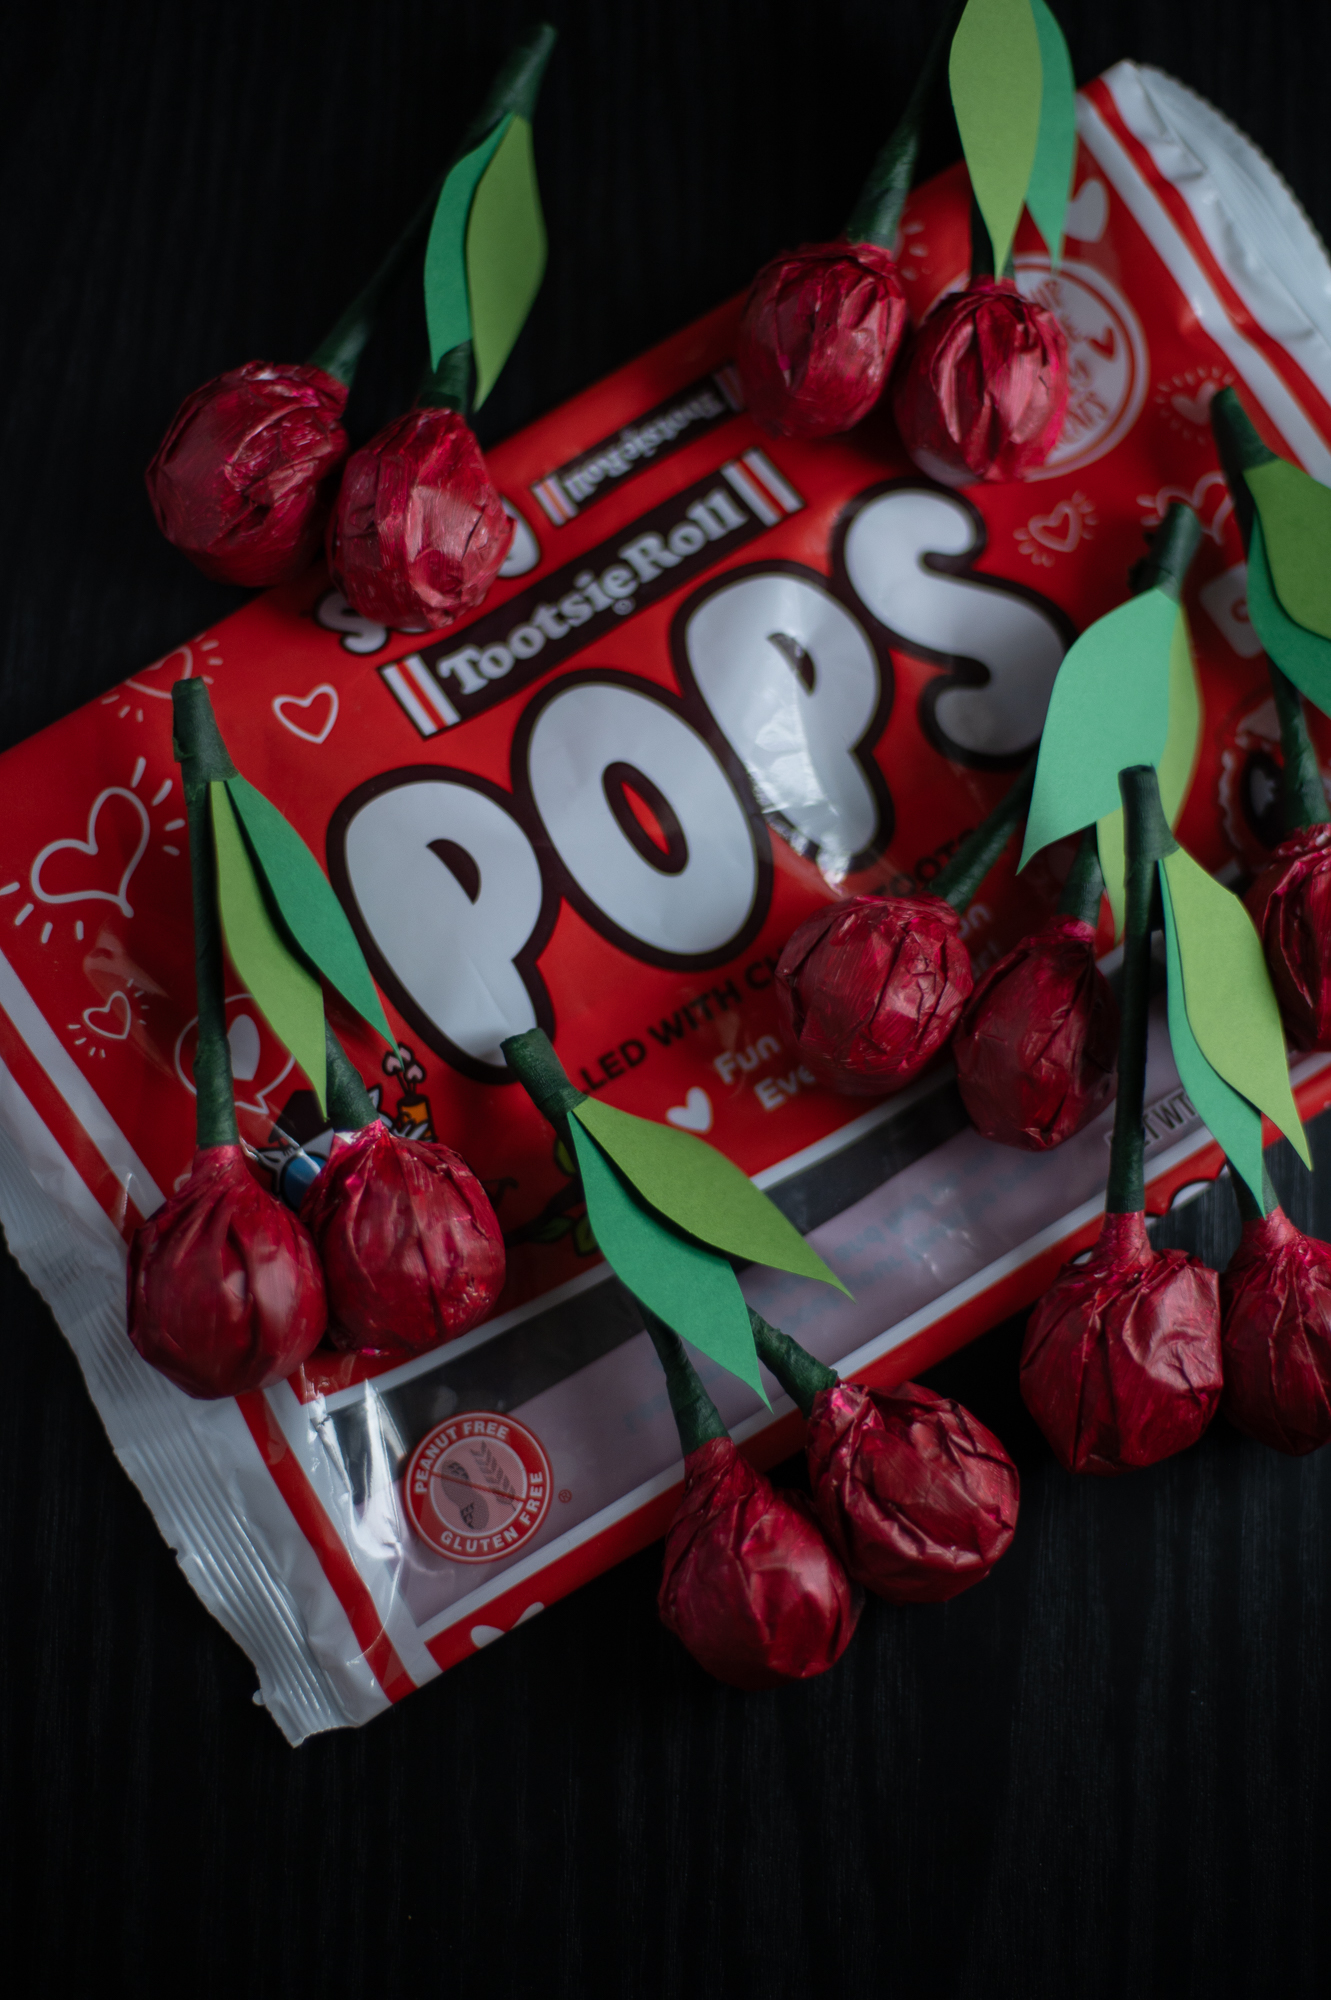
- Cherry Tootsie Pops
- Keep in mind each “cherry” will require 2 Tootsie Pops. The linked bag of 50 Tootsie Pops will make 25 complete “cherries”
- Non-Toxic Red Paint (Optional)
- The exact paint I used has been discontinued. The linked paint is a similar affordable option, (but really any deep dark red you can find at your local craft store will work).
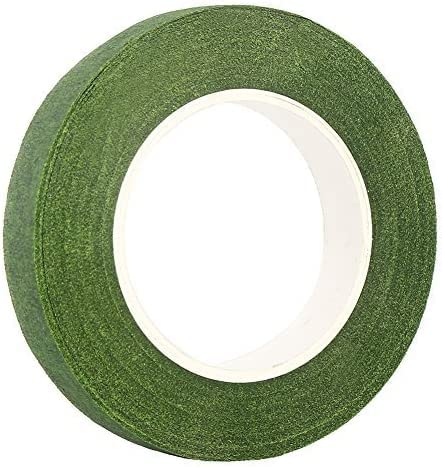
- Dark Green Floral Tape
- You can buy this online, or check your local Dollar Tree! They usually have floral tape in stock.
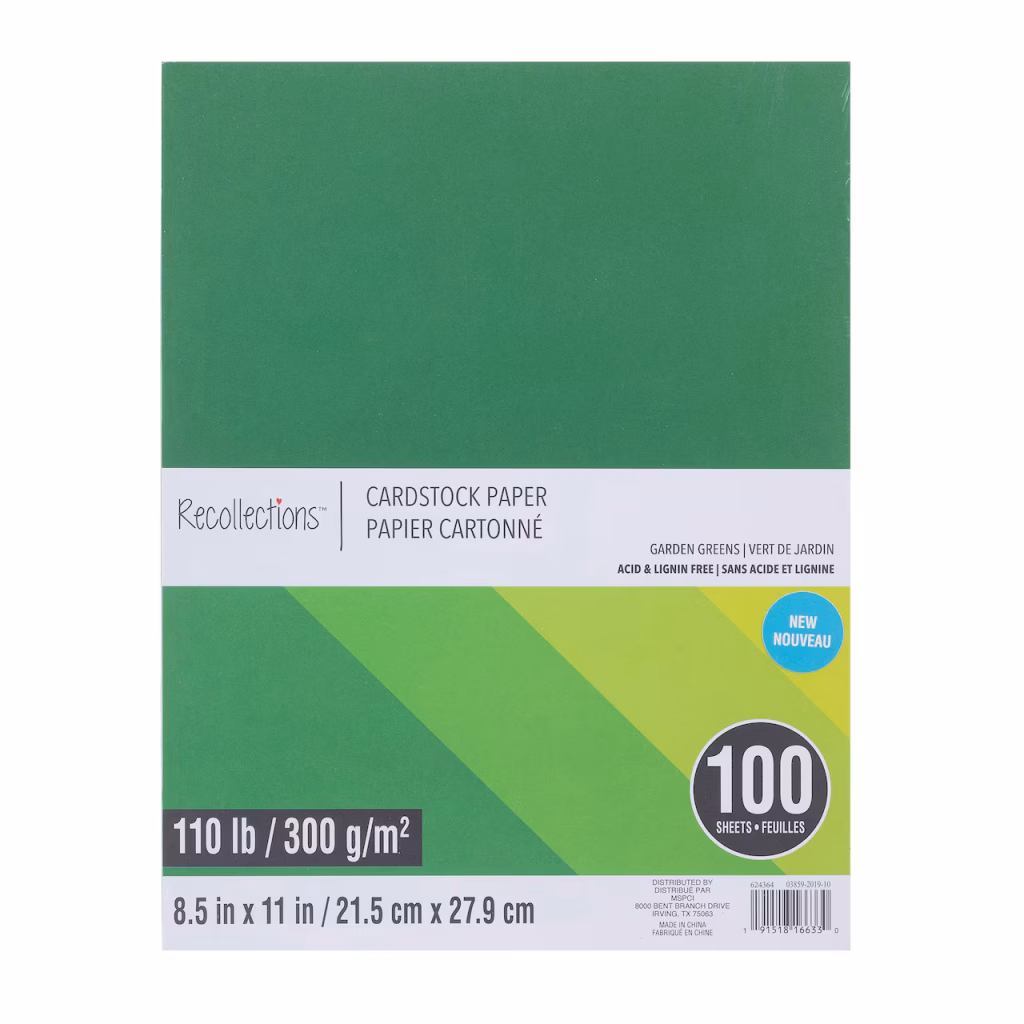
- At Least Two Shades Of Green Cardstock / Or download my free printable
- I’ve linked to the cardstock I used. I used the two darkest shades of green from this pack. You’ll only need one or two sheets of cardstock total for this project.
- Scissors
- Cherry Valentine Card Printable (Optional)
Tootsie Pop Cherries Instructions
Step One: Optional – Paint The Tootsie Pop Wrappers
If you want to make your Tootsie Pop cherries look extra realistic, try giving the wrappers a quick coat of non-toxic red craft paint! This step is optional but adds more realism to the final look.
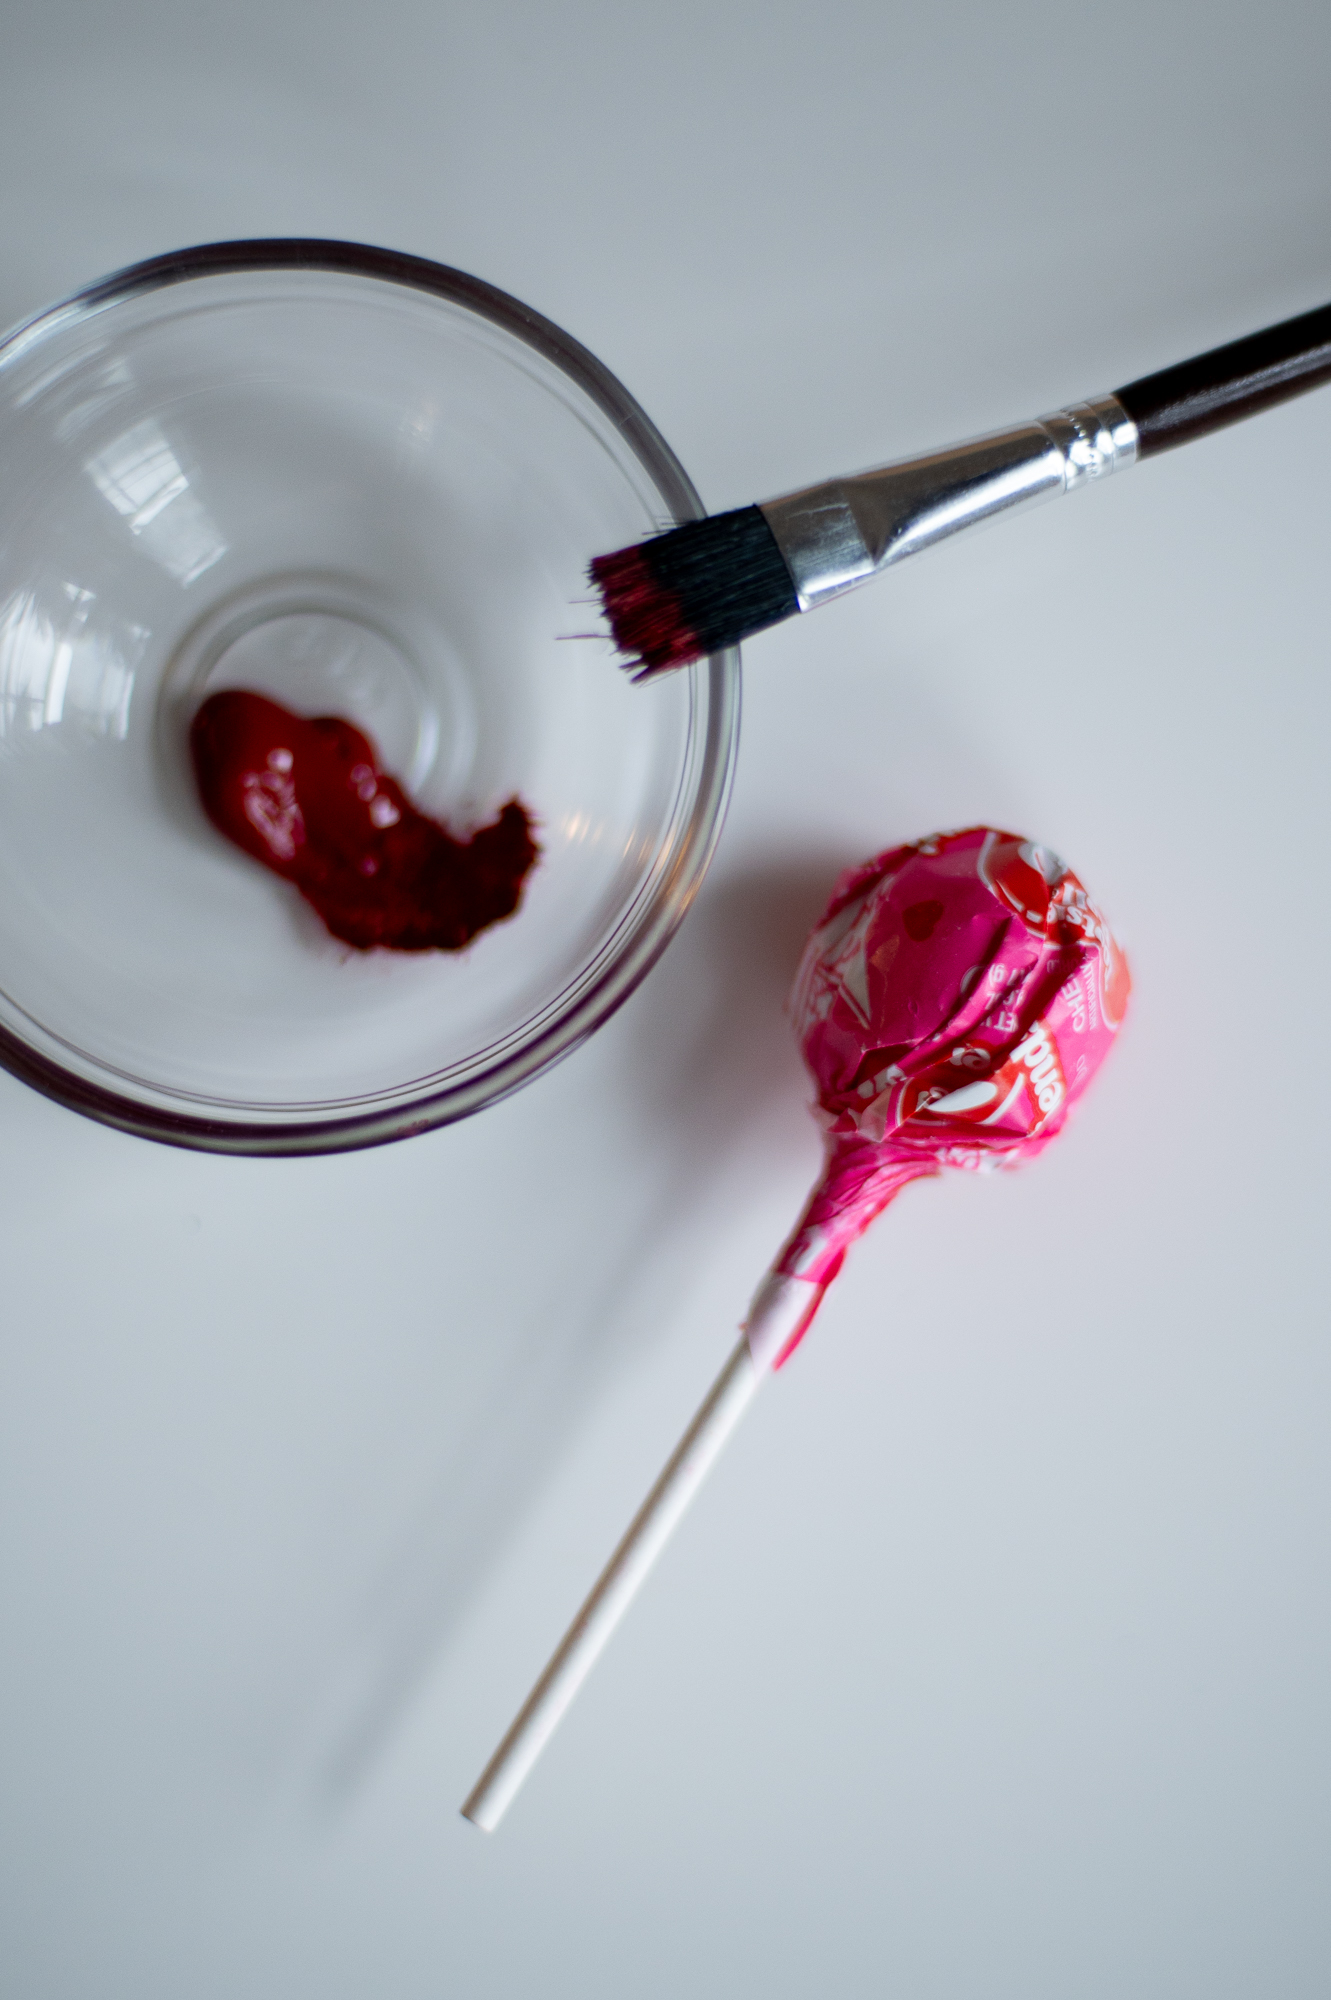
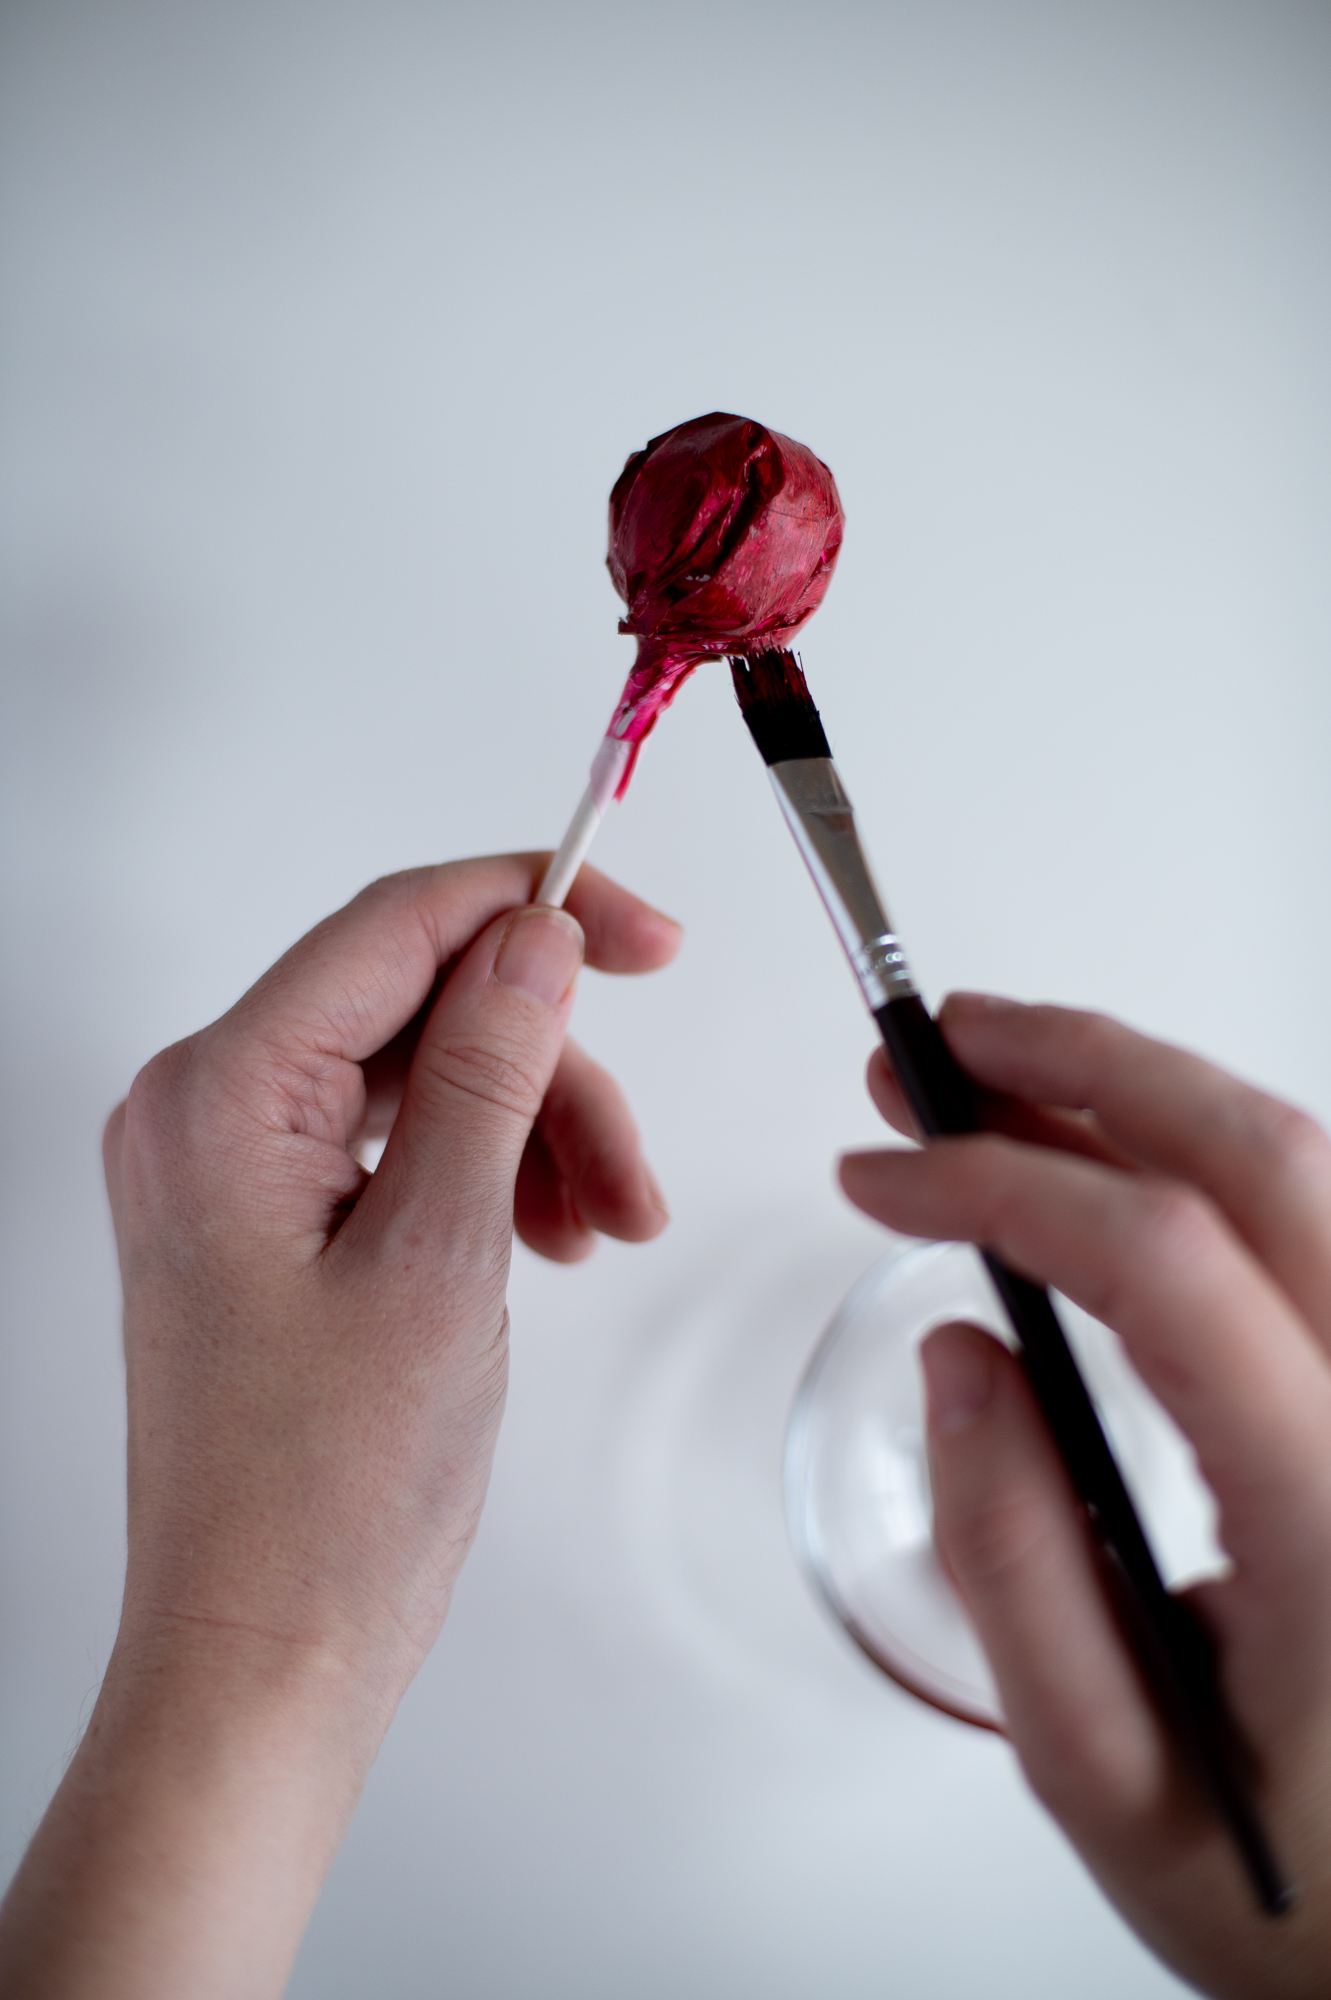
If you choose to paint your Tootsie Pop wrappers, ensure you thoroughly inspect each wrapper before you paint it for any hole or tears. You don’t want to accidentally paint the candy itself.
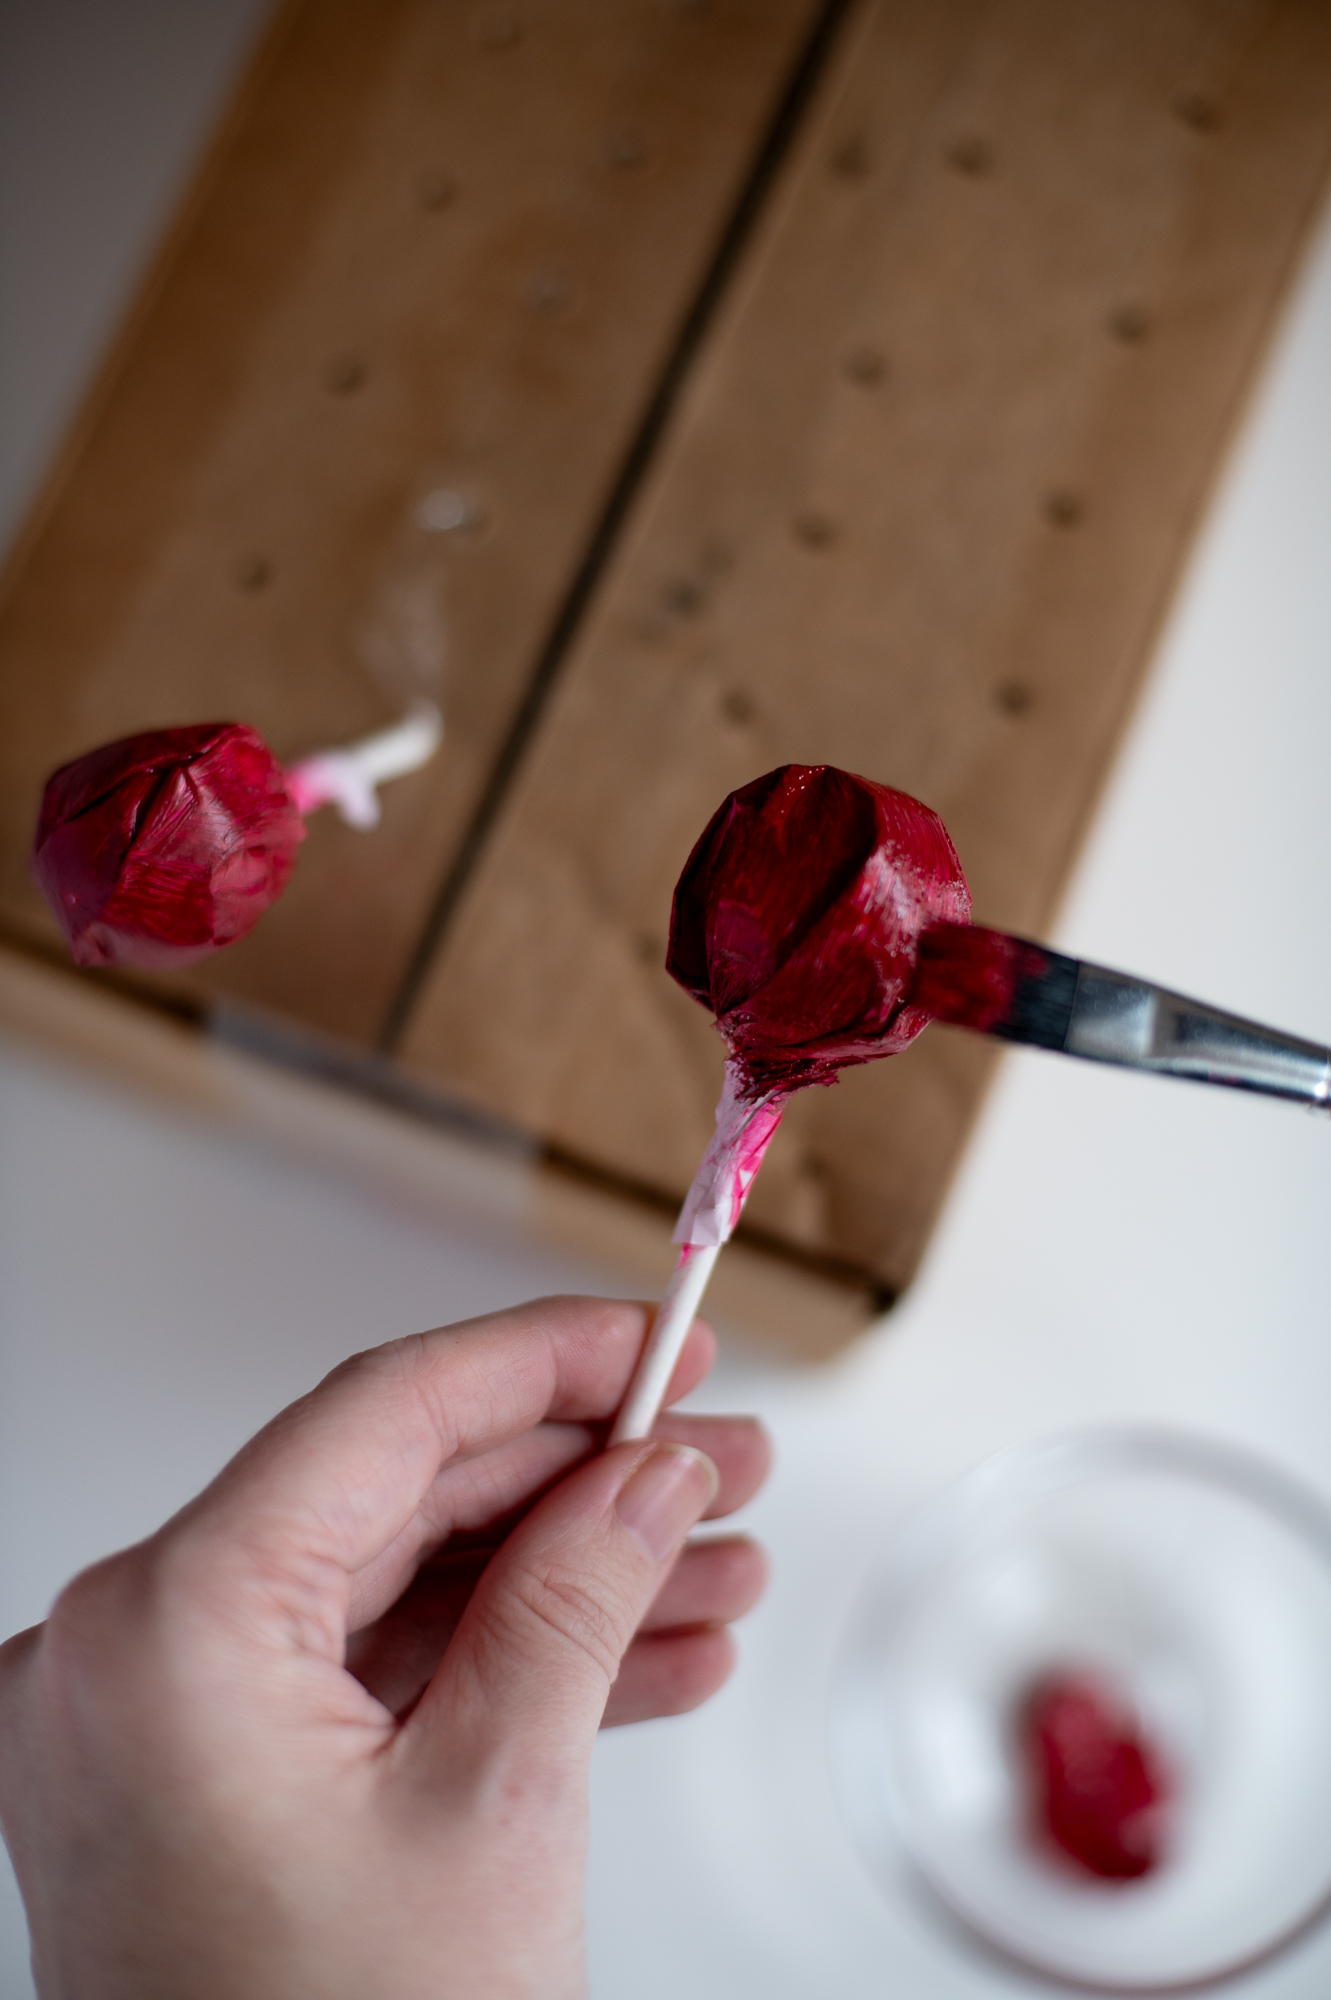
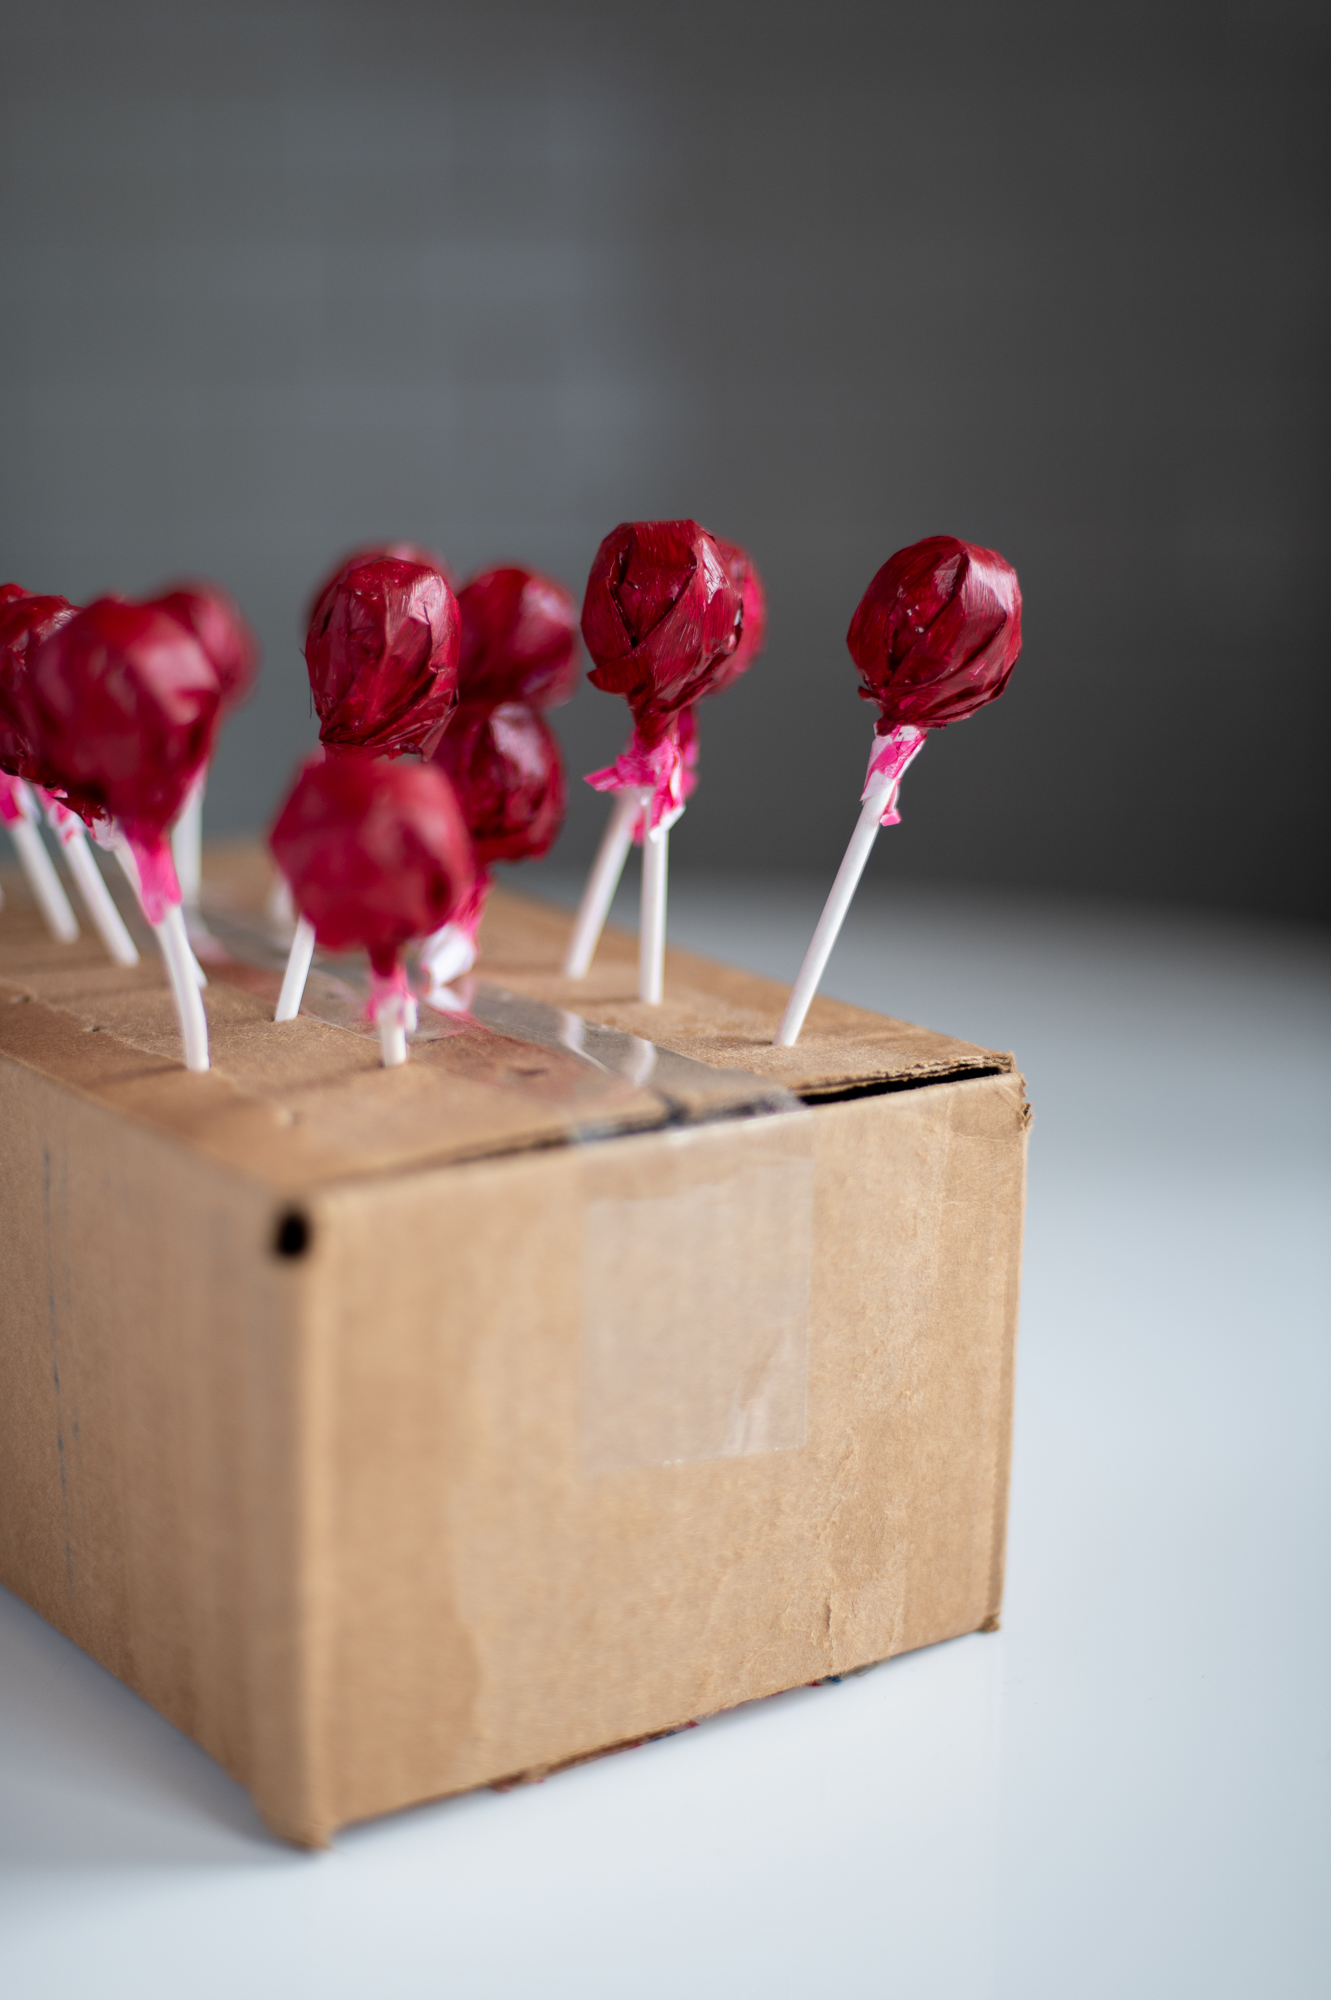
Quick Tip: A great way to dry your freshly painted Tootsie Pops is by poking a bunch of small holes into the top of an old cardboard box. Once your Tootsie Pop is painted, you can just shove the stem of the Tootsie Pop into the hole and it will hold it vertically while it drys for you!
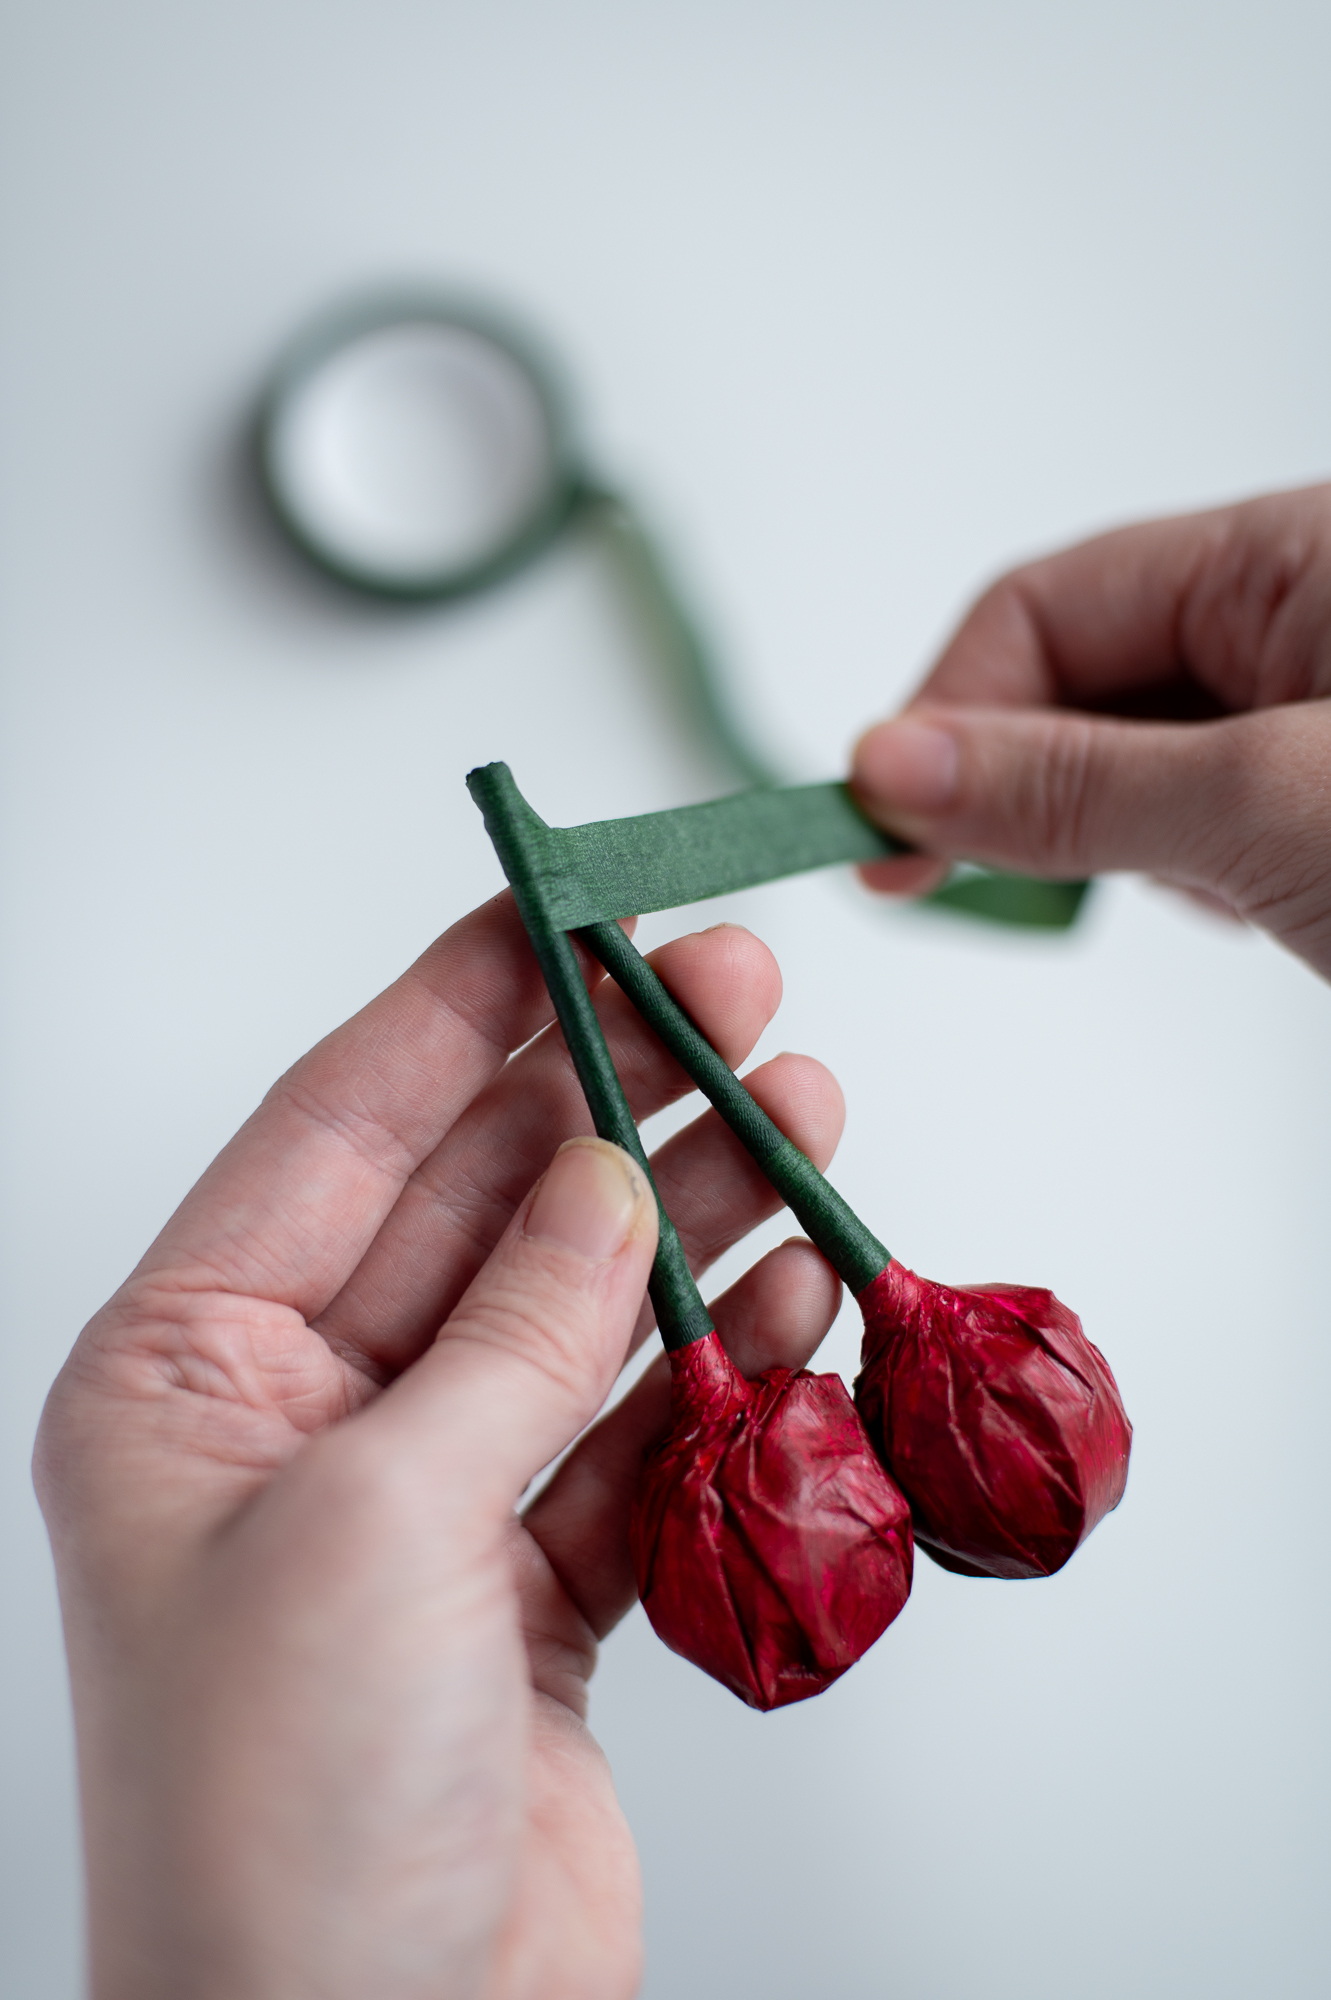
Step Two: Wrap The Stem Of Your Tootsie Pop In Floral Tape
Take the white stem of your Tootsie Pop and wrap it tightly with floral tape. Pull the tape as you wrap to activate the adhesive, ensuring it sticks securely.
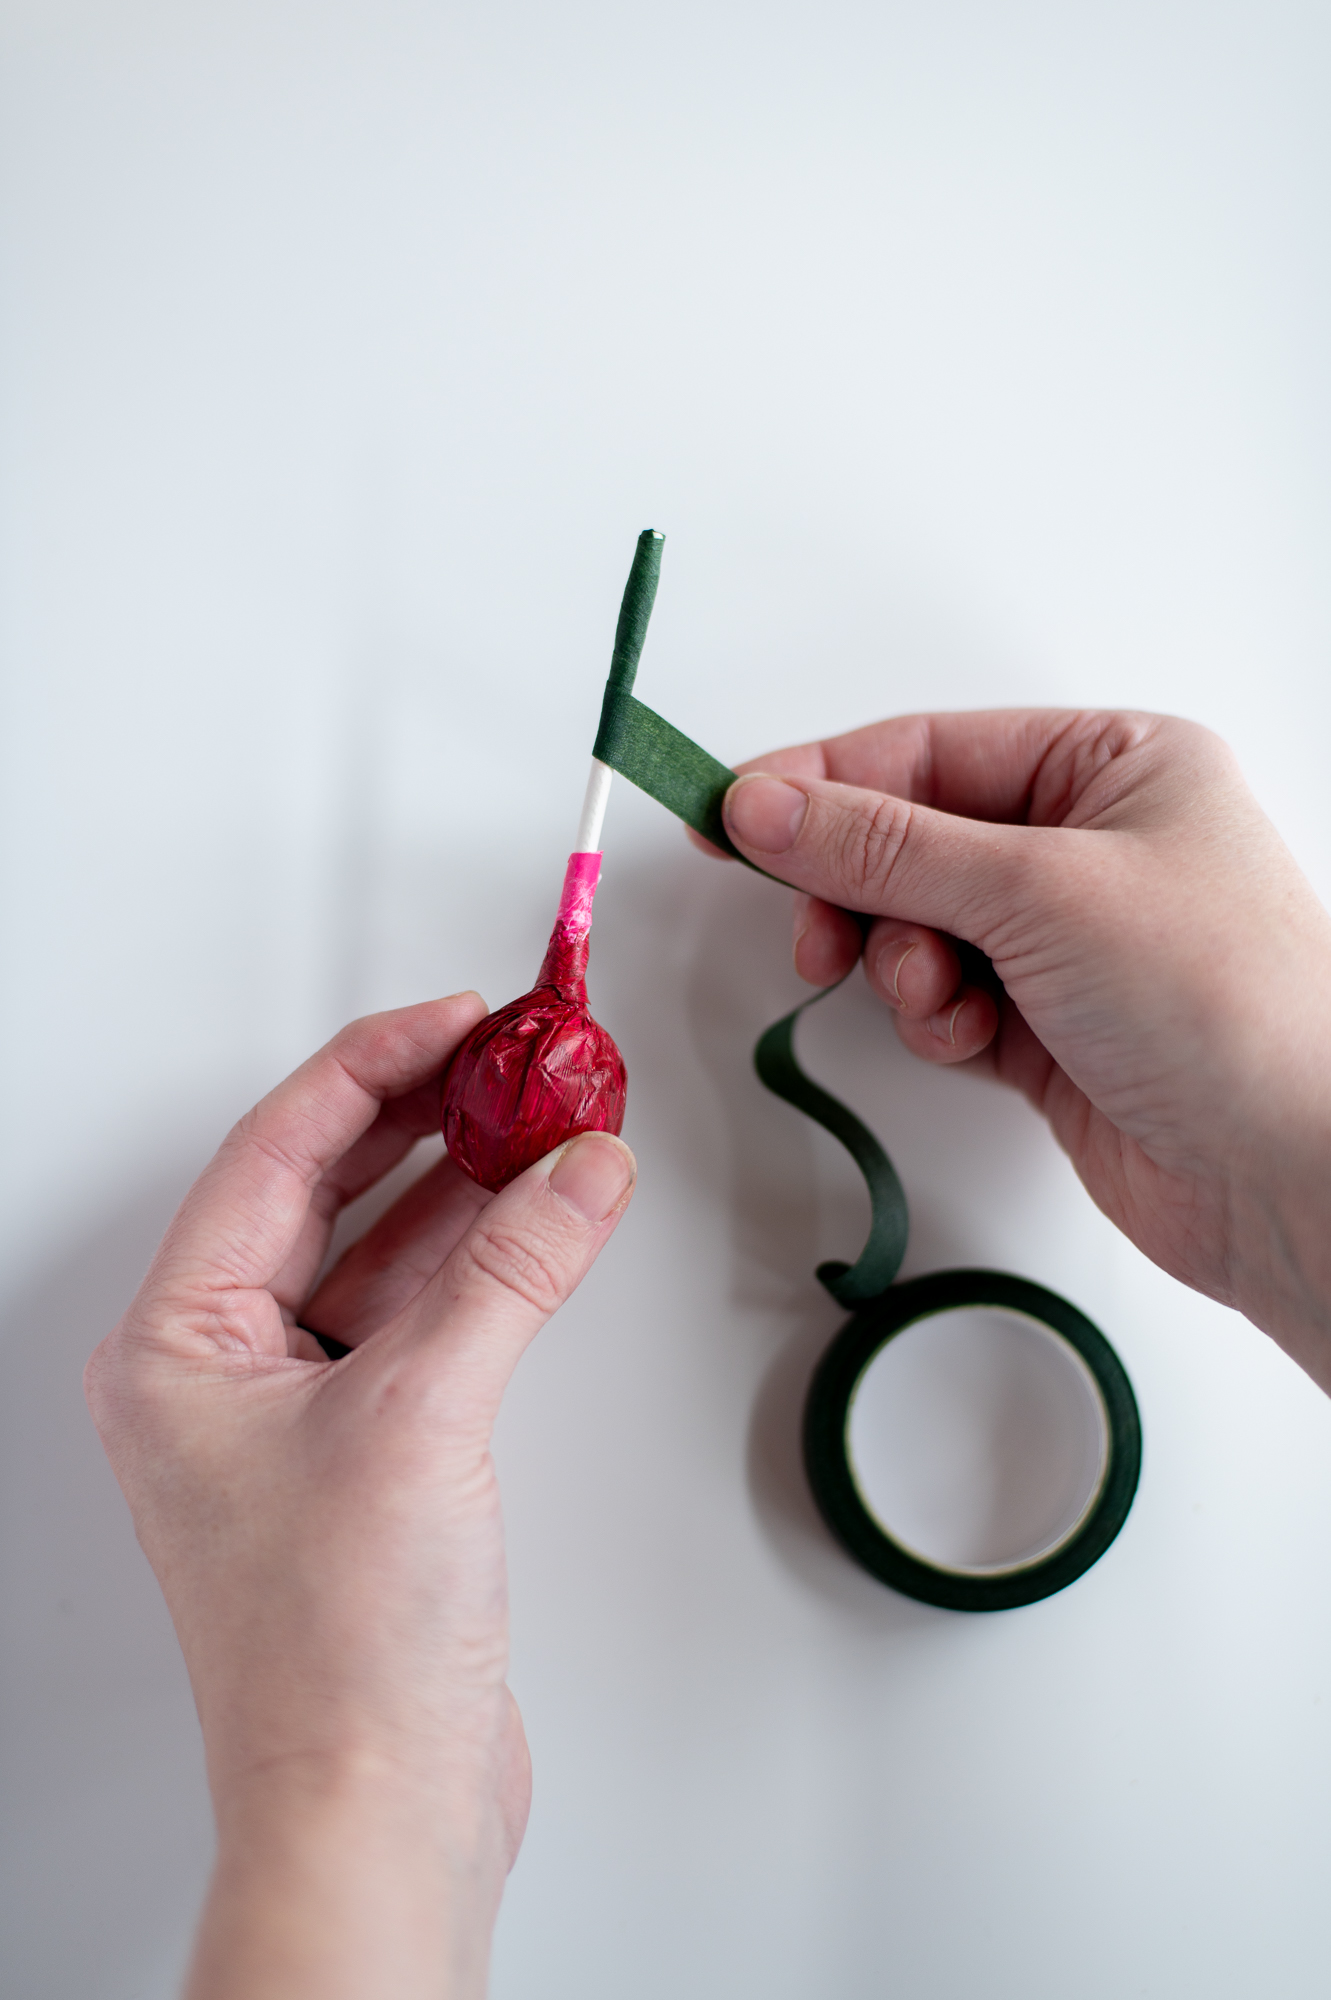
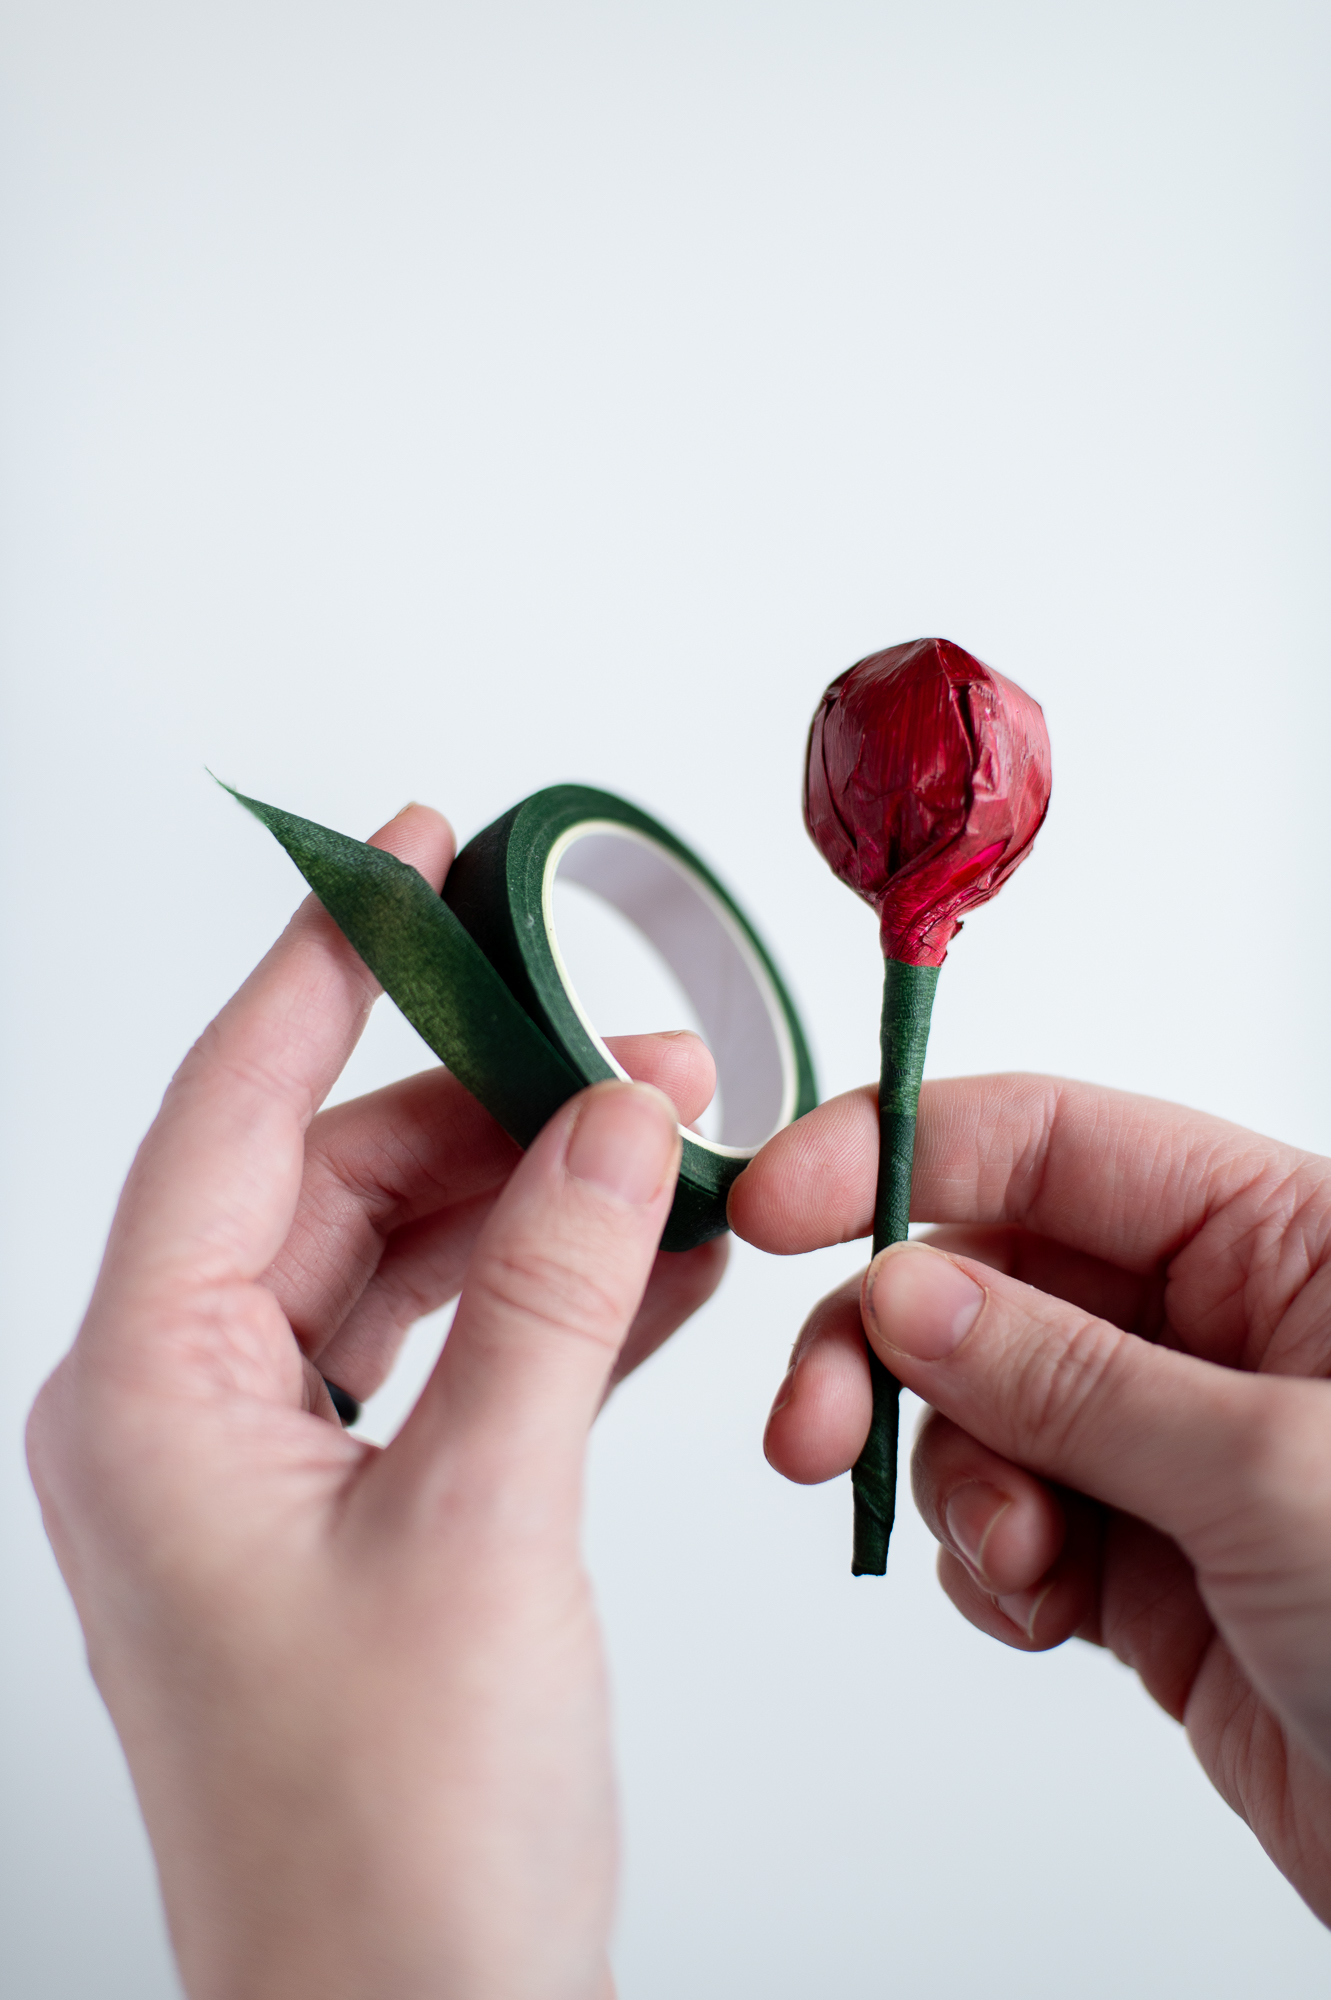
CRAFTING TIP: If this is your first time using floral tape, it can be a little confusing at first since the tape doesn’t seem to be sticky. The trick is that the tape only becomes sticky when stretched. So as you wrap, make sure you pull the tape nice and tight so the adhesive activates and will stick to itself. When you reach the end of your stem, just pull until the tape hard until it snaps and then rub the snapped end smooth with your finger.
Step Three: Create The Cherry By Combining Two Tootsie Pops
Hold two Tootsie Pops together and use floral tape to bind their stems tightly. Wrap down about an inch to secure the pops together.
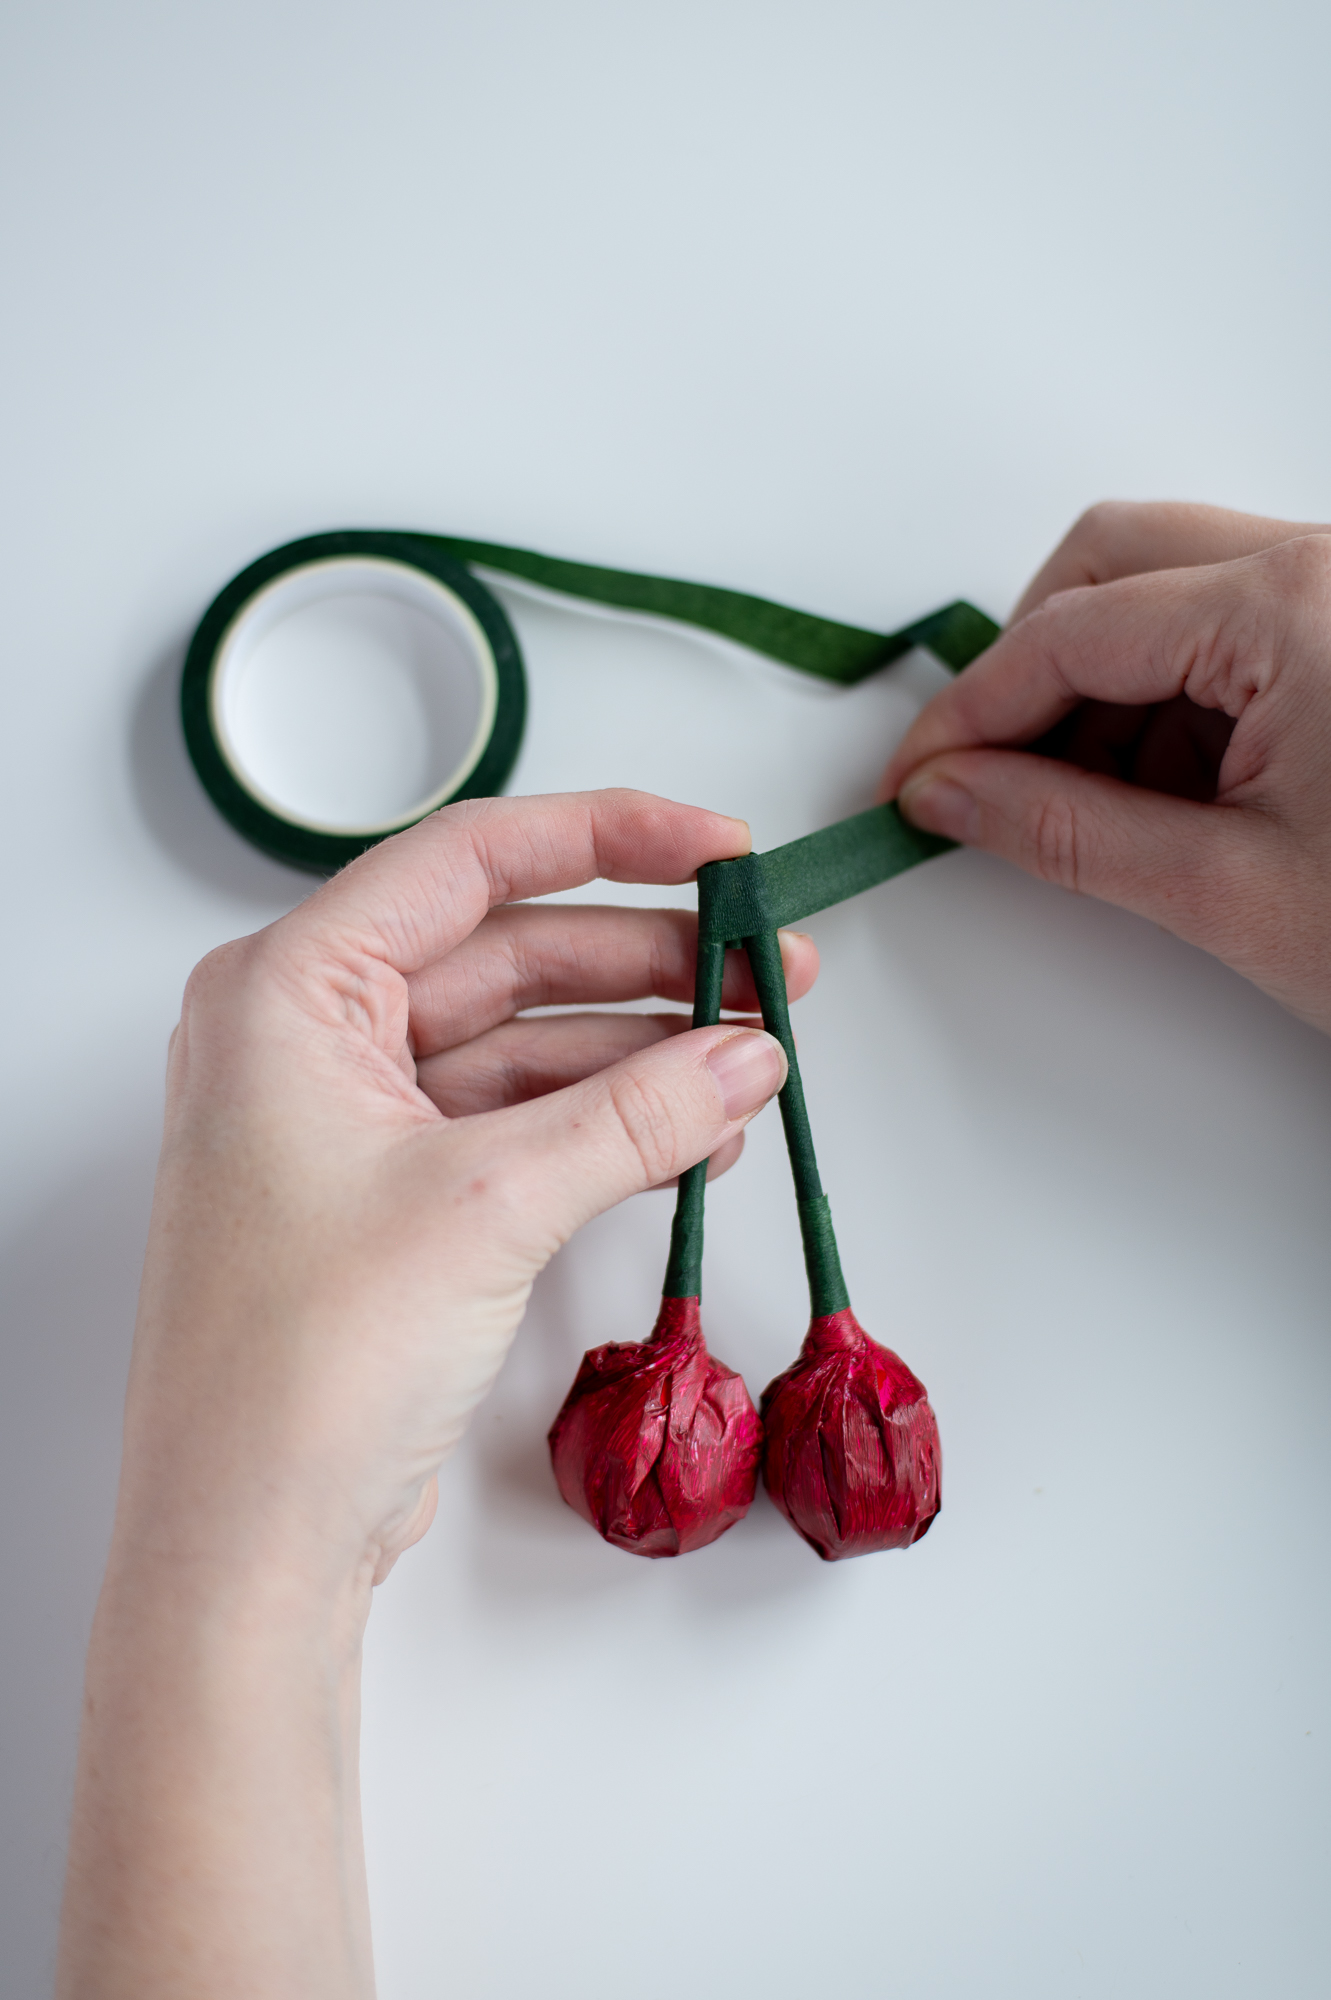
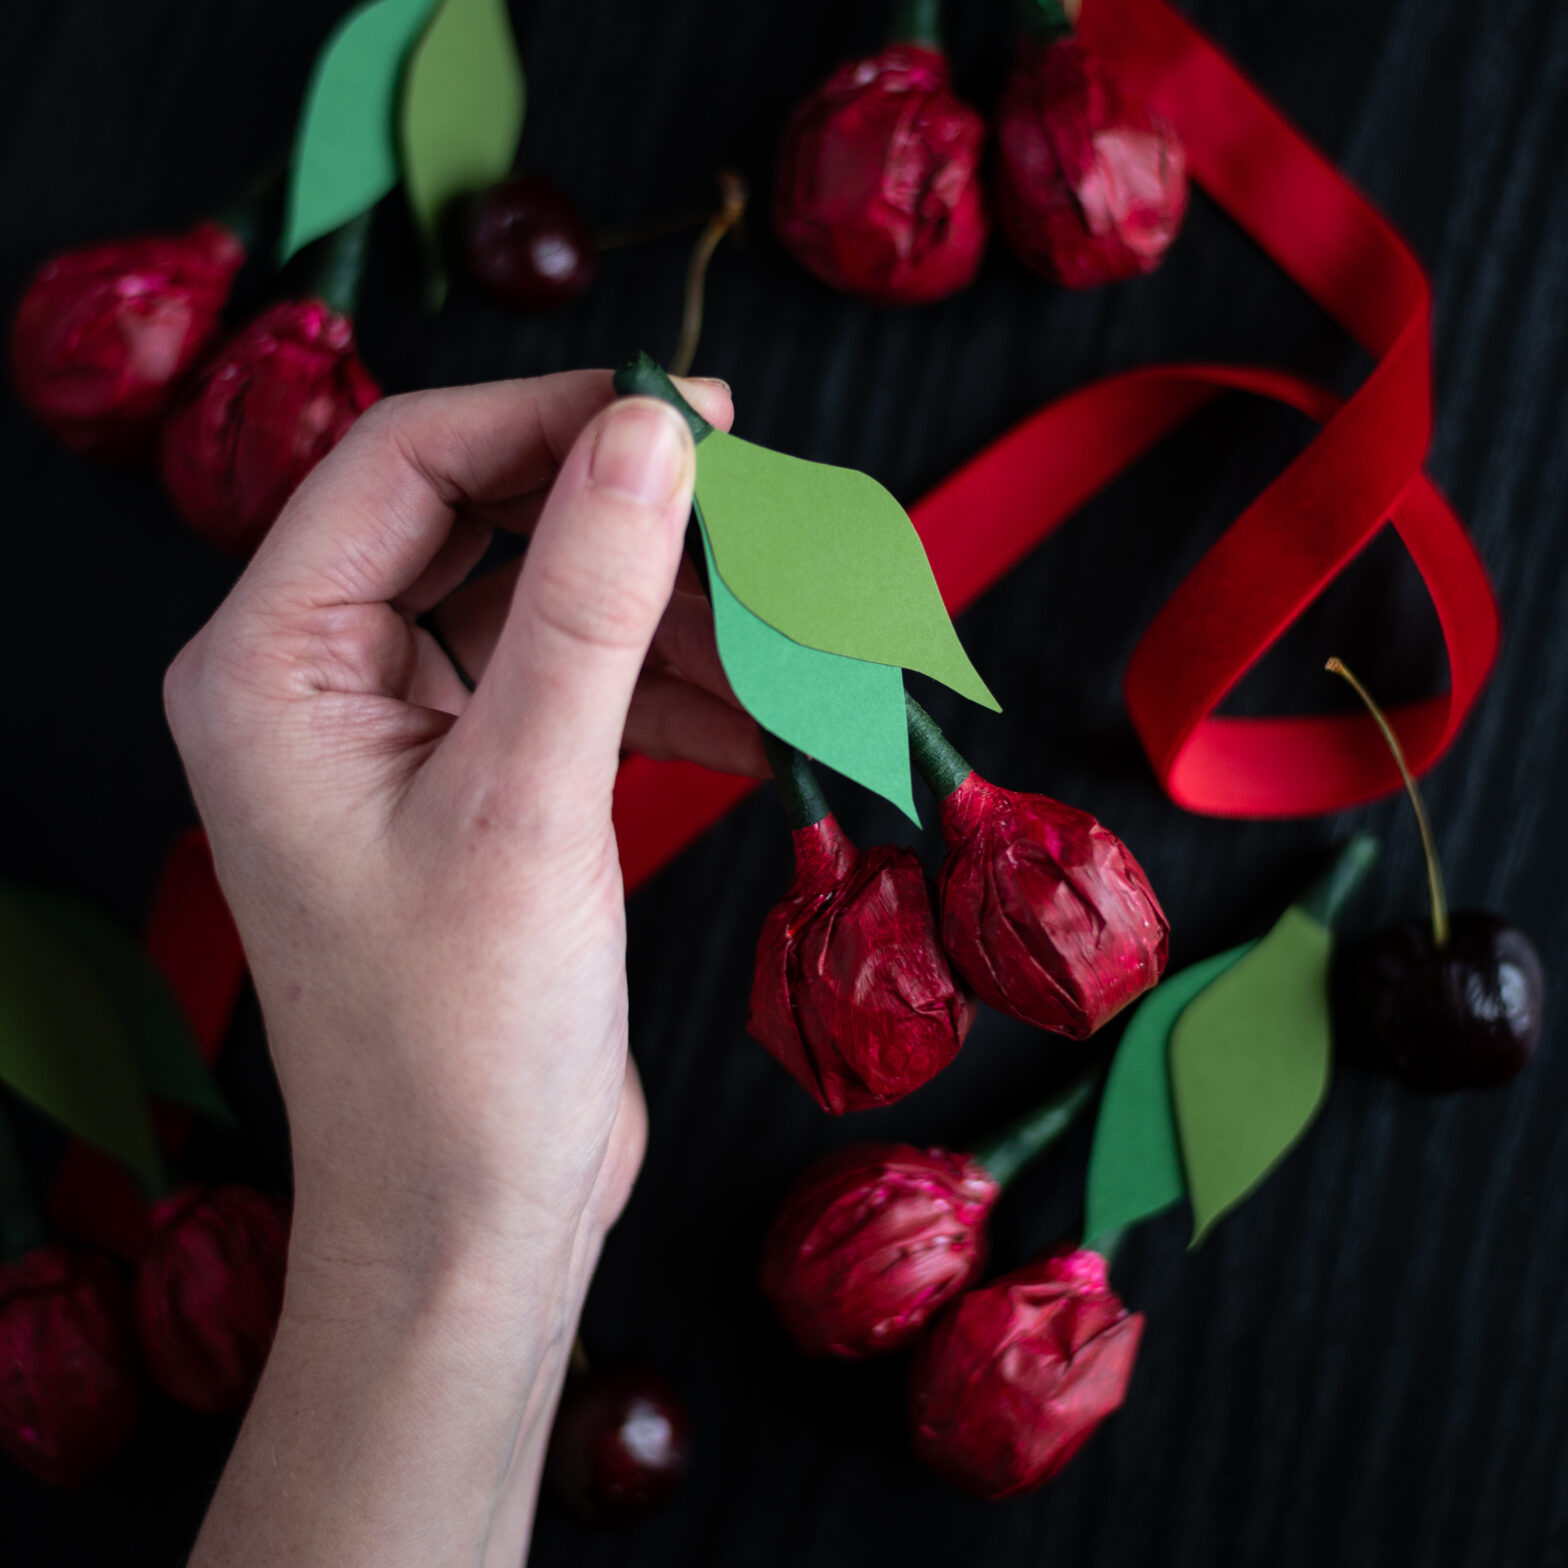
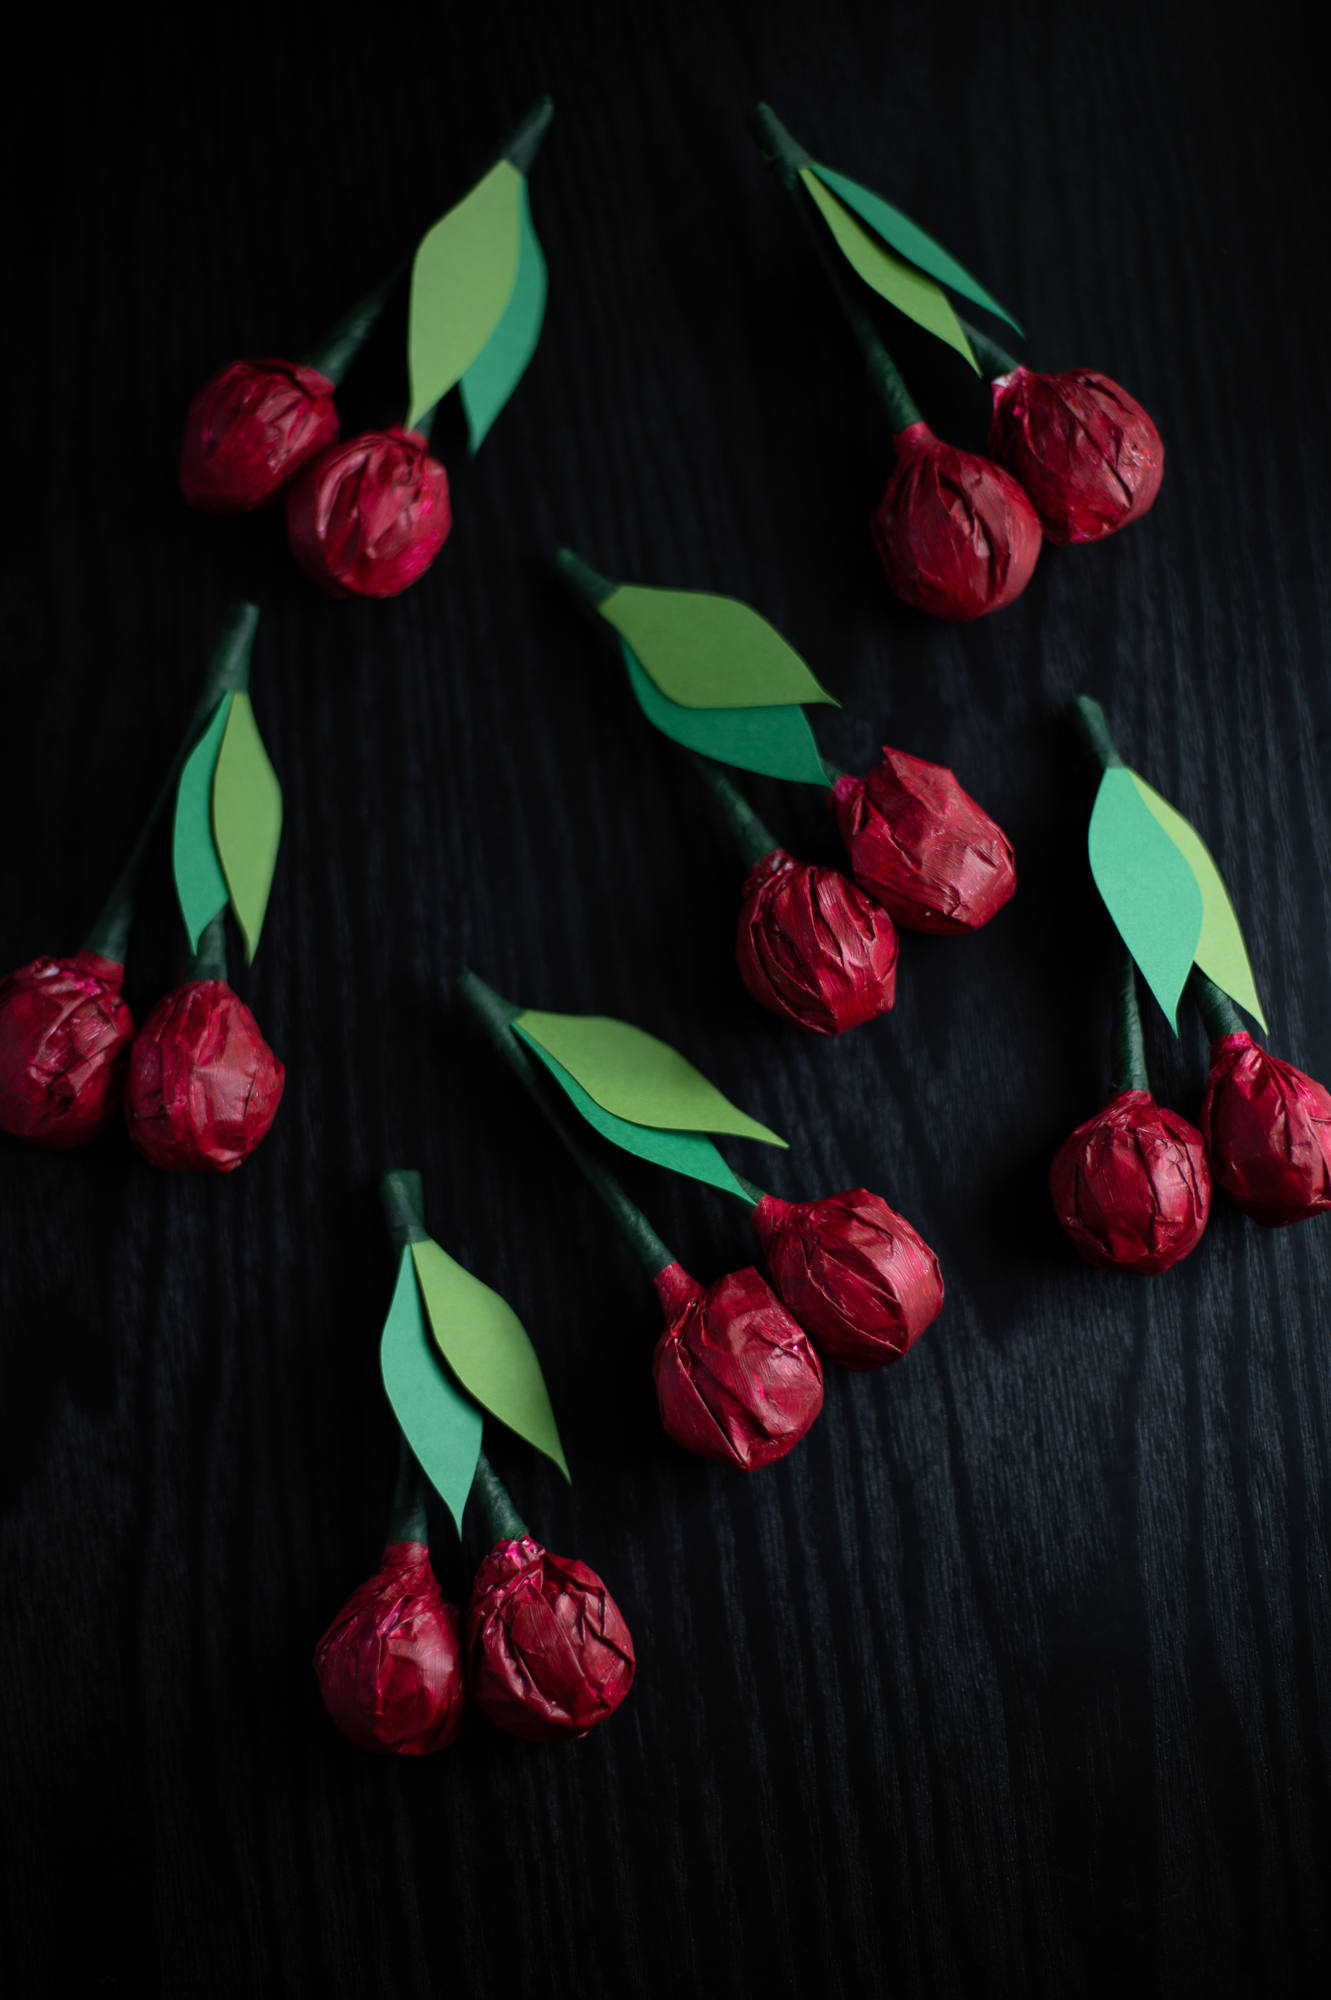
Your Tootsie Pop cherries should look something like this when you’re done.
Step Four: Cut Some Leaves For Your Tootsie Pop Cherries
Cut two small leaves out of green cardstock, use two different shades of green for added dimension. (I used the darkest two shades from this multi pack) Make one end of each leaf extra long and narrow to help ensure the it will be easier to attach to the stem in the next step of the process.
OPTIONAL STEP: If you are planning to write “TO:/FROM:” information on your Valentines or personalize them with a note, do so on your leaves NOW before attaching them to your Tootsie Pops. I found out the hard way they are very difficult to write on after the fact.
Free Printable Leaf Template
If you don’t feel comfortable free handing leaves like I did (or maybe you want to make it easier for a small friend to help you), I also created a FREE downloadable PDF leaf template with 5 templates.
- Two templates you can use on green cardstock: a sheet of blank leaves, and a sheet with the words “FROM:” on them).
- Three template you can use on white cardstock to print light and dark green leaves, and a sheet with light green leaves with FROM on them.
Step Five: Attach Your Paper Leaves To Your Tootsie Pop Cherries
To attach your leaves to your Tootsie Pop cherries, grab two leaves (one in each shade of green) at the top of your cherry stem.
Then carefully wrap the tops of your leaves with more floral tape and secure them to the stem. Wrap down the leaf just far enough so that the leaves feel firmly attached.
CRAFTING TIP: If you wrapped your leaves tightly enough, and were able to get enough of the leaf under the floral tape, the leaves should be nice and secure. However, if your leaves aren’t staying put, or you want a bit of extra security, feel free to whip out the hot glue gun and just glue the leaves onto you cher.
Creative Ways To Deliver Your Tootsie Pop Cherry Valentines
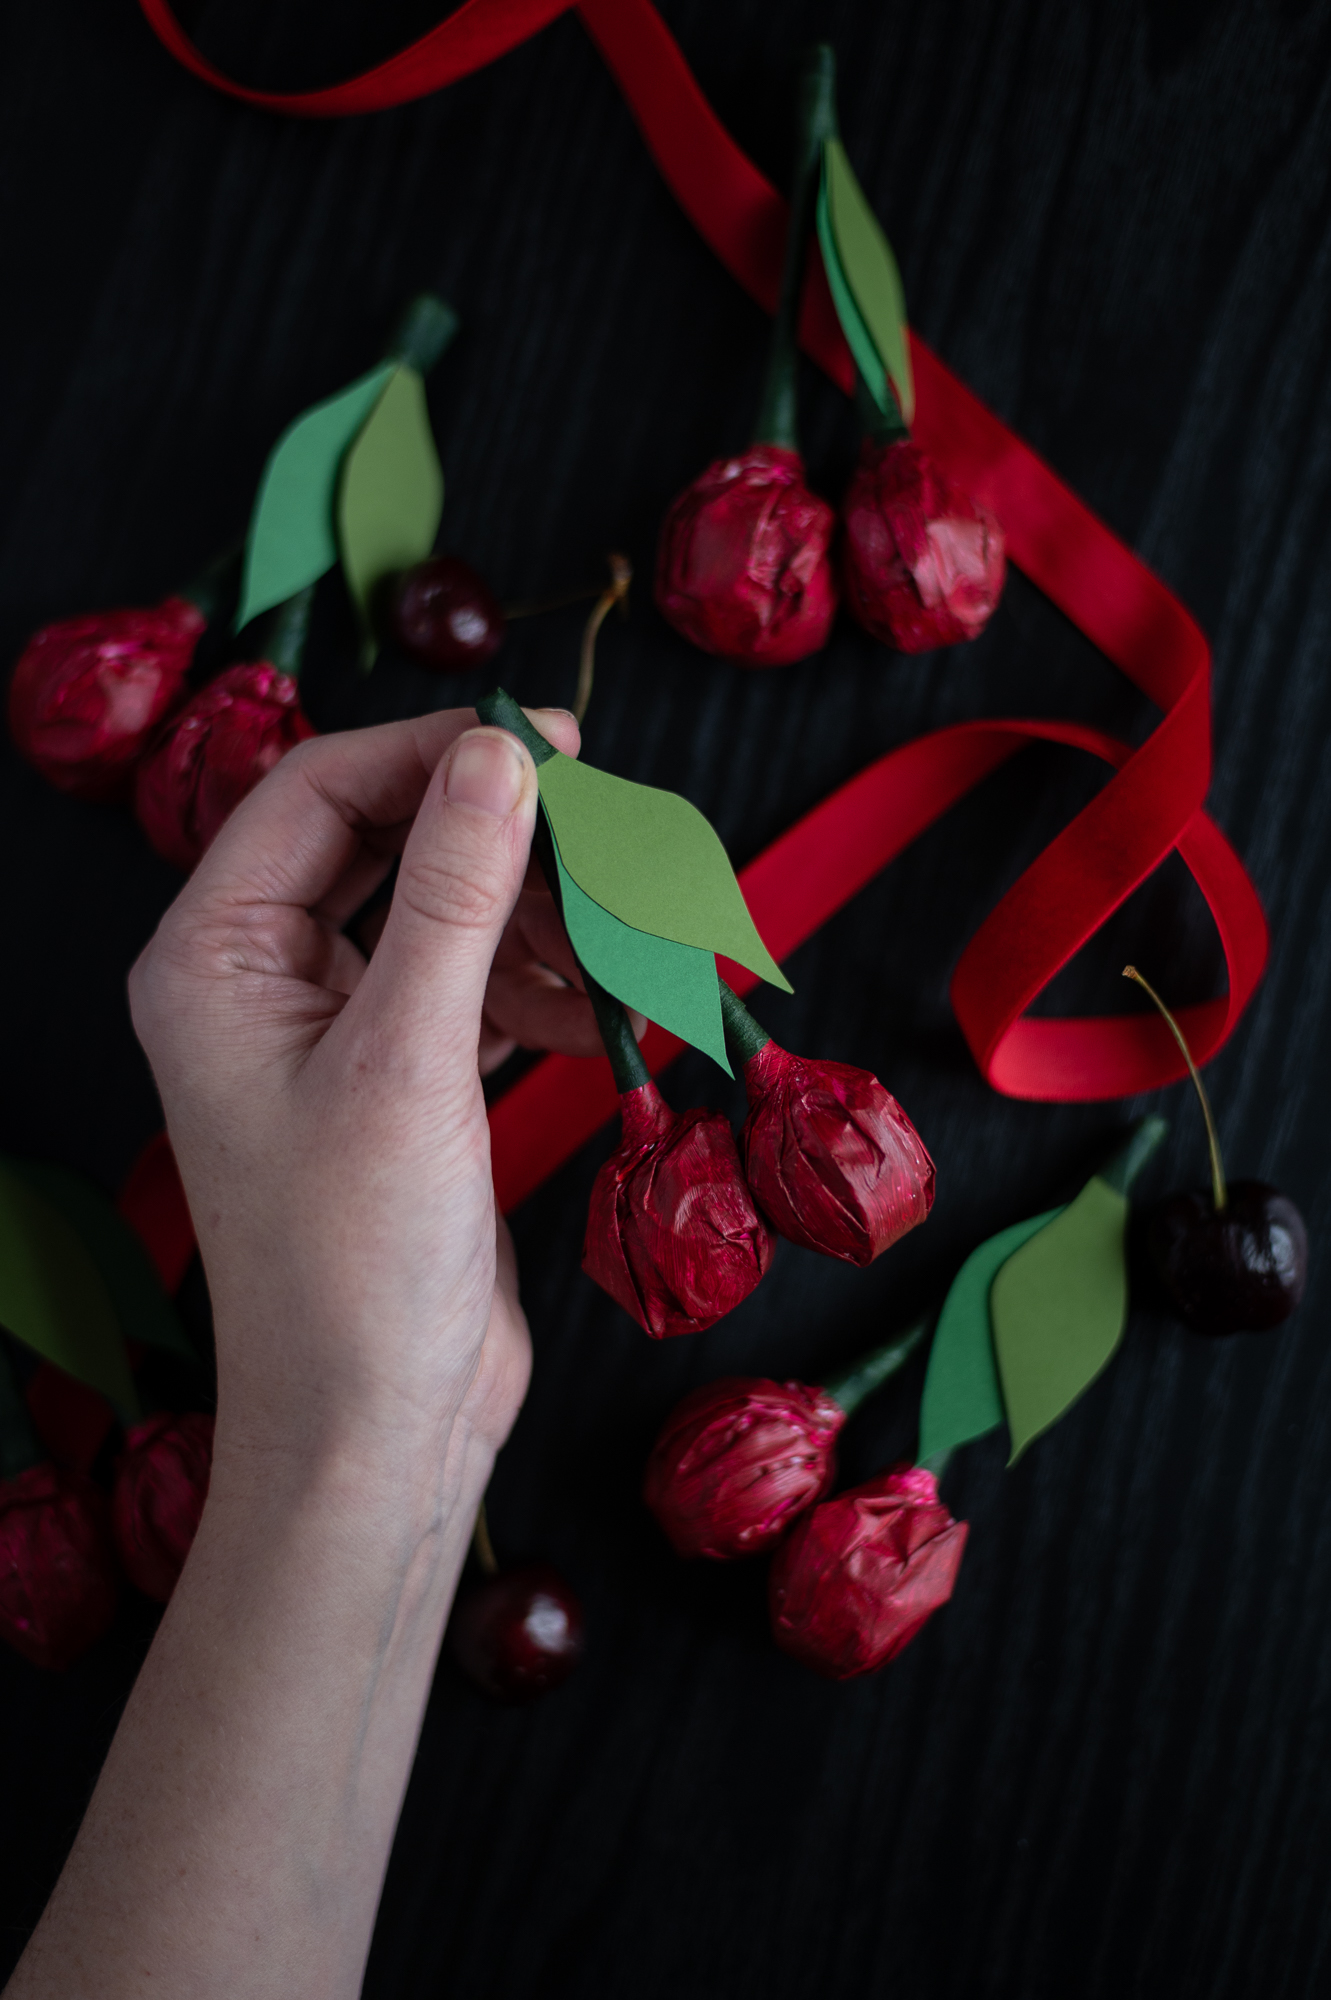
These treats are adorable and sure to please on their own as classroom Valentines, a sweet Galentine’s Day gift, Cherry themed party favor, or surprise for a special someone. But here are just a few ways to make them even more special:
Personalize With A Note
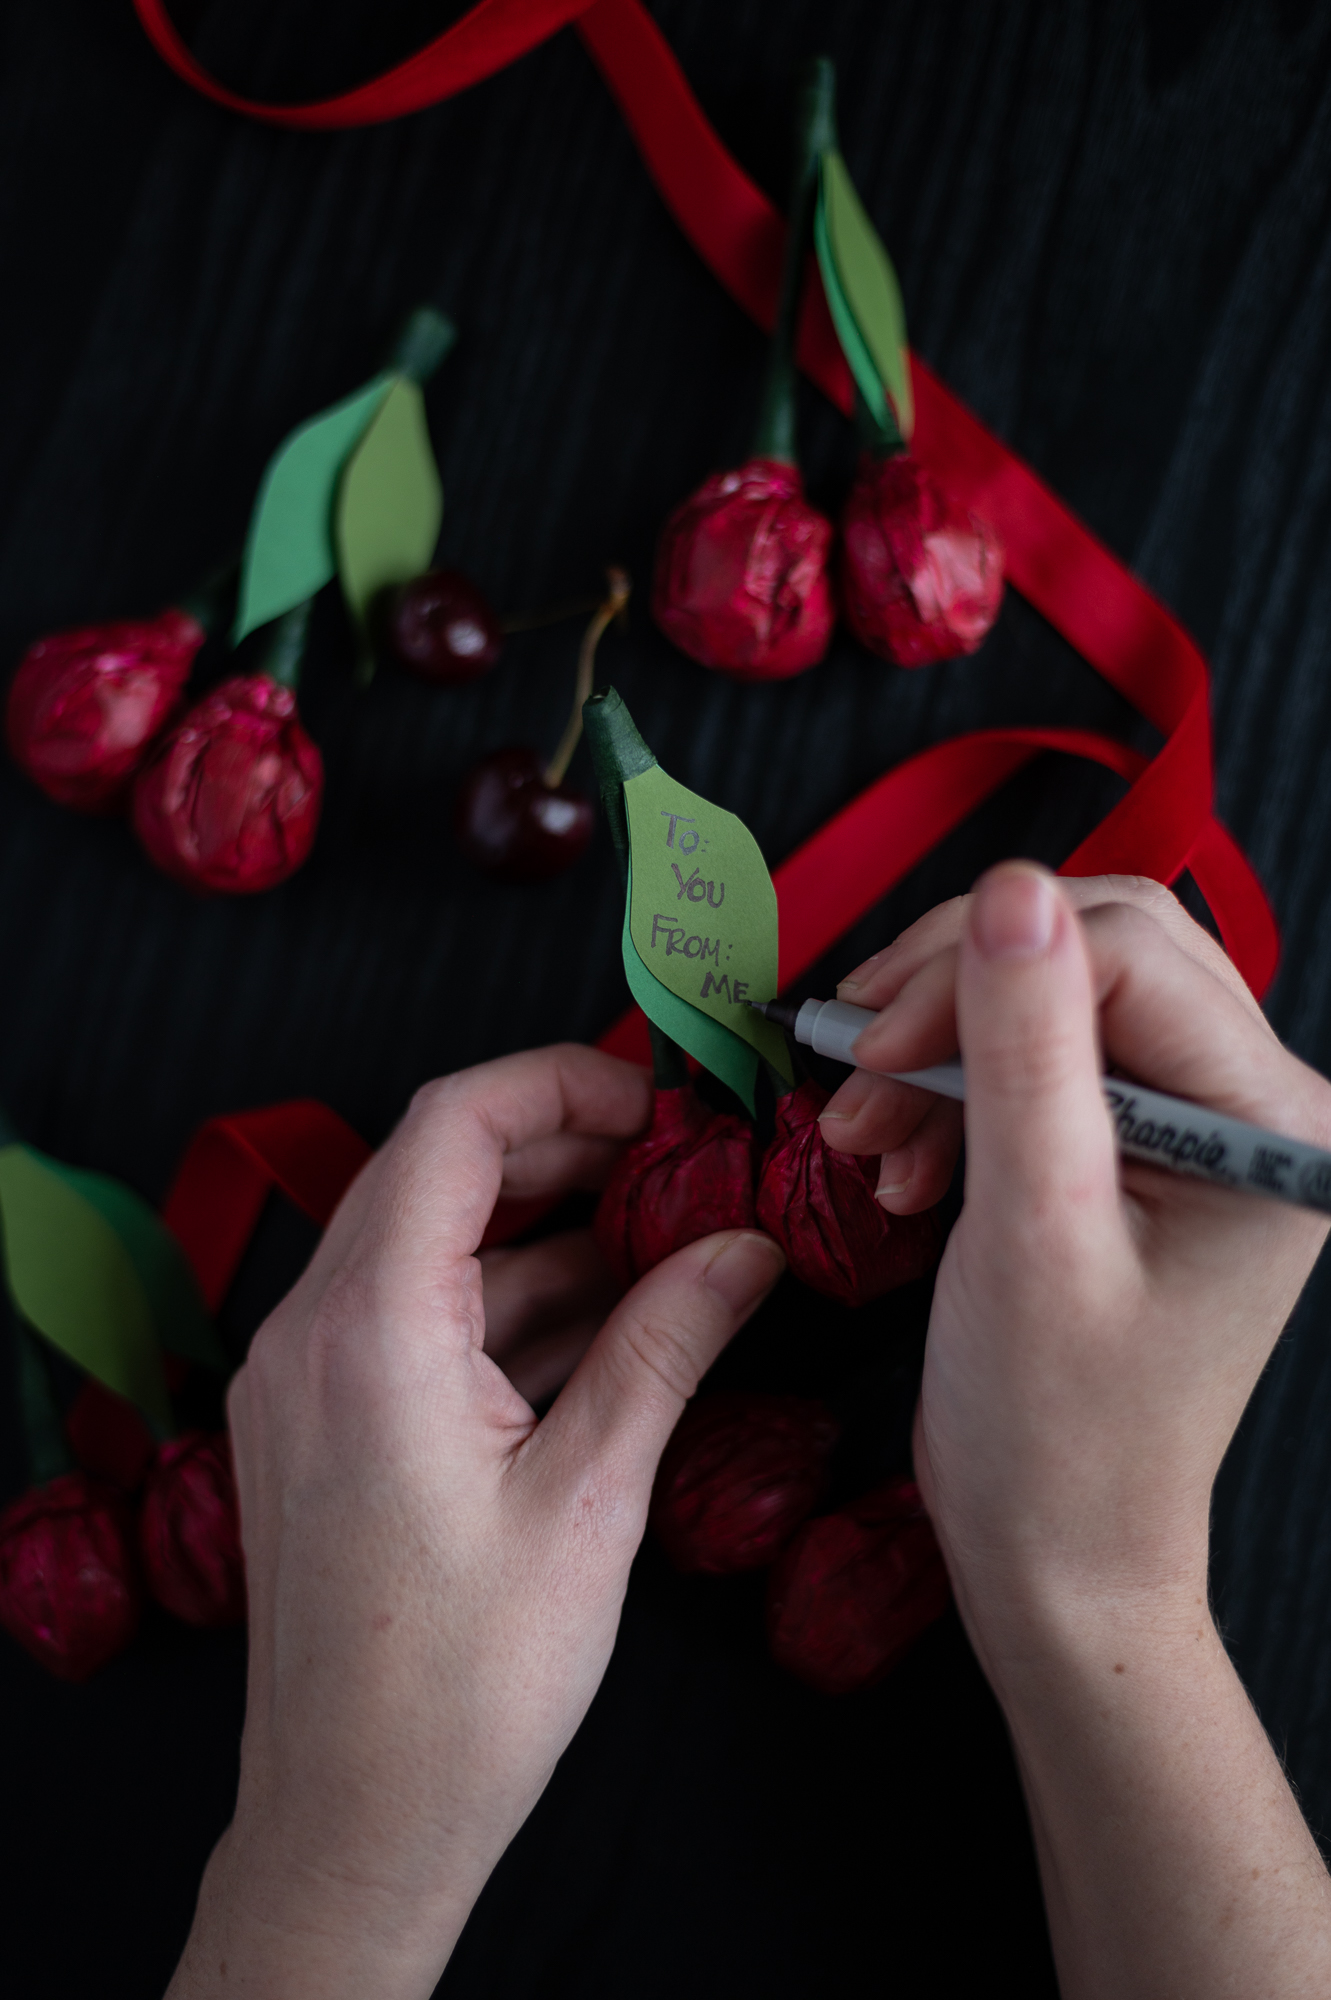
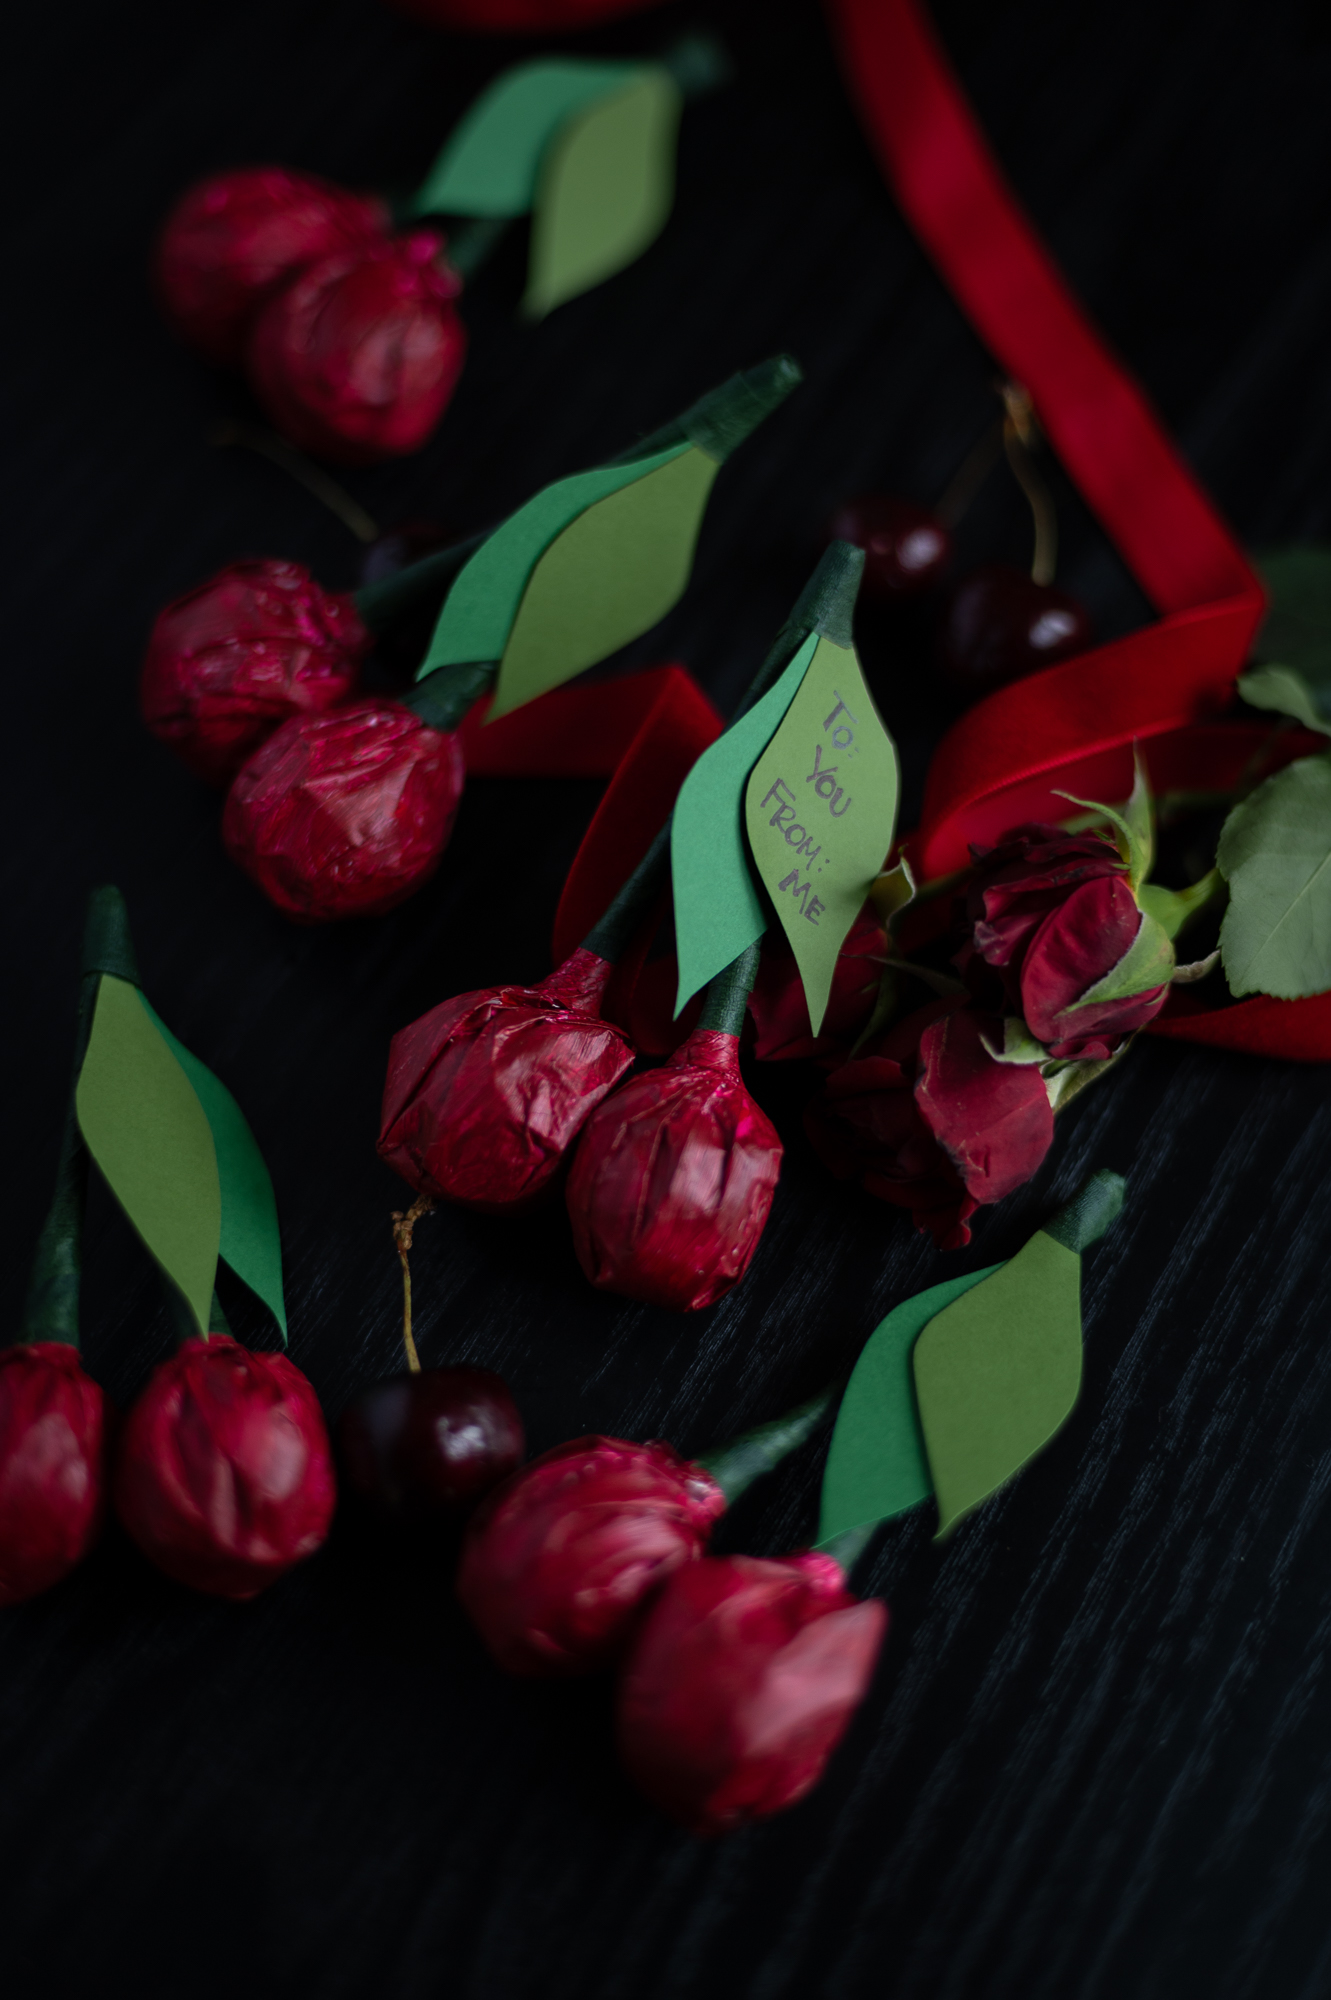
Write a small note on one of the leaves or personalize your cherry Tootsie Pop with TO/FROM details before attaching them to the stem.
Little sayings like these would be perfect for a school Valentine’s day card swap or Galentine’s day party:
• You’re Cherry Sweet
• I Cherry-ish Our Friendship
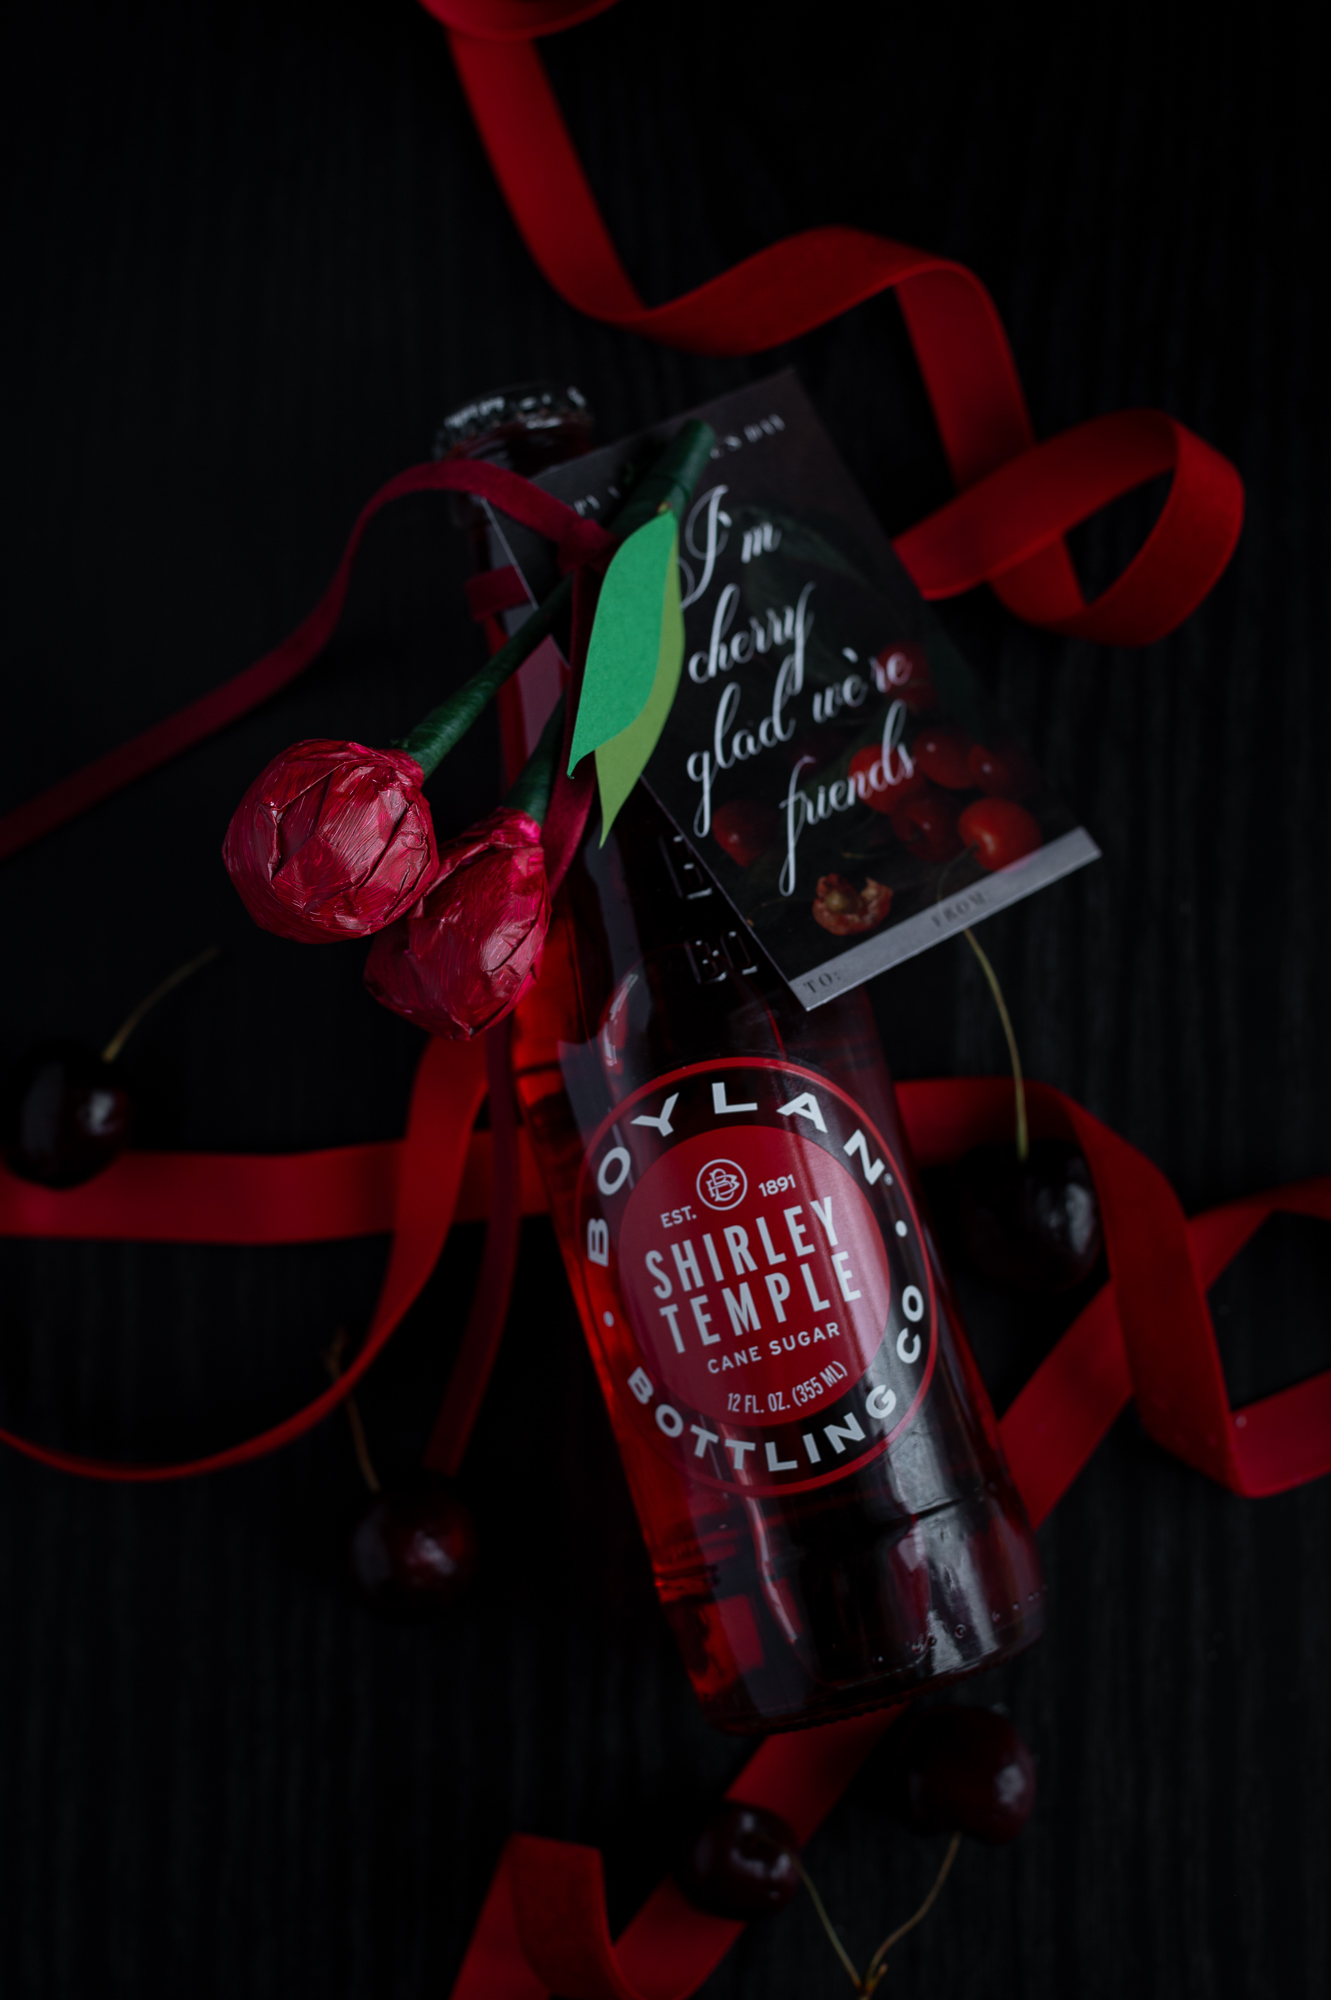
• I’m Cherry Glad We’re Friends
Pair With Other Sweet Treats
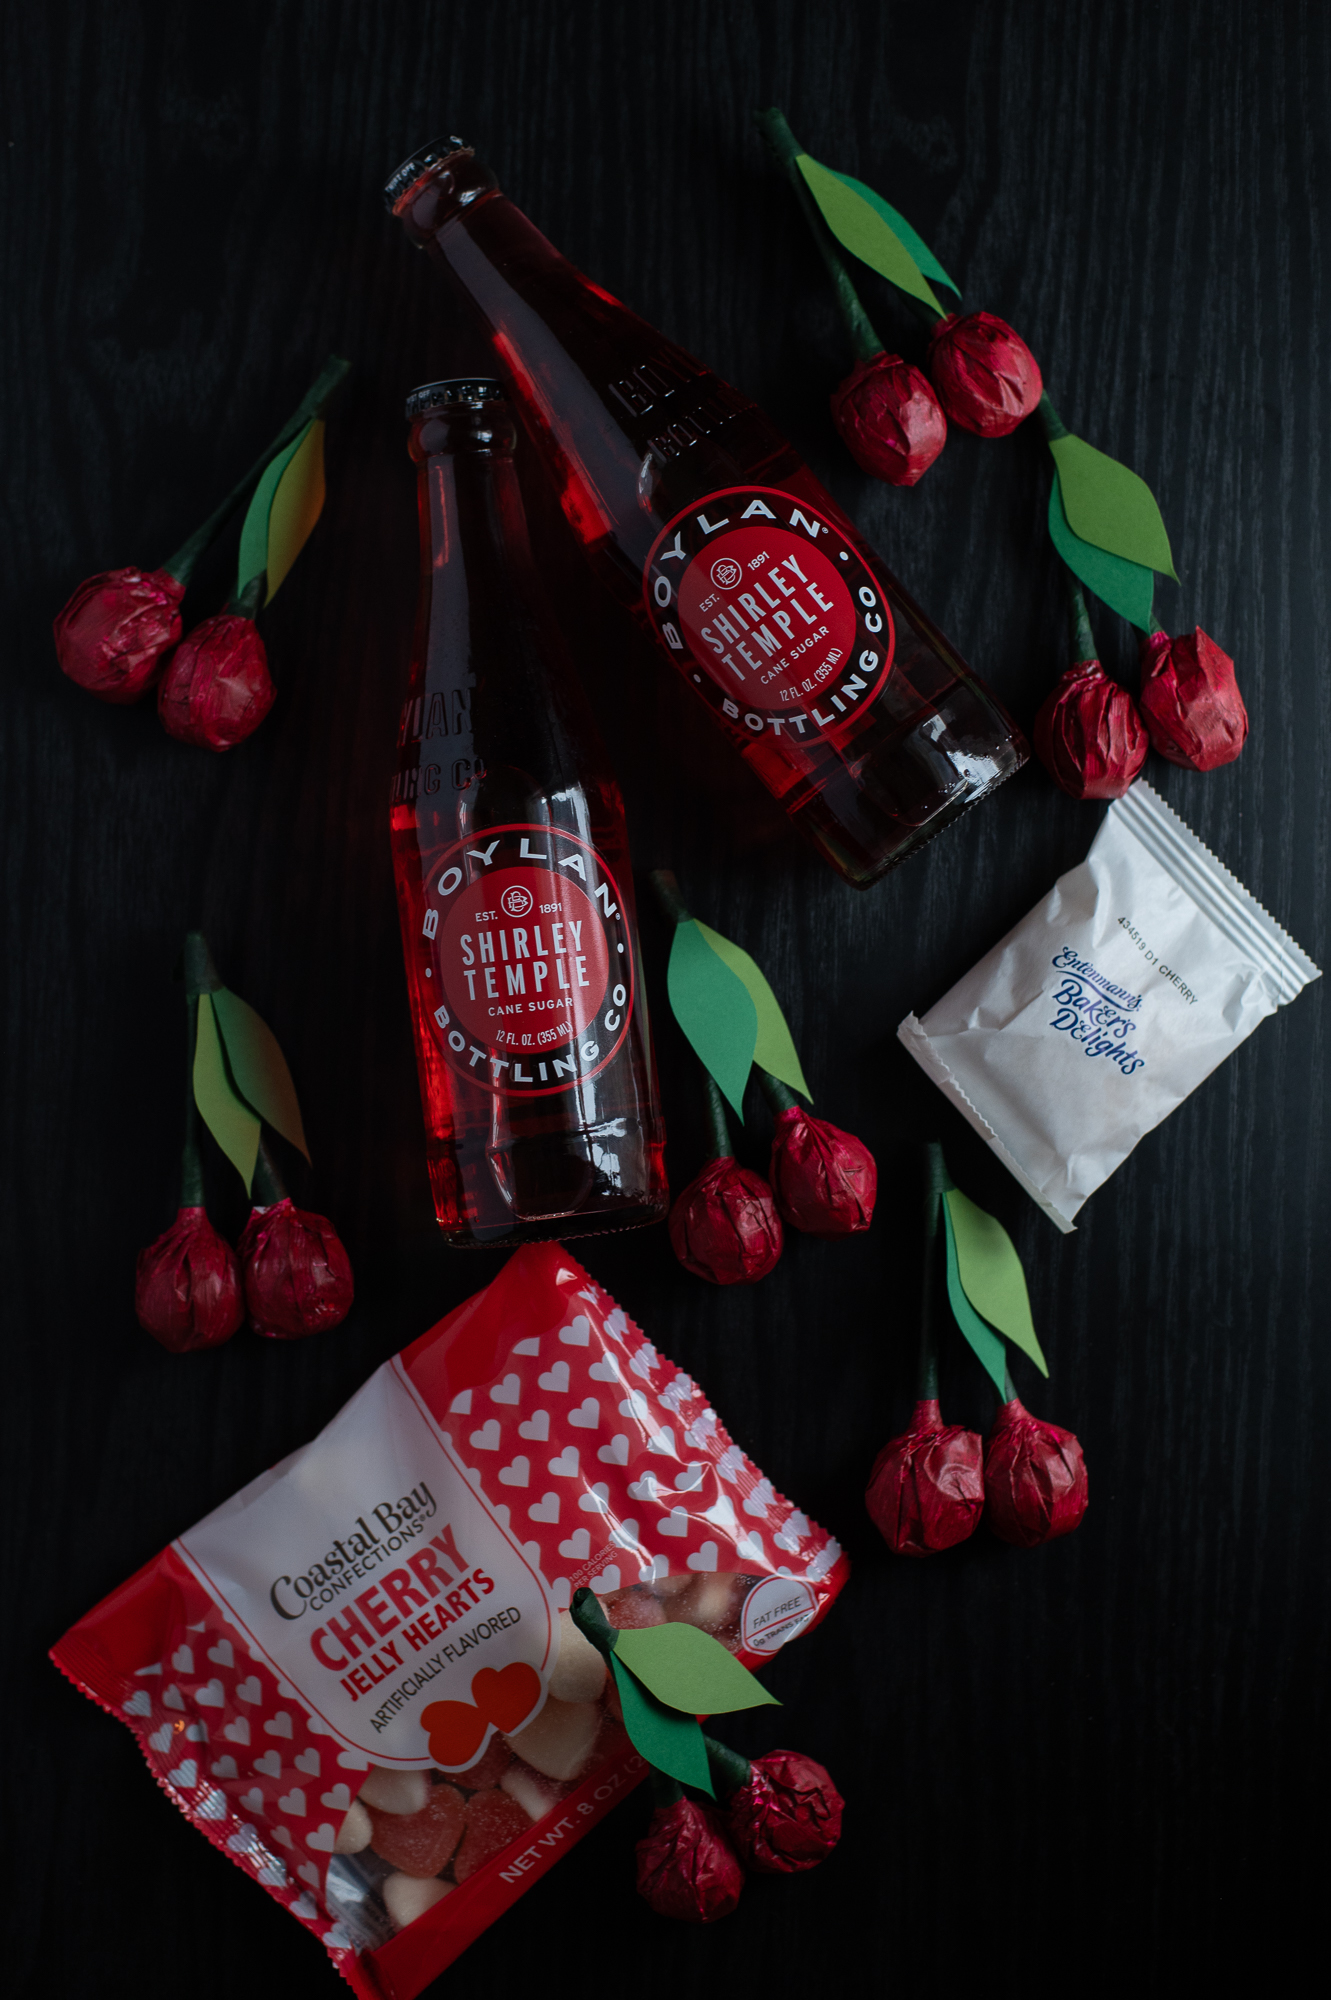

Combine your Tootsie Pop cherries with cherry-themed goodies like cherry soda, cherry hand pies, or other cherry treats. For a more adult gift, try pairing your cherries with a bottle of wine!
Attach To A Printable Card
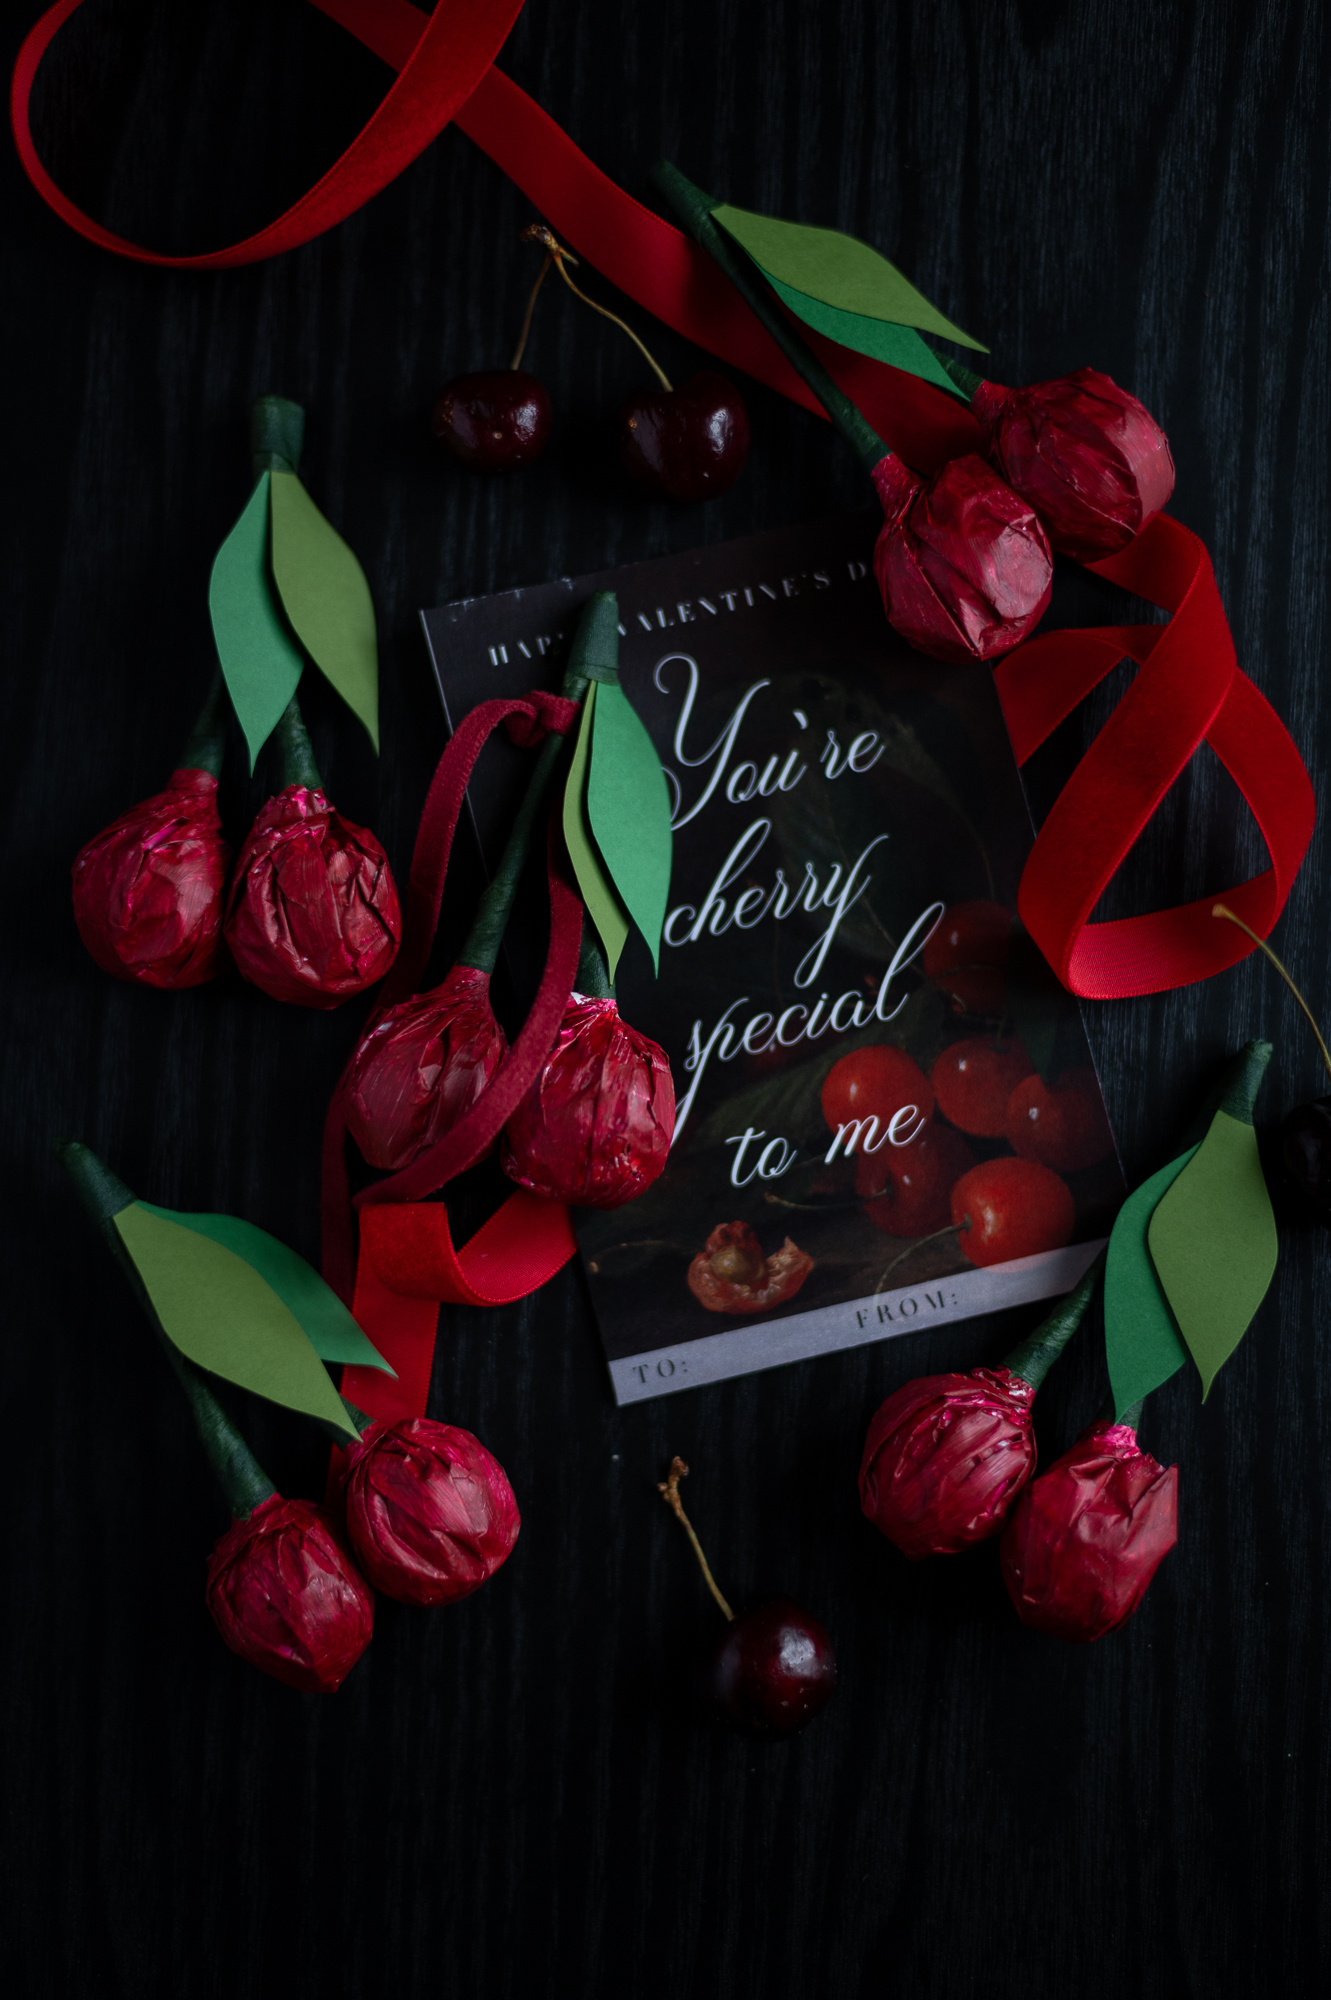
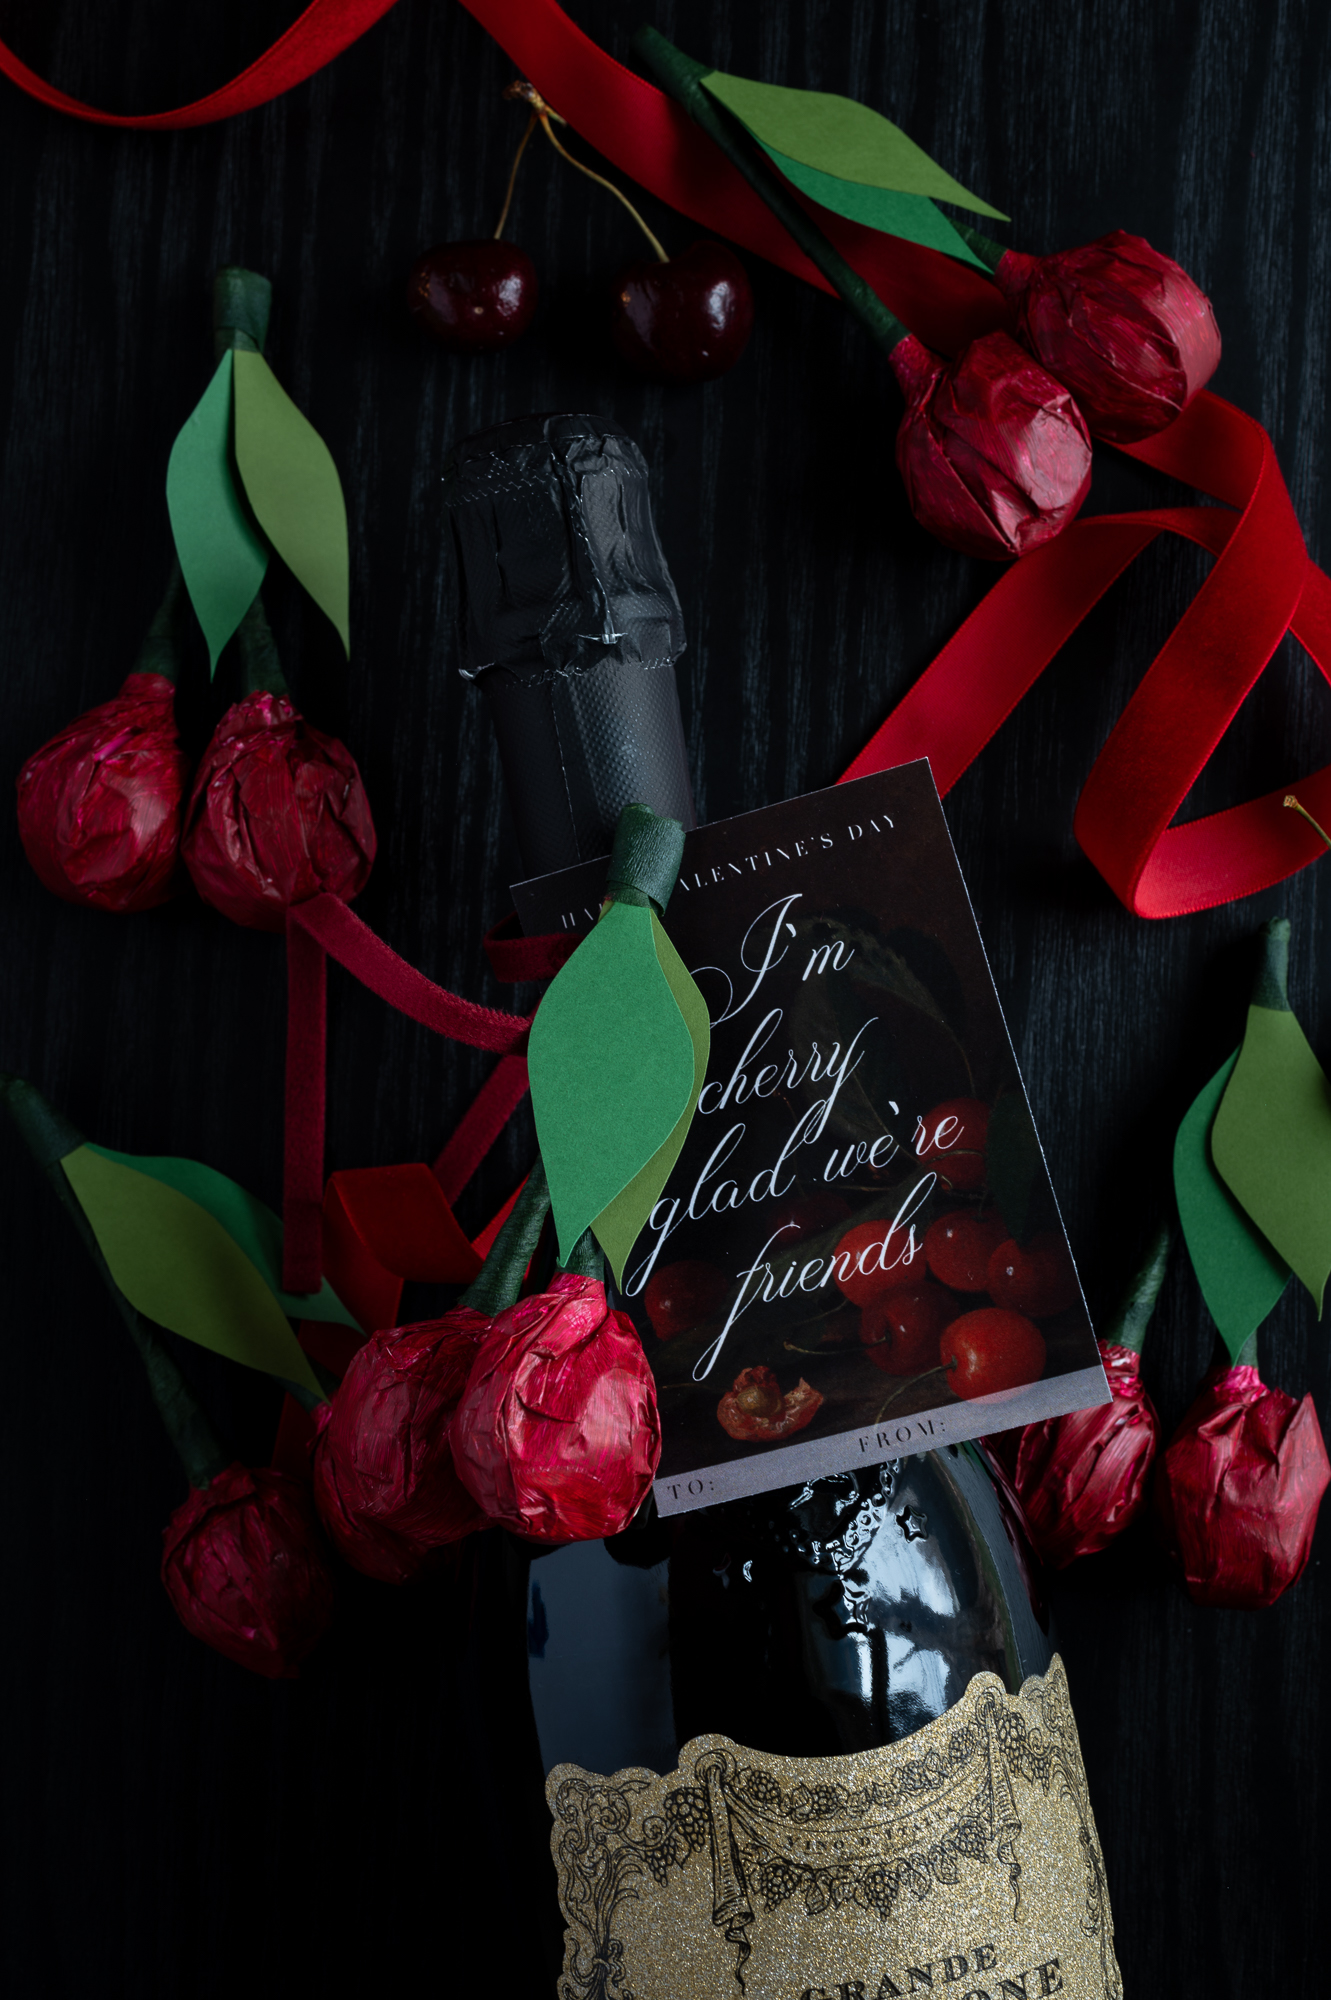
Attach your cherries with a velvet ribbon to a cherry-themed Valentine’s Day card to elevate your delivery. (Click here to download the one I created and used in these photos!)
Use As Place Cards For A Special Event Table Setting
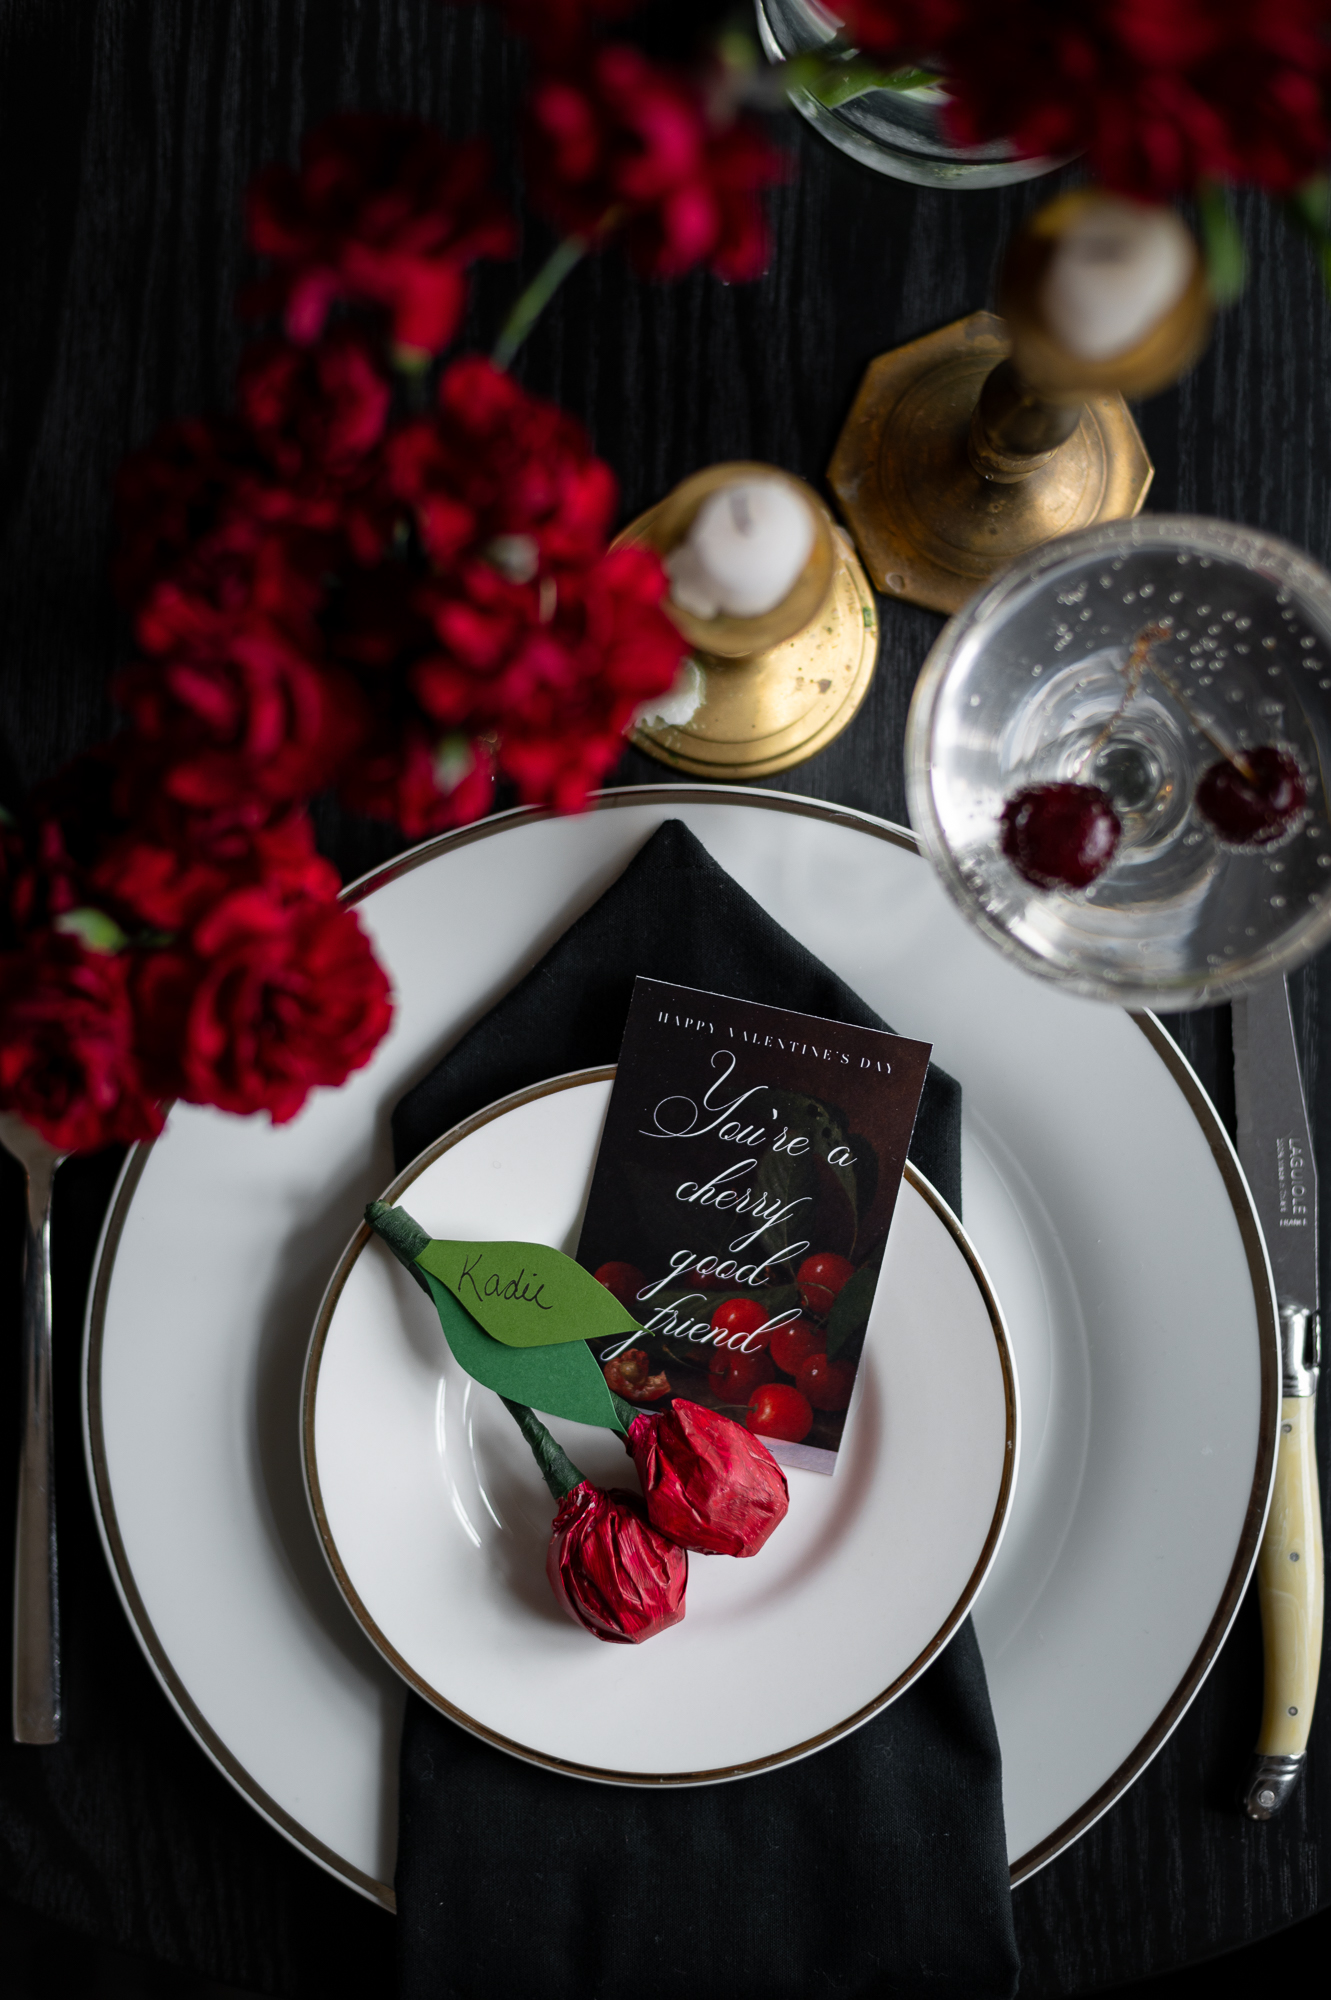
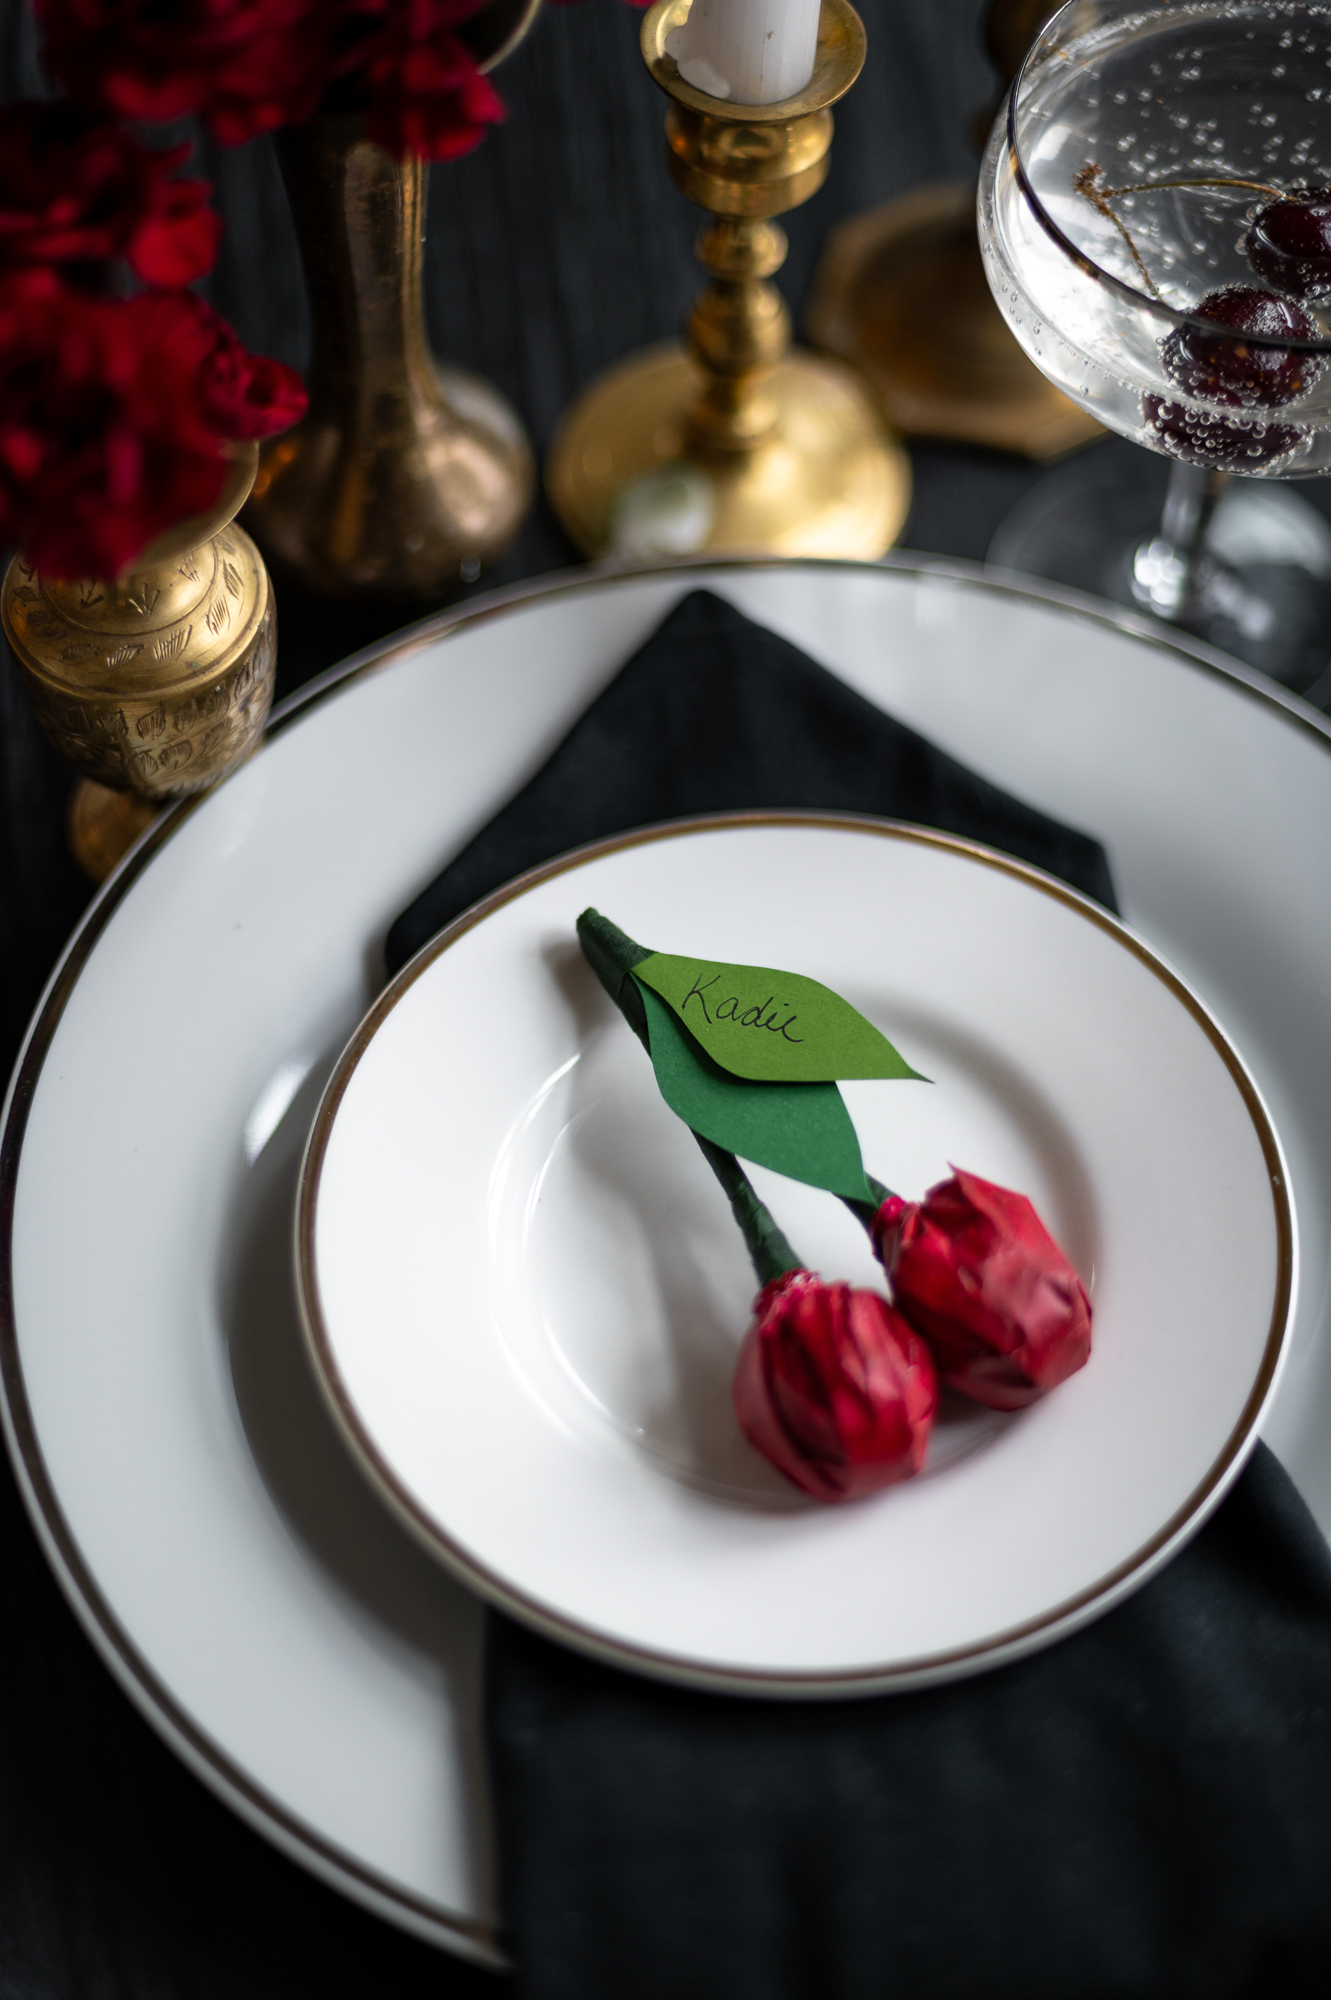
Lastly (and my personal favorite idea) finish off a cherry themed table setting by using these Tootsie Pop cherries as name cards! How adorable would this be for a Galentine’s day dinner!
How would you use these sweet treats?
Shop This Post


Don’t Forget To Pin This Post & Subscribe!
Want to keep getting more DIY home decor inspiration, thrifting tip & tricks, free art downloads, reading recommendations, and home renovation tutorials? Then don’t forget to pin this post for later so you can follow me on Pinterest and then subscribe to my blog so you can get links to my newest content as soon as it hits the blog!