Is there anything better than taking an ordinary utilitarian item in your home and giving it a bit of an upgrade? No. No there is not.
This whole journey started a few weeks back when I saw my friend Diana show off this beautiful brass utility hook she had picked up from Rejuvenation to hang up her garden hose.
*This blog post contains affiliate links, meaning that if you purchase any of the items using the links I provide I, as the author of this website, will receive a very very small commission from that sale. This is a great way to help support your favorite bloggers at no cost to you. Think of it like a tip jar that costs you nothing!
I never knew I needed a brass hose holder or “Hose Butler”, (which is what I now know it to be officially called… and if I’m going to write an entire blog post about a fancy hose holder, we might as well use the fanciest term I could find for one) but if I definitely needed one too after seeing hers.
But there was a catch…. I knew with the way our home is constructed I didn’t want to attach my hose butler directly to my house. (It’s mostly all brick from the early 1900s, so I try to avoid putting screws into it if I can.) After searching for days and finding nothing like what I wanted, I decided to get creative and make myself what I had envisioned.
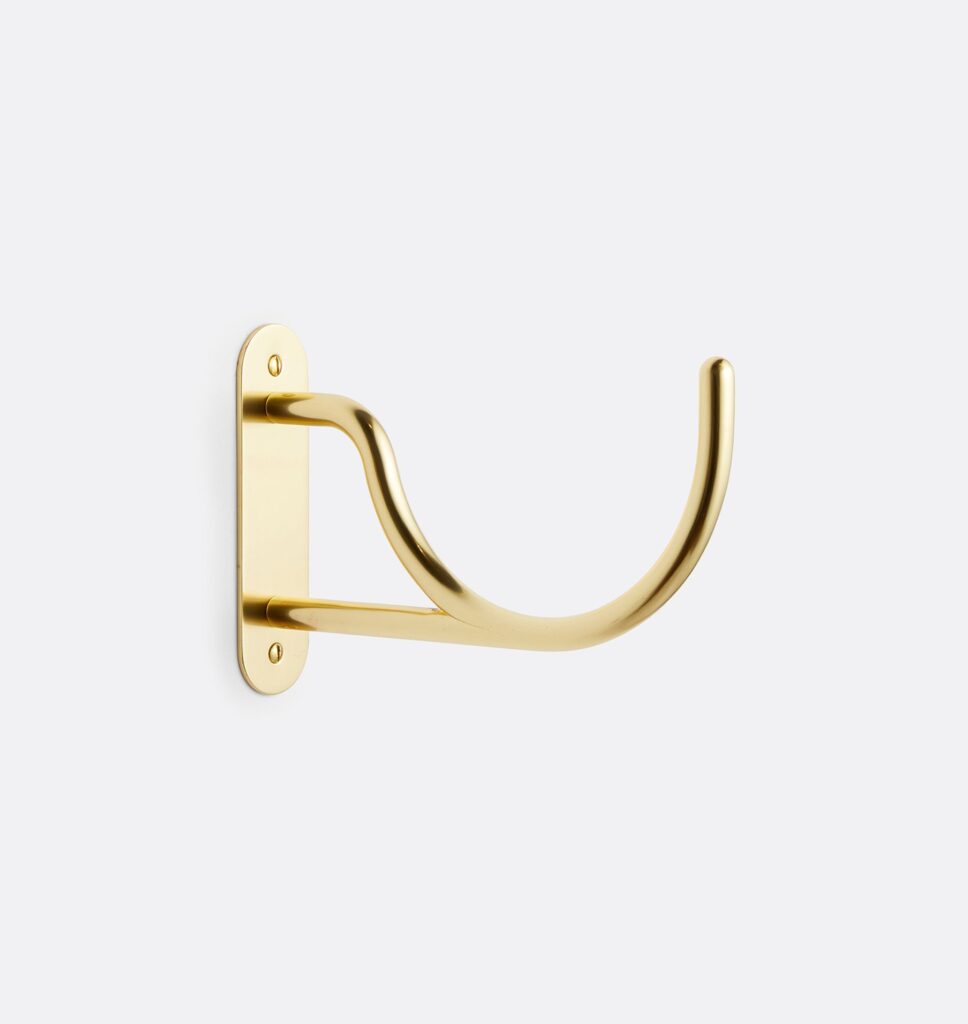
Step One: Find A Hose Butler You Like The Shape Of

This was honestly harder that it seems like it should be. But eventually I found THIS FREESTANDING HOSE BUTLER on Amazon.
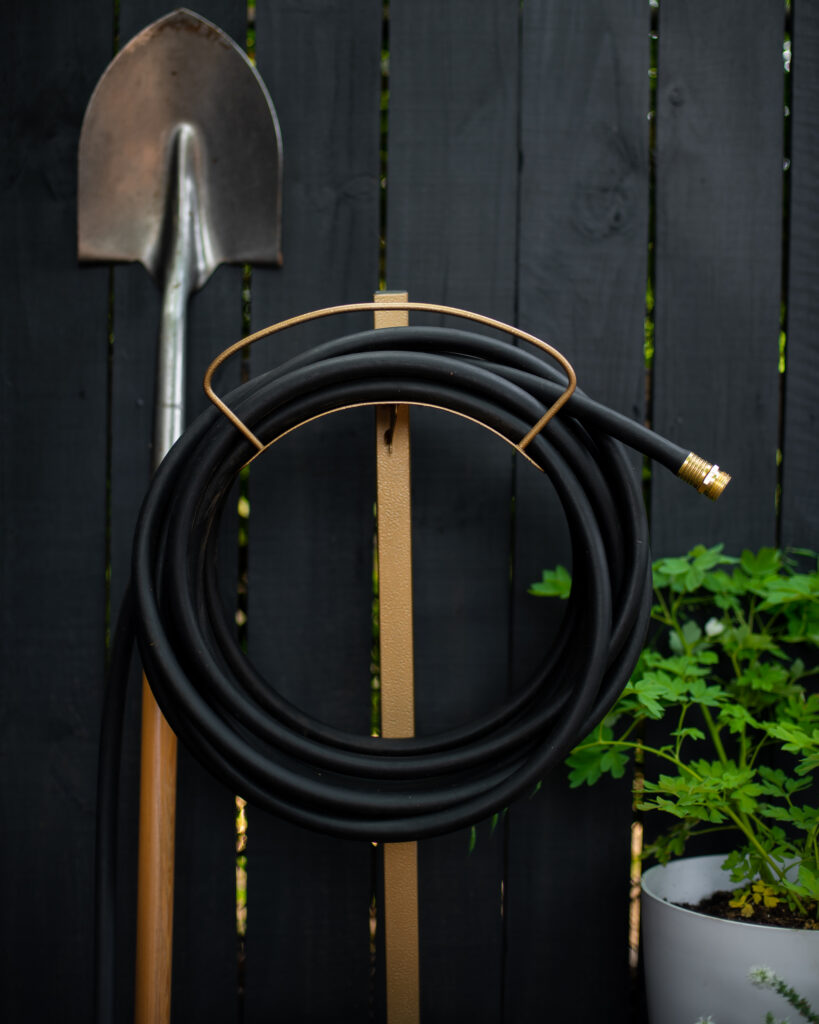
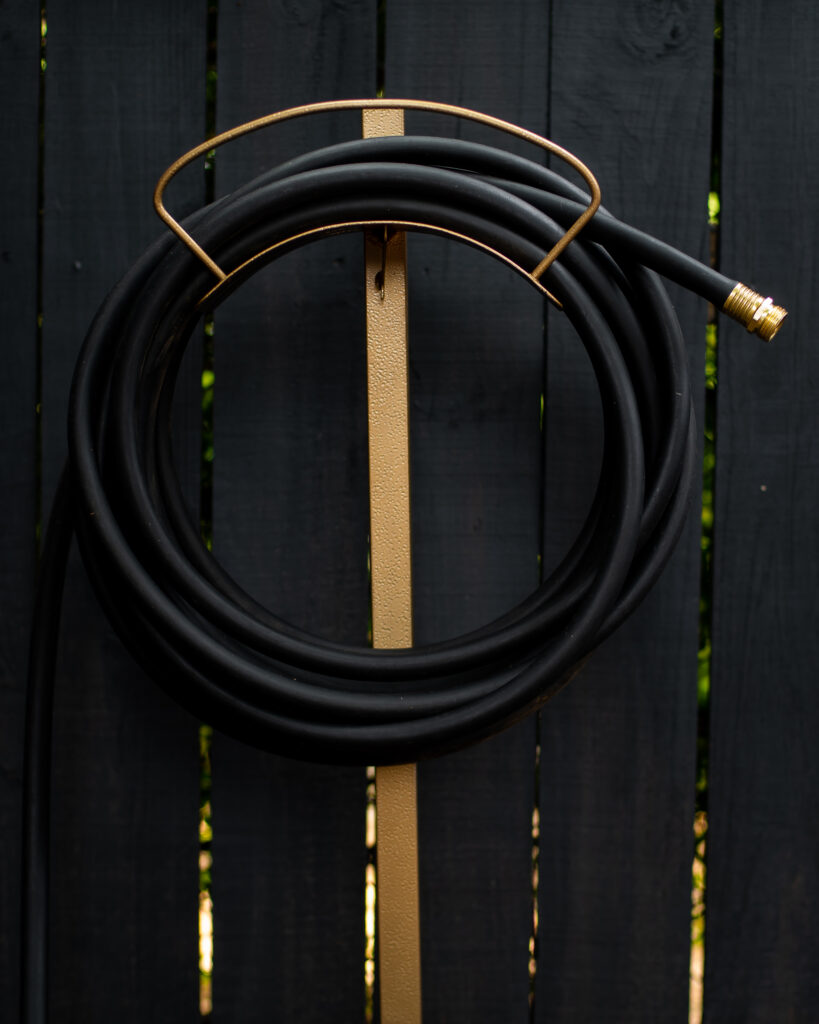
With her clean simple lines, she was perfect… just in desperate need of a little paint job upgrade.
If you’re having trouble finding something you like, try searching: Hose Holder, Hose Butler, Hose Hanger, Hose Reel & Hose Hook!
Step Two: Gather Your Other Supplies
Here’s everything I picked up at Home Depot for this project, along with a list of the misc stuff I had on hand at home and used to get the job done.
Things I Purchased:
- A Bag Of Concrete Mix
- I used about 1/2 of the 60lb bag we bought
- A Can Of Spray Paint
- A Sleek Looking Garden Hose
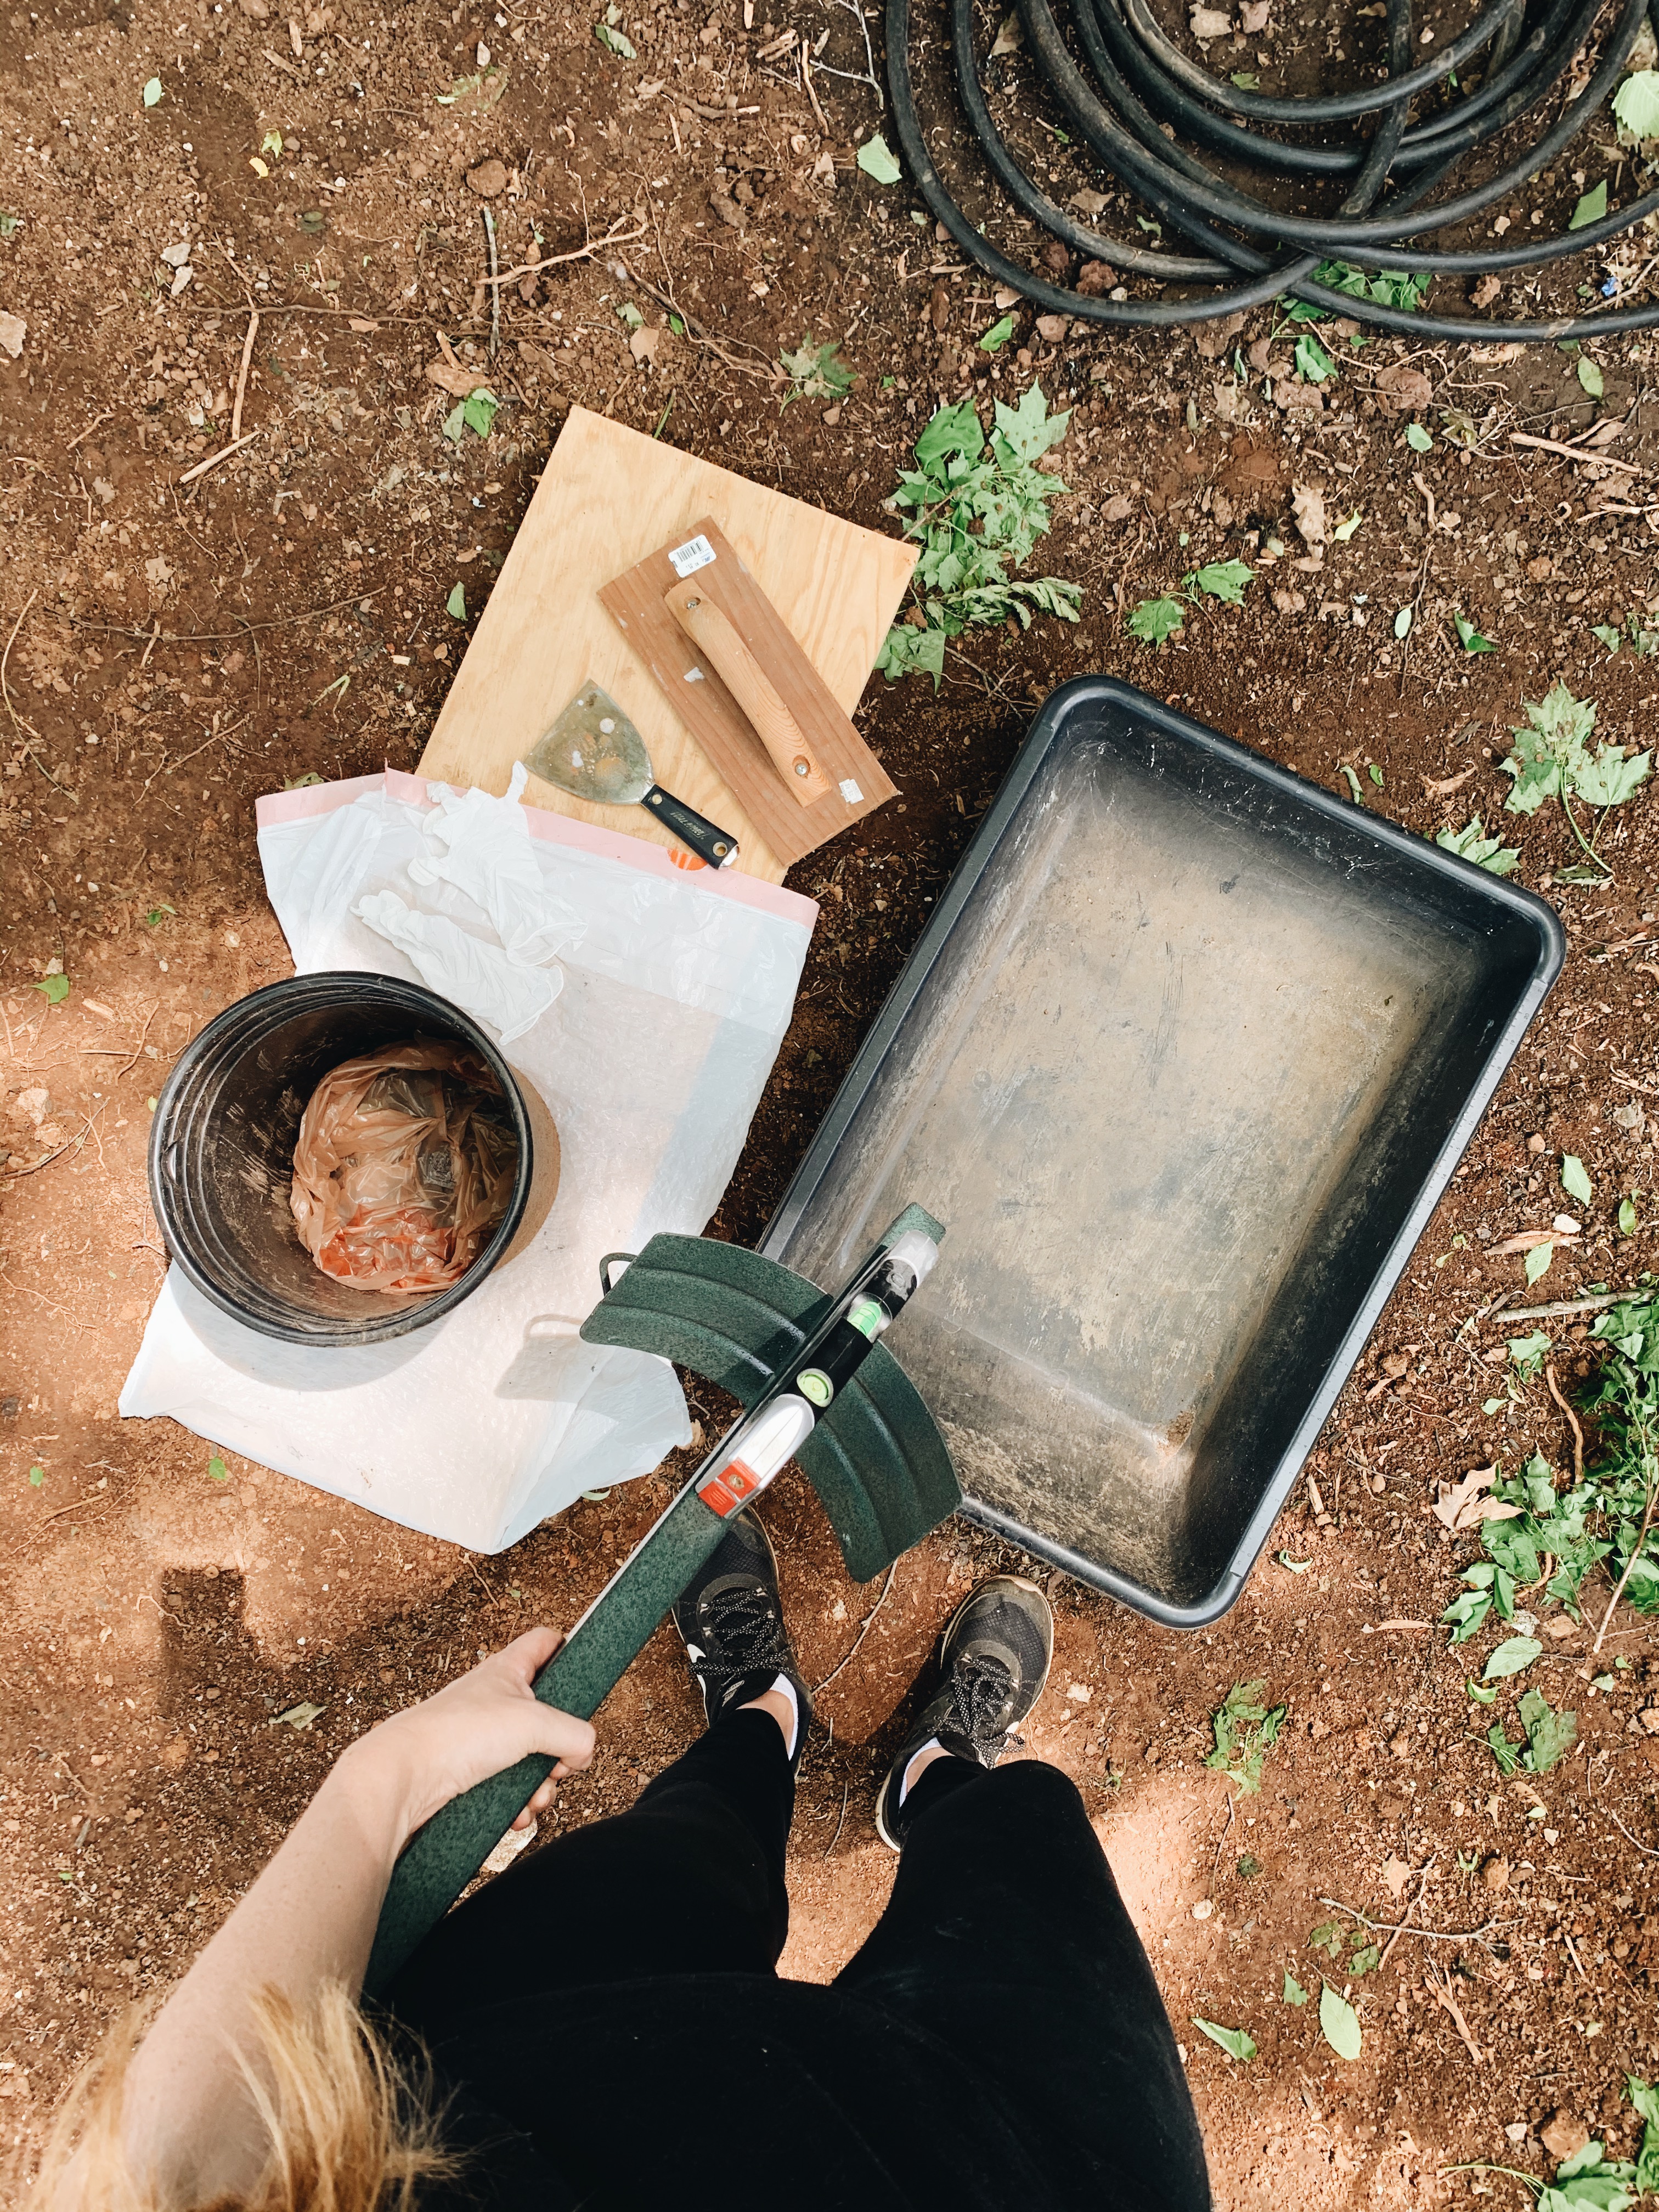
Things I Had On Hand:
- A container to mix your concrete in
- We used a mortar tub we had on hand.
- Some sort of tool to mix your concrete with the water needed and scoop it into the pot
- I just used a tamper and joint knife, but you could just use a shovel or trowel
- Gloves to keep the concrete off your hands while mixing
- The concrete will come off… but it will dry out your hands SO BADLY
- A level to make sure your host butler is plum (aka straight up and down and not crooked)
- A Container Of Some Sort To Pour Into (OPTIONAL SEE NOTE BELOW)
A Quick Note About Why I’m Using A Container (And Why You Might Want To As Well)
Normally, this type of freestanding hose butler get’s installed in the ground very much like a footer for a deck would. Meaning that you would dig a fairly deep hole in the ground (about 8″ – 12″ deep), place the leg of your hose butler in the hole, fill the hole up with concrete around it, then spread some dirt over the very top bit.
We however, have a lot of construction to do on this area of our house before we could install this hose butler in the ground where it will one day live. That means I needed it to be *moveable* for now. So I decided to set the leg of my hose butler in an old plastic tomato pot I had left over from last year, which I could then bury (pot and all) in the ground when the time comes. But meanwhile, will let me move the hose butler around the yard as needed
Alternatively, if you have a situation where you need to install a freestanding hose butler somewhere you *can’t* bury it in the ground. (Say on top of a concrete pad or something) This would be a great solution to that problem! You’ll probably just want to use a prettier container than I did lol… (If you do decided to go this route, I’d suggest making sure you either fill the pot all the way to the top with the concrete mix or ensure you have drainage holes of some sort in your pot so the top doesn’t just fill up with standing water and breed mosquitos for you).
Step Three: Set The Leg Of Your Hose Butler In The Concrete
You’ll need to work fast during this bit and ideally have an extra set of hands around to help hold things.
- First you’ll want to either grab your pot/bucket or dig your footer in the ground where you’ll be installing your host butler.
- Next, make sure you have your hose butler and level handy.
- Then mix up your concrete mix with the water as per the directions on the bag.
- Have your extra set of hands hold the leg of your hose butler in the hole you dug (or inside the pot you’re using*) where you want it and keep it in place while you scoop concrete mix into the pot/hole around it.
- *NOTE: If you will be placing your hose butler IN A POT, be sure and place the leg near the BACK side of the pot, not in the middle. Placing it along the back side wall of the pot wall will help to counter balance the weight of the hose when it is placed on the butler later.
- As the concrete sets, it will start to firm up around the leg of your hose butler, so be sure and do any adjustments you need to your leg of your hose butler right away to keep it level and plumb until the concrete has hardened enough to keep the leg in place all by itself.
If you want a visual of this entire process, you can check out my instagram story highlight here and watch the process from start to finish.

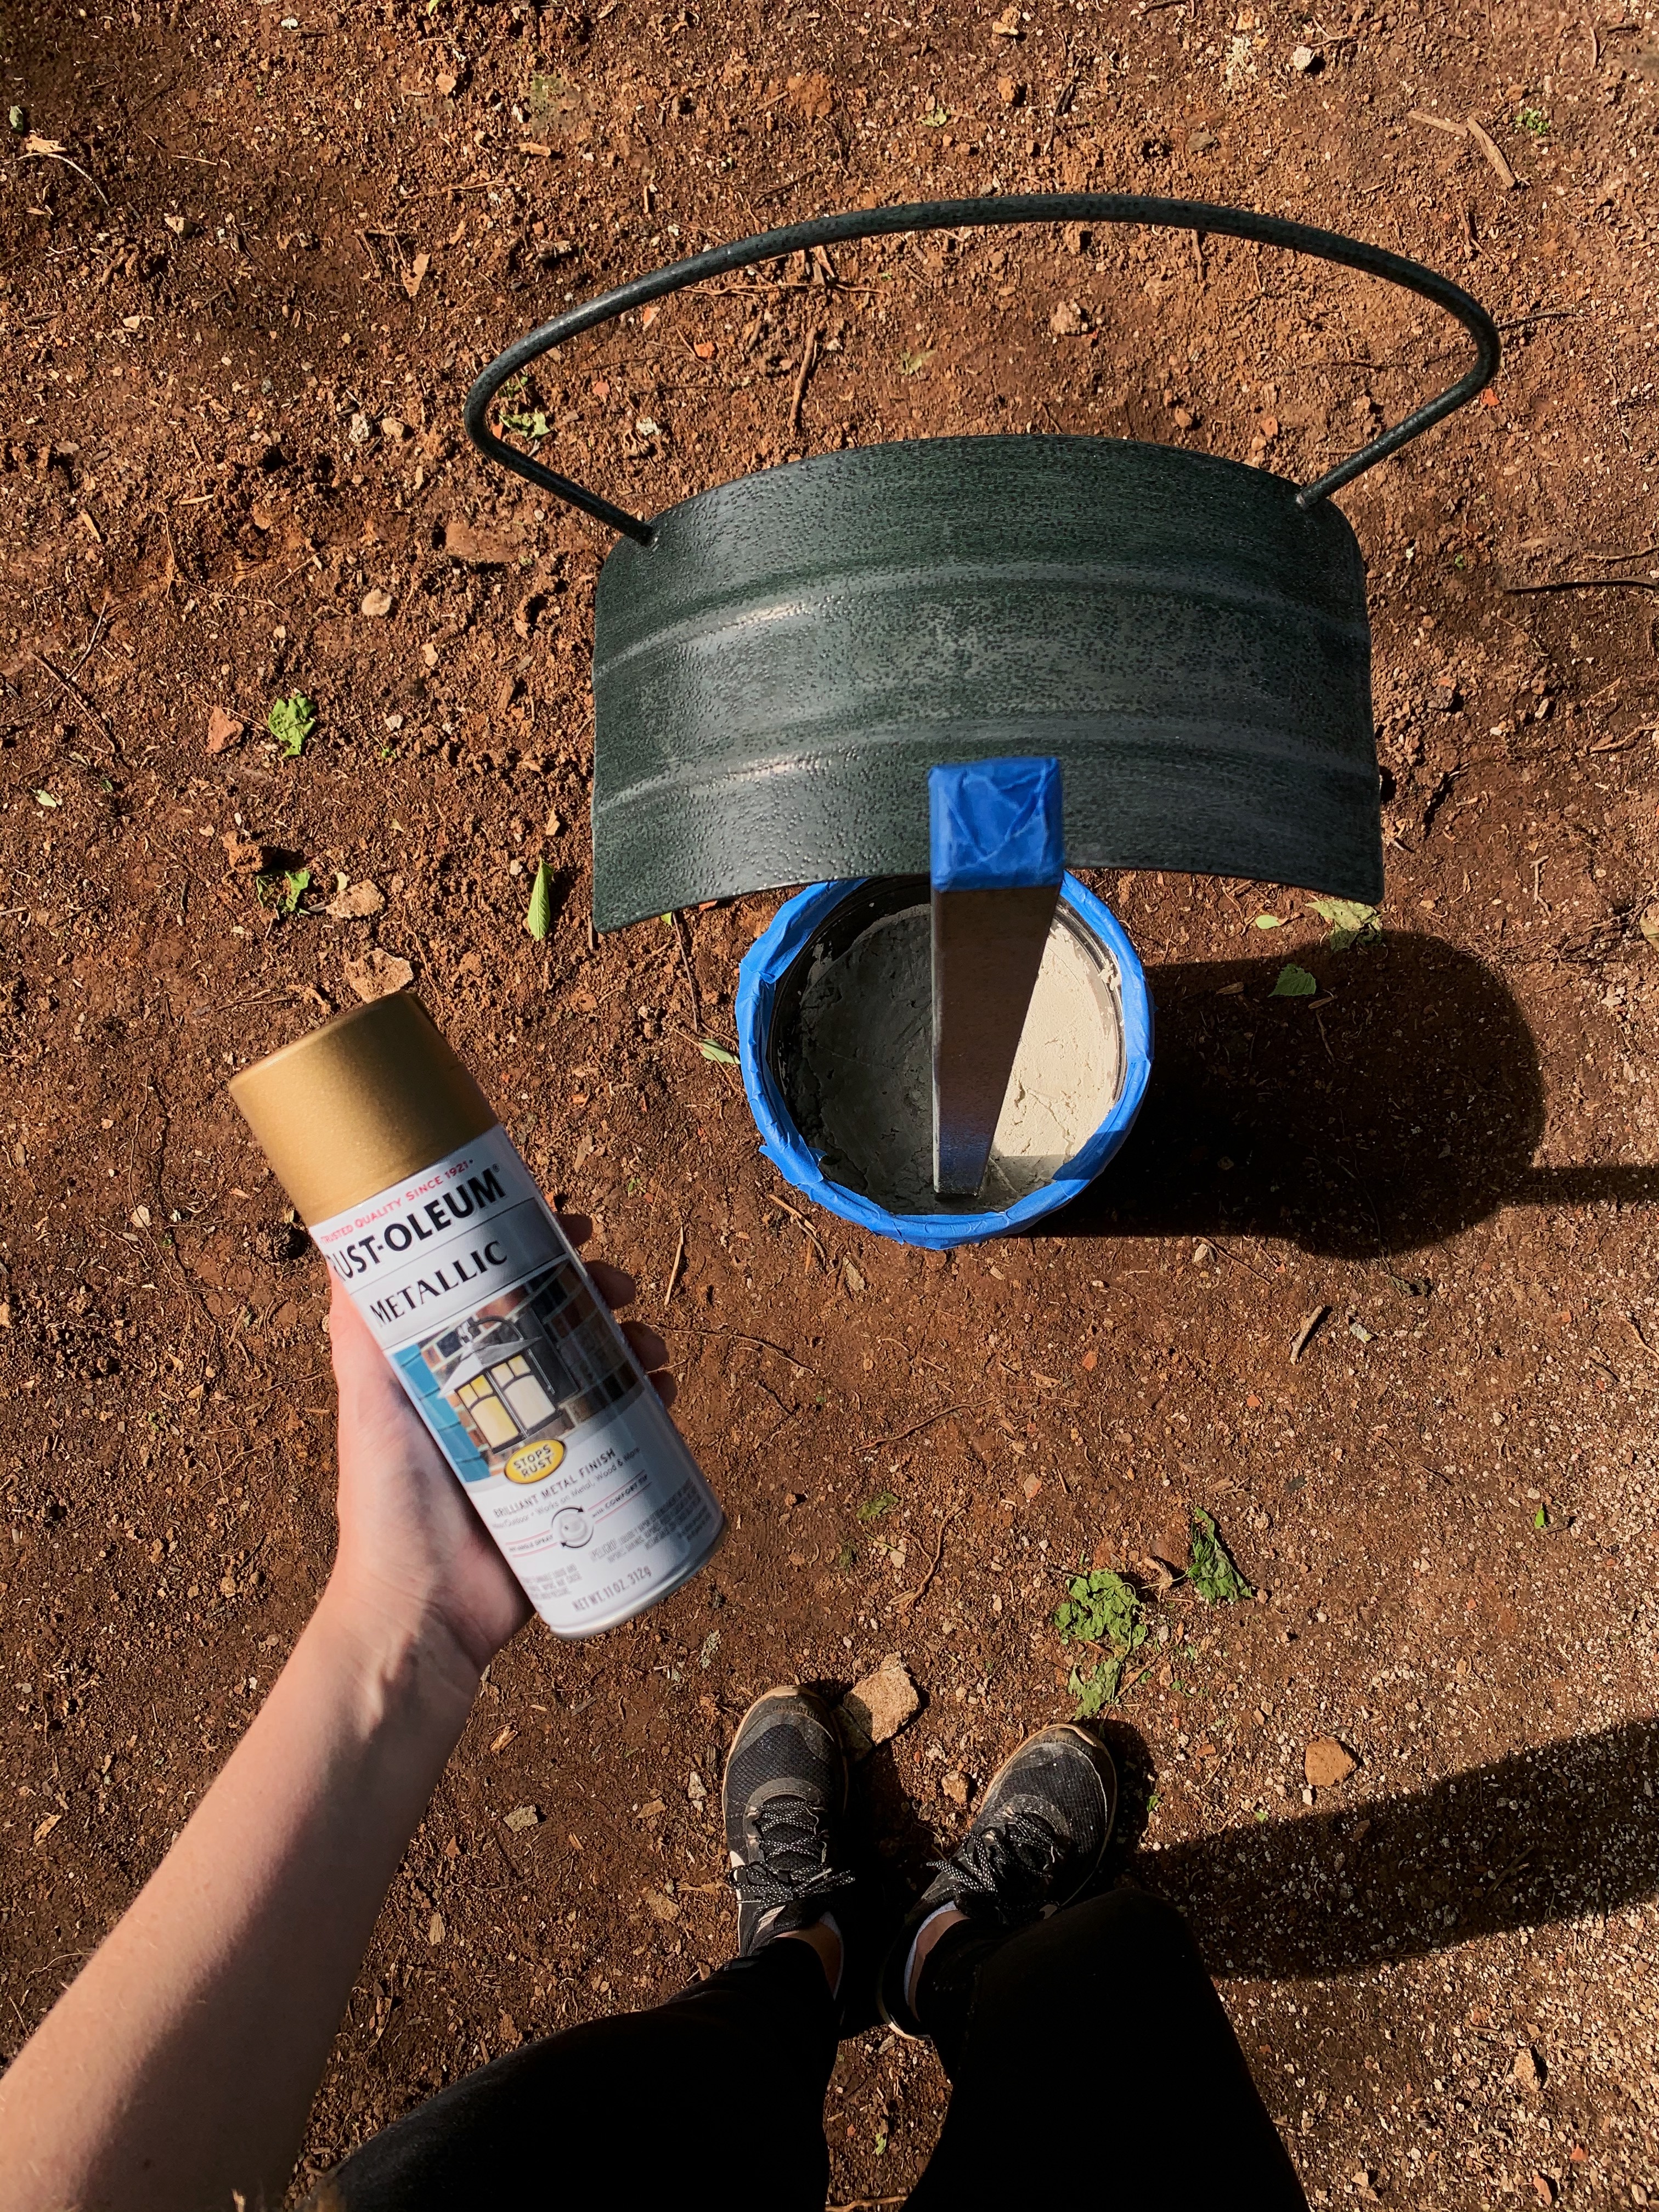
Step Four: Paint Your Hose Butler
If you are installing your host butler in ground against a wall, you may want to paint before setting it in concrete to avoid overspray or having to protect the wall behind the hose butler as you work. Since mine was set into a handy moveable pot, it was easier for me to paint it afterwards.
First I started by giving the hose butler a light sanding to remove a bit of the gloss coating and help my spray paint adhere better, then I wiped it down with a cloth to remove any sanding dust.
I then applied three very light coats of spray paint, trying to go as light as possible each time, aiming for a build up of thin smooth layers rather than globs of thick runny spray paint.
Step Five: Practice Patience While It Drys
Why is this the hardest step of any project?
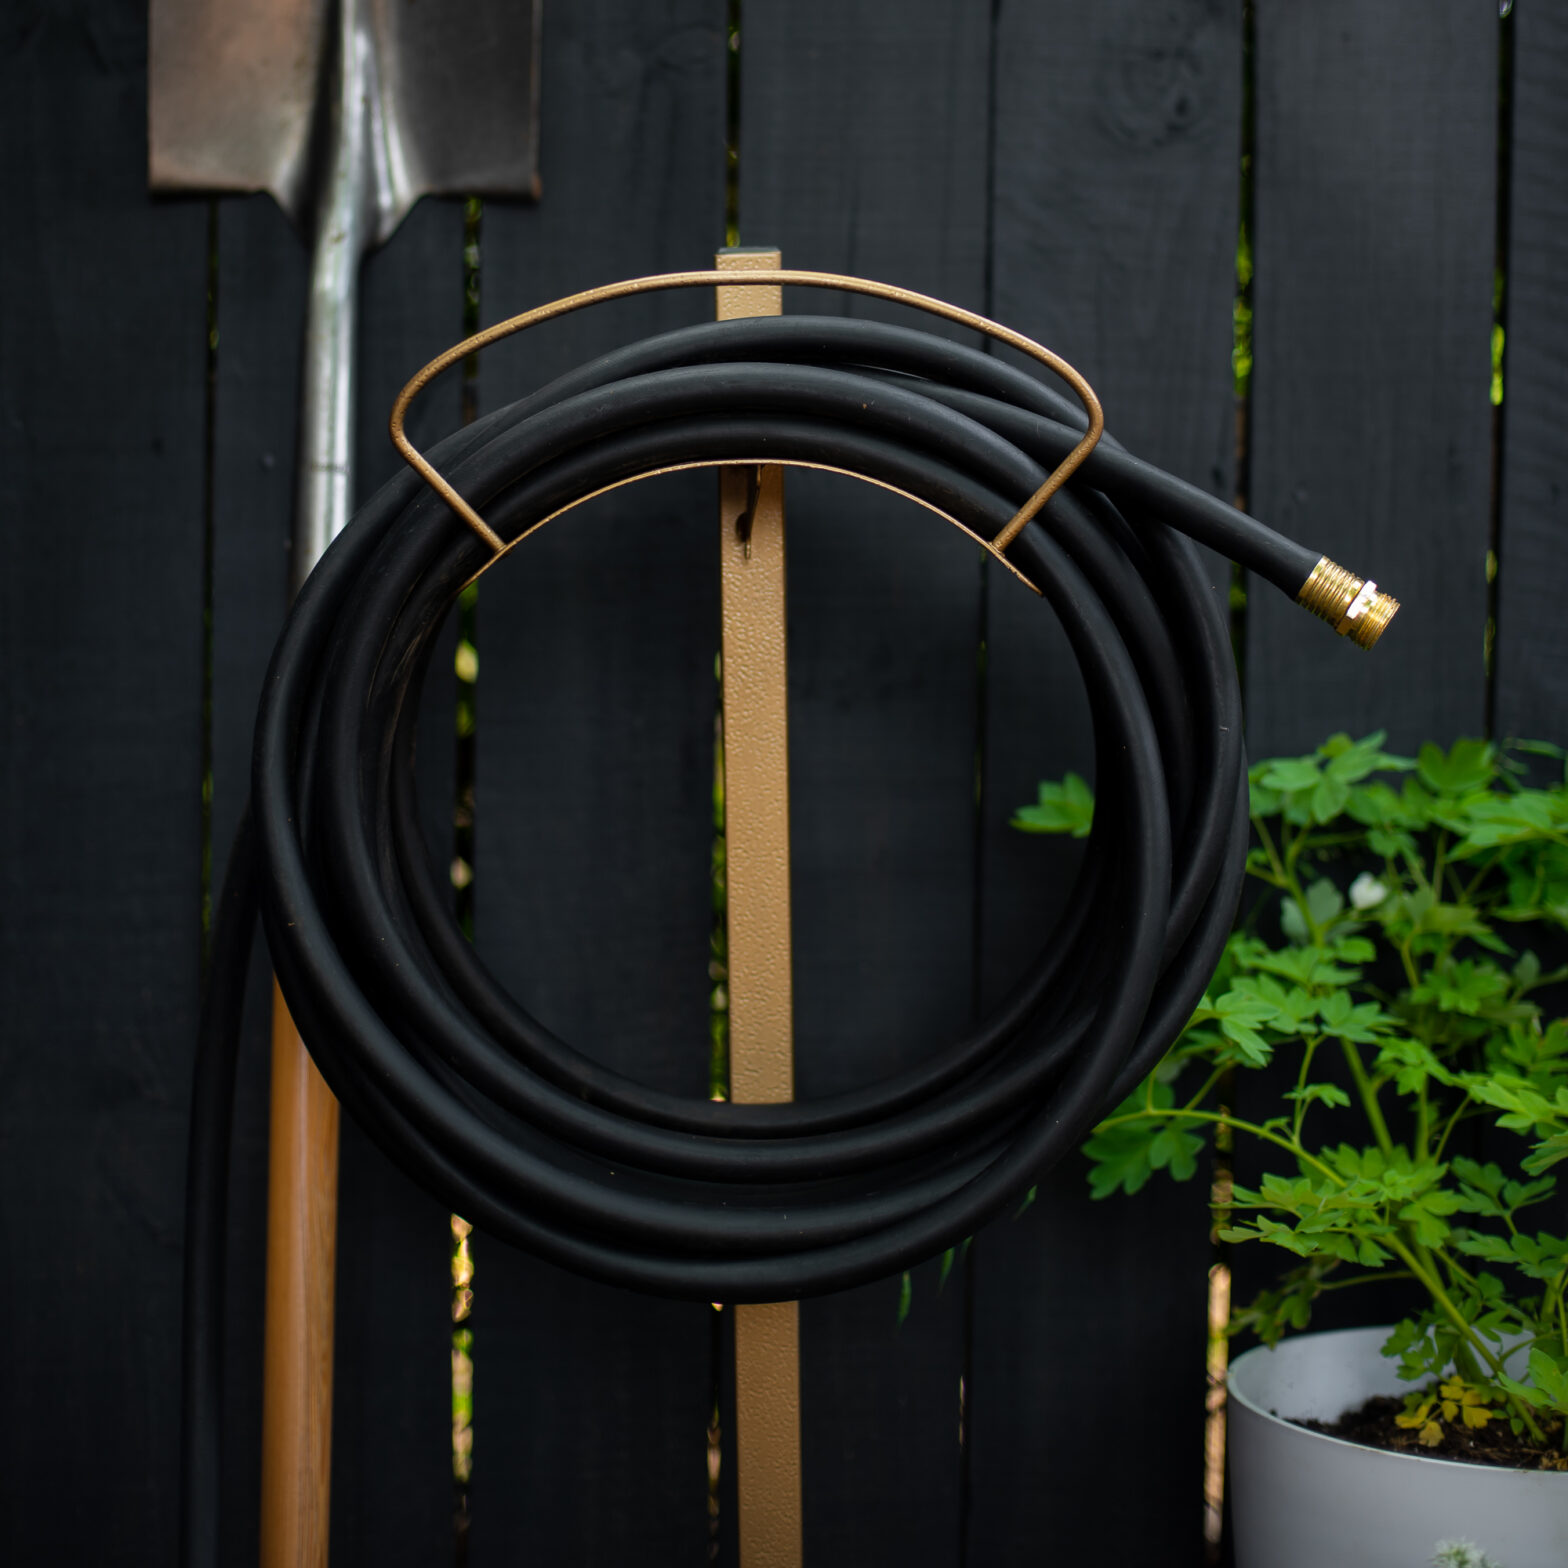
Step Six: Style It Up WIth Your New Hose & You’re All Set!


Shop This Post


Don’t Forget To Pin This Post & Subscribe!
Want to keep getting more DIY home decor inspiration, thrifting tip & tricks, free art downloads, reading recommendations, and home renovation tutorials? Then don’t forget to pin this post for later so you can follow me on Pinterest and then subscribe to my blog so you can get links to my newest content as soon as it hits the blog!
Ohh I really like this! I wonder if you could cut off the plastic pot and just have the concrete exposed? I see that you have the bricks blocking the base, but that could be a good alternative! Keep up the fun blog posts please! I love reading your DIY insight 😀