
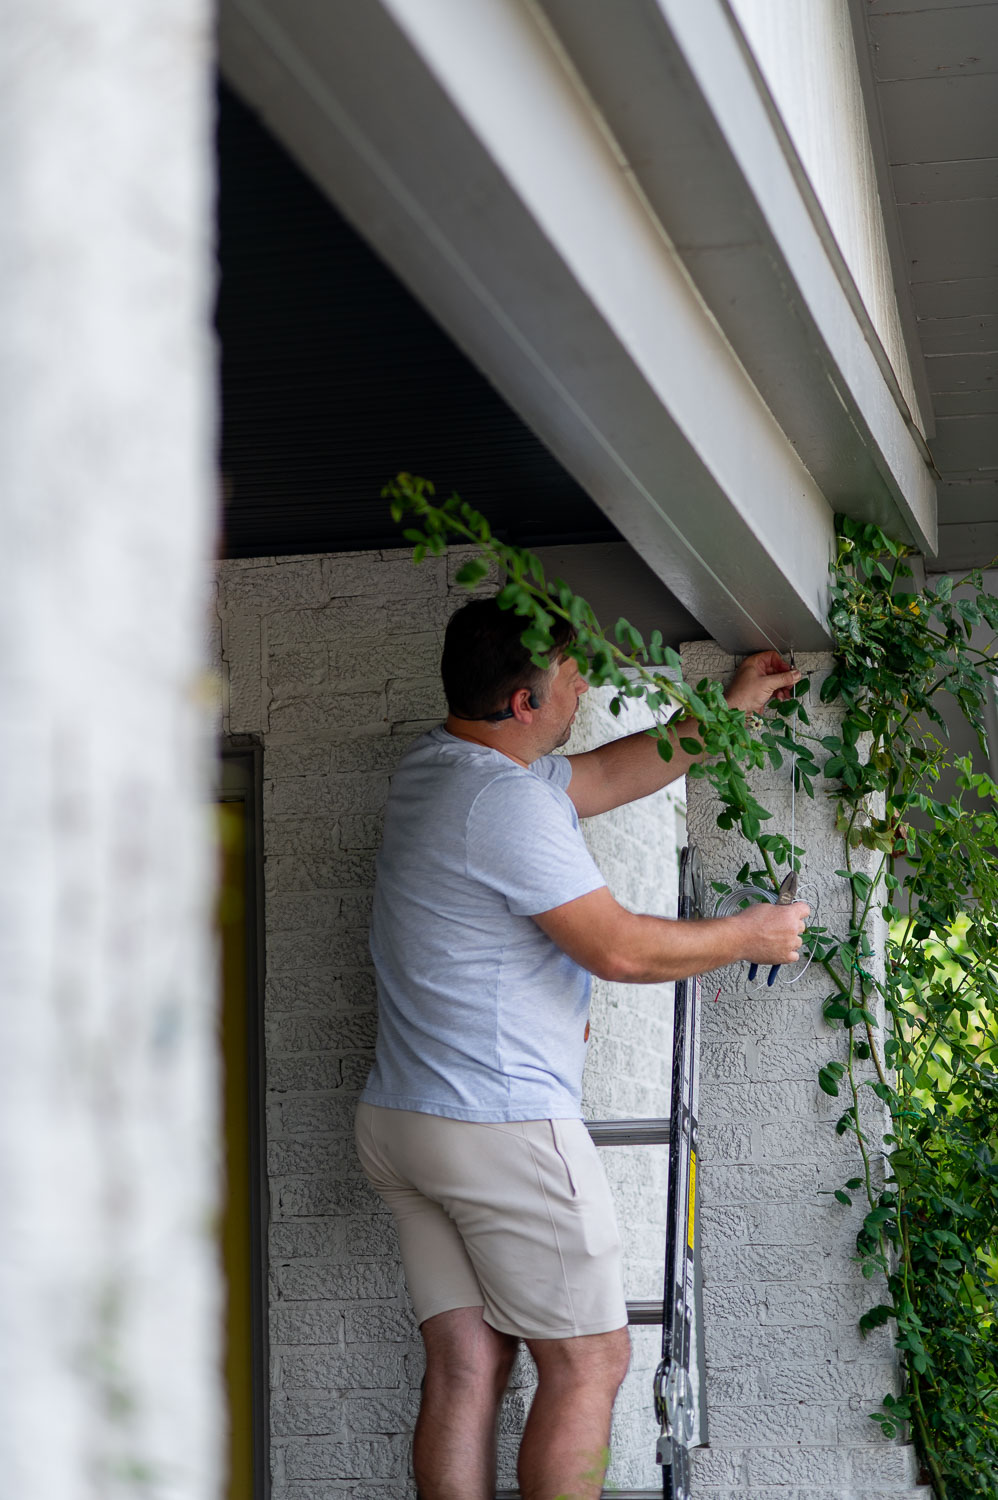
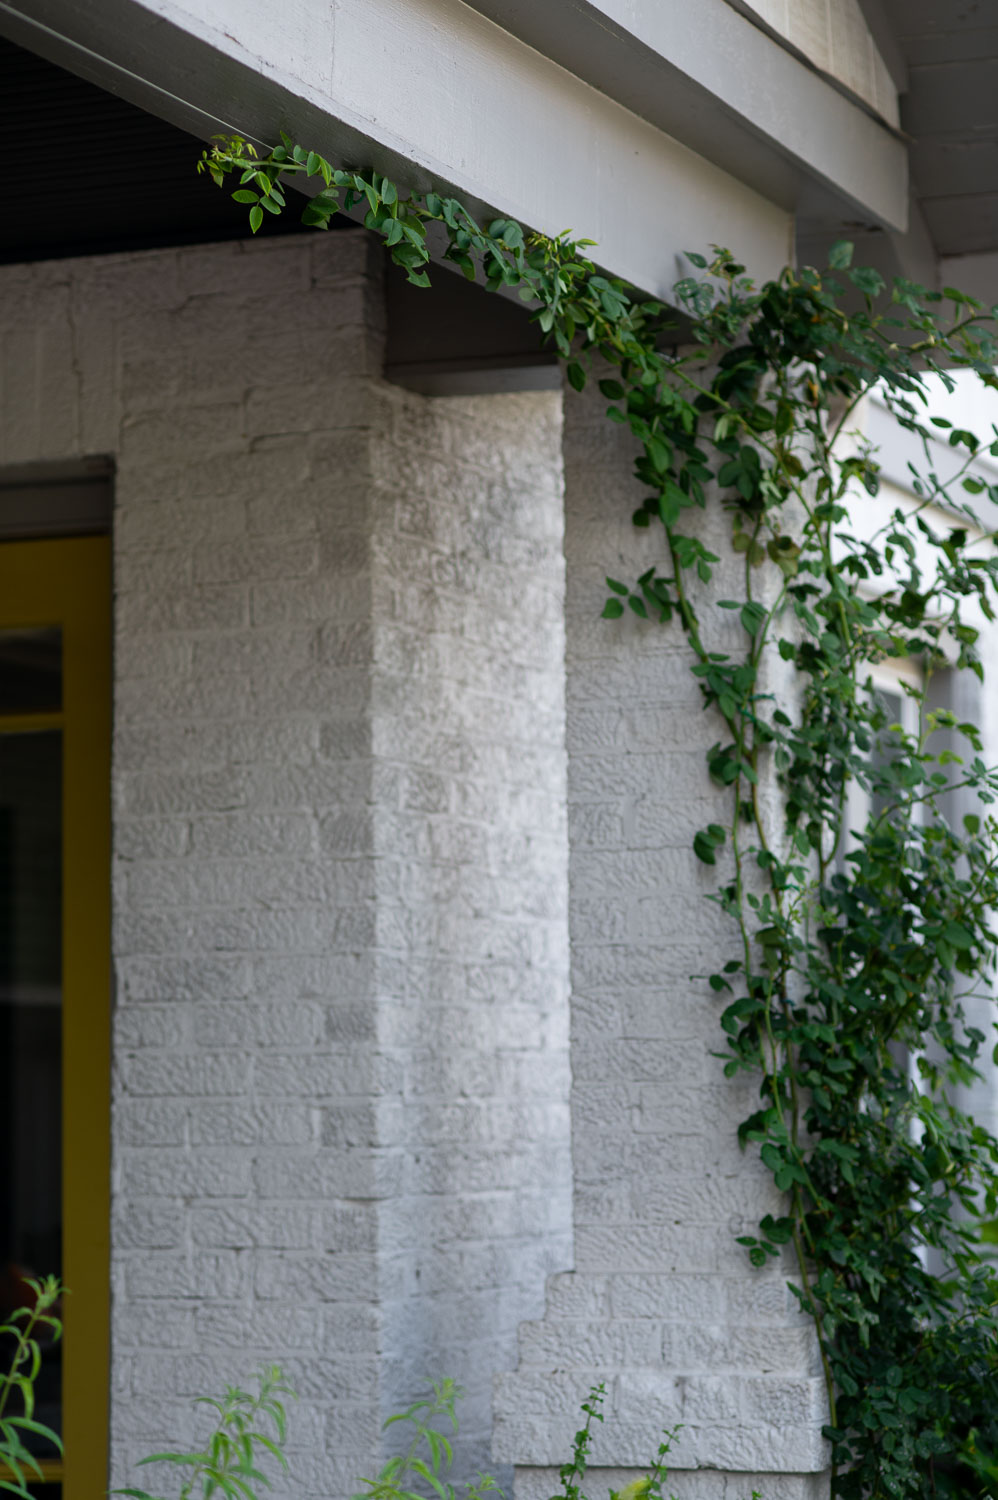
When I planted a David Austin climbing rose by our front porch, I fully assumed I’d kill it. But somehow, it survived. Not only that, it thrived. I had it tied to one of the porch columns and figured that was good enough. But then it started growing. A lot. Suddenly, the canes were way too long for the column and had nowhere left to be secured to.
Which meant, miracle of miracles, I found myself needing to train this rose to span our front porch.
After a lot of research, I finally figured out how to create a simple wire trellis (or guideline) system that worked perfectly. Thankfully it involved no fancy tools, no major construction, just a few supplies from the local hardware store and a free afternoon.
Here’s exactly how I did it:
*This blog post contains affiliate links, meaning that if you purchase any of the items using the links I provide I, as the author of this website, will receive a very very small commission from that sale. This is a great way to help support your favorite bloggers at no cost to you. Think of it like a tip jar that costs you nothing!
Why Climbing Roses Need Support
Contrary to what their name would imply, climbing roses don’t actually climb on their own like wisteria, morning glories or other climbing plants do. Instead they grow long, flexible canes that need to be “trained” to a trellis. Which basically means you have to gently guide and then tie down the plant in the direction you want it to grow.
If you don’t secure the plant to something, the long canes will just flop over, get tangled, or break under their own weight. If they’re left unsupported too long, they can harden in weird directions that are a pain to fix later. Training them early helps the plant stay healthy, encourages more blooms, and shapes your roses to look like they are effortlessly climbing up and over an arch, fence, or in this case, the porch. (Only it’s not effortless at all lol).
The Supplies You’ll Need To Build A Wire Trellis Over A Front Porch
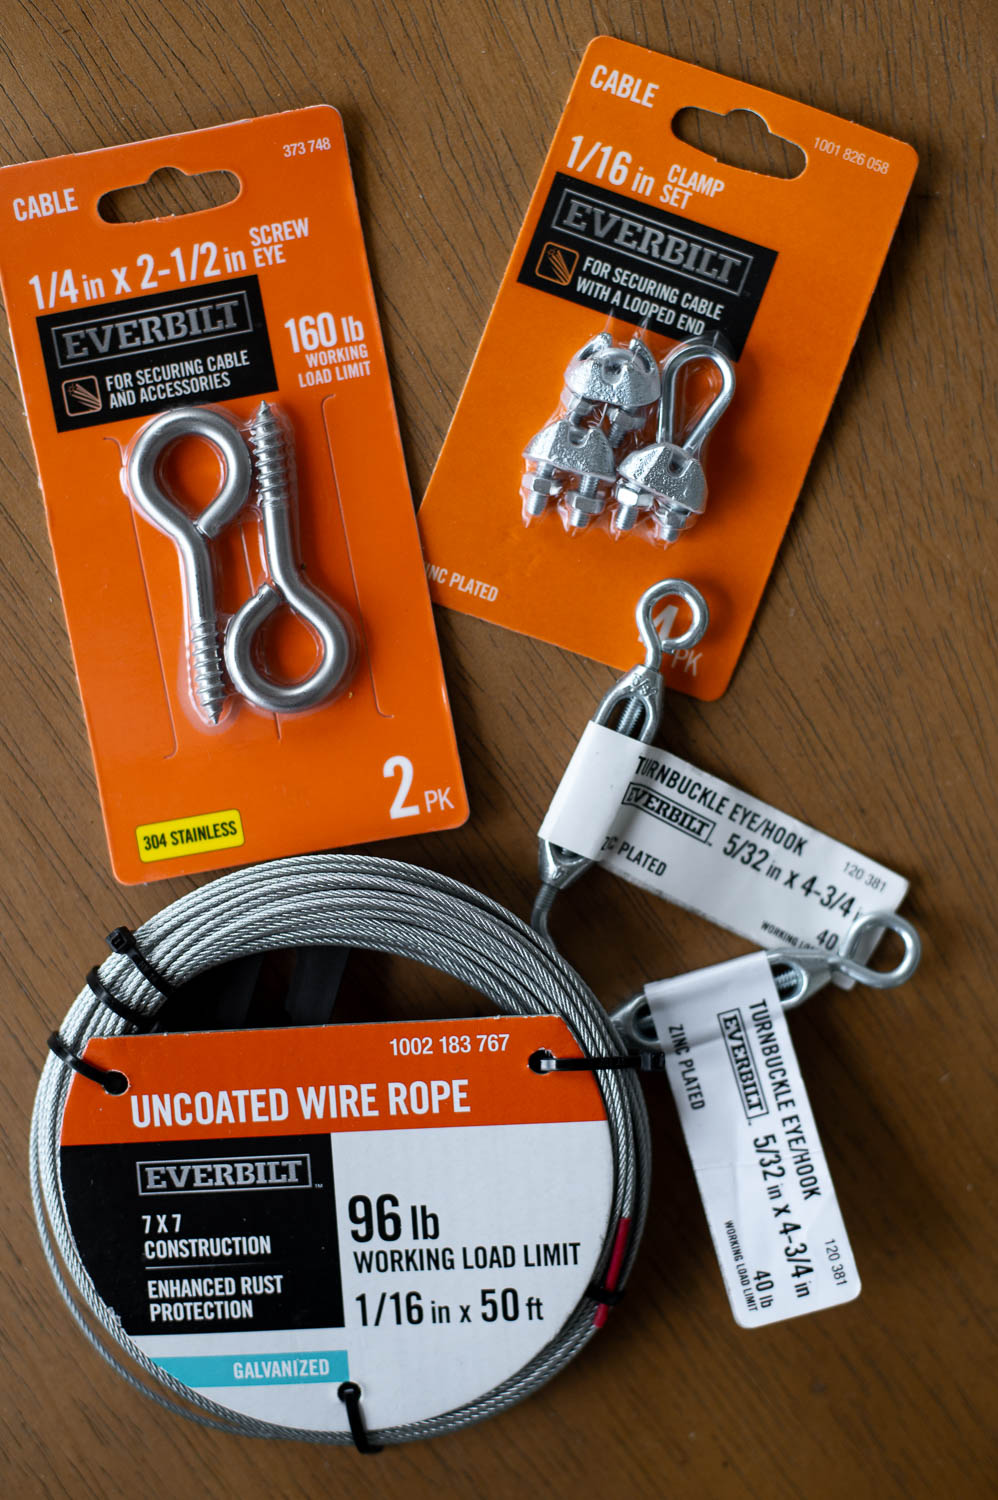

Here’s what I used to create a simple DIY wire support system across our front porch to tie up this extremely overgrown climbing rose. You can find all of this at your local hardware store or get the complete set of everything you’ll need online here:
- 1/16″ wire rope
Enough to span the width of your porch, plus a little extra so you have room to work with on both ends. - 2 screw eyes (1/4″ x 2 1/2″)
These screw directly into wood trim or posts and give you a sturdy place to anchor the wire. - 2 cable clamps (1/16″)
These hold the ends of the wire in place once it’s looped through the hardware. They’re tiny but important. - 2 turnbuckles (5/32″ x 4 3/4″, eye/hook style)
These let you tighten the wire once everything is in place so it stays nice and taut. The hook end also makes it easy to remove or adjust later if needed.
Other tools you’ll need for this DIY are a drill, wire snips, a pair of pliers, and a ladder.
Step-by-Step: Installing a Wire Support for Climbing Roses
After you’ve gathered up all the supplies needed here’s what you’ll do with them:
1. Drill Pilot Holes For Your Screw Eyes
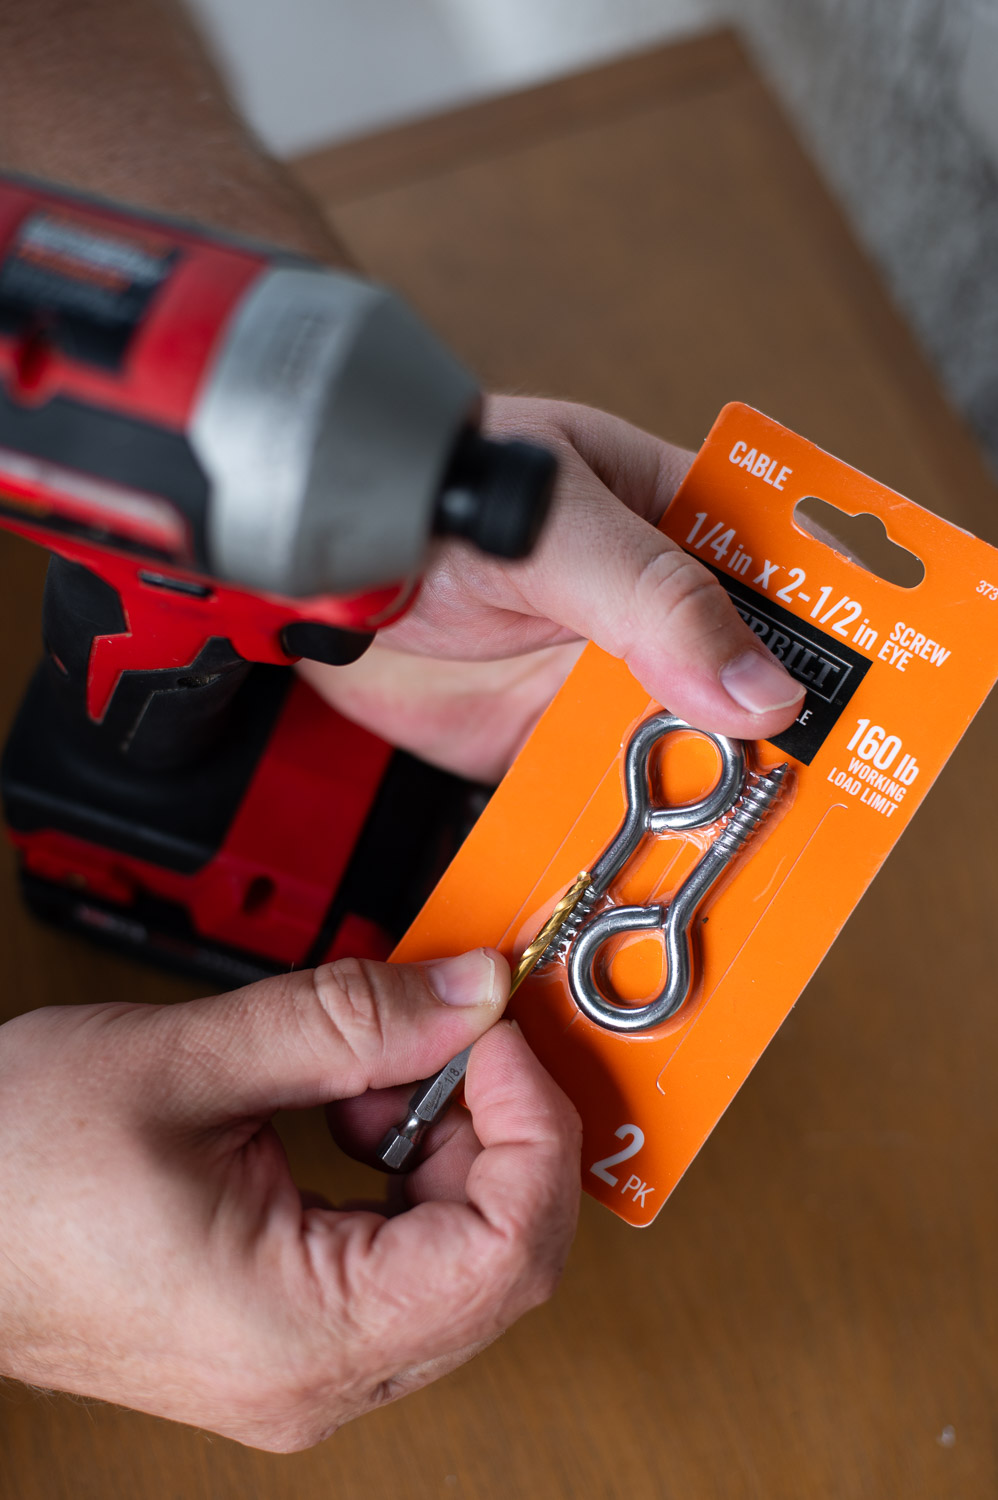
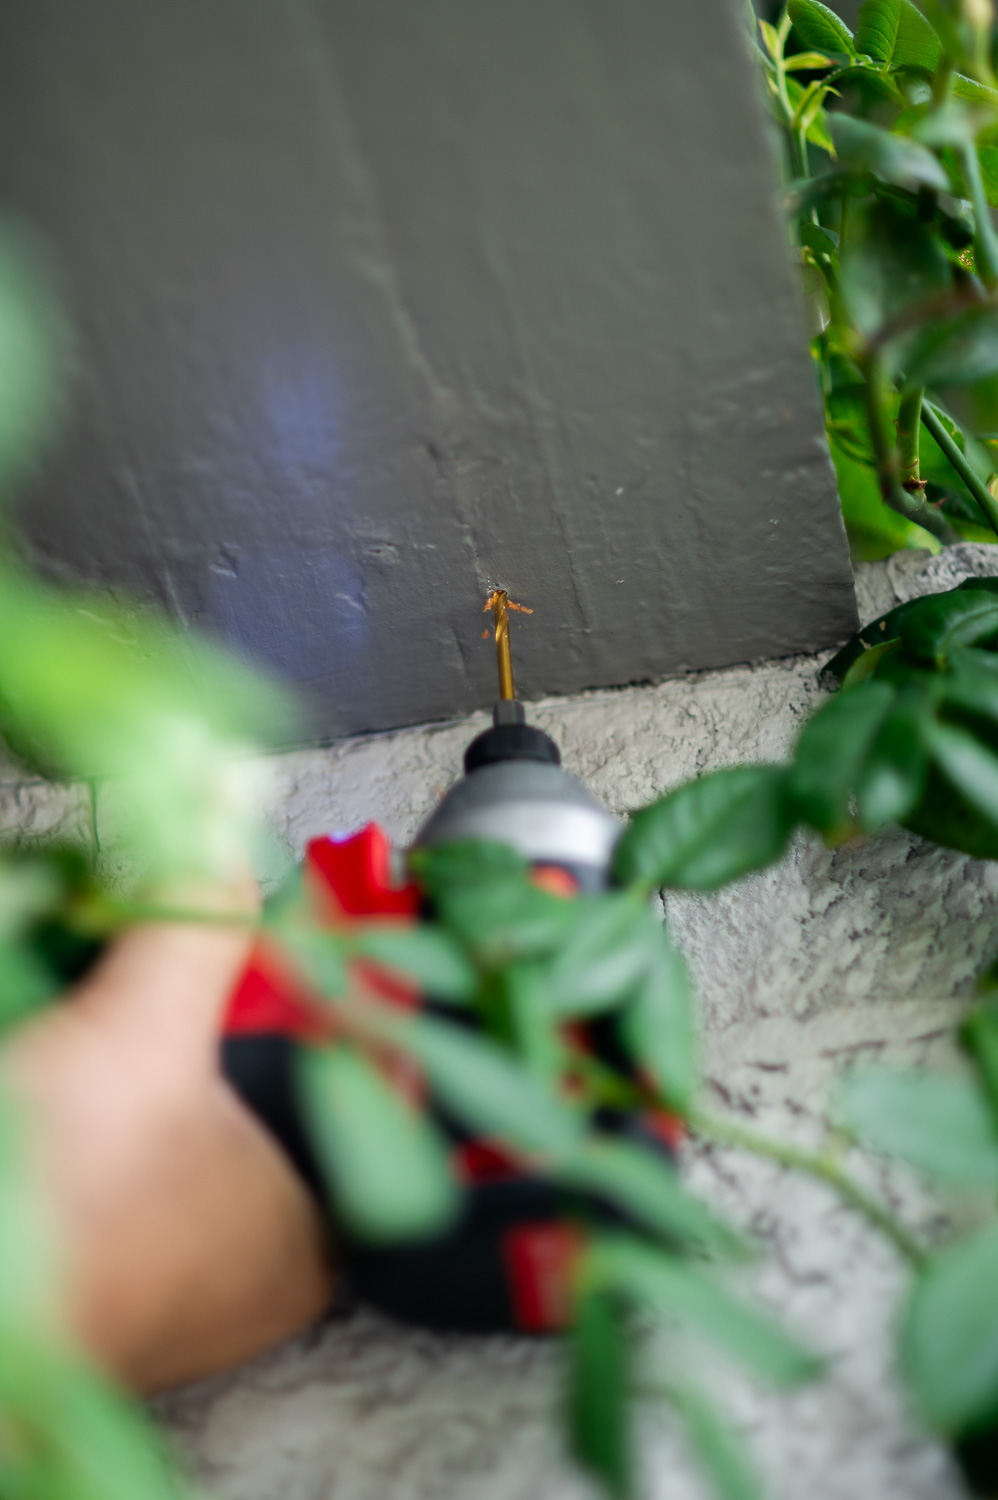
In order to install the screw eyes, you’ll first need to use a drill to create a small pilot hole. This helps your screw eye be installed more easily, and also ensure you won’t split the wood while installing them.
PRO TIP: You want to use a drill bit that is smaller than your screw eye so that your screw eye still has enough material to grip onto when you install it. For this 1/4″ screw eye, we used a 1/8″ drill bit.
2. Attach Your Screw Eye Hooks To Your Front Porch

Once your pilot holes are drilled, you can go ahead and screw in the screw eyes into the pilot holes you just drilled on either side of your porch.
You may be able to just do this by hand, but likely you’ll want a pair of pliers to help you get it in all the way.
Position the screw eye so it is parallel with the porch and perpendicular to the porch column as show in the 2nd photo above.
3. Measure & Cut You Wire Cable To Length
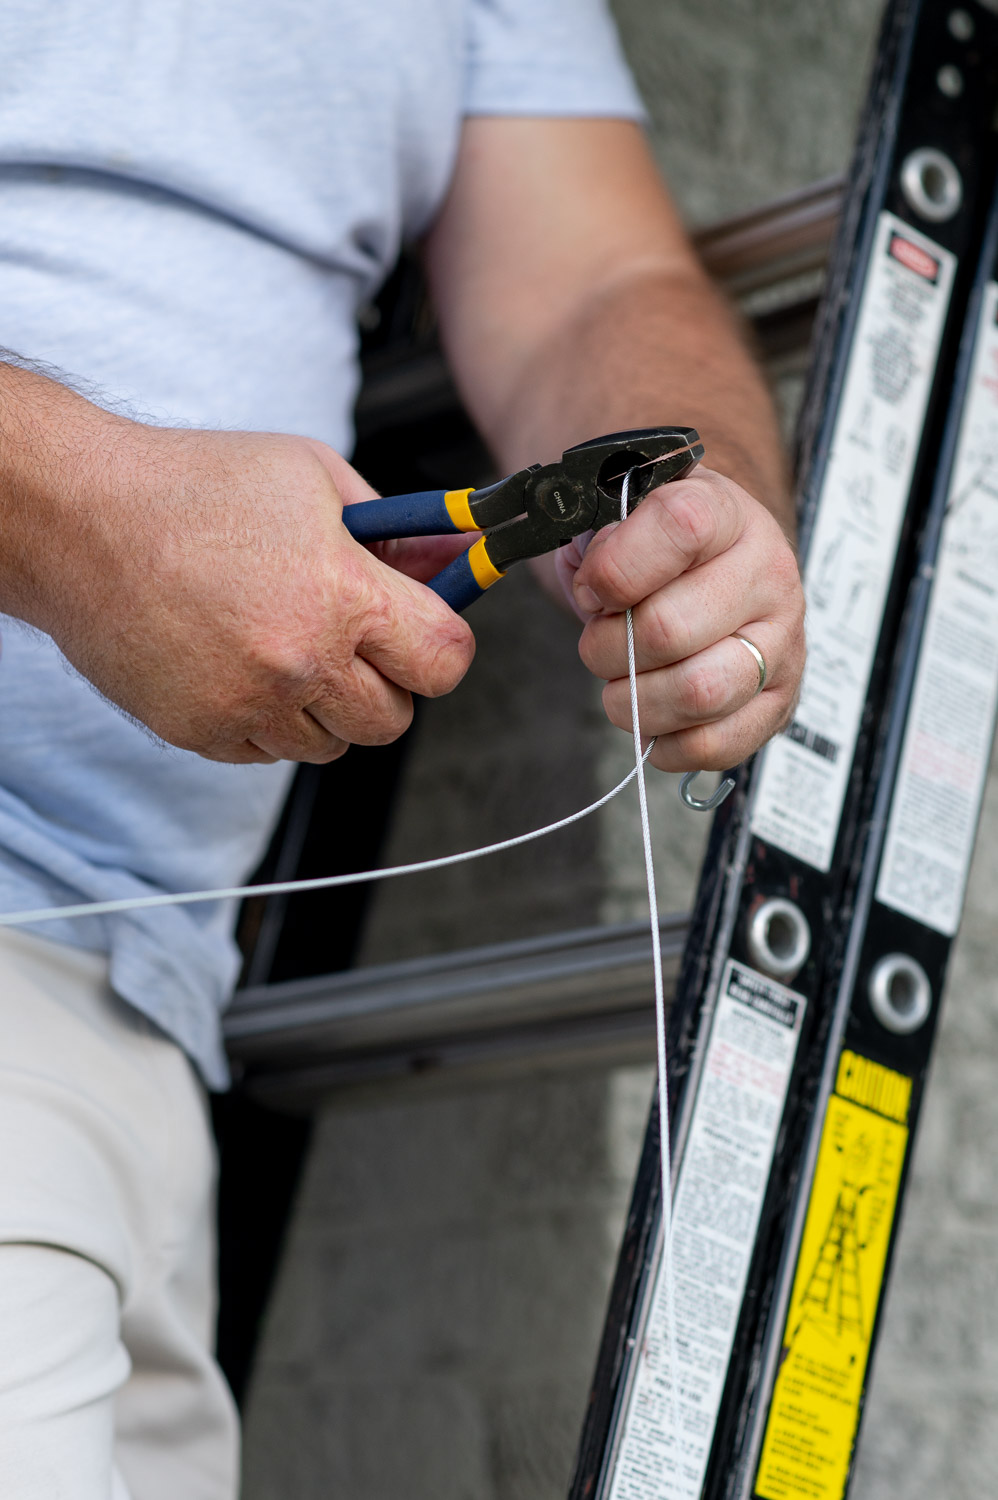
Next you’re going to measure the span of your front porch, add about 12″ to that measurement and then cut your wire cable line to length using wire snips.
You’ll need that extra length we added for the next step of this process.
4. Attach Your Turnbuckle & Clamps To Your Wire Cable
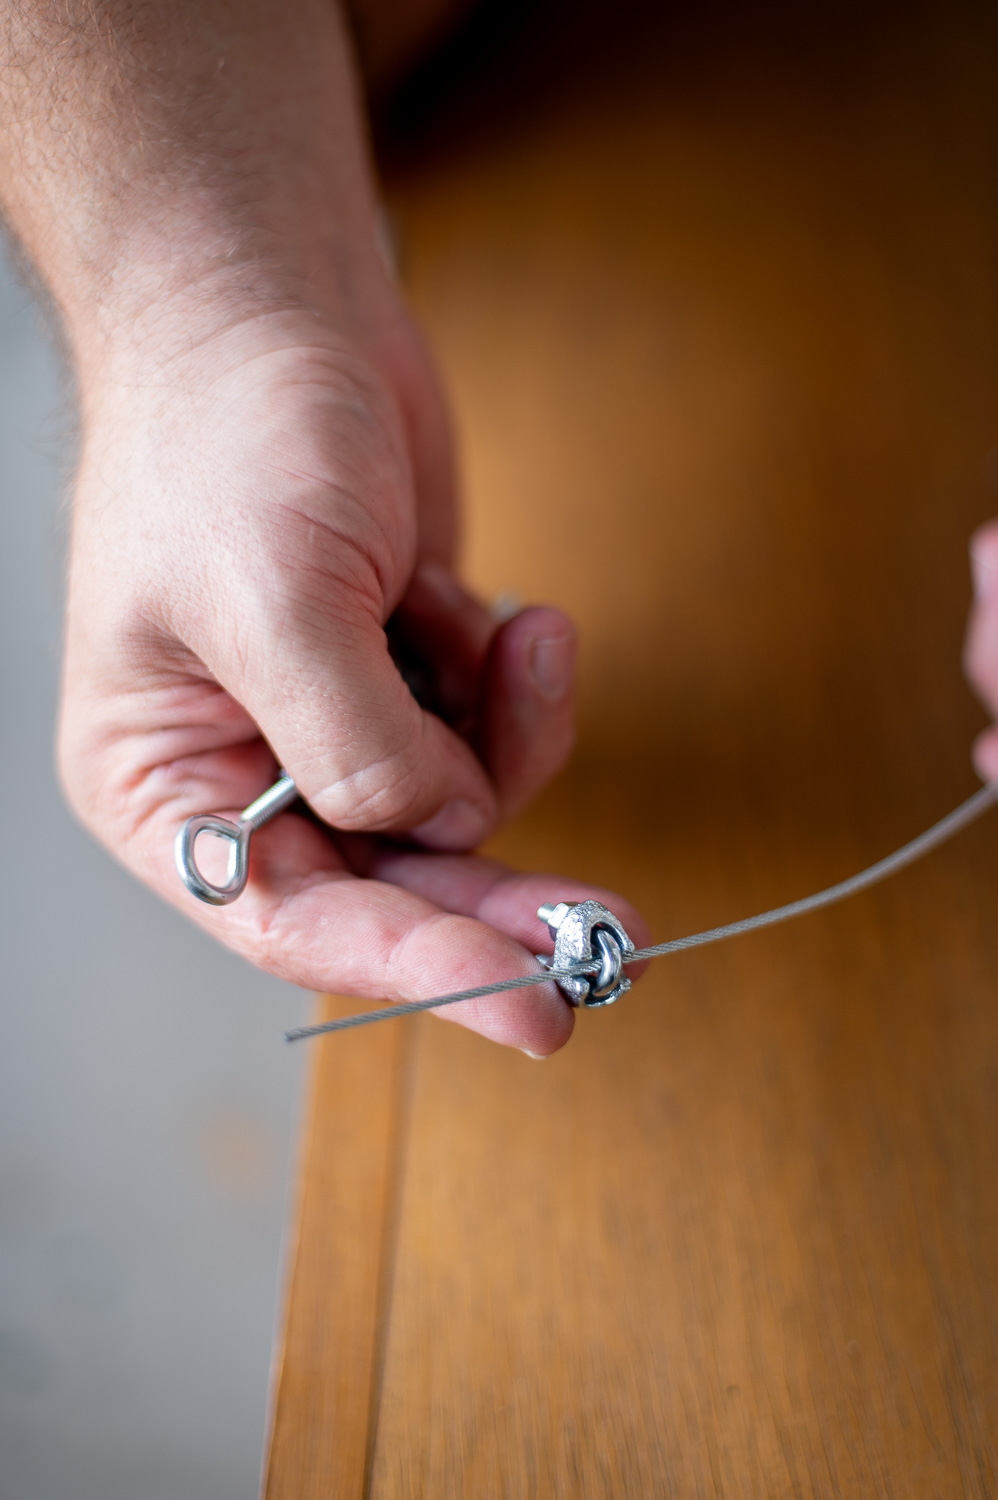
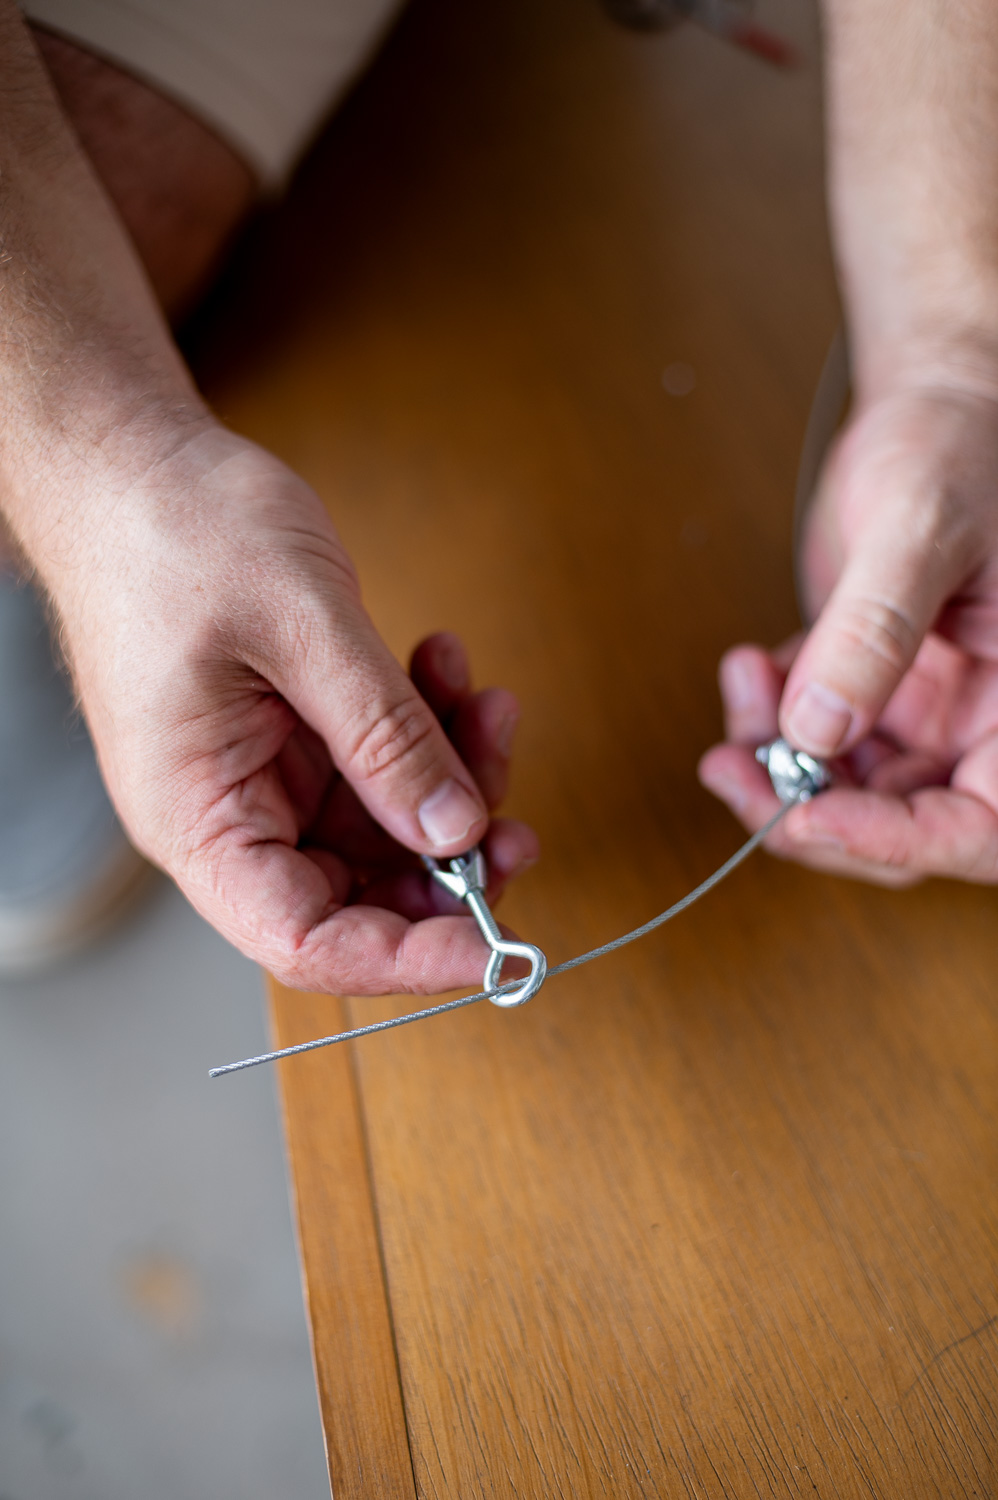
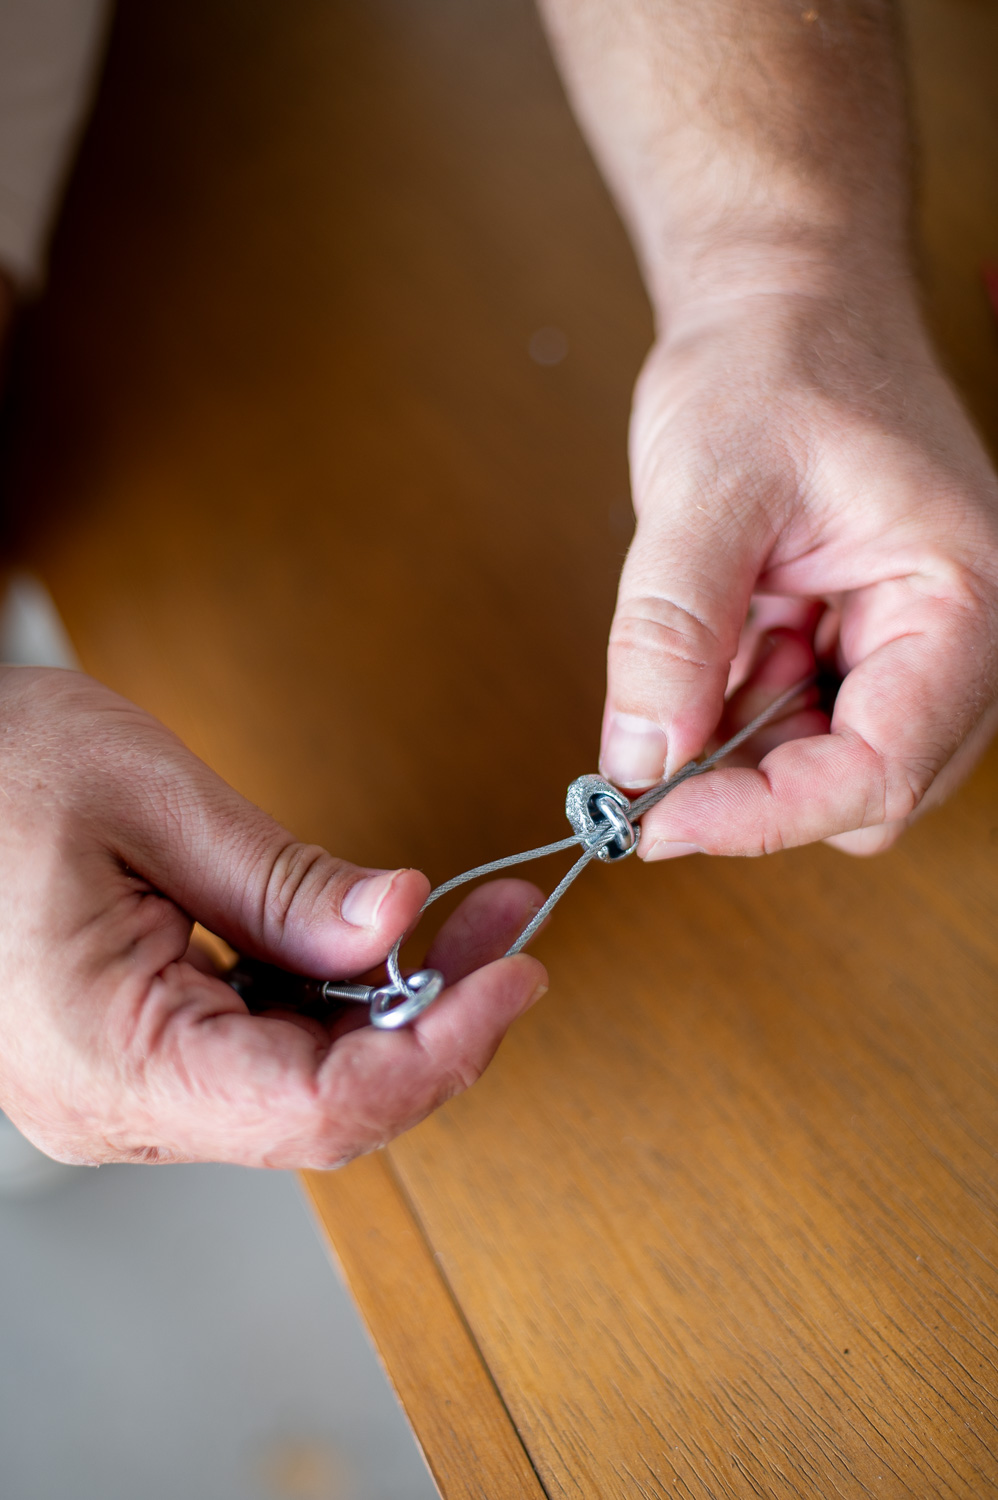
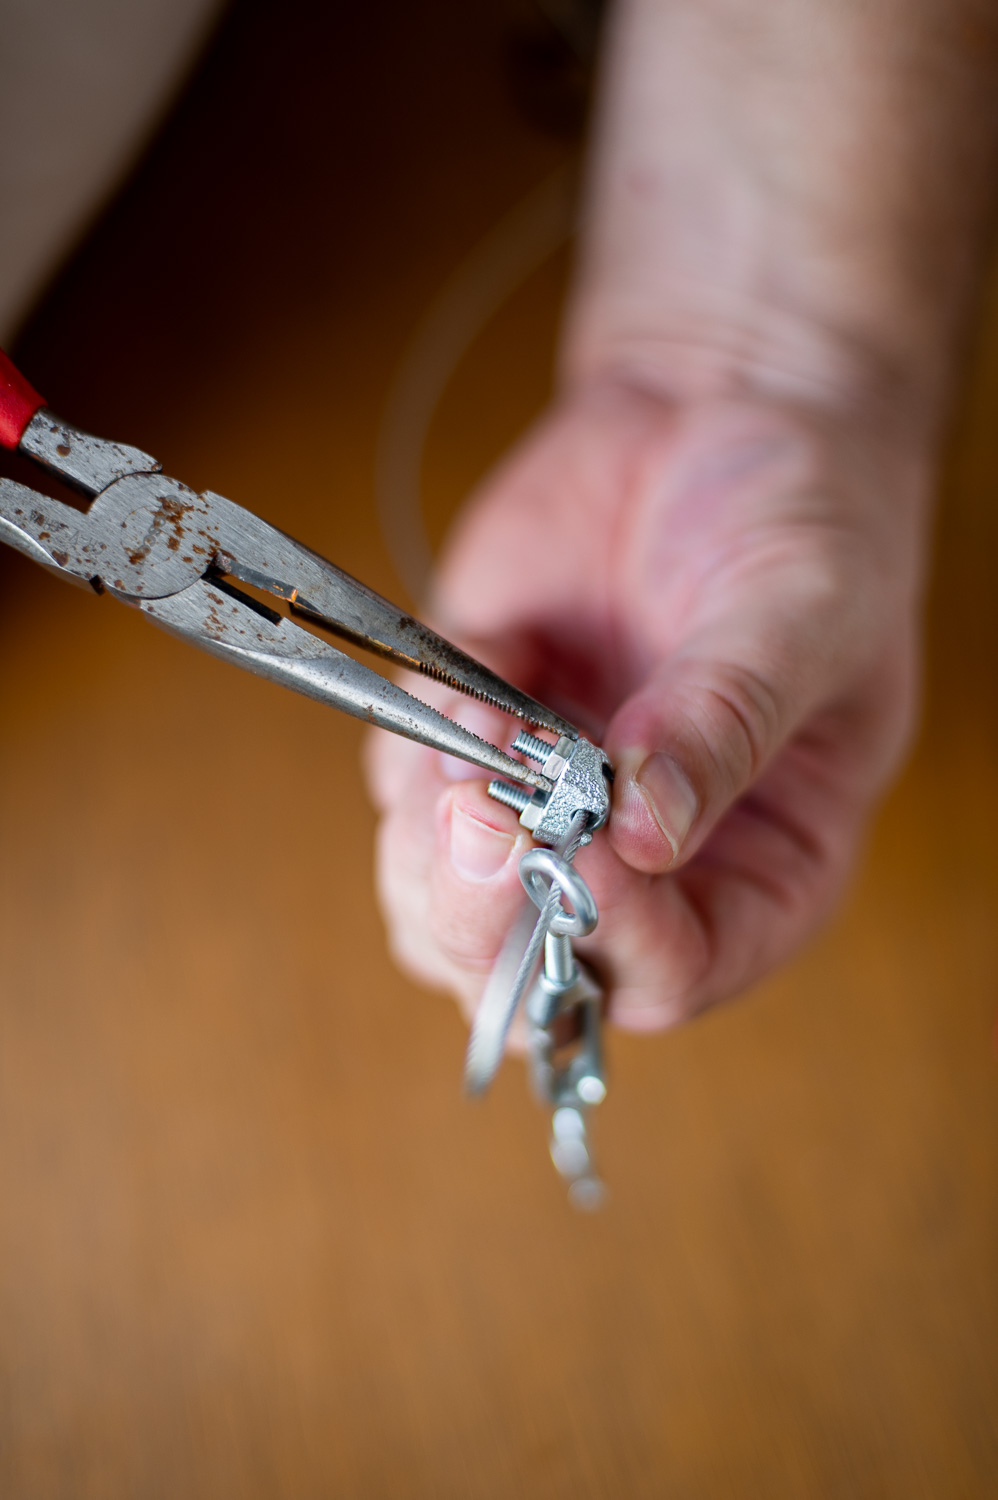
Now we need to attach all the hardware to our wire.
This part may look complicated but is actually very easy. I’ll walk you through it step by step:
- Thread the wire through the rounded top of the clamp.
- Thread the wire through the screw eye end of the turnbuckle
- Fold the thread back on itself and thread it through the rounded top of the clamp a second time.
- Tighten the screws on the bottom of the clamp to secure the wire cable. You will want this at tight as you can possibly get it.
- Make sure the turnbuckle is fully opened at this point.
- Repeat the same process on the other side of your wire.
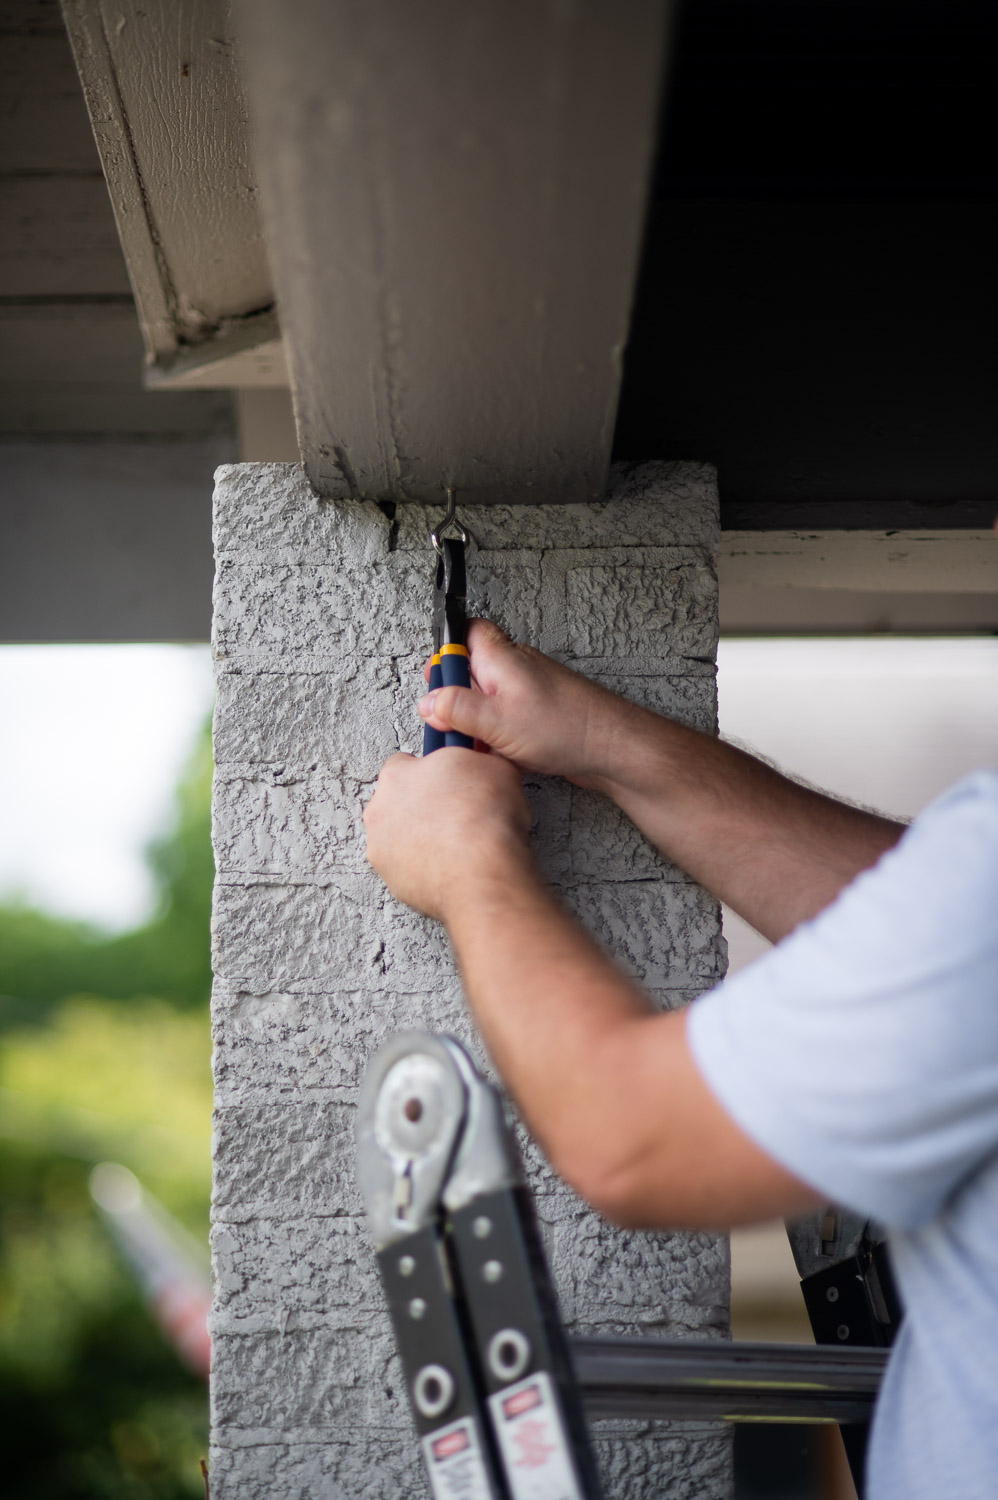
5. Hook The Open Turnbuckle Onto The Screw Eyes & Tighten The Guide Wire
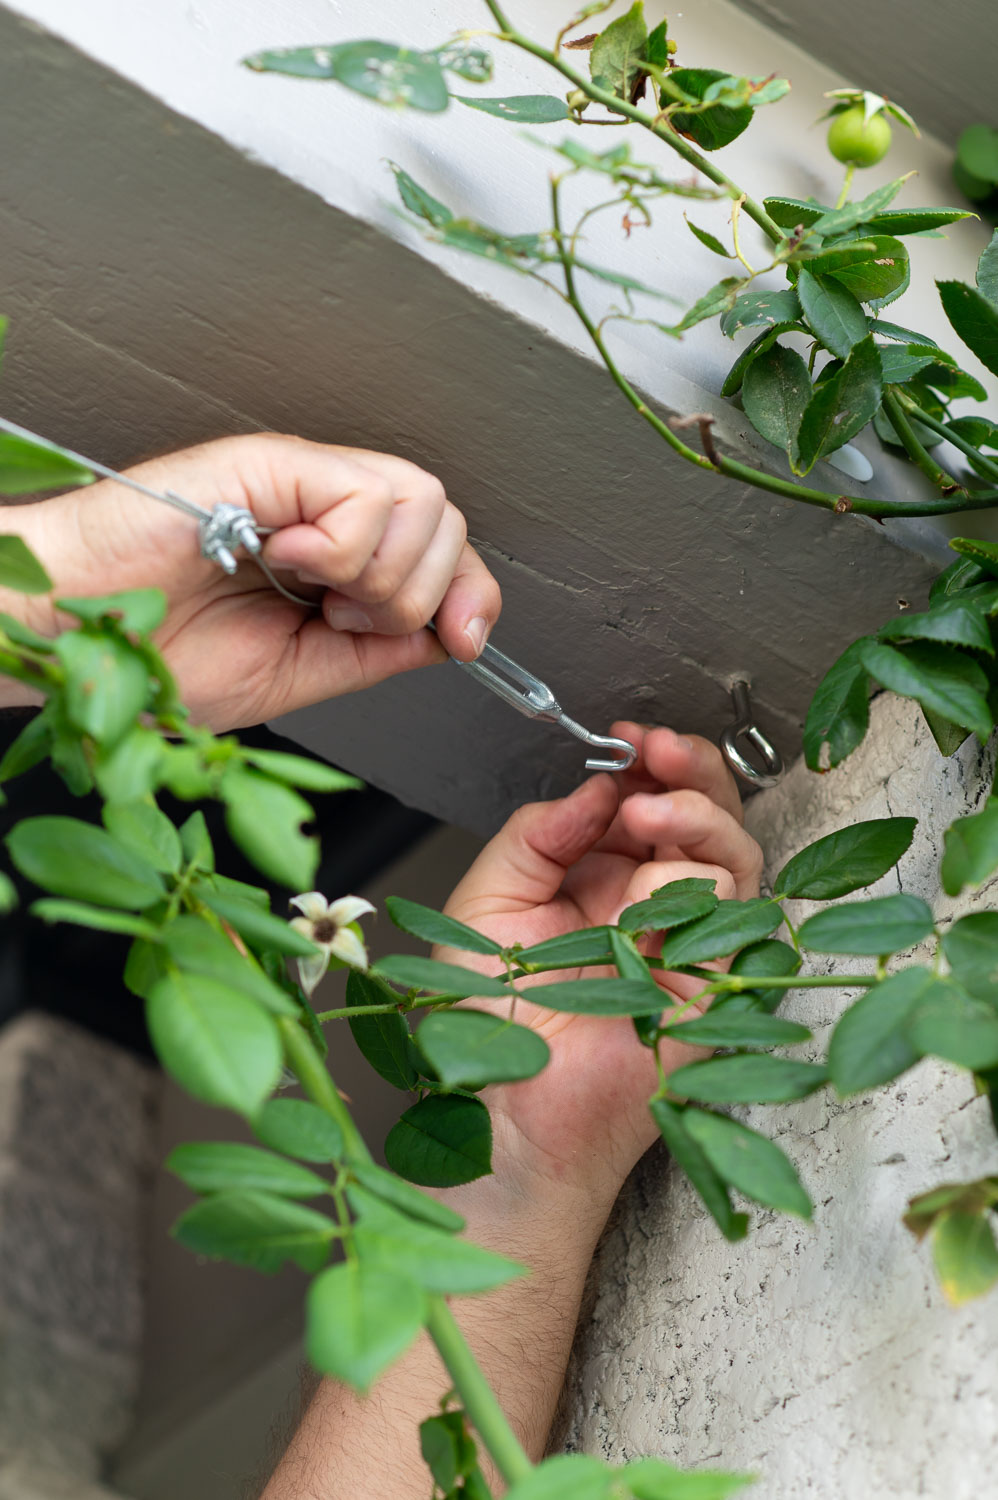
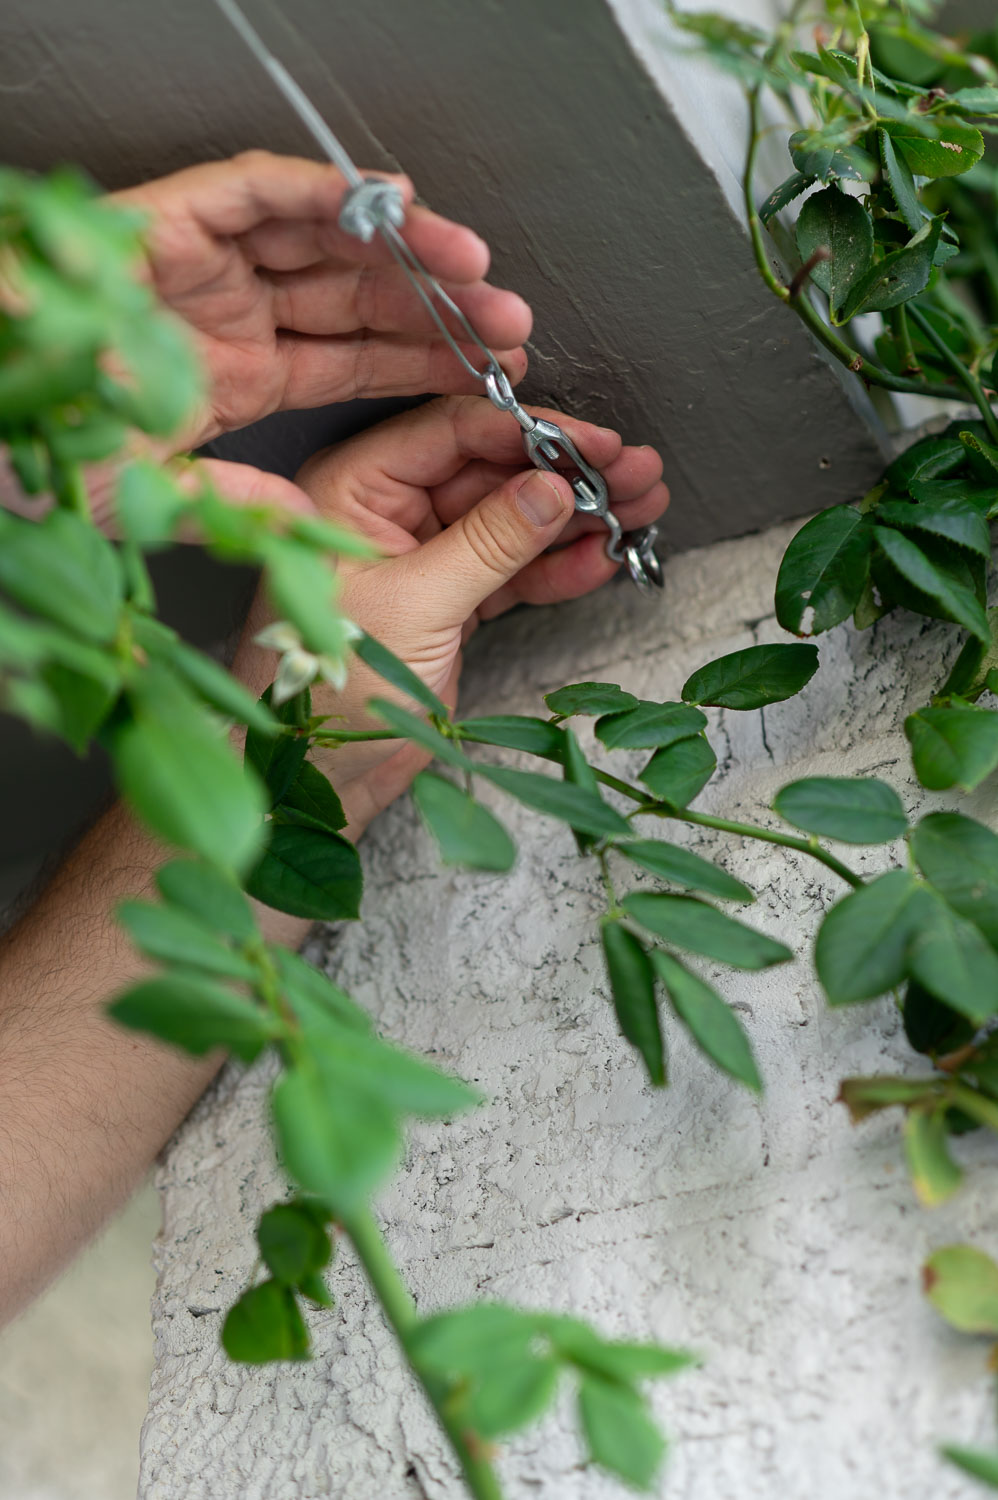
Once you have attached your turnbuckle to each end of your wire and ensured the turnbuckle is fully open, you’ll simply hook the turnbuckles onto the screw eyes you attach into the roof of your porch.
Then, holding the two ends still, you will turn the middle section of the turnbuckle to tighten the wire. Repeat on both ends of the wire until you have reached your desired tightness.
If once you have fully closed both turnbuckles your wire still is not as tight at you want it, simply take the wire down, open the clamps on each end and shorten the wire. Tighten the clamp back down and try again.
6. Secure Your Rose To The Guideline Wire

Now that your wire is installed you can easily attach the canes of your climbing rose to the wire to train them over your porch and support them from breakage.
I personally love using these soft ties I found to tie up my climbing rose!
Frequently Asked Questions
Q: Can this wire trellis support heavy vines?
A: YES! Each of the components used to create this wire trellis has an advertised “working load limit”. The lowest of which, for this particular set-up, was 40lbs for the turnbuckle screw/hooks I used. However, you could upgrade any of these components to higher load bearing options easily if needed.
Q: Can you train other flowers or vines on this system?
A: Yes! This diy vine support is perfect for supporting a wide variety of climbing and vining plants and flowers.
Click Here To See What Other Popular Vines & Flowers This Trellis Would Also Be Suitable For…
1. Star Jasmine
Fragrant, evergreen, and fast-growing. It twines on its own but still benefits from early guidance along wires. (This is what I have growing on the other side of our porch!)
2. Clematis
Comes in tons of colors and bloom shapes. Lighter than roses but still needs something to cling to or tie onto.
3. Honeysuckle
Fast-growing and very fragrant. Needs structure to climb and can get heavy, so this set-up is perfect for it.
4. Sweet Peas
Delicate but eager climbers. Seasonal, but perfect for draping along lightweight wire supports.
5. Bougainvillea
Gorgeous and bold, but thorny. Needs tying in and thrives on sun-drenched walls or porches with wire support.
6. Wisteria
Very heavy when mature, but if your wire system is upgraded to a much higher working load limit, this setup can also work very well.
7. Mandevilla
Tropical and showy. Doesn’t cling on its own, so wires are perfect for tying it up as it grows.
8. Black-Eyed Susan Vine (Thunbergia)
Fast-growing annual that’s great for summer color. Loves a light trellis or wire frame.
9. Morning Glory
Classic cottage garden look. Climbs by twining and will quickly cover a wire trellis.
10. Trumpet Vine
Bold and beautiful but very aggressive. Use with caution and prune regularly, but it climbs wires well.
Q: Will I need to replace the wire over time?
A: No. Stainless steel is rust resistant and designed to handle outdoor exposure without corroding. So you should never need to replace it unless at some point the weight of your vine exceeds the load limit of the wire.
Q: What type of climbing rose is this?
A: It’s a Wollerton Old Hall climbing rose from David Austin, and it is one of my favorite flowers. I love that it looks almost like a peony when it blooms and it smells amazing!
Final Thoughts
I’m honestly still mostly in shock that I haven’t killed this climbing rose and that it has grown this big in the first place. And while this David Austin rose likely won’t span our entire porch (it’s already beyond it’s typical max height of 12ft), this same wire trellis system will also work perfectly to train the star jasmine I planted on the other side of the porch!
I can’t wait to see how this trellis fills in over the next few years!
And yes, for anyone concerned, I did deadhead this climbing rose after I took these photos lol. (To be fair, I did I tell you I was shocked it is thriving as well as it is.)

Don’t Forget To Pin This Post & Subscribe!
Want to keep getting more DIY home decor inspiration, thrifting tips & tricks, free art downloads, reading recommendations, and home renovation tutorials? Then don’t forget to pin this post for later so you can follow me on Pinterest and then subscribe to my blog so you can get links to my newest content as soon as it hits the blog!