While I love a good framed print, sometimes it just doesn’t feel the same as a naked oil painting hung on your wall. Which got me thinking, could you MAKE a faux oil painting you could hang on the wall without a frame using free art from The Public Domain Print Shop? Better still, could you do it with limited tools and for less than $5!?
After a lot of experimentation… cough…a series of massive failures…cough cough… I’m happy to report that YES you can and the results are SO GOOD… once you know all the mistakes to avoid.
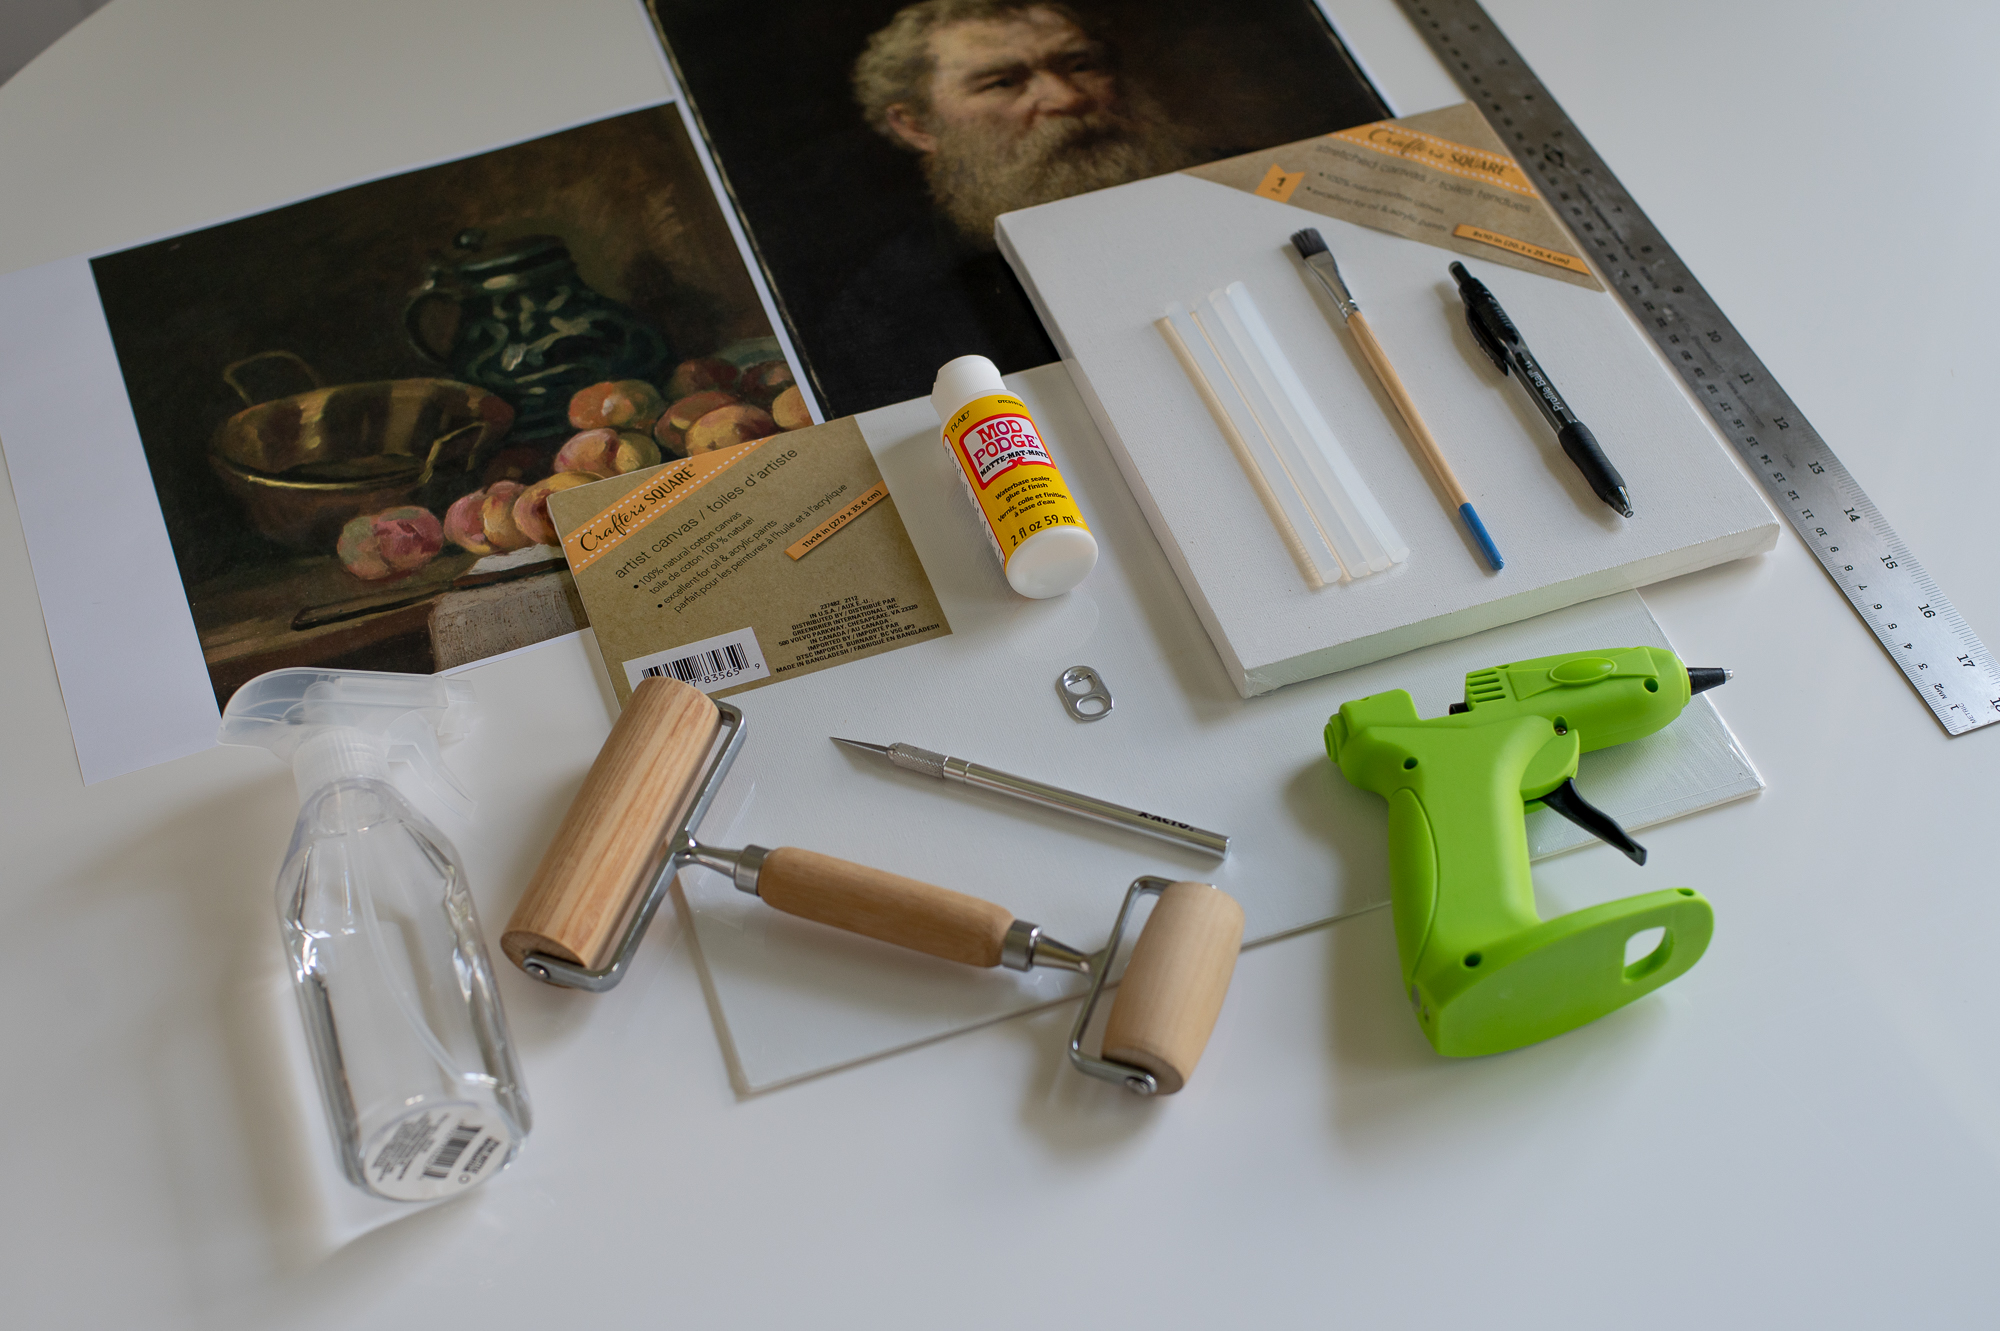
The Supplies
*This blog post contains affiliate links, meaning that if you purchase any of the items using the links I provide I, as the author of this website, will receive a very very small commission from that sale. This is a great way to help support your favorite bloggers at no cost to you. Think of it like a tip jar that costs you nothing!
The supplies for this project are very simple, but do require a few tools that you may need to pick up if you don’t already own them. I’ll link to the ones I used.
Tools You’ll Need
- A Glue Gun & Glue Sticks – This one is CORDLESS!!! Which if you’ve ever used a glue gun before, you know is LIFE CHANGING.
- An X-Acto Knife – Technically this is a “craft knife” since it’s not made by the X-Acto brand. But I’ve found I prefer it to the X-Acto knife I used to use.
- A Spray Bottle – I grabbed mine from The Dollar Tree
- A Ruler
- A Cheap Paint Brush – One from somewhere like The Dollar Tree is fine for this
- A Pen Or Pencil
- & A Small Rolling Pin – I linked the one I used but it’s really for rolling out pizza dough. They actually make a specific ones for this purpose that is probably better.
Supplies You’ll Need To Buy
My favorite part of this project is that all of this (excluding the paper prints themselves) can be found for a discount at The Dollar Tree! If you don’t have a Dollar Tree near you, I linked other similar options you can find online.
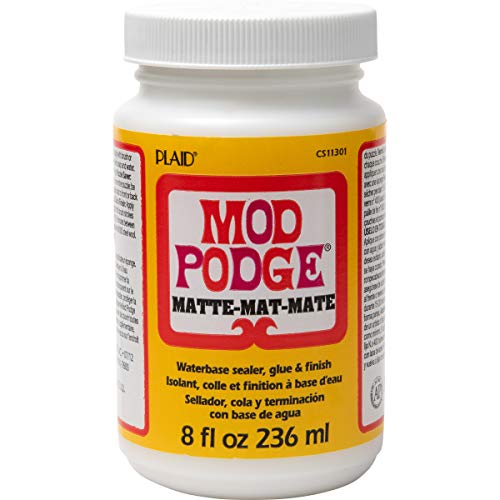
- A Bottle of Matte Mod Podge – The small Dollar Tree bottle is more than enough, but if you want a larger bottle it’s cheaper on Amazon I’ve found.
- An 8×10 Stretched Canvas (For Version #1) – Alternate Amazon Option Here
- An 11×14 Artist’s Canvas Panel (For Version #2) – Alternate Amazon Option Here
- A Tab From The Top Of A Soda Can (For Version #2)
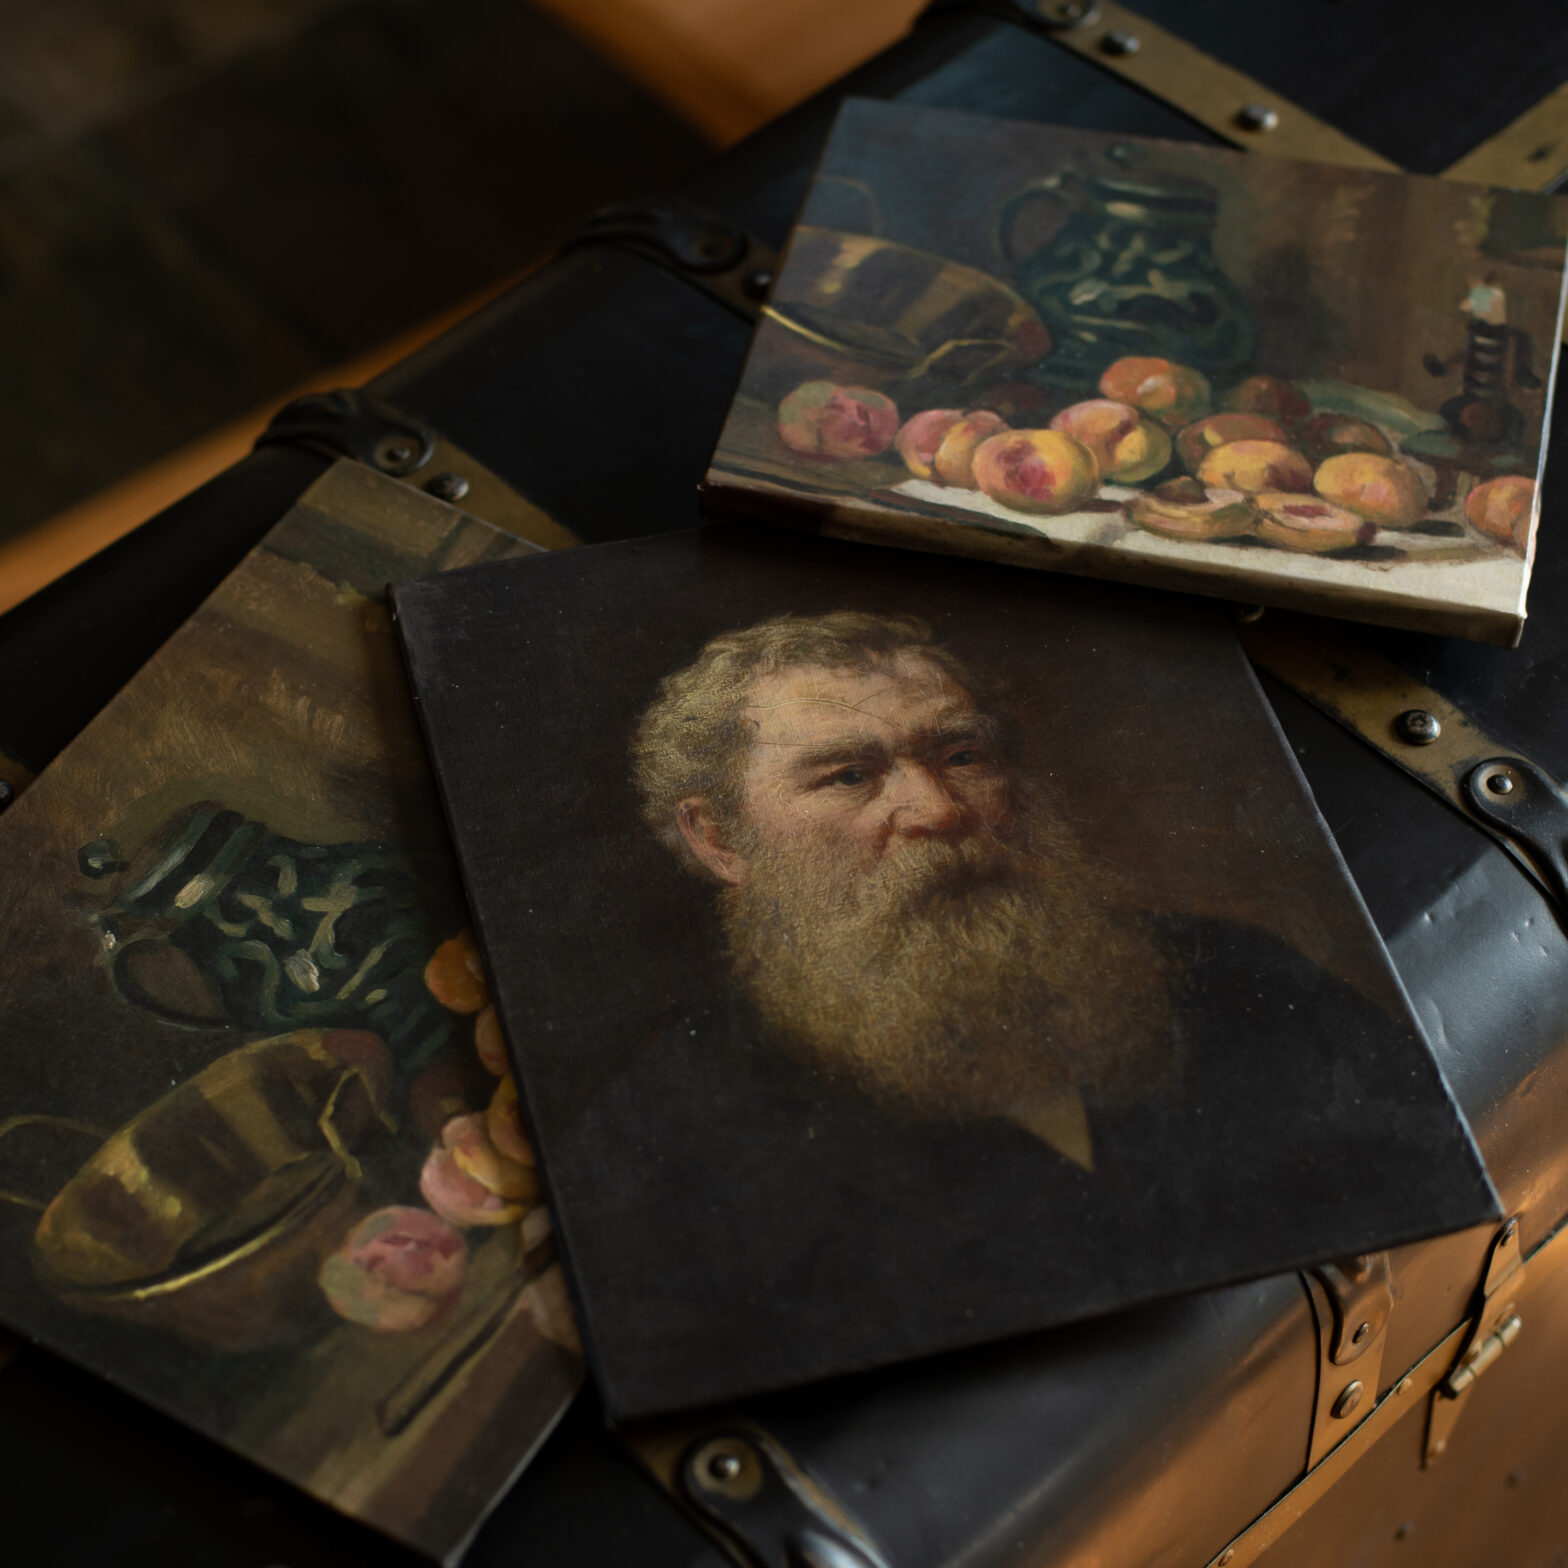
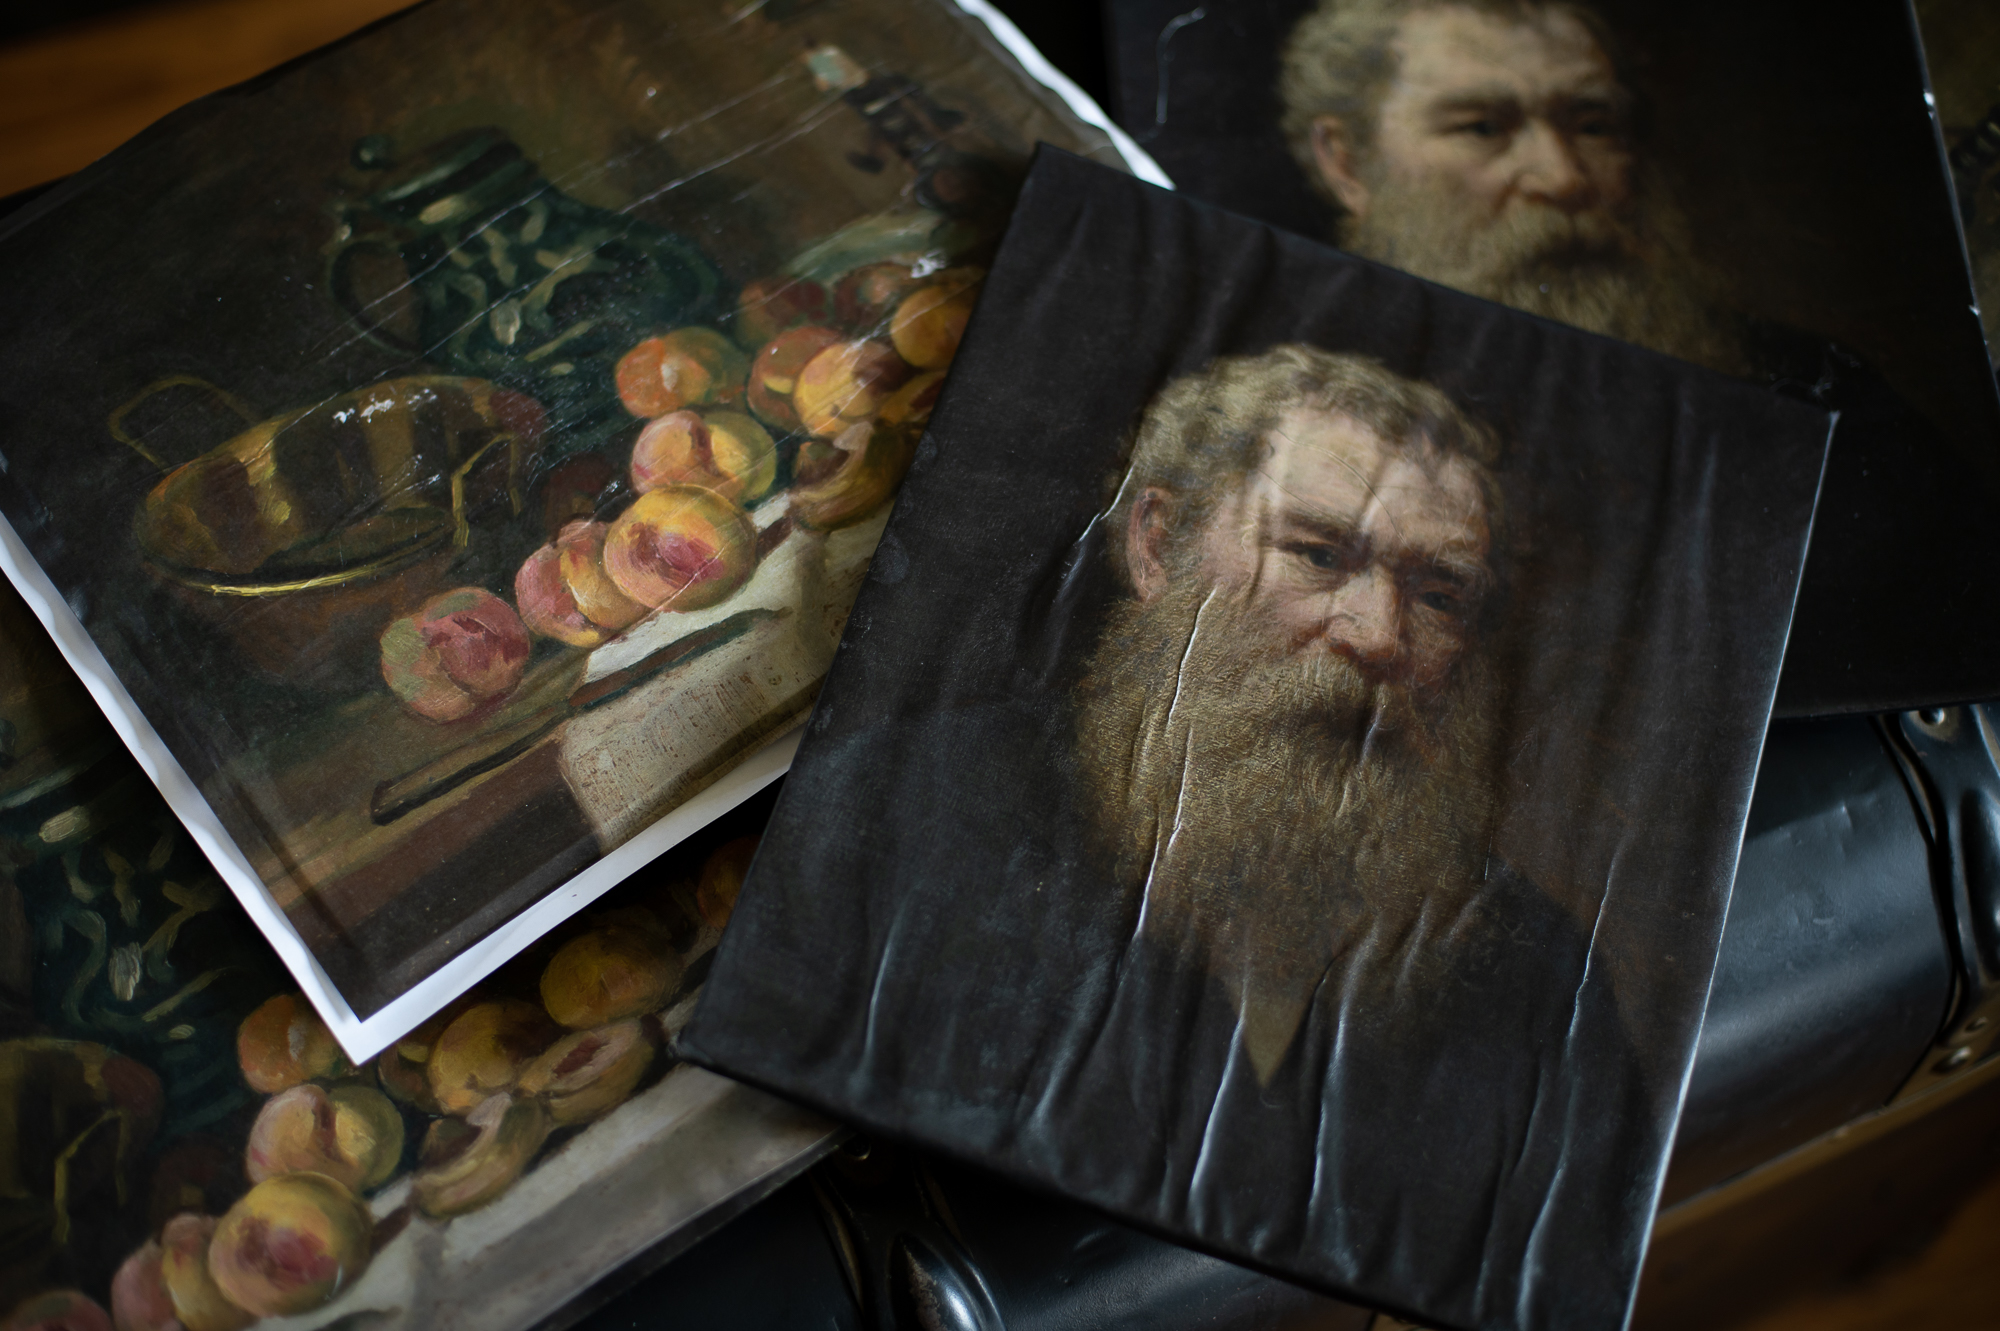
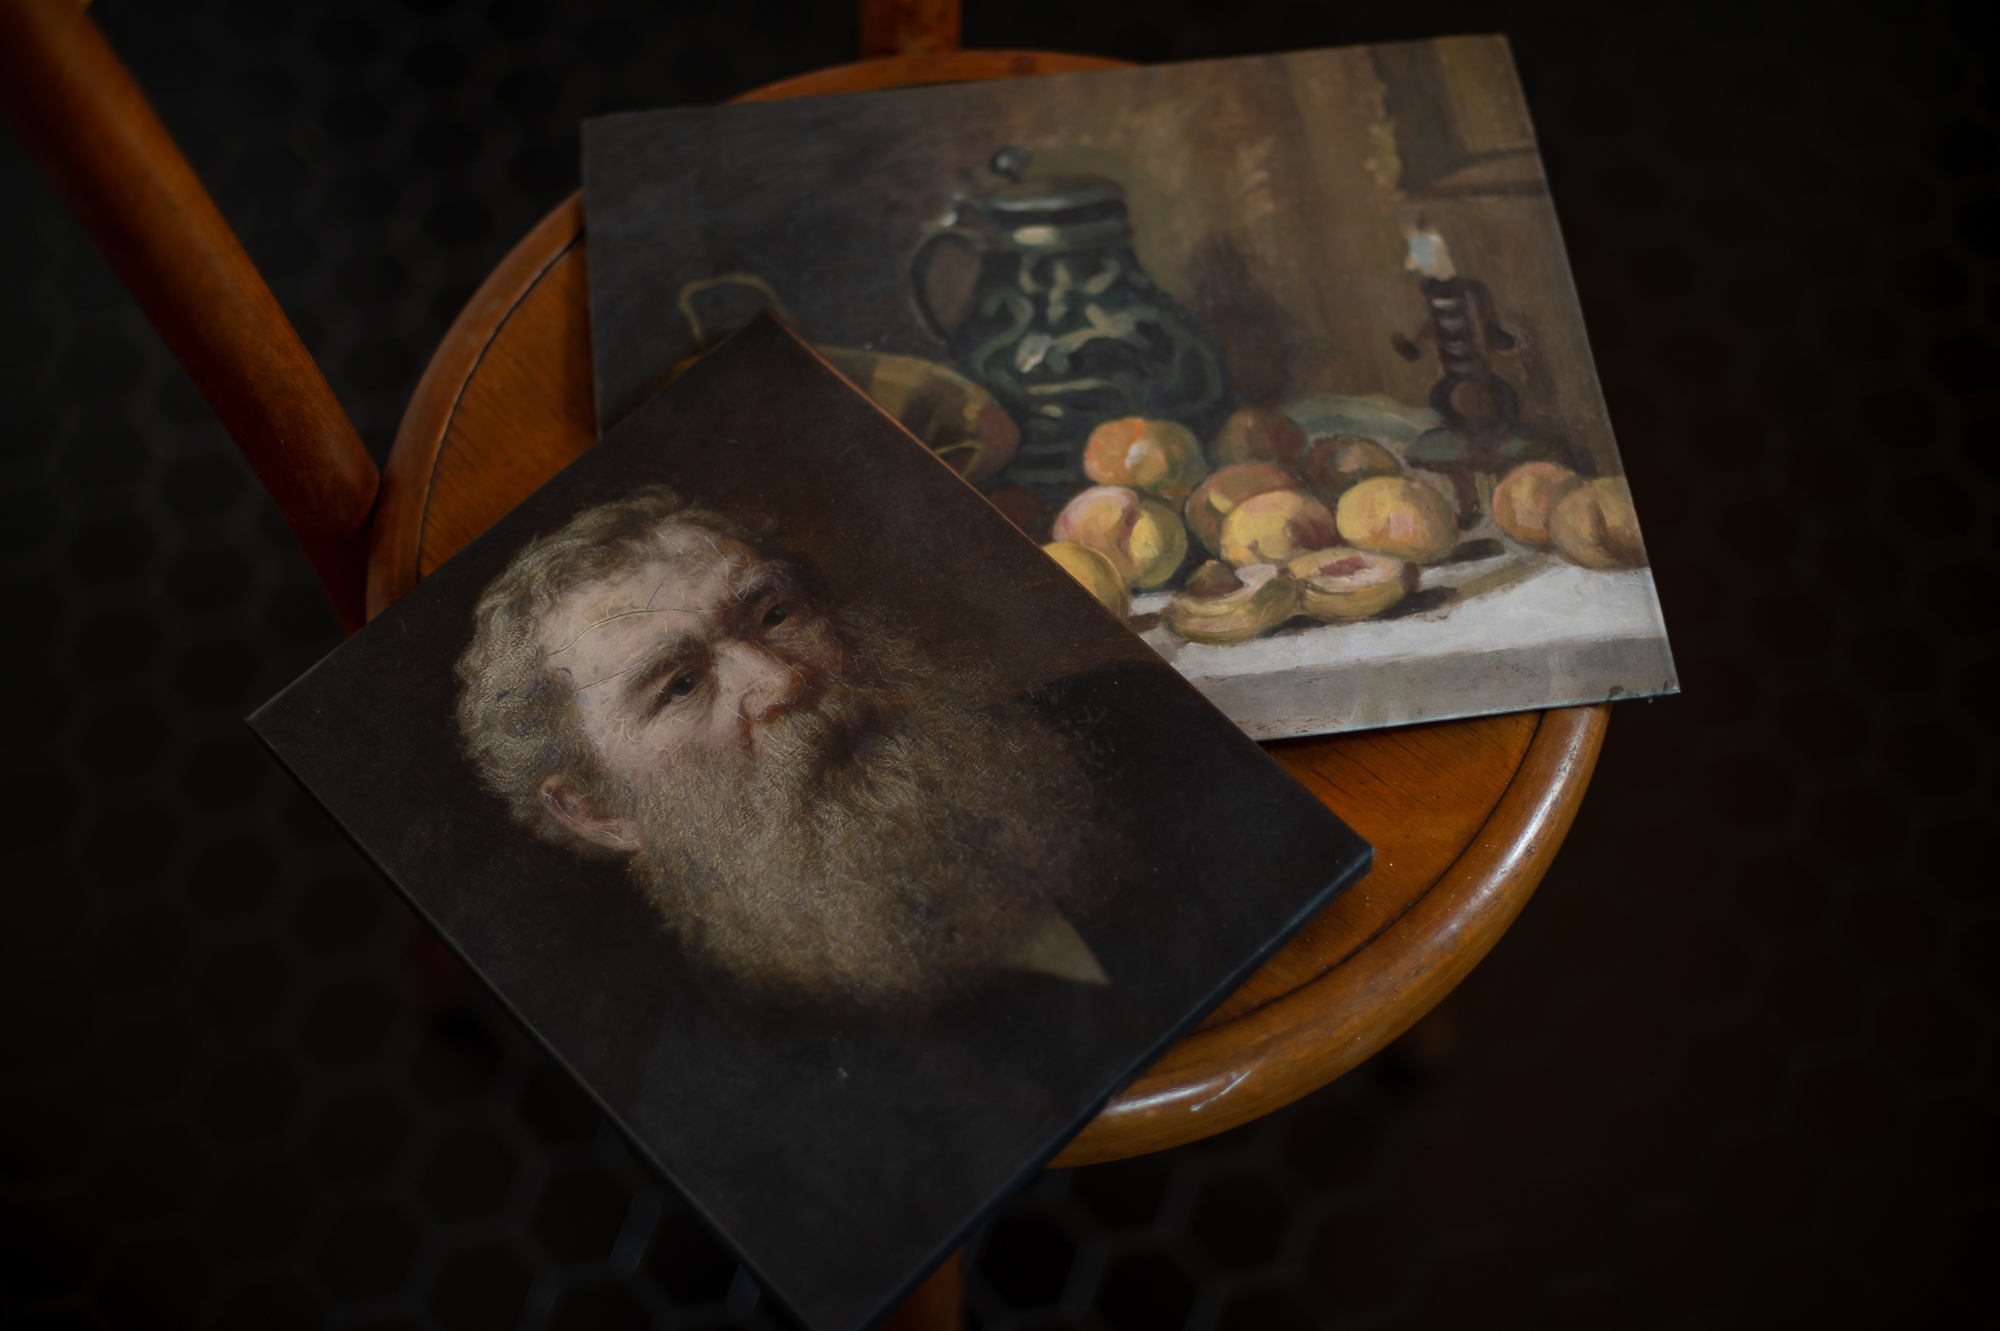
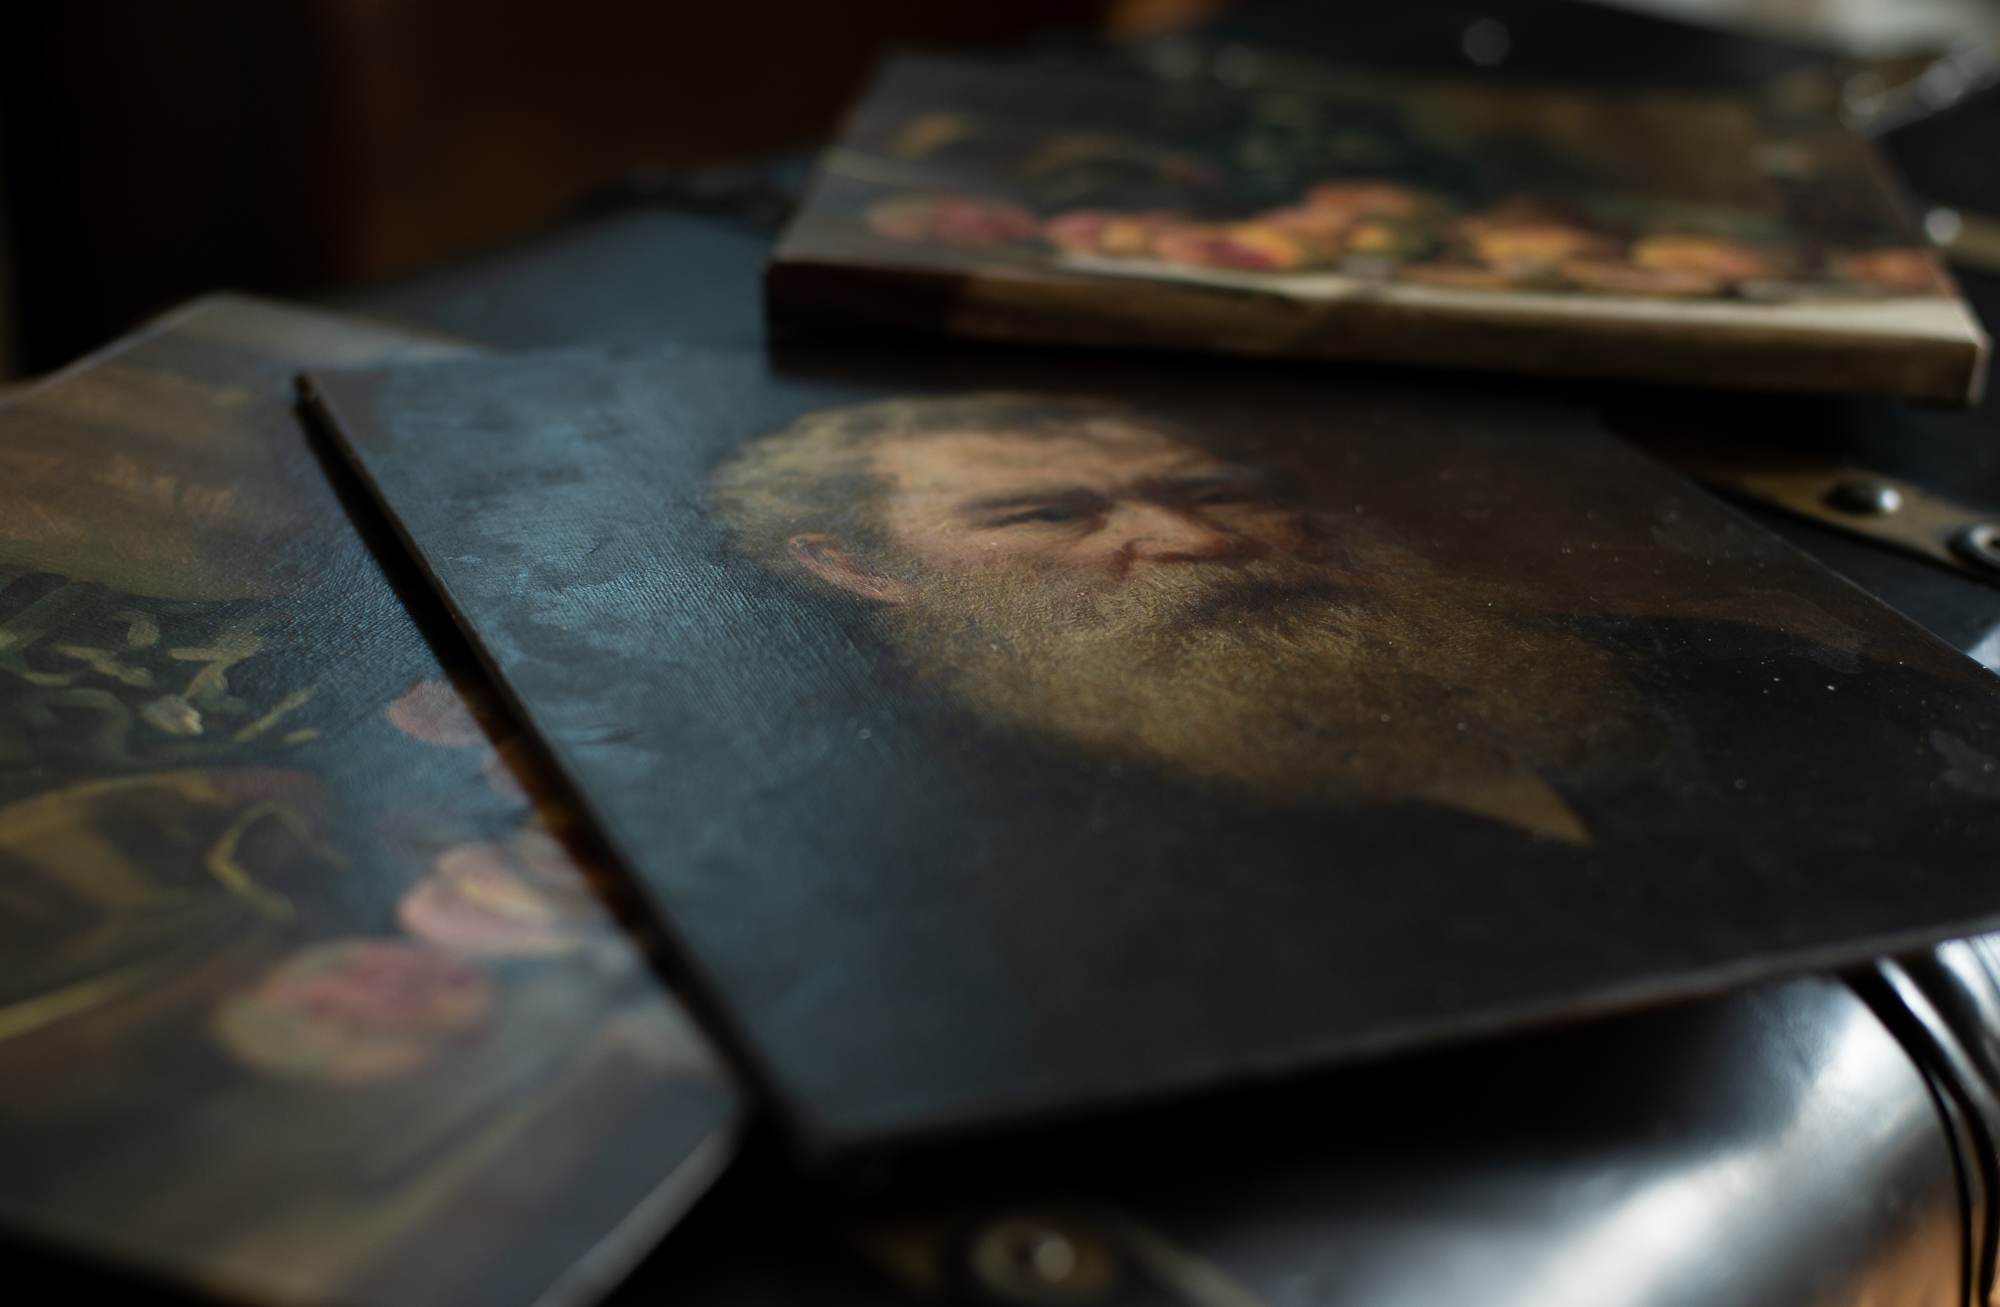
- A Digital Art File Of An Oil Painting – I used these two I snagged for free from the print shop
- & A Cheap 11×17 Color Copy Of Your Artwork On PLAIN COPY PAPER – I got mine printed at Office Depot for $1.50 each
Version #1 – The Stretched Canvas
There are two way to do this project, I’m going to break down the easiest one first:
Step One: Trim Your Paper Print
Trim your paper print out down to remove some of the excess paper from around the edges
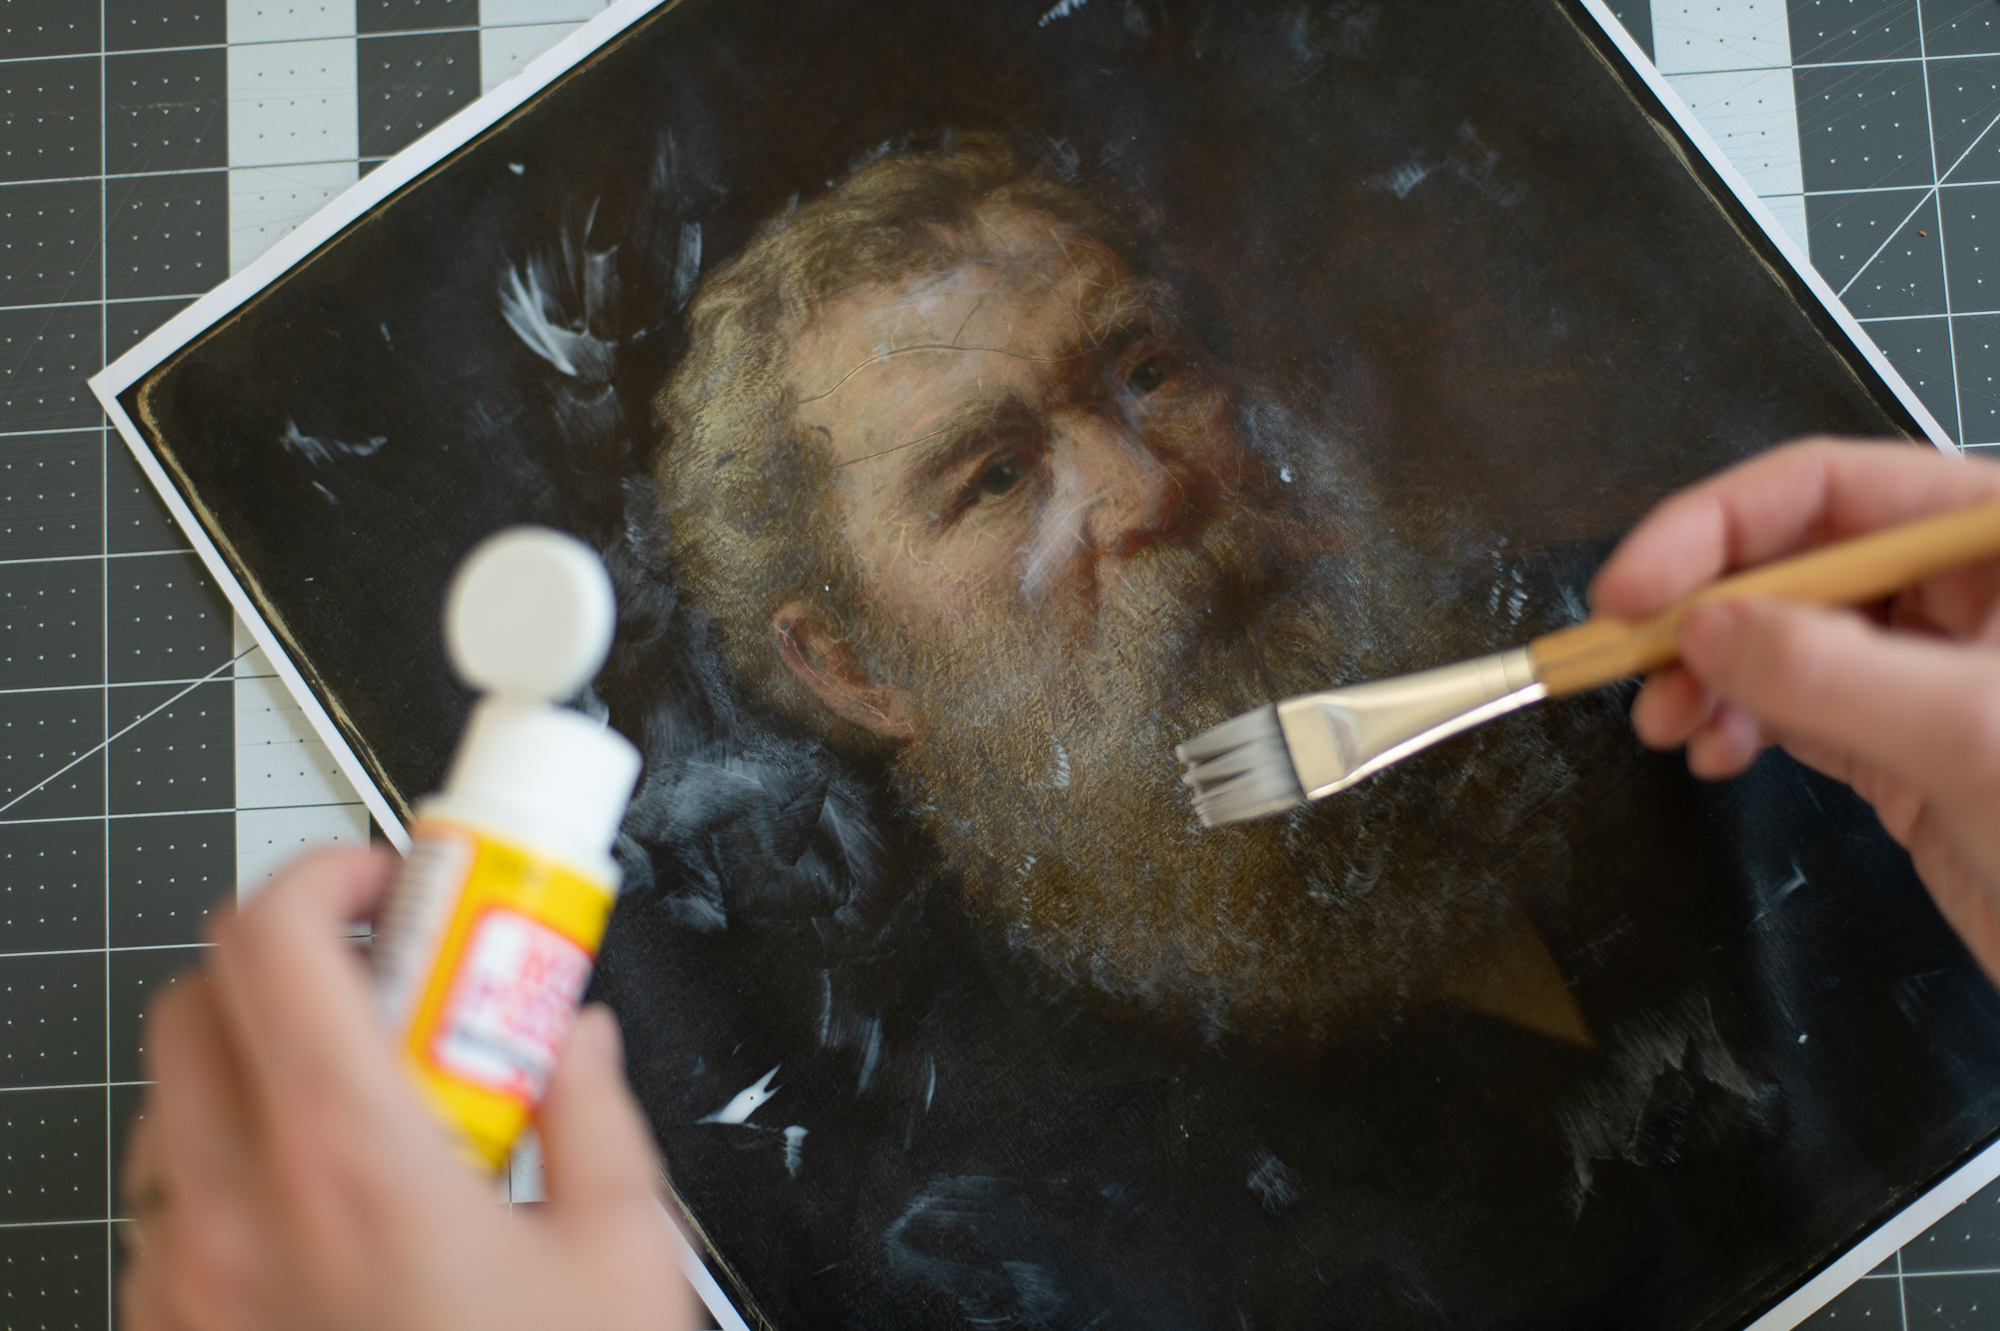
Step Two: Brush On A Coat Of Mod Podge
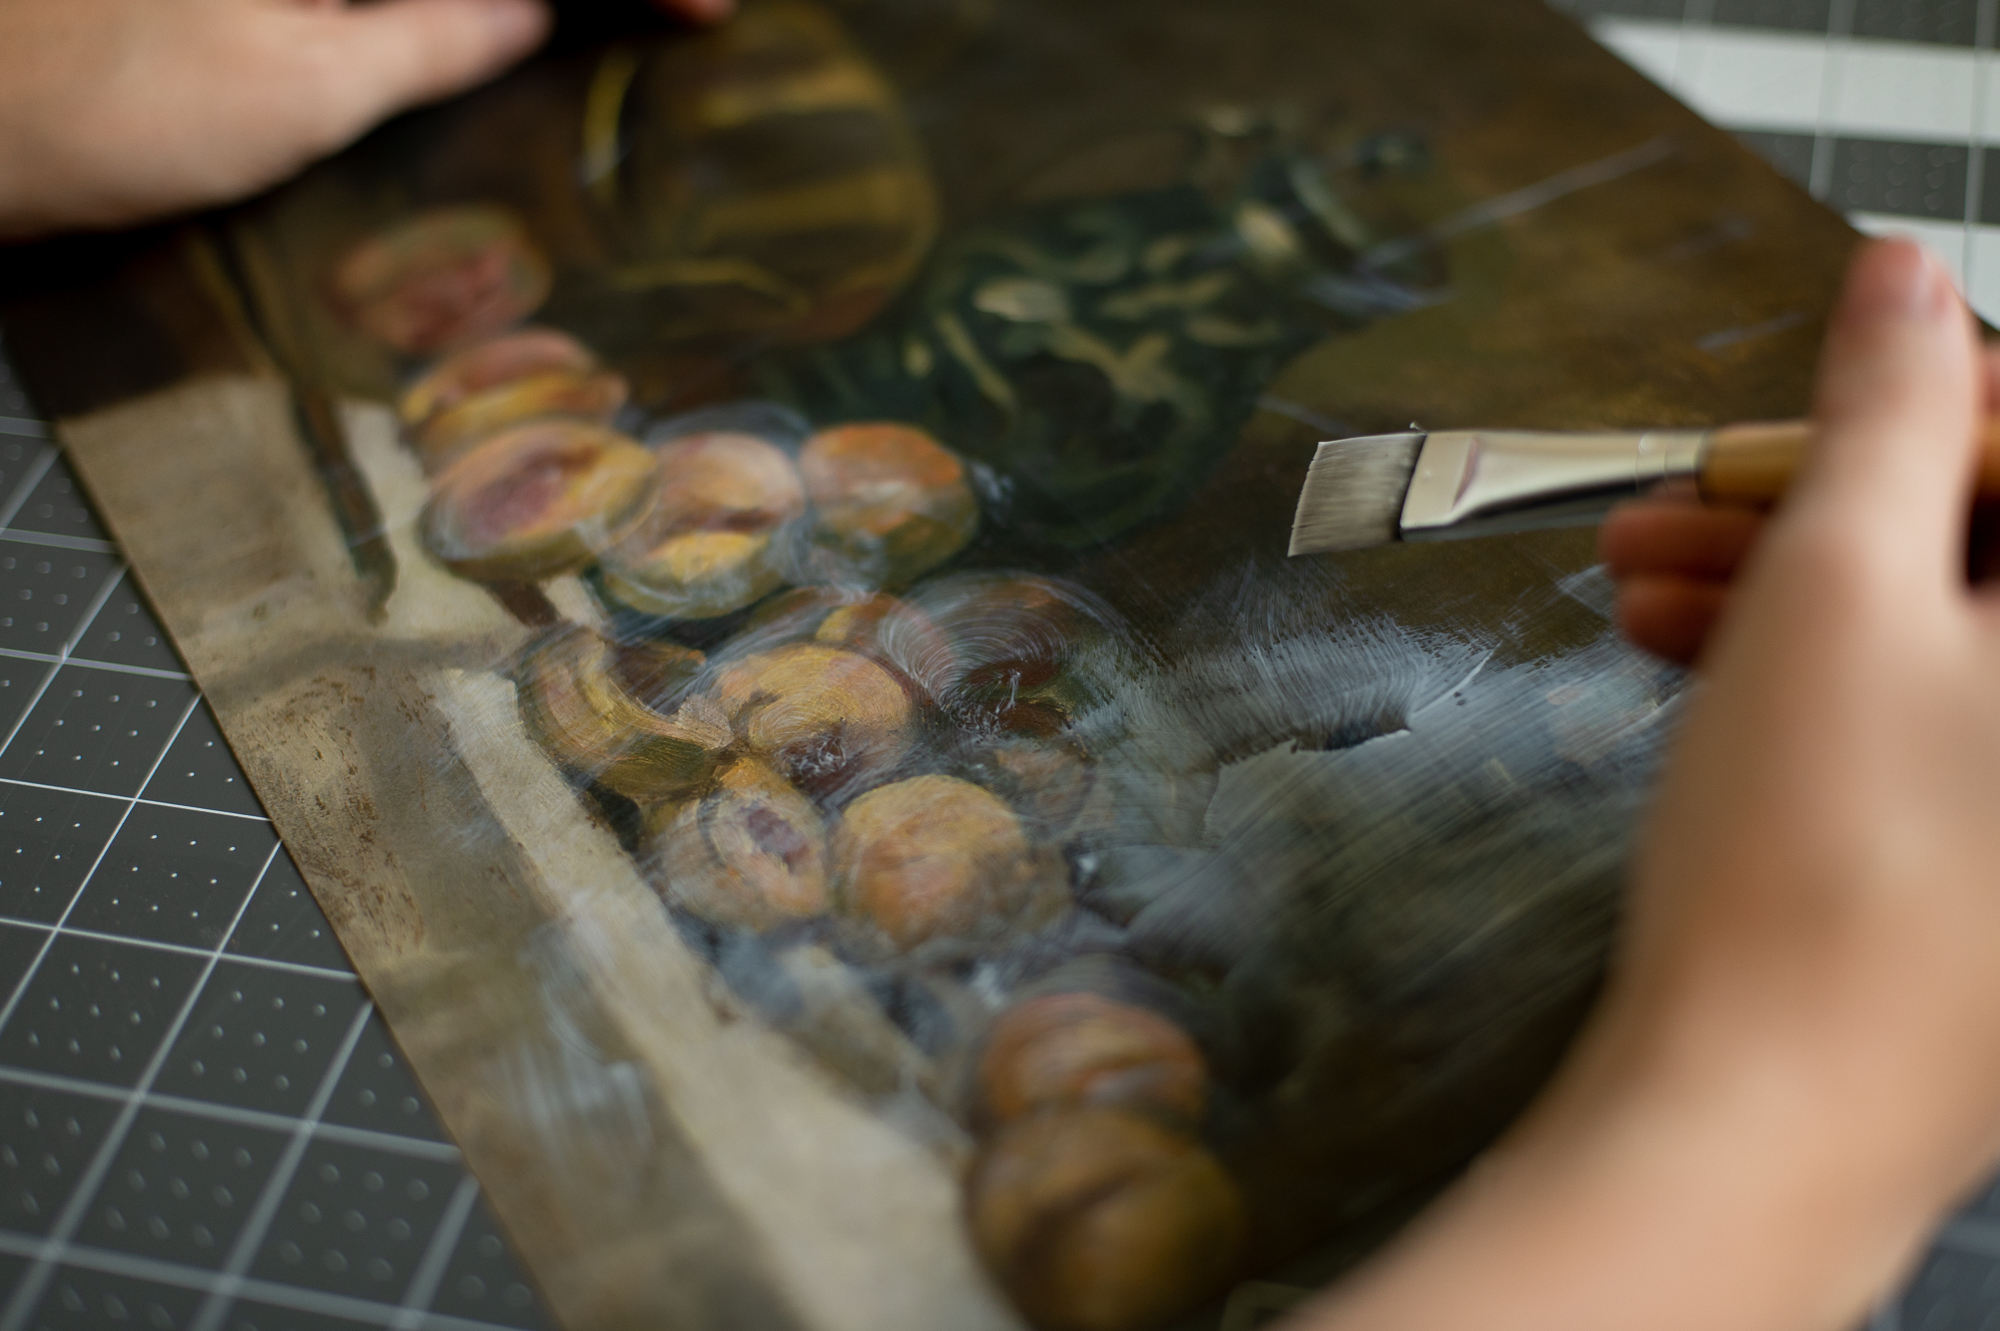
Paint over the top of your print out with a generous layer of Mod Podge. I like to lay down a thin layer over the entire painting first, then go back with a bit more Mod Podge on my brush to mimic the brush strokes in the actual painting.
This will make it feel more realistic when we get done. We’re looking for texture here so don’t smooth out your brush strokes too much.
Step Three: Let Your Print Dry
Let you print fully dry. I repeat, let that print FULLY DRY. Do not touch it or move it or mess with it while it is wet.
Step Four: Prep To Wrap Your Print Onto The Canvas
Once your print is dry, flip it over and then place your 8×10 stretched canvas face down on top of the back of your print where you want it. Keep in mind you’ll need to leave enough paper to wrap around the sides of the canvas and secure your print to the back of the canvas.
Step Five: Wrap The Edges Of Your Print Around The Canvas & Secure To The Back With Glue
Using your glue gun you’re going to wrap your paper print around the side of the canvas and secure it tightly to the back. I found it worked best to think of this like wrapping a present, securing the long sides first (pulling the paper as taught as I could each time) and then the short ends last.
And that’s it! You’re mini faux oil painting is ready to display! Super easy right?
HOT TIP: The only downside to this version of the project is that will lose a lot of your image to the sides and back of your canvas. So if you plan to do this version of the project, make sure you pick a print that will provide you with enough extra space around the edges of the subject to do that (vs losing important parts of the image to the sides or back of your canvas).
Version #2 – The Artist’s Canvas Panel
This is the version that took me A LOT of experimentation to perfect, but the results are SO GOOD once you figure out all the tricks!
The first three steps are the same as Version #1 but I’ll list them again here anyway….
Step One: Trim Your Paper Print
Trim your paper print out down to remove some of the excess paper from around the edges
Step Two: Brush On A Coat Of Mod Podge
Paint over the top of your print out with a generous layer of Mod Podge. I like to lay down a thin layer over the entire painting first, then go back with a bit more Mod Podge on my brush to mimic the brush strokes in the actual painting.
This will make it feel more realistic when we get done. We’re looking for texture here so don’t smooth out your brush strokes too much.
Step Three: Let Your Print Dry
Let you print fully dry. I repeat, let that print FULLY DRY. Do not touch it or move it or mess with it while it is wet.
Step Four: Prepare Your Artist Canvas Panel
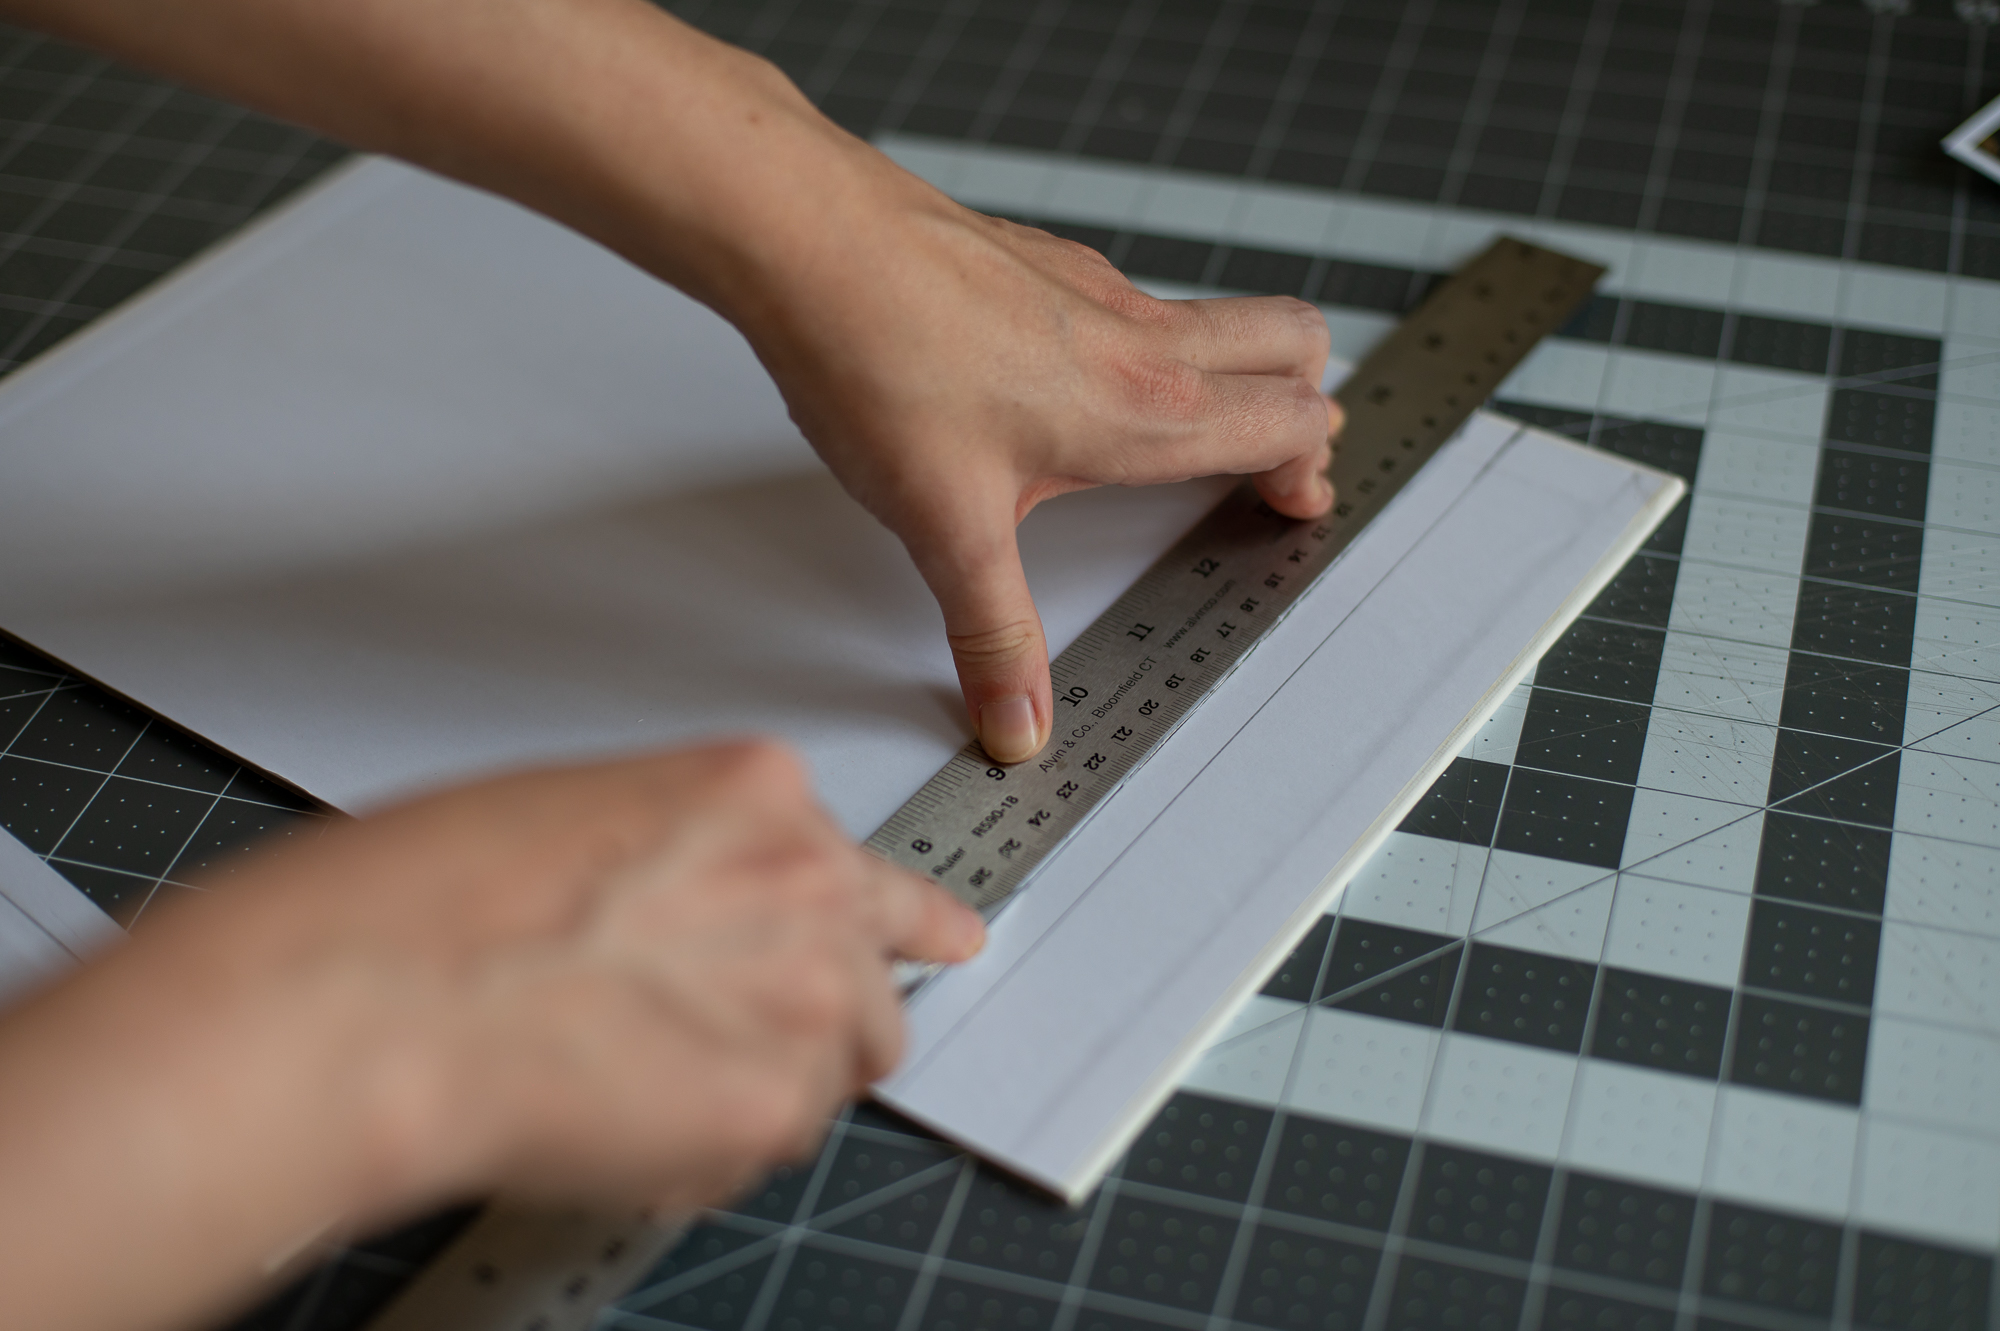
Once your print is fully dry, you’ll want to lay it on top of of your Artist’s Canvas Panel in order to mark the dimensions of your print onto the canvas.
Then take your ruler and measure at LEAST 1mm in on two of the sides to ensure you’ll have enough print to wrap around your canvas and secure it to the back.
Once you’ve got everything marked, go ahead and trim down your artist canvas using your X-acto knife and your ruler.
It will take A LOT OF PASSES with your knife to get through all the layers. Once you have it trimmed down do a quick test with your print to make sure you’ve cut it down to a size that will work.
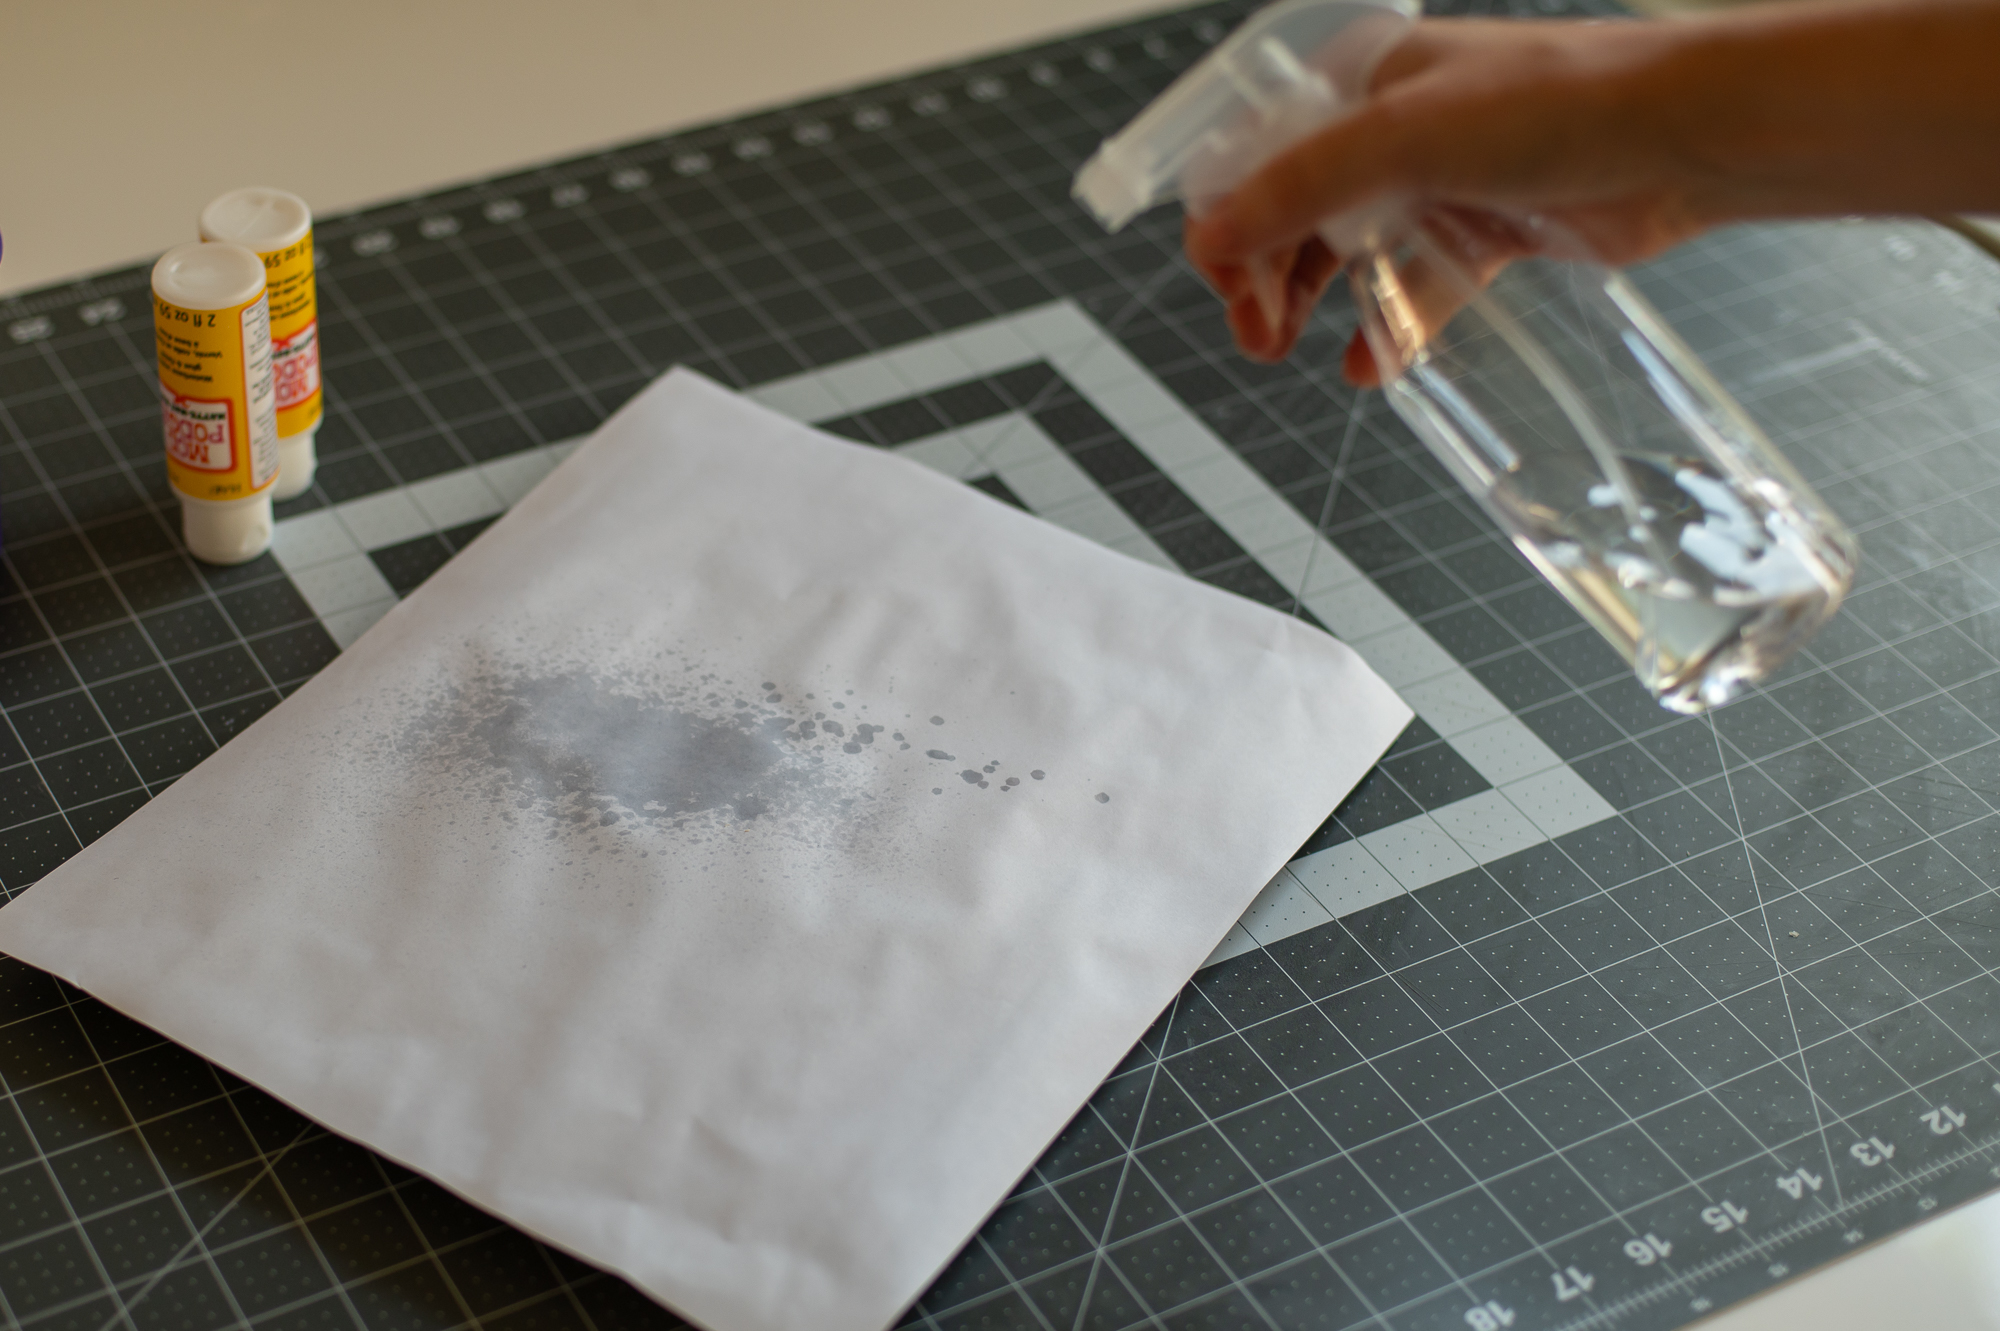
Step Five: Mist The Back Of Your Print With Water
Lay your print face down on the table and *lightly* mist the entire back of your print with water using your spray bottle. Be careful not to apply too much water or your paper will dissolve and fall apart when you go to pick it up in a moment.
Step Six: Apply A Thin Layer Of Mod Podge To The Canvas
Working quickly, you’re going to evenly spread a thin layer of Mod Podge over the entire surface of your artist’s canvas. Make sure that you get the mod podge everywhere. Don’t take too long because it drys quickly and we need it to still be very wet when we do the next step.
Step Seven: Lay Your Damp Print On Your Mod Podged Canvas
Now very carefully lift up your damp print and lay it on top of your canvas. Your print will be **very fragile** right now because of all the moisture, so this is a bit of a get it right the first time deal as you won’t be able to reposition it very much once it’s down or it will tear.
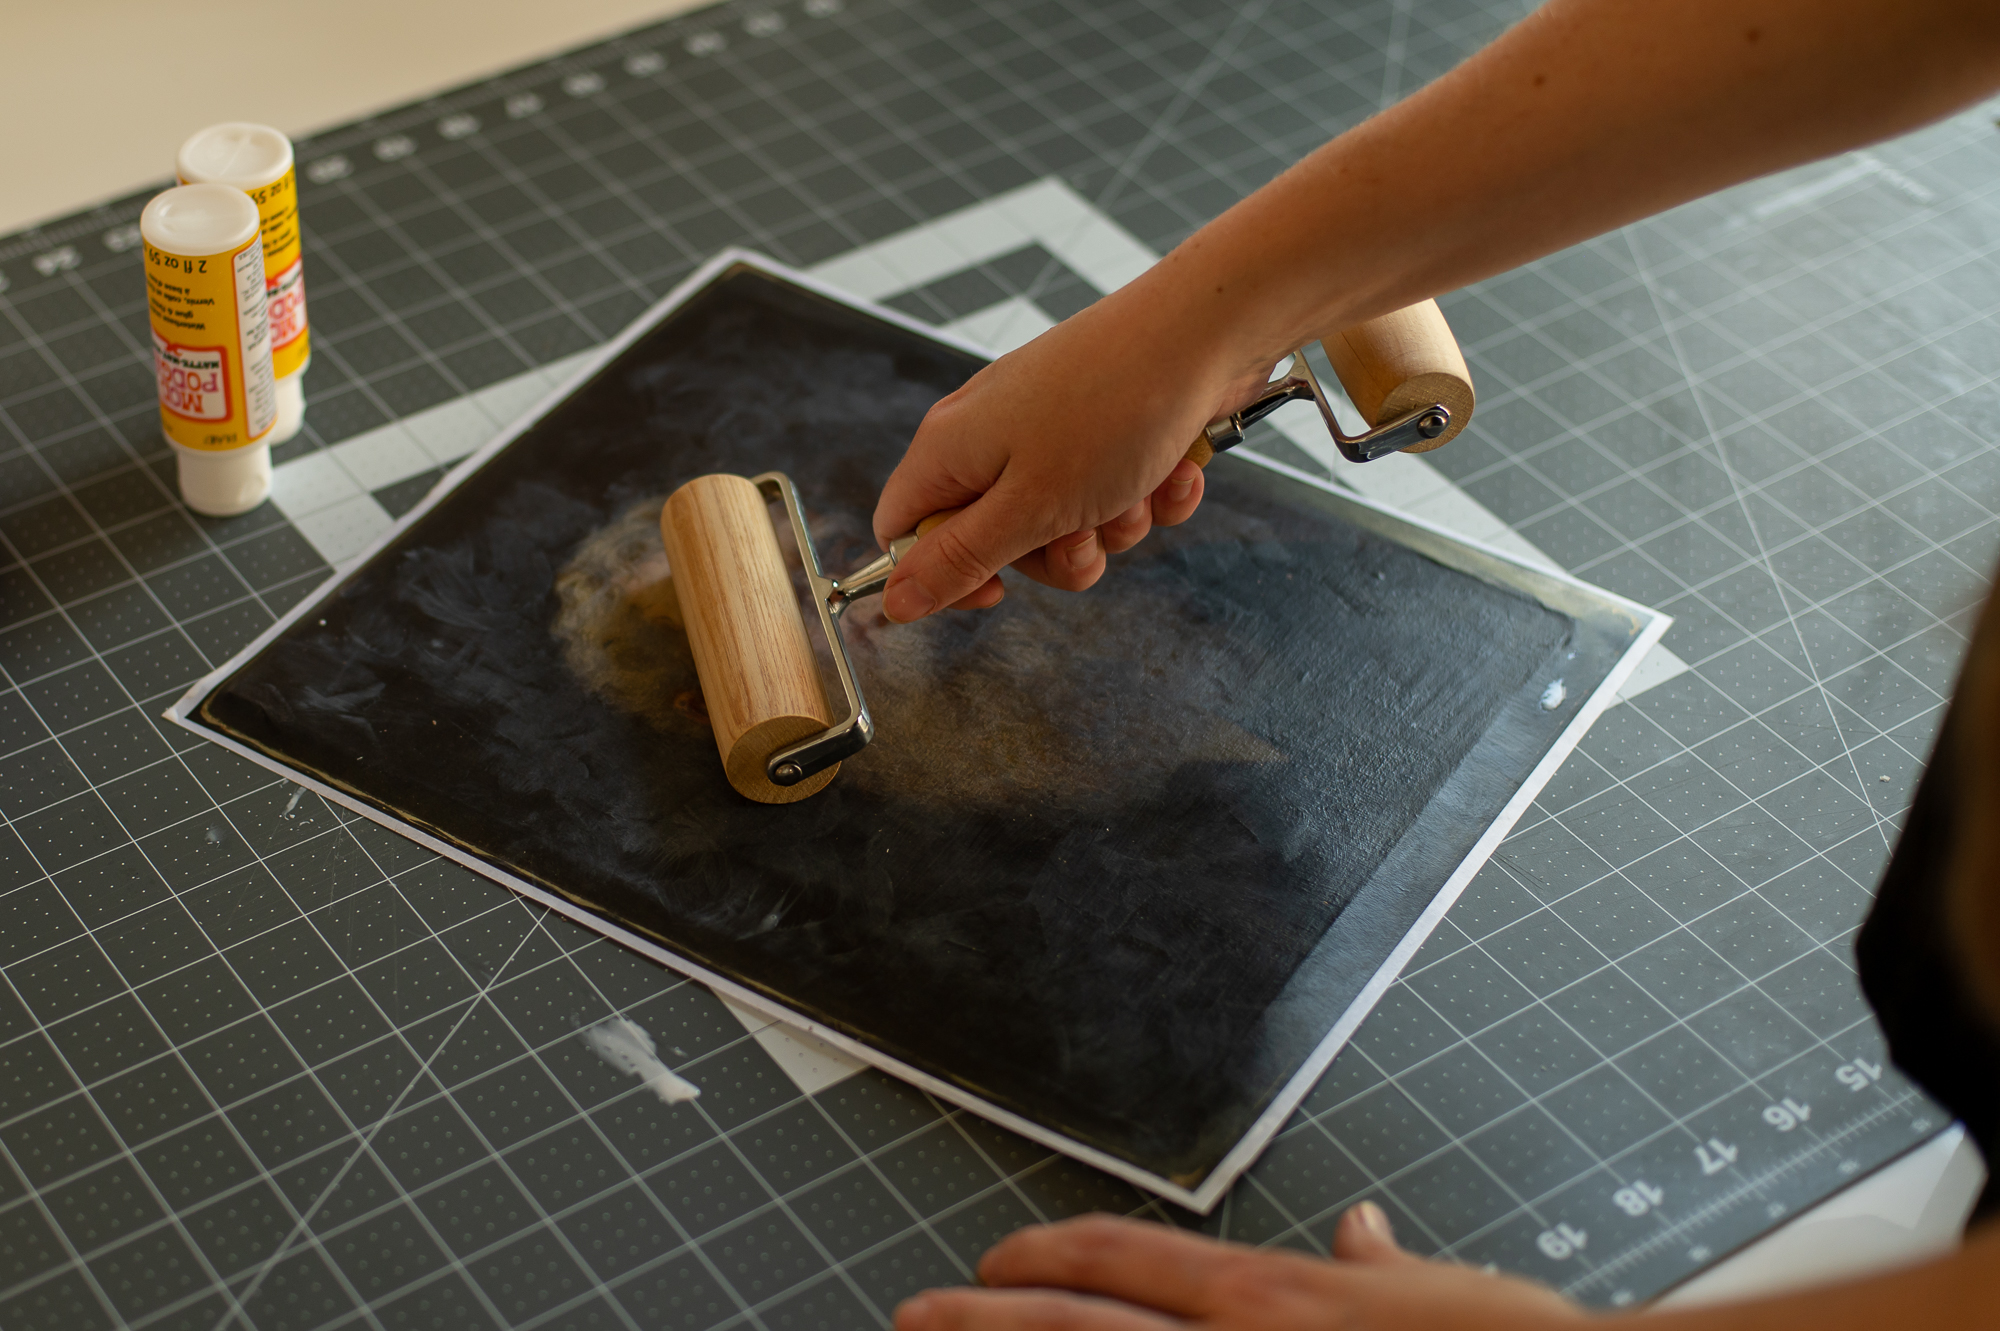
Step Eight: Bond The Surfaces Together With A Small Rolling Pin
Using your small rolling pin, you’re going to start in the center of your print and gently roll out towards the edges. Slowly working out any air bubble and ensuring the paper has a good bond with the surface of the canvas.
Once you’ve done this, WALK AWAY AND STOP TOUCHING THINGS. Trust me on this. If you keep fussing with it, the paper will likely rip or tear… ask me how I know… lol…
Also if the surface of your print gets all weird and white during this step, don’t freak out. That will go away once it has fully dried.
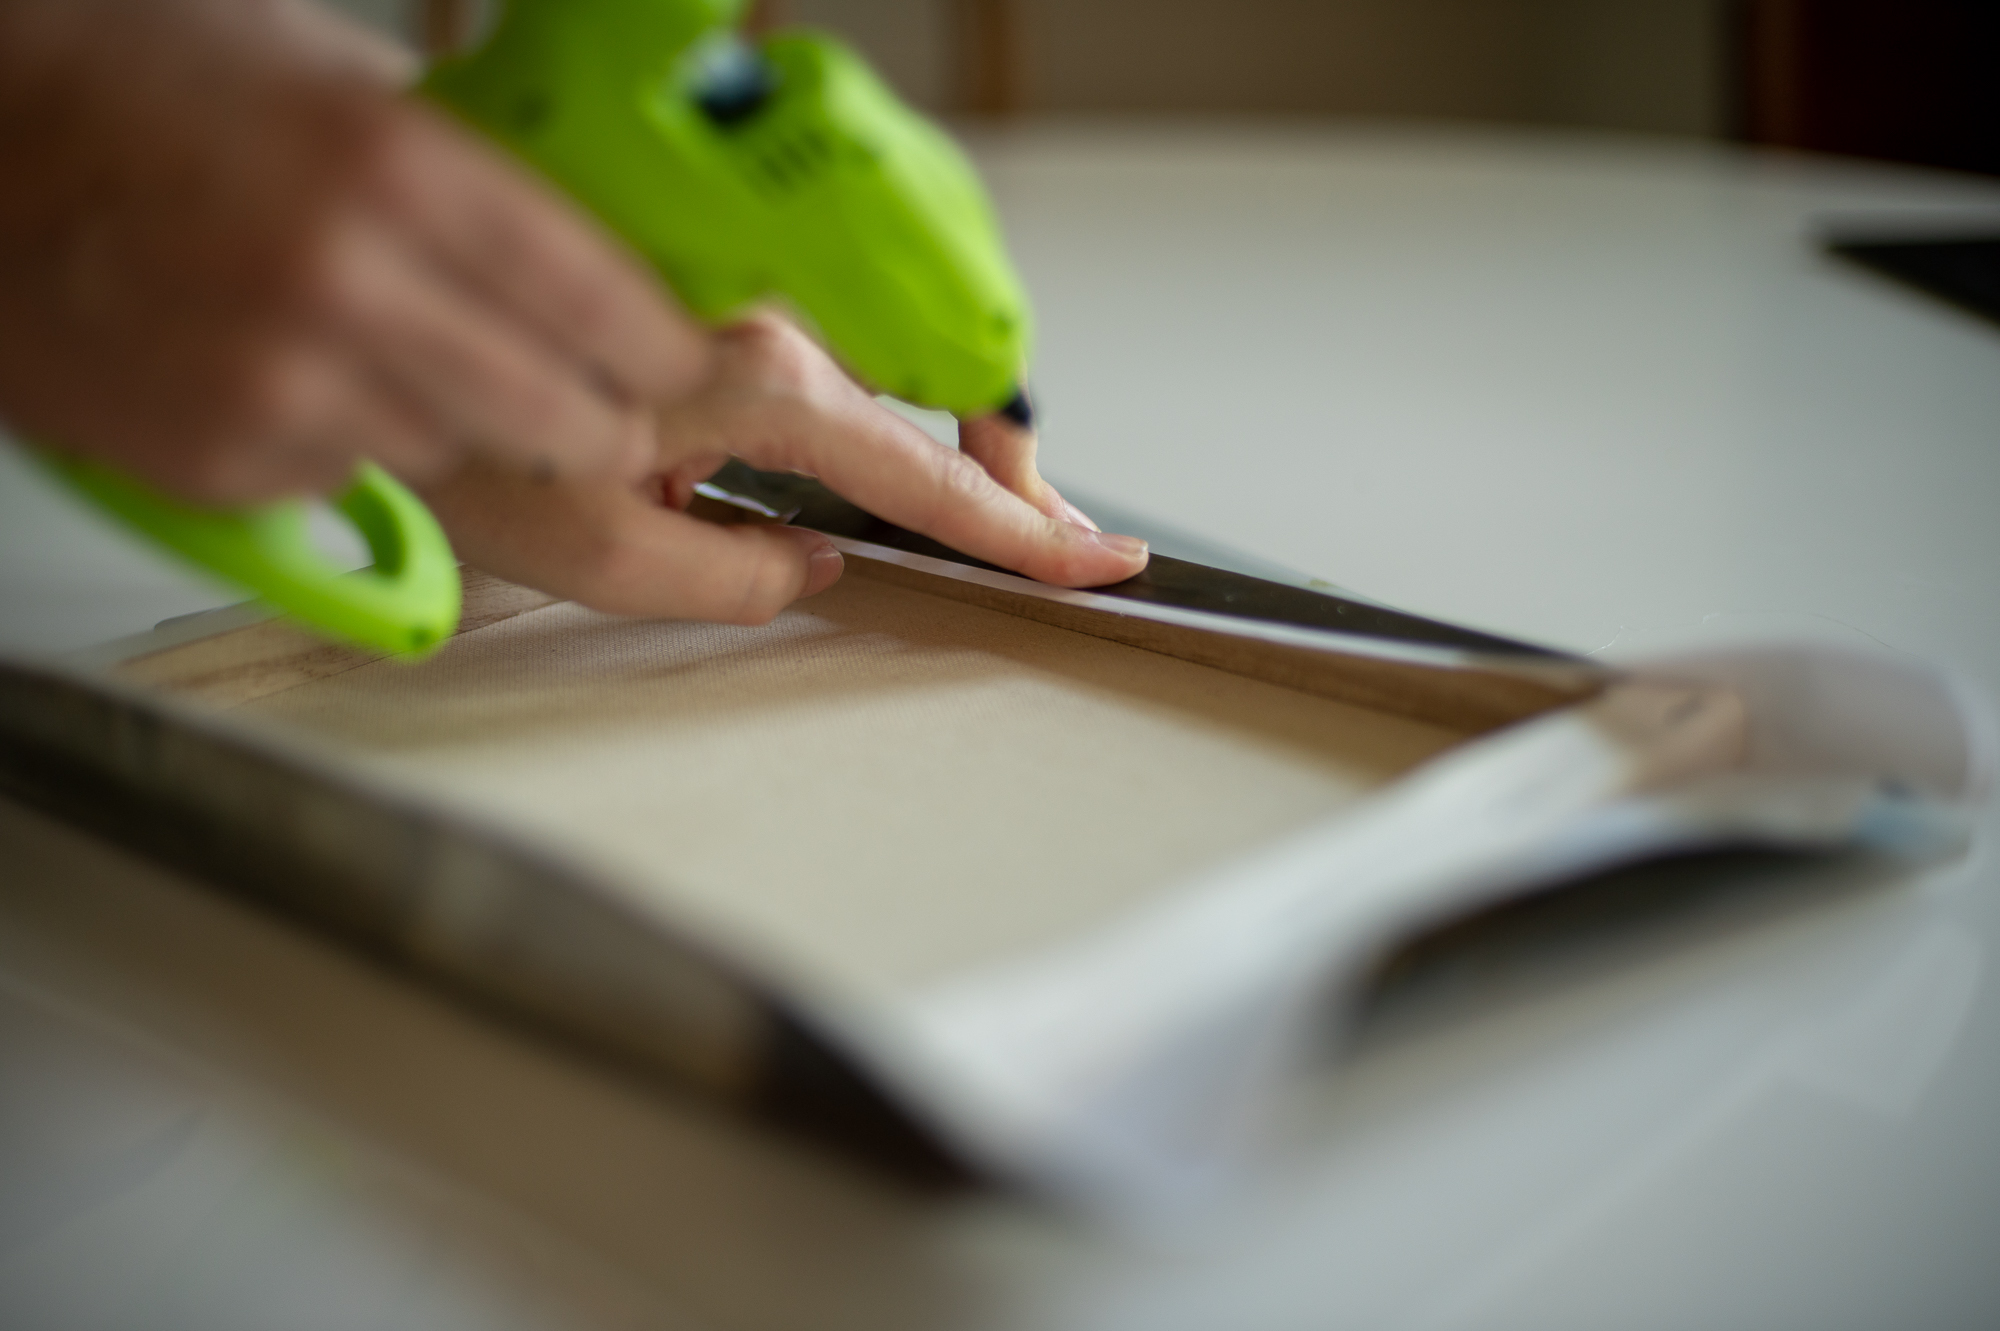
Step Nine: Wrap The Edges Of Your Print Around The Canvas & Secure To The Back With Glue
Once your mod podge and damp print are FULLY DRY (and not a moment before) you’re going to turn your canvas over and secure the excess paper to the back of your canvas using your glue gun just like we did before for step five of version #1.
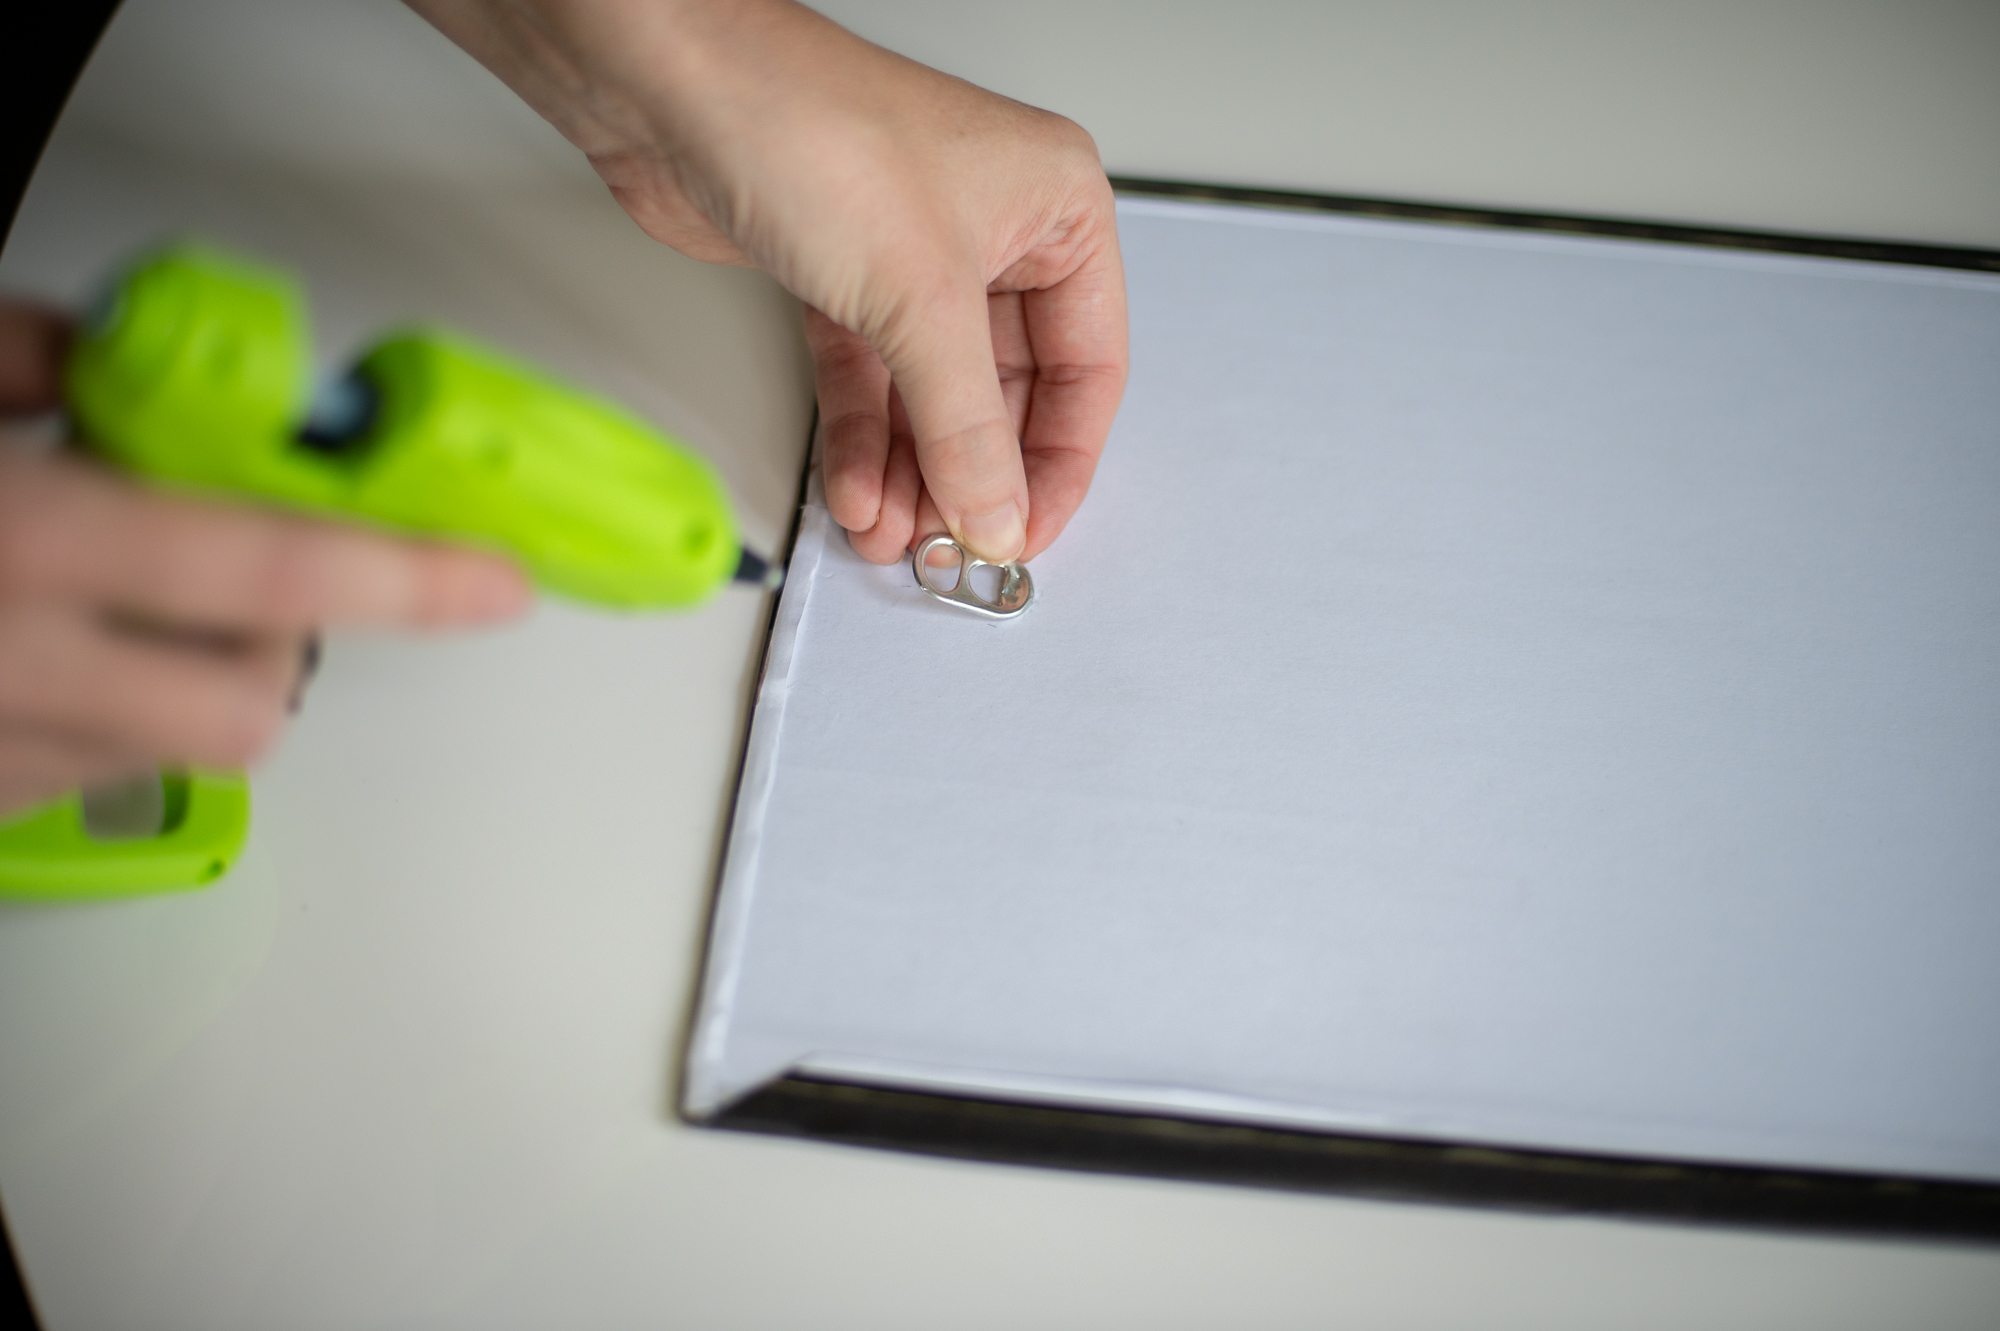
Step Ten (Optional): Add A Hook To The Back Of Your Canvas For Hanging
If you plan to hang your print on the wall (vs popping it in a frame or just leaning it up against something on a shelf) you’ll need to secure a hook to the back of your canvas.
A super cheap, easy way to do that is to simply hot glue the tab from the top of a soda can to the center of the back of your canvas.
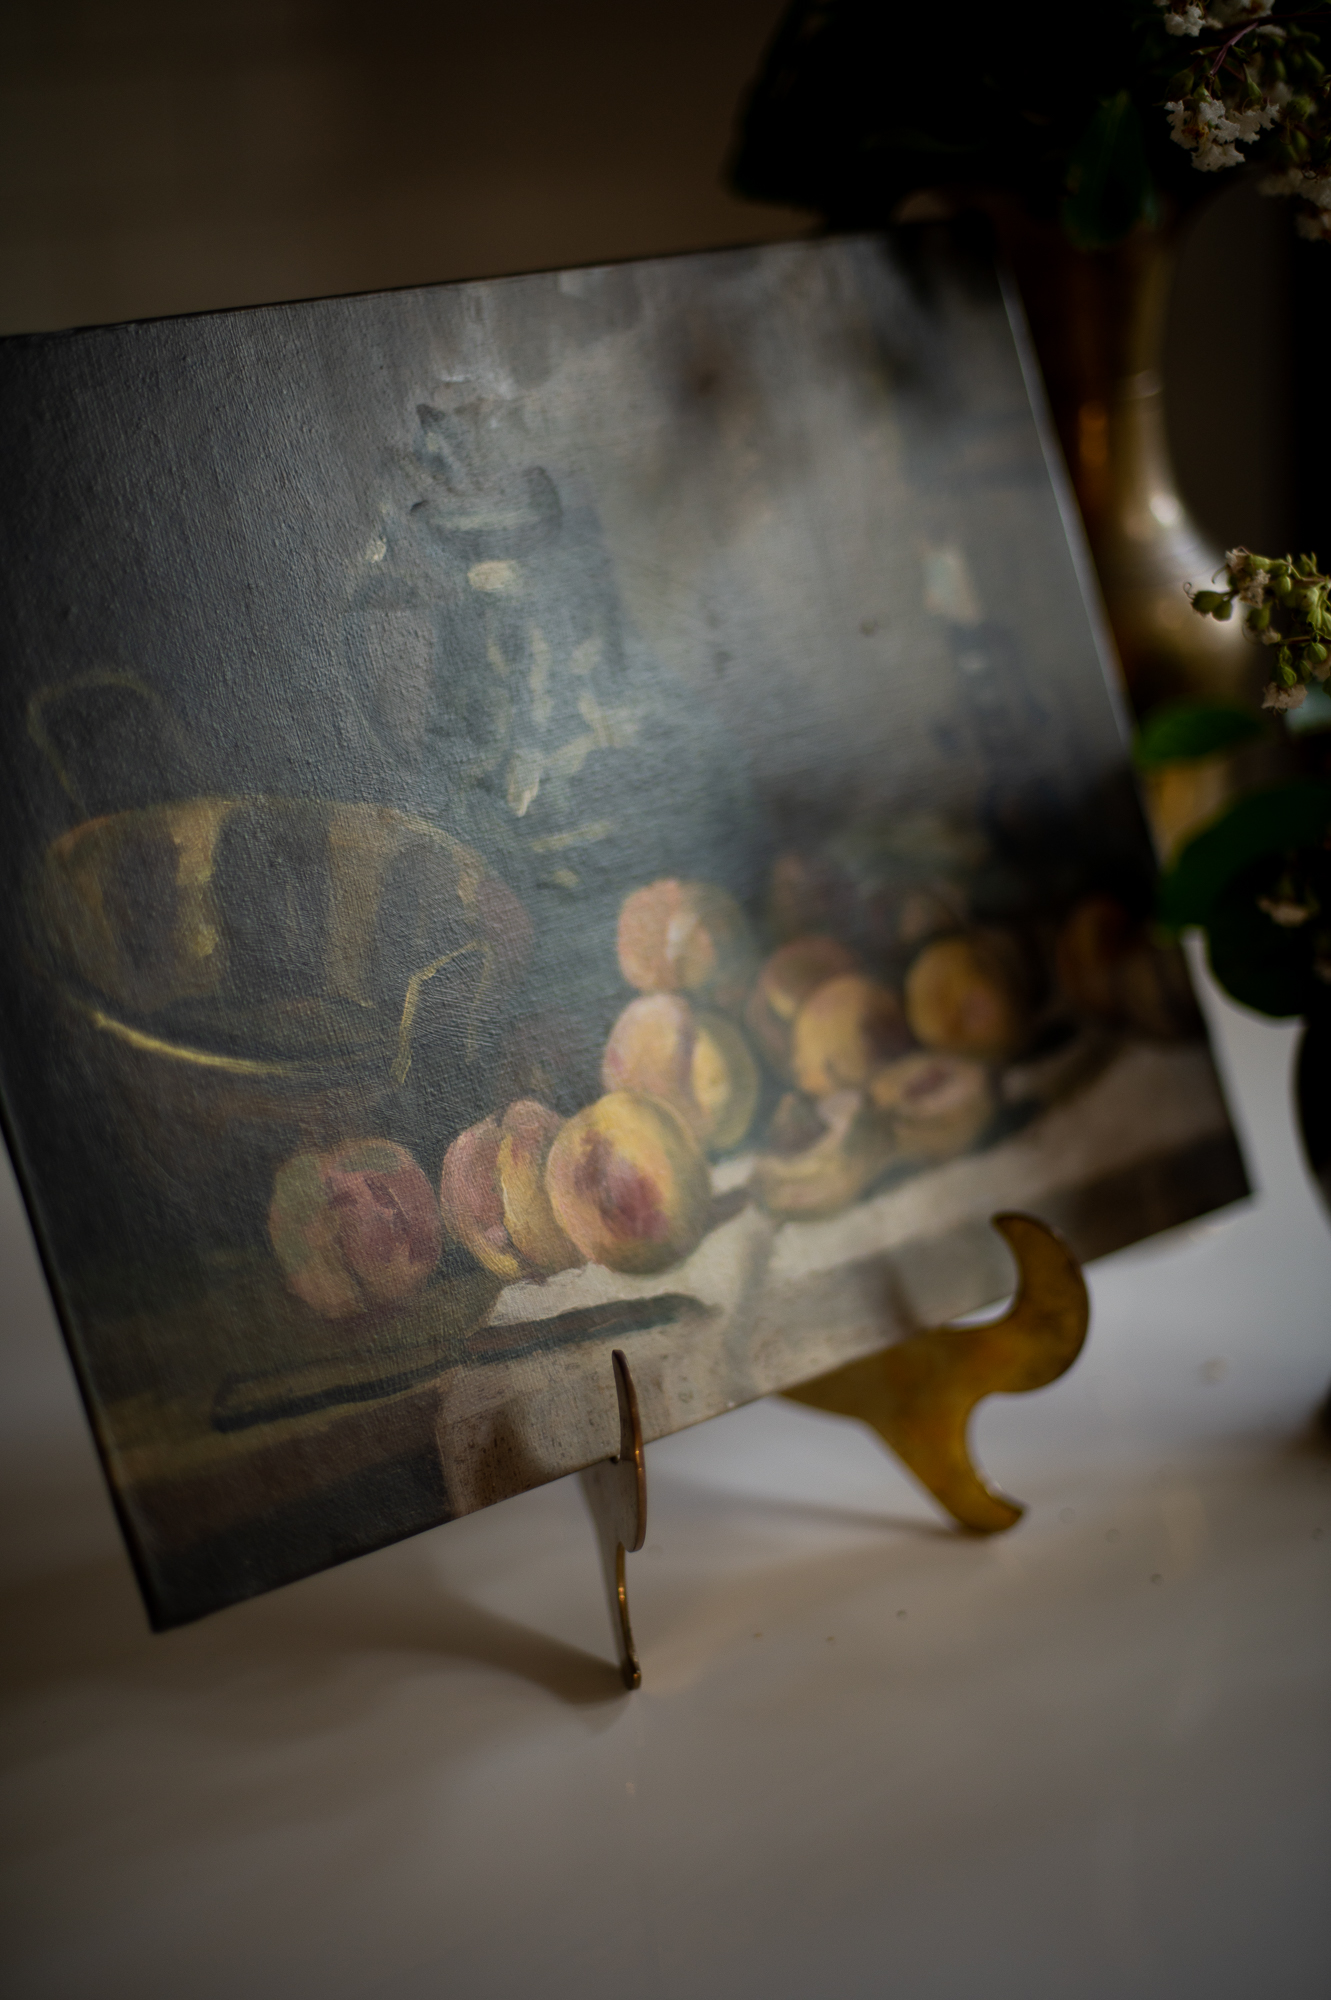
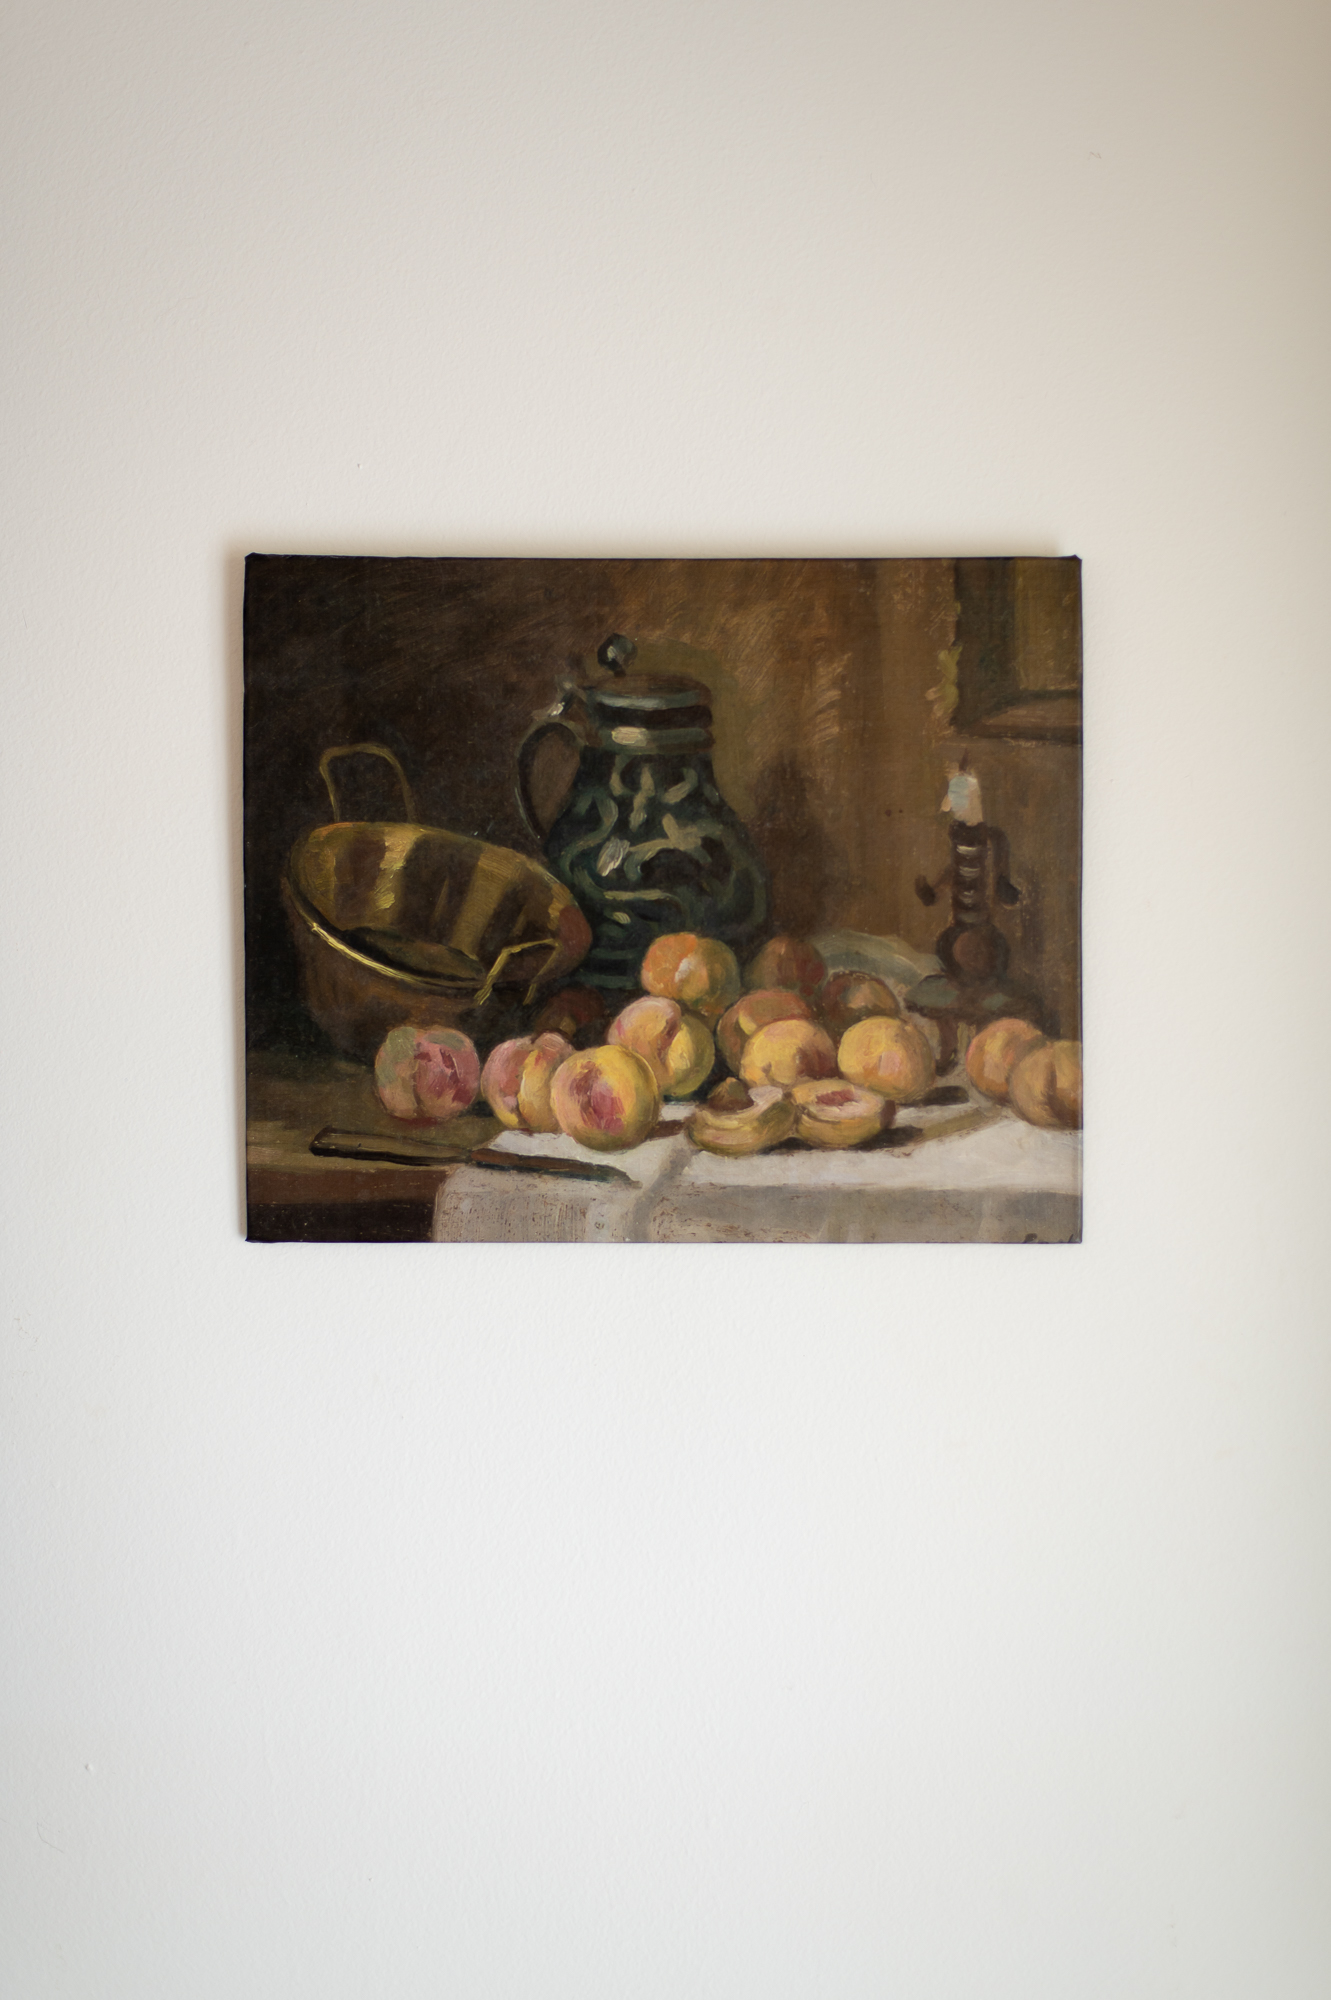
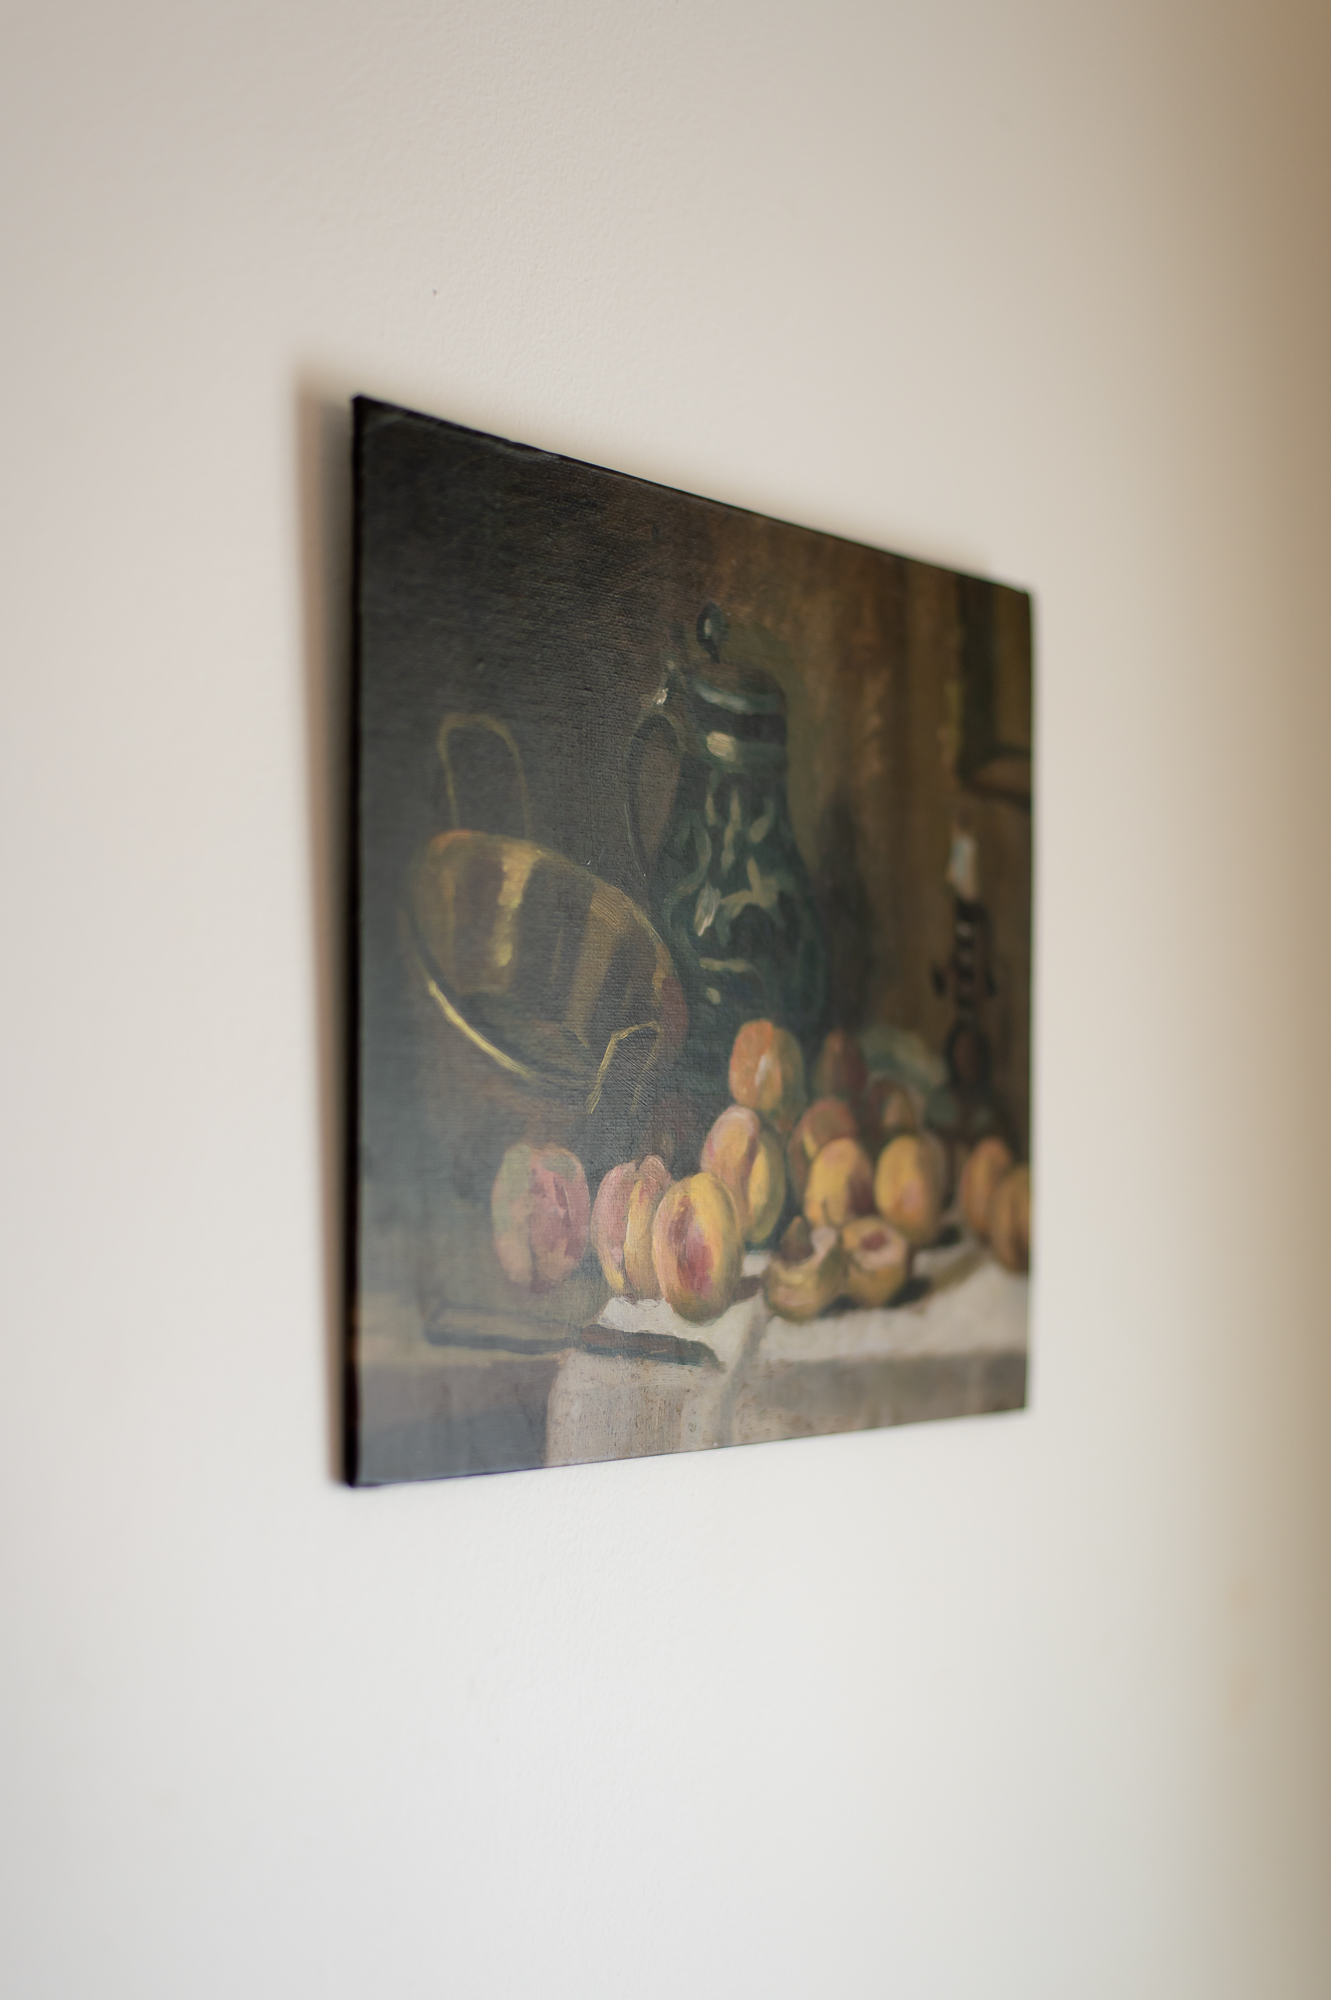
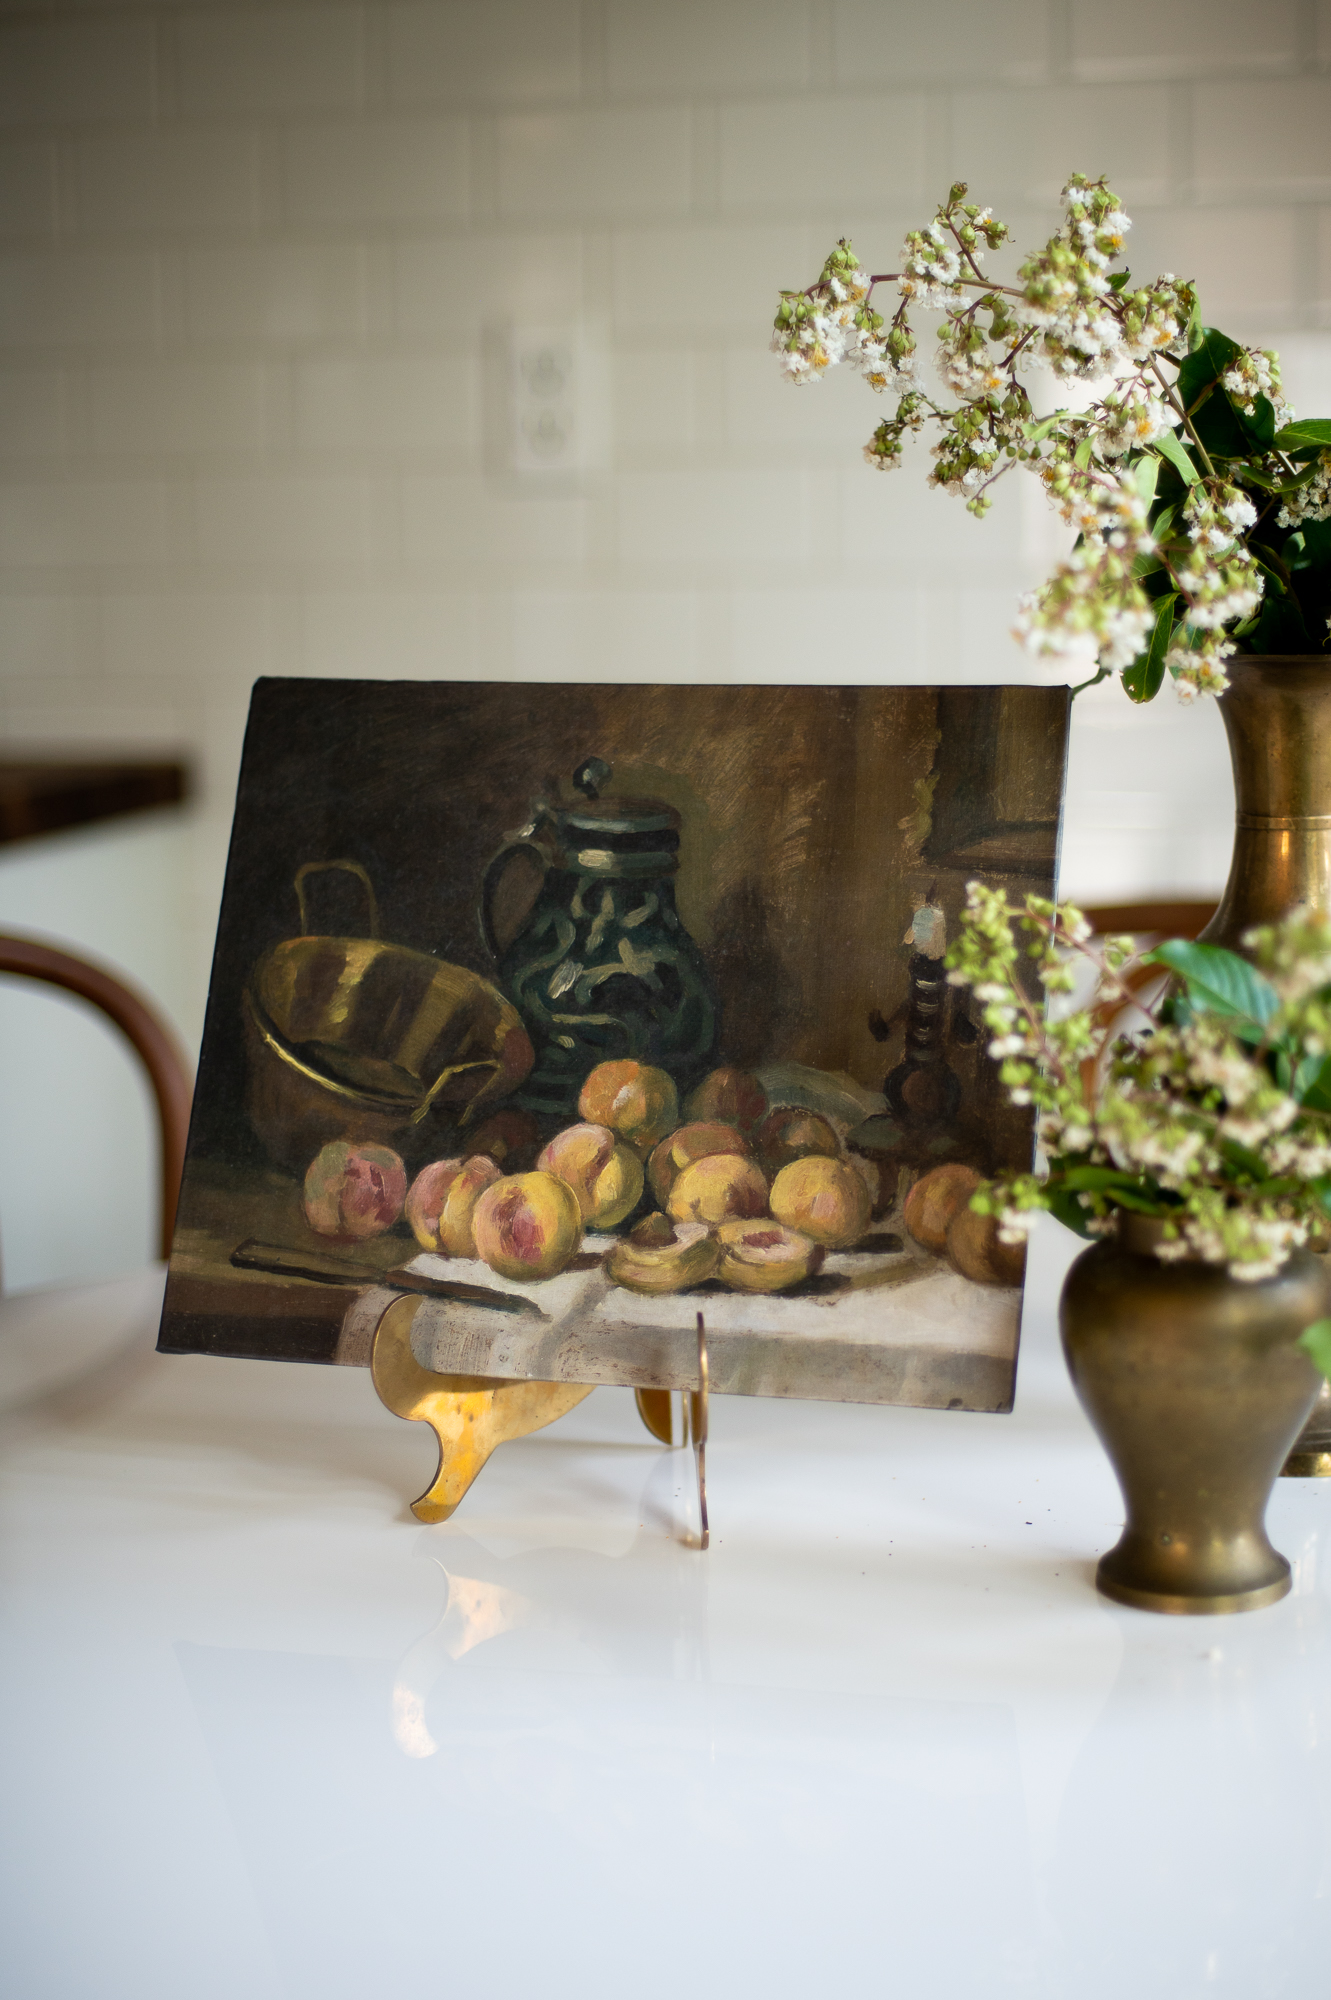
I LOVE LOVE LOVE the texture that mod podging this onto the artist’s canvas panel gives the print! It looks SO incredibly authentic!!! Totally worth the extra steps.
Mistakes I Made So You Don’t Have To
Ok now that we broke down the process for creating each fuax oil painting, let’s dig into a few of the pitfalls I conveniently fell into so that you don’t have to.
Whether these are truly mistakes, simply user error or bad luck I can’t say for sure. But I do know that the process I outlined above gave me consistent, repeatable, quality results and the following gave me nothing but problems:
Mistake #1 – Mod Poging The Surface AFTER Securing My Print To The Base.
So while I think it’s *possible* to do this in the reverse order, I found that mod podging the surface of my print first gave my paper more structural integrity and made it less fragile to work with on the following steps.
I also personally found that I ran into a lot of issues with my paper bubbling up and rippling if I tried to apply the mod podge to the surface after securing it to the base.
Mistake #2 – Using A Base Material That Won’t Hold Up Well To Lots Of Moisture
So when I first had the idea for this project, my initial thought was to use FOAM BOARD from The Dollar Tree as my base material. My reason being that it is very large, lightweight and easy to cut down to a variety of shapes and sizes that different projects may necessitate.
However, after creating a few test samples using foam board as my base, I quickly discovered that the foam board easily warped when subjected to the moisture needed for this project.
This failure turned out to be a blessing is disguise because using the artist’s canvas turned out to be EVEN BETTER as once the print was applied you could actually SEE THE TEXTURE of the canvas underneath the print, making it look even more realistic.
Mistake #3 – Fussing With Things When I Should Have Stopped
I touched on this repeatedly in the steps above, but I would say 50% of the problems I had when doing this project came from fussing with things when I should have stopped and waited for them to dry first.
This applies to both fussing with the paper when it is still wet, but also to when you’re applying the mod podge to the print to start with, after a while the mod podge will start to dry on your print and on your brush and as such it will get tacky, if you keep messing with the print at this point you can accidentally rip off the surface layer of your print… trust me… I know…
Mistake #4 – Being A Little Too Generous With The Mod Podge
Here’s the thing, you need enough mod podge on the surface to build up texture on your print and help make it look like an actual painting. BUT, if you use TOO MUCH mod podge your print may get lumpy looking and dry with lots of annoying air bubbles all over the surface of your print.
As a general rule of thumb, if your mod podge is so thick you can hardly see the print underneath it, it’s probably too much mod podge.
Mistake #5 – Not Wetting Down My Print Before Applying It To My Canvas
If you want to mod podge your print onto the surface of your canvas (like in version #2) don’t skip wetting down the back of your print first.
I cannot begin to explain to you the science behind WHY this works, but I do know I had nothing but rippled, lumpy, terrible print applications and a quick google search told me to try this and it magically fixed the problem.
You can also buy a fancy spray that mod podge makes for this same purpose… but water was free and worked for me.
Mistake #6 – Not Rolling Out My Print From The Center Out To The Edges
Again if you are mod podging your print onto the surface of your canvas (like in version #2) make sure you start in the CENTER of your canvas and work you way out with either your small rolling pin or even just your hands if that’s all you have.
Either way, you don’t want any air bubbles to get trapped under your print.
Final Thoughts & Take Aways
While this project took me nearly three full days to successfully figure out how to accomplish with the results I wanted, if you follow the steps I laid out above, this is a SUPER FAST, SUPER EASY low cost project that yields really high end looking results for pennies. PENNIES.
I did attempt to create a combo of these two versions by mod podging a print onto the surface of a stretched canvas, and while it worked and I really love the result, it was BY FAR the hardest version of the three as it was much more difficult to work the bubbles out from under the print without having a hard surface to press against.
If I did this again I’d probably try laying down some parchment paper, flipping the canvas over and rolling it from the back of the canvas potentially.
On The Subject Of Photographic Prints Vs. Color Paper Copies
One note I want to make before I end things is that this project uses PLAIN PAPER COLOR COPIES and not PHOTOGRAPHIC PRINTS which are very different things.
Photographic prints are made on much thicker paper, and would have trouble bending and wrapping around our canvas in the way we needed them to for this project.
HOWEVER, you can use this SAME PROCESS to update the surface of any photographic print and make it look more like a painting by doing just STEP TWO of the above. After the mod podge on your photographic print dries, you can then simply pop it in a frame free of glass!
But what do you think of this project? Are there any questions you have that I didn’t answer? Let me know in the comment section below!
If you give this project a try I’d love to hear how it turns out! And if you post it to instagram, be sure and tag me @ahomeisannounced so I can see your creation!
Shop This Post


Don’t Forget To Pin This Post & Subscribe!
Want to keep getting more DIY home decor inspiration, thrifting tip & tricks, free art downloads, reading recommendations, and home renovation tutorials? Then don’t forget to pin this post for later so you can follow me on Pinterest and then subscribe to my blog so you can get links to my newest content as soon as it hits the blog!
Thank you for this great tutorial! Your results look so good. I am going to try it this weekend. When you say “plain color copies” — if I were to get art printed at Staples or Kinkos, would I just need to ask for a standard color print? I’m not sure what makes it a photographic print (or do you just mean printing it on glossy photo paper)? Thank you!
Thank you for such detailed instructions and a wonderful site that is so pleasing to the eye.
This is the best most helpful blog posts ever! We recreated it with dollar tree canvases and now have the most gorgeous gallery wall with all our favorite Dutch paintings without breaking the bank. Thank you so much!
I’m so glad I stumbled onto your site. What a wonderful resource for us DIYers who love art. I’ll be trying all of these methods and thanks again for giving us the tools to make something beautiful and inexpensive ♥️💋
Hey! Great method, thanks. Mod podge huh? Very impressed
Great tutorial! I had been wondering how to accomplish this goal. But as usual not knowing end results held me back-now I’m ready to try as you have done all the hard work.